
Search the Community
Showing results for tags 'celtic knot'.
Found 17 results
-
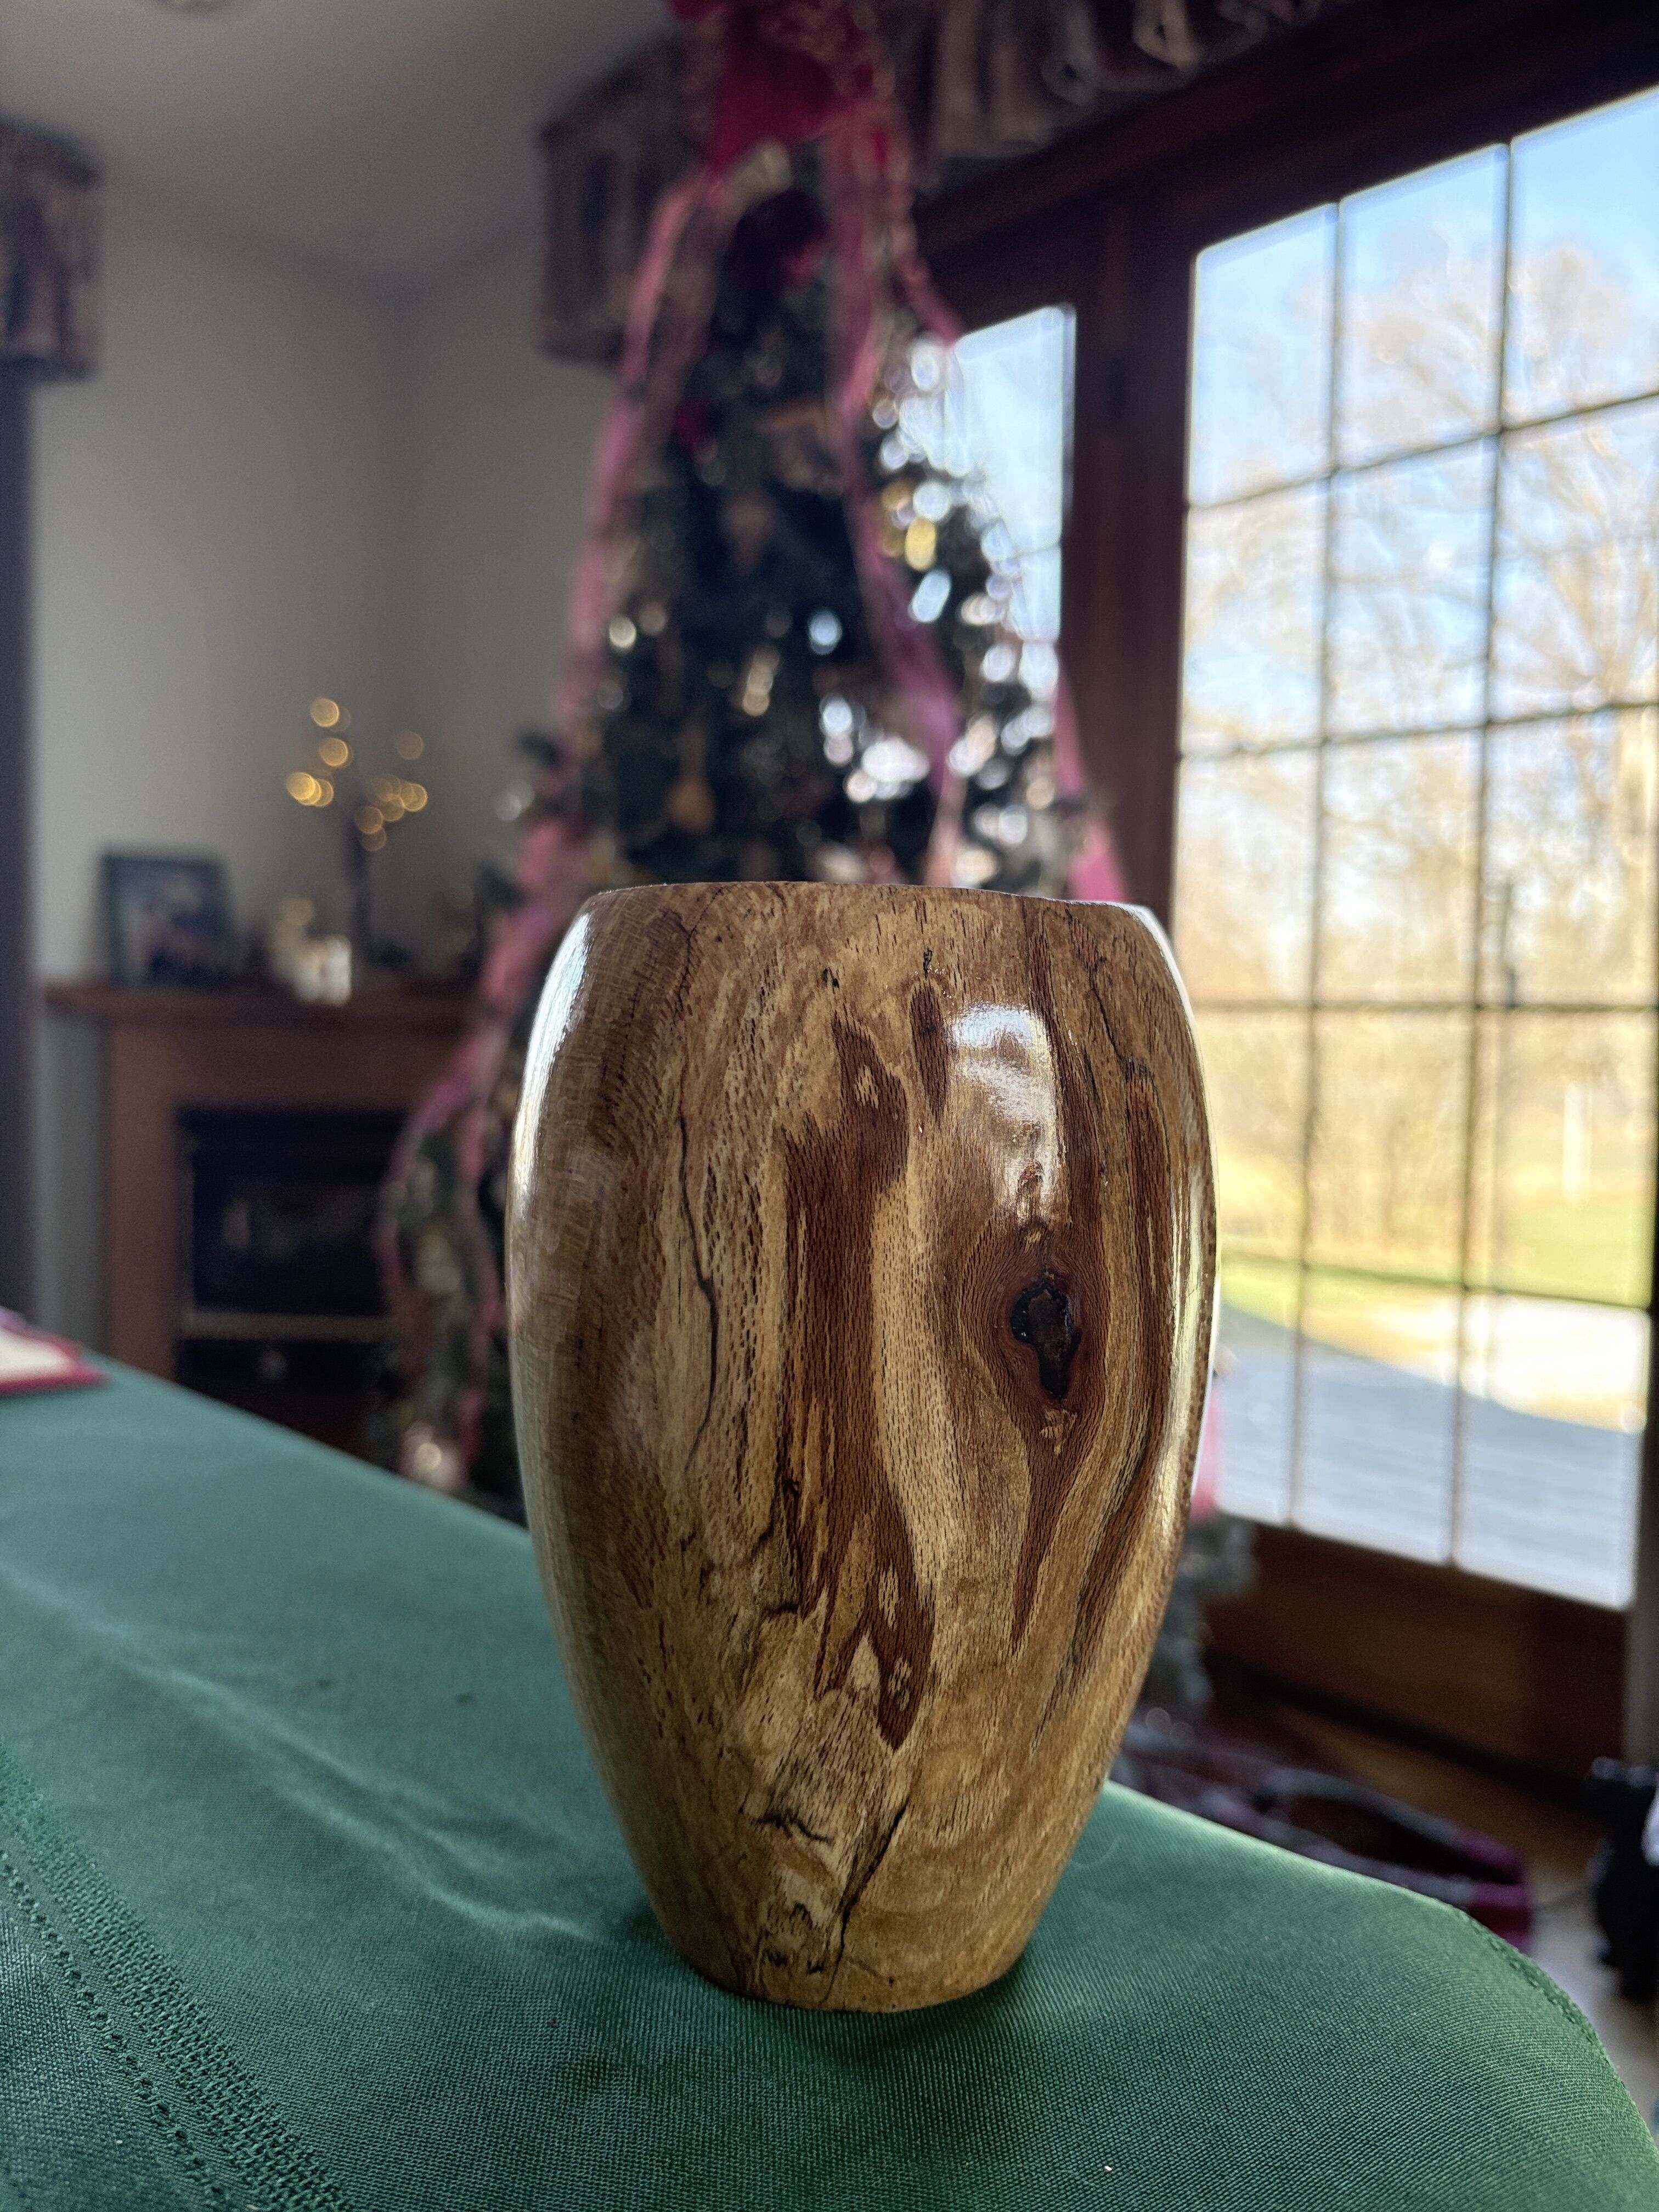
Only a couple weeks remaining in our annual Christmas project. We need to make this the best Christmas yet for our military family. Please consider donating. You will be entered into the raffle for some awesome prizes. Our Patriot Turners- @Steve Krumanaker created another Dragon Fly turning. This one is a special gift. Steve tells us about the story behind the present. @Gerald shared an image of some of the "4-in-1" screwdrivers he makes from Harbor Freight parts. They look really comfortable to use. @Rusty S Shared pictures of his Christmas ornaments. You know I love these!!! I'm fascinated as to how Rusty added the contrasting species within the knot itself! What's Coming Up- This Friday, December 19, Cindy Drozda will have her live addition of "Tool Talk" Here's the link for registration and more information-https://streamyard.com/watch/a7JJ8NcsaqXJ For The Newbies- This week, Stuart Batty released a bunch of new instructional videos. Normally we embed them here but with so many it seems prudent to provide the link to his main YouTube channel. https://www.youtube.com/@StuartBattyTools/videos Craft Supplies USA published a very comprehensive video on skew chisels. This is one of the better presentation on the skew. Tim Yoder shares a lathe sanding tip- Mike Peace turns and decorates some snowman ornaments Thinking about getting a lathe? Richard Raffan just upgraded and leads us through the process of setting one up- Expand Your Horizons- Tomislav explains how to get the best finish, on the inside of a bowl, using a standard scraper. You've made pepper grinders and salt shakers but have you tried to put them together? Sam Angelo makes a fancy holder to display that special ornament- Alan Stratton turns some small square "bottles" and decorates them with laser embellished medallions. Turning Time With Easy Wood Tools- The Easy Wood Tools demonstrators are taking a well deserved rest over Christmas but they will be fired up and ready to go after the first of the year!! A couple of videos by McCollim Woodworking demonstrating the ease at which various materials can be turned. Burl- 3ab8c37b-1951-4f42-b4fa-6d51fa1e0b35.mp4 Deer Antler- Project 3.mp4 New Turning Items- We previously mentioned the Stuart Batty instructional videos. Included were sharpening videos for their new replaceable blade negative rake scrapers. https://stuartbattytools.com/buy-woodturning-tools/ols/categories/negative-rake-scrapers-nrs The sharpening videos are at the same YouTube channel as mentioned above- https://www.youtube.com/@StuartBattyTools/videos. You'll need to scroll down a little to find them. Axminster previews their new smaller lathe Perform PD205WL woodturning Lathe in this video short- Everything Else- Getting back to the vessel of illusion project for attempt number 3. This is first attempt. There was a collar at the top with a small opening. Unfortunately the idiot doing the turning did one more cut and the collar separated. Now it's a vase. The second attempt in somewhere at the bottom of the trash can- The third one is on the lathe awaiting the finish. I have no artistic talent. The opening is very plain. I hope at least to be able to finish the vessel with the inner filler. Safe turning

-
Our Christmas Project is underway. Help us to make a military family's Christmas one to remember! Check out all the awesome prizes and details here- https://thepatriotwoodworker.com/forums/topic/42294-adopt-a-warrior-family-for-christmas-2025/ Our Patriot Turners- @Steve Krumanaker is putting his new laser to good use creating unique Christmas ornaments! Check out these two post from Steve to learn more about how these are done Unfortunately, there was a "catch" during the turning process as Steve explains here- A couple of weeks ago we had a post asking our preference for either a Longworth chuck or vacuum chuck. There have been a few additional comments. The post picks up here- From @Gordon on our "Off The Lathe" topic, a gorgeous natural edge bowl in a board type turning. Check out the comments and catch with some of the other comments on past posts. @RustyFN scored some awesome maple! Preparing the blanks for storage kept him busy!! Head on over to Rusty's post to see the rest of the blanks!! New member, @Rusty S, shared a heart breaking incident with a walnut turning he had "almost" finished. In his post, he explains what happened and received lots of sympathy from those of us in the "BTDT Club" What's Coming Up- If you missed the Fall Vendor Showcase, it is available on YouTube. Unfortunately, the link won't embed the video but clicking the link will take to YouTube. https://www.youtube.com/watch?v=pKJVVo-vrKA Cindy Drozda will be hosting here Tool Talk on Friday November21, 2025 Here's the link for registration- https://streamyard.com/watch/nFhunNEiiBP6 Cindy also has some of her previous IRD's available for rent. This trailer is for her Gilded Sphere Box- The link for renting the IRD video- https://www.cindydrozda.com/html/IRDvideo4rent.html For The Newbies- Turning tools are expensive. Some manufacturers sell the tools without handles, which reduces the costs. Tools with round shafts are fairly simple to create handles by drilling the correct size hole. But, what about the tools with square shafts? Sam Angelo has a solution- Looking for a project that can help you advance your skills and learn a few new ones? Check out this ornaments from Carl Jacobson. Using a jam chuck can solve a lot of "How do I hold this piece". Richard Raffan demonstrated using this type of chuck for bowl/lid turning Expand Your Horizons- Add a little custom bling to your life with turned ring! Mike peace show how it's done. You know if Alan Stratton is going to share a video it will have some cool jigs involved! This one is no exception! I've been known for doing some crazy glue-ups on some of my turnings, but this one is insane! Roger Wollam demonstrates Tangential segment turning. Tim Yoder demonstrates how to create and finish captive rings- Tomislav Tomasic may have you rethinking how you create your tenons on those turning blanks Turning Time With Easy Wood Tools- If you haven't seen it yet, check out the unique Easy Wood Tools, midsized rougher created specifically for The Patriot Woodworker Christmas project- To paraphrase a well known person- "Bid Baby Bid" We find Easy Wood Tools turning all sorts of materials. Deadrise Wood Crafts turns some leather pens with the EWT Finisher- AQMmv-7pm-VQD3_r469MQFle62m0SG9I0ceXBA7FbygjjqzzYYdCwNFT_dWRub7Igo02bz1e-fSnigagyR6yTpQPLFF9Ah05ZHK--oE.mp4 Demonstrations for next week- Come burn off some of those turkey and pumpkin pie calories by checking out this demo- https://www.woodcraft.com/pages/store/oklahoma-city @Jordan Martindale New Turning Items- These are not new items but they are from a fairly new company. This is another review of the CBN wheels from the Ukraine company https://www.uksg.tools/ Everything Else- Want to thank @kmealy for sending me this YouTube video from Stumpy Nubs. Keith knows I love Celtic Knot patterns. Stumpy's video shows an easier way to glue up a Celtic Knot rolling pin. It's pretty cool and his diagonal cutting jig is really easy to make/use. The only thing I would caution on is to NOT cut the square blank completely through. By separating the blank and gluing the insert will cause the overall blank to "grow' in length on each successive rotation. this will cause the "knots" to be out of alignment. Here's the video- Safe turning
-
I found it easier to glue if I oriented the blank with the diagonal cut facing up. I use an old restaurant cutting board as a gluing work surface and pieces of the cutting board as culls and pads. In this picture, you can see the three strips to be glued into place. They measure 2” x 10 3/4” x 1/8”. Test fit the pieces first to make sure they will seat into the slot. (I now have a thick piece of Corian countertop for the gluing surface) On my first attempt, I didn’t use enough clamps- using more clamps and culls assured that all of the joints were tight. I probably overdid it with the amount of glue. A liberal coat over all mating surfaces. Clamped up After the glue has dried and the clamps removed, the blank is ready for trimming. I used to use a special table saw jig for this but found it was easier and quicker to trim off the excess insert length on the bandsaw just free handing it. Trim both ends and the side. At this point it is a good idea to “sweeten up” the layout lines, if the trimming operation removed them. Now it is just a matter of re-mounting the blank on the diagonal cutting jig and repeating the operations for making the second diagonal slot. The diagonal slots, glue ups and trimming operations are the same for each of the remaining three sides. On the lathe, ready to be turned. The final dimensions on this rolling pin were: 20” long; diameter at the center: 1 9/16”; diameter at the ends : 1 1/4”. I have tried two types of tapers. One started at the center and continued to the ends. The other starts at the ends of the ellipses and continues to the ends. Personal preferences will determine the tapers. After the blank is turned round, the layout lines for the taper can be drawn on the blank. To aid in getting it symmetrical, I started with an arc template. My turning skills leave a lot to be desired and there was too much variation from one pin to the next in diameter and symmetry. I considered purchasing a lathe duplicator but finances dictated this calls for another jig! Most of the hardware is standard off the shelf stuff- ¼” x 20 threaded stock, wing nuts, T-nuts, deck screws. The only thing “special” was the ¼” tool steel- which I purchased from a local machinist for 25 cents and then ground a rounded tip. This shape worked better than a point because it left the wood with a smoother surface. The base of the jig mounts onto the lathe bed. The back edge of the jig has the “reverse” arc of the rolling pin. The cutting portion of the jig sits on the MDF bottom and the bolt follows the arc to create the shape. The long bolt can be adjusted to position the cutter depth.
- 13 comments
-
- 3
-

-
- french
- celtic knot
- (and 2 more)
-
I started with the picture too small to hold in my hands while grinding the unwanted parts away and decided to hang it on the wall as a reminder. I already had this small piece of wood so I made the picture fit in that area. I usually do it the other way like having the picture as the size I want to work with then prepare the wood to fit that size. Thats only the second time in my life I made a mistake.And the back side shows the small pieces. smallpatch
- 16 replies
-
- 10
-
-
- knot
- celtic knot
- (and 1 more)
-
Birds chirping, sun shining, grass is green here in south central PA- probably snow tomorrow! Our Patriot Turners- @jthornton Posted a question about dust collection for his lathe. He posted pictures of his shop along with a description of what he currently has set. Please check his post and see if you can offer any suggestions to help him. JT continues to work on his "Dizzy Bowl". He has taken a lot of time to document the steps a and share the progress with us- You can catch up with his continued progress here- @Masonsailor finished up the bowl that will be the prize in his neighborhood's get-together. Some lucky family will really be happy with this- You can catchup here- "What's On Your Lathe" got a post from @forty_caliber. I think he must have hit the jackpot on Pecan! What’s Coming Up- Click on the images for links to registration and more information- For The Newbies- Ever use CA glue to fix a turning only to find out later that the CA stained the wood? This came in an email from Kent Weakley from Turn A Wood Bowl- Richard Raffan demonstrates how to modify an already turned bowl. Notice the use of the jam chuck which will be talked about more in Cindy Drozda's presentation. Another toothpick holder with a unique shape. Some spindle work and a little hollowing from Carl Jacobson- Expand Your Horizons- Alan Stratton continues to add Celtic Knots to his turnings. This time he experiments with a bowl. Embellishing a turning with color can turn an ordinary piece into something spectacular. This one from Craft Supplies USA on dying- Ebonizing may only be a single color but it can add striking effects to a turning. This article from Fine Woodworking was written more for the woodworker but can easily be "applied" to a turned object- https://www.finewoodworking.com/project-guides/finishing/ebonizing-wood-2 A video for the recipe for the ebonizing solution can be found here- https://www.finewoodworking.com/project-guides/finishing/video-ebonizing-oak-steel-wool-vinegar?oly_enc_id=7454G3912223B7R New Turning Items- Neither of these are really new. But some insights from other turners on equipment and resources. Everything Else- Been finishing up those little natural edge, flowering cherry tree bowls. Pictures to follow...
- 4 replies
-
- 1
-
-
- dying
- craft supplies usa
- (and 32 more)
-
More nice weather! Garden rototilled and fertilized. On to replanting grass over the dog's bathroom. Our Patriot Turners- @Steve Krumanaker posted a cedar bowl he finished up. Beautiful colors and grain patterns! Check out the comments from our turners at- @forty_caliber is still cranking out bowls from his dryer stash. This one has some gorgeous spalting- In his post, he tells us about the shape- @Gerald mentioned he did a presentation for the Magnolia Woodturners club. He demonstrated some of the tools and methods for embellishing a turning. This video picks up at his part of the presentation- Thanks, everyone for continuing to post in our thread on "What's On Your Lathe"! I think this is about where we left off last week- What’s Coming Up- Click on the images for links to more information and registration- Note: The Bowl turning class will also be on June17, 2023 For The Newbies- Put your spindle skills to work and turn a mixed media wine glass. Very informative video from Craft Supplies USA Mike peace demonstrates turning small square bowls. These can be made from scraps of even several boards glued together. Expand Your Horizons- Carl Jacobson turns, carves and adds color to a vase- I've seen this turning show up on several social media sites. Carl Jacobson explains how it is done- We pretty much know about scroll chucks and jam chucks but do you know about a "cup chuck"? Richard Raffan demonstrates- I'm not sure which I enjoy more- watching Alan Stratton turn objects or looking at the shop made jigs he uses. For a "jig junky" like me, it's a real treat. In this video, Alan adds Celtic Knots to Easter eggs- New Turning Items- Not new but on sale from Niles Bottle Stoppers- https://nilesbottlestoppers.com/product/tenderizer-set/ Everything Else- From Ron Brown's Newsletter- Difficult Things Why Is It Always So Hard The First Time You Try Something New? Do you remember the first time you tried to ride that bicycle? How about roller skates, ice skates, or a skateboard? And I hope trying that hoverboard didn’t send you to the emergency room. What about parallel parking or hooking up that trailer? Then there was your first time using a skew chisel, WOW! I’ll bet you didn’t even know catches that big were even possible. How about the first time you tried to get started hollowing the inside of a bowl? Did the gouge skate clear off the edge like mine did? The reason is that you don’t know what you don’t know. As we summon enough courage to try something new, we imagine how it is supposed to go and how we are supposed to react. It seldom goes as well or as badly as we imagined. We try again, but the second time around, we adjust from what we learned the first time. The third time it gets better and so on. When I demonstrated turning on the Woodworking Show Circuit, I would often hear the phrase “He’s done that before!”, or “I’ll bet that isn’t his first time!” I promise you, it gets better. If you have the courage and persistence to try and try again, you eventually figure it out. The secret is taking the time to understand what went wrong so you can make the small changes necessary for success. I deal with this scenario almost daily. I find it really helps if I limit my changes to only one or two things so I can narrow down the culprit and focus on those areas. As an example, if torn grain is my issue, I might change from a gouge to a scraper or a gouge with a different grind. If that doesn’t work, I might try shear scraping (holding the scraper at a 45-degree angle). You can shear scrape with both the scraper and the gouge. You just have to turn the gouge over. If that fails, I might cut from the inside out or the outside in using lighter cuts over the problem area. I’ll change up one thing before moving on to something else. Imagine trying to juggle the effects of speed, feed, tool geometry, cutting angles, grain orientation, and wood hardness all at once. My advice is to control what you can and understand that some things are out of your control. Make small changes slowly until it works like you want it to. Be careful not to tweak it so much that something that used to work, doesn’t work anymore. That is something I also have to guard against. It happens all too frequently when running complicated machinery like CNCs and Lasers. Rome wasn’t built in a day and you will be money ahead when you learn to make changes little by little. One day soon you will have figured it out and folks will marvel at your expertise. Zig Zigler often said, “Yard by yard it’s hard, but inch by inch it’s a cinch!” Remember that wherever you go, there you are. Safe turning
- 5 replies
-
- 2
-
-
- ron brown newsletter
- meat tenderizer
- (and 22 more)
-
Seems I remember someone posting on here how to do it?? Its been on my back burner for years, I'm wanting to do it, Finally! What glue to use? Was thinking maple and black walnut for color contrast, I think the walnut is a no go for food contact? Advice? Links?
- 2 replies
-
- 2
-
-
- celtic knot
- rolling pin
- (and 2 more)
-
Well, one more day and March will be in the books... Typical spring weather here in PA. This morning we were under a winter weather advisory. Tomorrow afternoon a severe thunder storm watch. Our Patriot Turners- @Steve Krumanaker said he finally mastered the operation of a Throw Top. Some of our members sympathized with Steve's predicament. Check out the post at- Steve continued his adventures in gnome turning. He added his unique touch to this one- Along with his post was a challenge to guess the source of the "hair". @Gerald added a great comment to last week's "Wednesday's..." post. His idea was that we might share our thought process of determining what the final piece will look like when starting with a chunk of wood. I'll try to start something this week and hope our turners will share their ideas. What’s Coming Up- Several upcoming events. Click on the images for the links to more information and registrations. For The Newbies- Mike Peace has another video to help us with lathe problems. This one covers the banjo- Cindy Drozda talks about her Vortex and Pyramid Tools. From a live presentation- Expand Your Horizons- You say you'd like to try segmented turning? Check this out- Alan Stratton has a cute video just in time for Easter- Turned finials are a great way to add pizzazz to hollow forms. But, how to turn them really thin and delicate without breaking? Cap'n Eddie has a tip- New Turning Items- This isn't exclusively for turning but certainly can be used to get those glued up blanks on the lathe a little quicker. Big thanks to @Gene Howe for the heads up- Everything Else- Rick Turns list of YouTube woodturning videos from last week- A couple of weeks ago, Alan Stratton, posted a project where he added Celtic Knots to a segmented turning. Using his jig concept to make my own version, I've been playing around with some turnings. My first attempt- Just some glued up scraps and quickly turned to see if the knot would look OK. Second blank. Not sure how it will look as I goofed on one of the setups. This one might become a small sugar bowl or a "pepper cellar" Working on getting a blog written up with detailed process shots. Safe turning
-
Not too much happening this week- Our Patriot Turners- @forty_caliber turned a couple of bowls from a pecan log. That species surely has some lovely grain. First up is an incredible salad bowl- And then an awesome bread bowl- What’s Coming Up- Cindy Drozda- Click on the above image for the link to registration. For The Newbies- Mike Peace did an Interactive Remote Demonstration for the Fraser Valley Woodturners Guild, British Columbia, Canada. He covered spindle projects and methods of holding the turnings. This is a little long but lots of good information- Craft Supplies USA posted an instructional video for turning a goblet- Expand Your Horizons- Carl Jacobson celebrated Captain Kirk's return to space, this past week. I see social media has been having great fun creating memes about Mr. Shatner's voyage- It is not too early to start thinking about ornament turning! Here's your chance to turn a funnel (bowl) and not have it be a mistake!! My early turning creations tended to be useful kitchen items. Salt and pepper mills, salt cellars, sugar bowls and rolling pins. I never could figure out how to incorporate the Celtic Knot into the hollow vessels. Alan Stratton has solved that problem. All I have to do is build a jig!! New Turning Items- Some new stuff and some stuff on sale- Woodturners Wonders has Rikon and Jet grinders back in stock- https://woodturnerswonders.com/collections/rikon-grinders And this special deal- https://woodturnerswonders.com/collections/all-sanders/products/angle-drill-sanding-bundle Ruth Niles' October newsletter is now available. Ruth shares instructions on how to get setup for selling your turnings on eBay. You can sign up for Ruth's free newsletter at- https://nilesbottlestoppers.com/ Everything Else- Rick Turns list of YouTube woodturning videos from last week- Finally finished up with the last batch of rolling pins. Then I realized I am out of holders. Looks like some flat work in my future- Safe turning and stay well
-
Sorry, not much to report this week. Please don't forget, we are into our site fundraising raffle. We started off like gangbusters but we still have about halfway to go! If you haven't already purchased your tickets, please consider checking out the fantastic prizes! All the proceeds from this fundraiser go to the operating costs of this site. Here's more: Our Patriot Turners- @Steve Krumanaker came up with a neat idea for converting a patio table umbrella stand into a bird feeder Check out Steve's post for more details- What’s Coming Up- Click on the above image for the link to Cindy's sign up page. For The Newbies- Part 2 of selecting and using a bowl gouge, by Jim Rodgers- An informative video on cutting bowl blanks on the bandsaw. Gets a little repetitive but some good tips. Check out the informative links below the video (on the YouTube channel) for some other good tips. @RustyFN has been turning segmented bowls. Found this video series from Jim Rodgers describing the steps. This is Part #1 and the other parts are linked on Mr. Rodger's YouTube channel. Craft Supplies USA posted another video in their series "Woodturning 101". This one takes us through the steps of turning a platter. Expand Your Horizons- More from Alan Stratton on those Celtic knots. In this video he shows how to add the knot to a turning. I'm gonna have to try this! Mike Peace shows us how to make a great gift for that special person who knits or crochets. New Turning Items- There's still a few days left to pick up a free light from Woodturners Wonders- Click on the above image for the link to Woodturners Wonders. Everything Else- Rick Turns YouTube woodturning videos for the past two weeks- Safe turning and stay well
-
We have started our annual site fund raiser. There are some fantastic prizes to be had for the lucky winners. If you like this site, consider donating to the operating costs! Also, don't forget this coming Sunday is Mother's Day. We can't forget our Moms. Our Patriot Turners- It has been a slow week here on the Woodturner's Forum, so we will jump ahead to What's Coming Up What’s Coming Up- Click on the above image for more information. Looking for some inspiration, ideas or conversations on turning? Check out the World Wide Turners web site. Lots of great turners there- https://worldwidewoodturners.org/ For The Newbies- Last week we posted a video from Record Power on lathe maintenance. Here is the second part- Highland Woodworking published a nicely illustrated article on using the fingernail gouge, by Temple Blackwood- The article can be read here- https://www.highlandwoodworking.com/woodturning/woodturning-with-a-small-fingernail-gouge.html?utm_source=ActiveCampaign&utm_medium=email&utm_content=Read+the+May+2021+Issue+of+Wood+News+Online&utm_campaign=May+2021+Wood+News&vgo_ee=SSZUGqILrYqLrMaaxASZAzpxdzkQNl9LgdxZ9pnzLRY%3D Expand Your Horizons- Jim Rodgers has a very nice series on turning miniature articles. This is Part 1 and the others are referenced on his YouTube channel- I've been making Celtic Knot rolling pins for a long time. Although the wood I use matches the pepper mills and salt cellars I make, I always wished there was a way to duplicate the knot in those items. Thanks to Alan Stratton, I think this might be the answer- Our sponsor, Laguna, linked this video on social media. Turning a coffee spoon. It incorporates multiple media and some cool jigs. New Turning Items- We mentioned these wooden threads before. Here's a short video, From Ron Brown, showing the steps to using them on a pet urn. Turner Carl Jacobson has quite a large following on social media. He recently posted a video answering questions about his favorite tools. The last tool he mentioned is a pneumatic sander. Here's the video- And the link to the sander he mentions- https://www.woodworkingshop.com/product/WK45950/ Also, check out his comments about that awesome Easy Wood Chuck The folks at Woodturners Wonders have a new product to help fill those cracks and splits in your turning. It can also be used for decorating and embellishments- Check it out at- https://woodturnerswonders.com/collections/featured-products/products/wonder-putty-two-part-sculpting-epoxy Everything Else- Rick Turns list of woodturning YouTube videos from last week- Safe Turning and stay well aaa
-
Well, this is my first rolling pin of any kind. When I do something for the first time, I jump in and try the most difficult thing. This was “supposed to be a Celtic knot rolling pin. It looks more like a drunken knot...ha ha....I thought turning the taper would be difficult, but it wasn’t to bad. I know there must be a way of doing it....anyhow here is a photo of it. It’s Curley maple with walnut inlays...
- 21 replies
-
- 6
-
-
- rolling pin
- celtic knot
- (and 2 more)
-
The second part will concentrate on the layout of the rolling pin blank in preparation for cutting the slots. Create a blank that is 22” long and 2” square. Locate the center of the length (11”) and carry a line around the blank. The ellipses are 11” long and made of three pieces of 1/8” thick material Layout a mark 5 ½” on either side of the centerline and accurately carry the lines around the blank. To assist in laying out the diagonals, use a 3/8” thick spacer gauge, drawing lines on the blank, along BOTH sides of the spacer gauge. It is not necessary to layout both diagonals on each side. However, a check of the second diagonal will indicate if the layout is accurate and crossing in the center of the blank. NOTE: the cut for the diagonal strips falls within the 11” layout lines Rotate the blank 90 degrees and layout the location on the next diagonal cut. Continue rotating and drawing the diagonals until all four sides have been completed. Each diagonal consisted of two drawn lines. One line intersected with the layout line that defined the end of the ellipse. The second diagonal line ends “short” of the ellipse layout line. The location of the end, of this diagonal line, must be carried around the blank. These lines define the location of the saw cuts for the strips that create the ellipse. I have also begun to mark each end of the blank at the exact center of each end. This along with a centering line on the jig have helped reduce positioning errors as the saw kerf widens over time. Accuracy is important when laying out these lines in order to get the ellipses to maintain continuity. This drawing is not to scale. The measurements are what I used to make this rolling pin. The length and diameters were averaged from various baking supply websites for their rolling pins.
- 3 comments
-
- 1
-
-
- celtic knot
- layout
- (and 2 more)
-
Once the blank has the layout lines drawn, it is time to cut the slots for the ellipses. The first step is to set the blade height. When the cut is made, there should be about 3/32" to 1/8” of material left holding the two sides together. This is necessary during the glue up by keeping the pieces aligned. Set the blank on the jig and adjust the angle and the end stop so that the front SHORTER layout line is positioned to the LEFT side of the blade cut. Orientation is when you are standing at the back of the saw looking forward. (These pictures are from the SIDES of the saw). On the latest jig, I drew positioning lines to locate the ends and center of the knot layout as well as the longitudinal center. These really help in positioning the blank. Make sure the length stop is adjusted against the end of the blank Aligning the layout lines to the jig Continue to adjust the angle and the end stop so that the rear LONGER layout line is positioned to the LEFT side of the blade cut. Securely tighten all adjustments. Once these angles/lengths are set, they will not change for all of the remaining cuts. Clamp the blank firmly in the jig. Double check the layout lines. In order to keep the correct orientation of the blank, I labeled the end of the blank nearest me. This end must always be placed against the rear stop for all diagonal cuts. With everything secure, make the first cut. Unclamp the blank. To make the second cut, I made a space strip to reposition the blank without having to change any of the jig setting. My first guess was that this spacer would be 3/8” thick- the same as the width of the finished cut. BUT that was too thick. I guess there is a way to calculate the thickness but trial and error won out. It came out closer to 1/4” (.265”). Later, someone told me that the reason was that I had failed to consider the width of the saw blade and on which side of the layout line the blade was cutting. The second cut is made with the blank position so that the front LONGER layout line is on the RIGHT side of the saw cut. The rear SHORTER layout line is on the RIGHT side of the saw cut. The walnut spacer strip can be seen between the blank and the fence of the jig. The thickness of the spacer strip could be different for each person. So check the setup carefully. Also, Make sure the blank butts up against the end stop before each cut. After the second cut has been made, there may be a thin piece of material left in the slot. I made another spacer- about 1/8”- replaced the first spacer and made a third “clean out” pass. The finished cut should be 3/8” wide and almost through the blank. Completed slot- Checking the slot for the inserts
- 1 comment
-
- 1
-
-
- rolling pin
- french
- (and 1 more)
-
In Part #1, I mentioned that the pattern of the Celtic knot can be varied by how much wood is removed during the creation of the slots. Typically, I plow out a 3/8" wide slot and fill it with three inserts. That technique results in a pattern of knots that overlap- If the slot is cut, leaving a center slice of wood intact, and then placing an insert on each side; the pattern displays diamonds at the cross-over- Another subtle change in the pattern can be achieved by the sequence of the cuts related to the sides. I number each side of the blank during the layout procedure. Then when cutting the slots, I cut sides with the sequence 1, 3, 2, 4. Cutting the sides in a 1, 2, 3, 4 makes a slightly different pattern. So, that's how it's done! Once sanded, and the ends trimmed, a liberal application of mineral oil and they are ready to use.
- 2 comments
-
- 2
-
-

-
- pattern
- celtic knot
- (and 1 more)
-
Now I am sure I haven't made anything like this. When I first cut it out with the scrollsaw I didn't think it would look anything like the picture. A while more with the machinery, who knows?
- 5 replies
-
- 6
-
-
- celtic knot
- celtic
- (and 2 more)
-


CindyDrozda_Facebook.png.0fba9c3003920f8572f2dd4ab733838b.png)
.png.a045eae09787245c55e19d06d5a33544.png)


CindyDrozdasToolTalkLiveStream_Facebook.png.5646479cf9c90d4ce3abdd77e181407e.png)


.png.12676b340dfcdd0b7818ffedb9fc1673.png)


.jpeg.bf9290108dccefbb103a11f9069a2dfb.jpeg.81ac736ee1034ce03780ea2b693fe0c6.jpeg)

.jpeg.dbab242f46ae1558468c04fb608d05f4.jpeg.6db438f5a767da00be2e35bcf636d485.jpeg)

.png.b233ed9fa707f304212f33de181138e0.png)
.png.6ddccd2be427f0f2e7bb4970ab743ae3.png)


