Skip to content
View in the app

A better way to browse. Learn more.

The Patriot Woodworker

A full-screen app on your home screen with push notifications, badges and more.

To install this app on iOS and iPadOS
  1. Tap the Share icon in Safari
  2. Scroll the menu and tap Add to Home Screen.
  3. Tap Add in the top-right corner.
To install this app on Android
  1. Tap the 3-dot menu (⋮) in the top-right corner of the browser.
  2. Tap Add to Home screen or Install app.
  3. Confirm by tapping Install.
Supporting Our Service Members
We proudly stand with all United States service members in Operation Epic Fury and those deployed around the world. Your sacrifice, courage, and dedication are deeply respected and never forgotten.

Part#2 Layout

(0 reviews)

The second part will concentrate on the layout of the rolling pin blank in preparation for cutting the slots. Create a blank that is 22” long and 2” square. 

1538841021_SquaredBlank1.JPG.18d09add1181c77112203b91ee2246ad.JPG


Locate the center of the length (11”) and carry a line around the blank.

399681557_LayoutForInsert.JPG.21a57987b42a9c6428b1e1c10a172d31.JPG

 
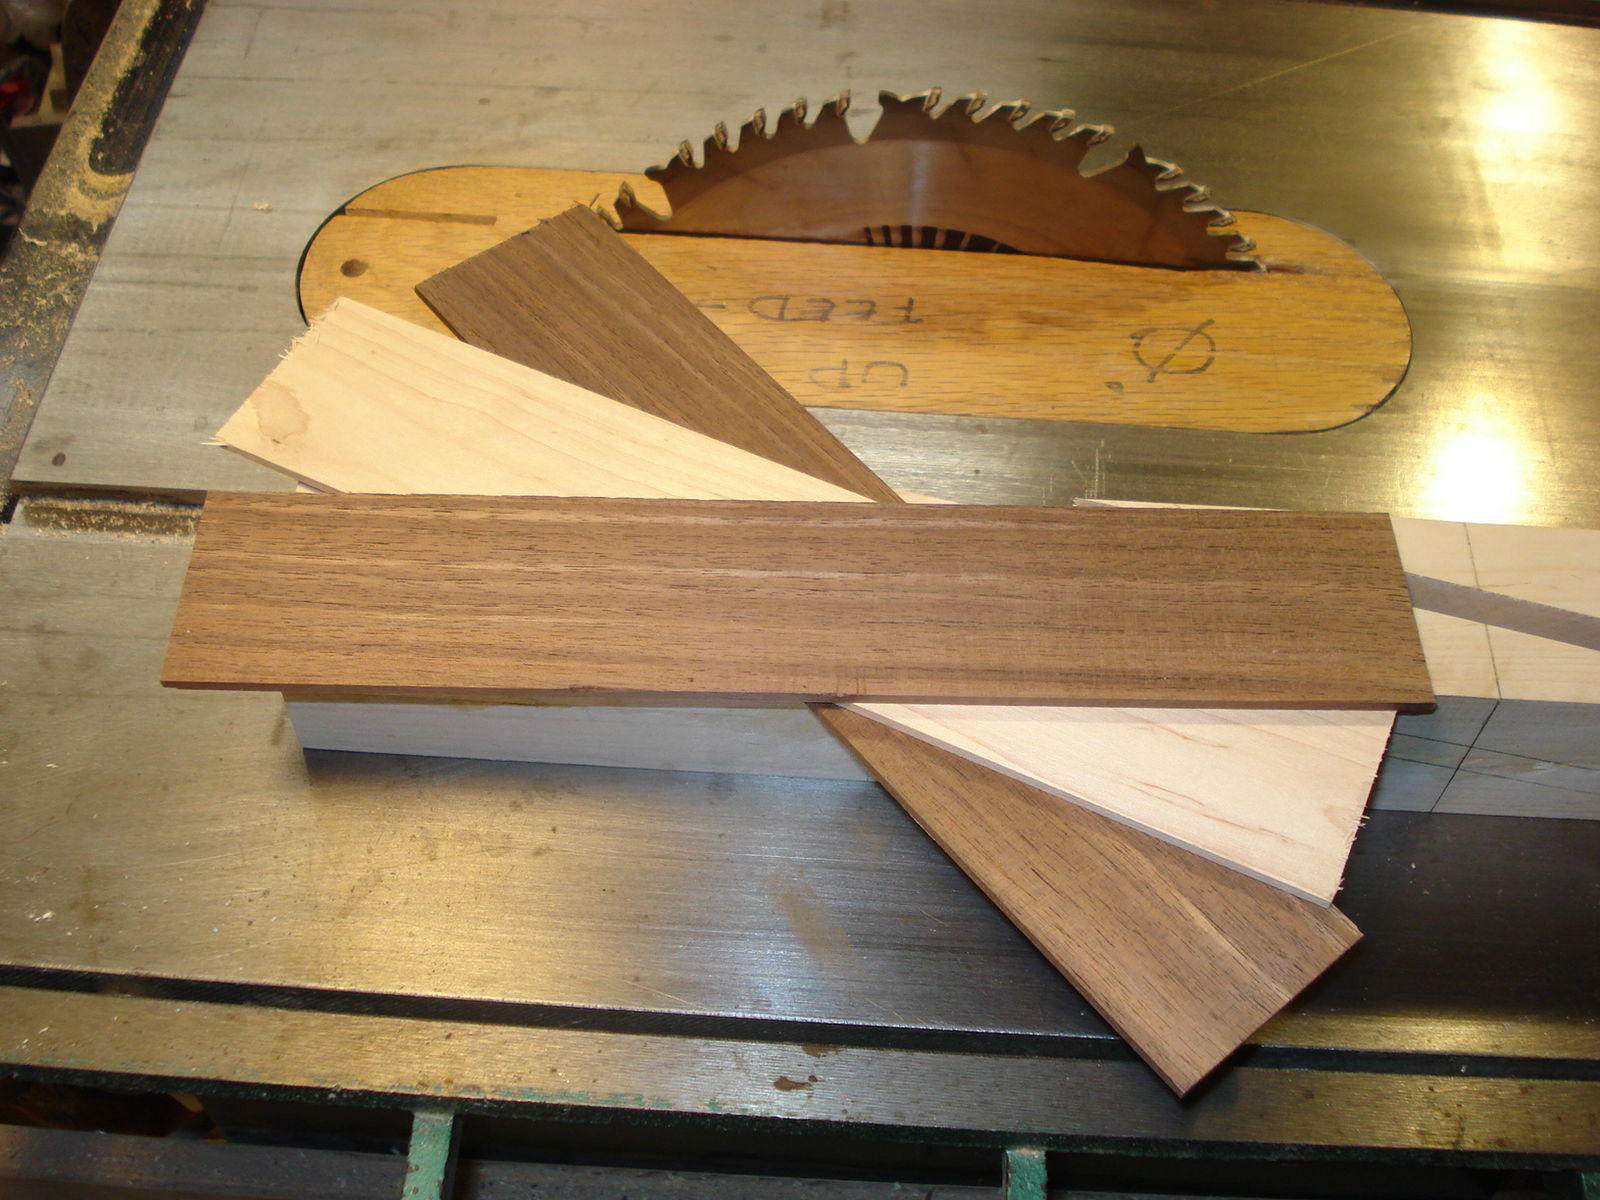
The ellipses are 11” long and made of three pieces of 1/8” thick material

1155428918_ThreePieceInserts1.JPG.b47ce1295bd620f691e79242791e5f60.JPG


Layout a mark 5 ½” on either side of the centerline and accurately carry the lines around the blank.


To assist in laying out the diagonals, use a 3/8” thick spacer gauge, drawing lines on the blank, along BOTH sides of the spacer gauge. It is not necessary to layout both diagonals on each side. However, a check of the second diagonal will indicate if the layout is accurate and crossing in the center of the blank.

1358910117_MeasuringJig.JPG.6348ae0174a7356983193dab4fab383f.JPG


1914831974_LocatingJigOpposite.JPG.60441a598c87ec5c095e47d2f244fa59.JPG


1390417155_LocatingJigEnd.JPG.9ec2046dba9287b3e8f55f4e61b3e5db.JPG


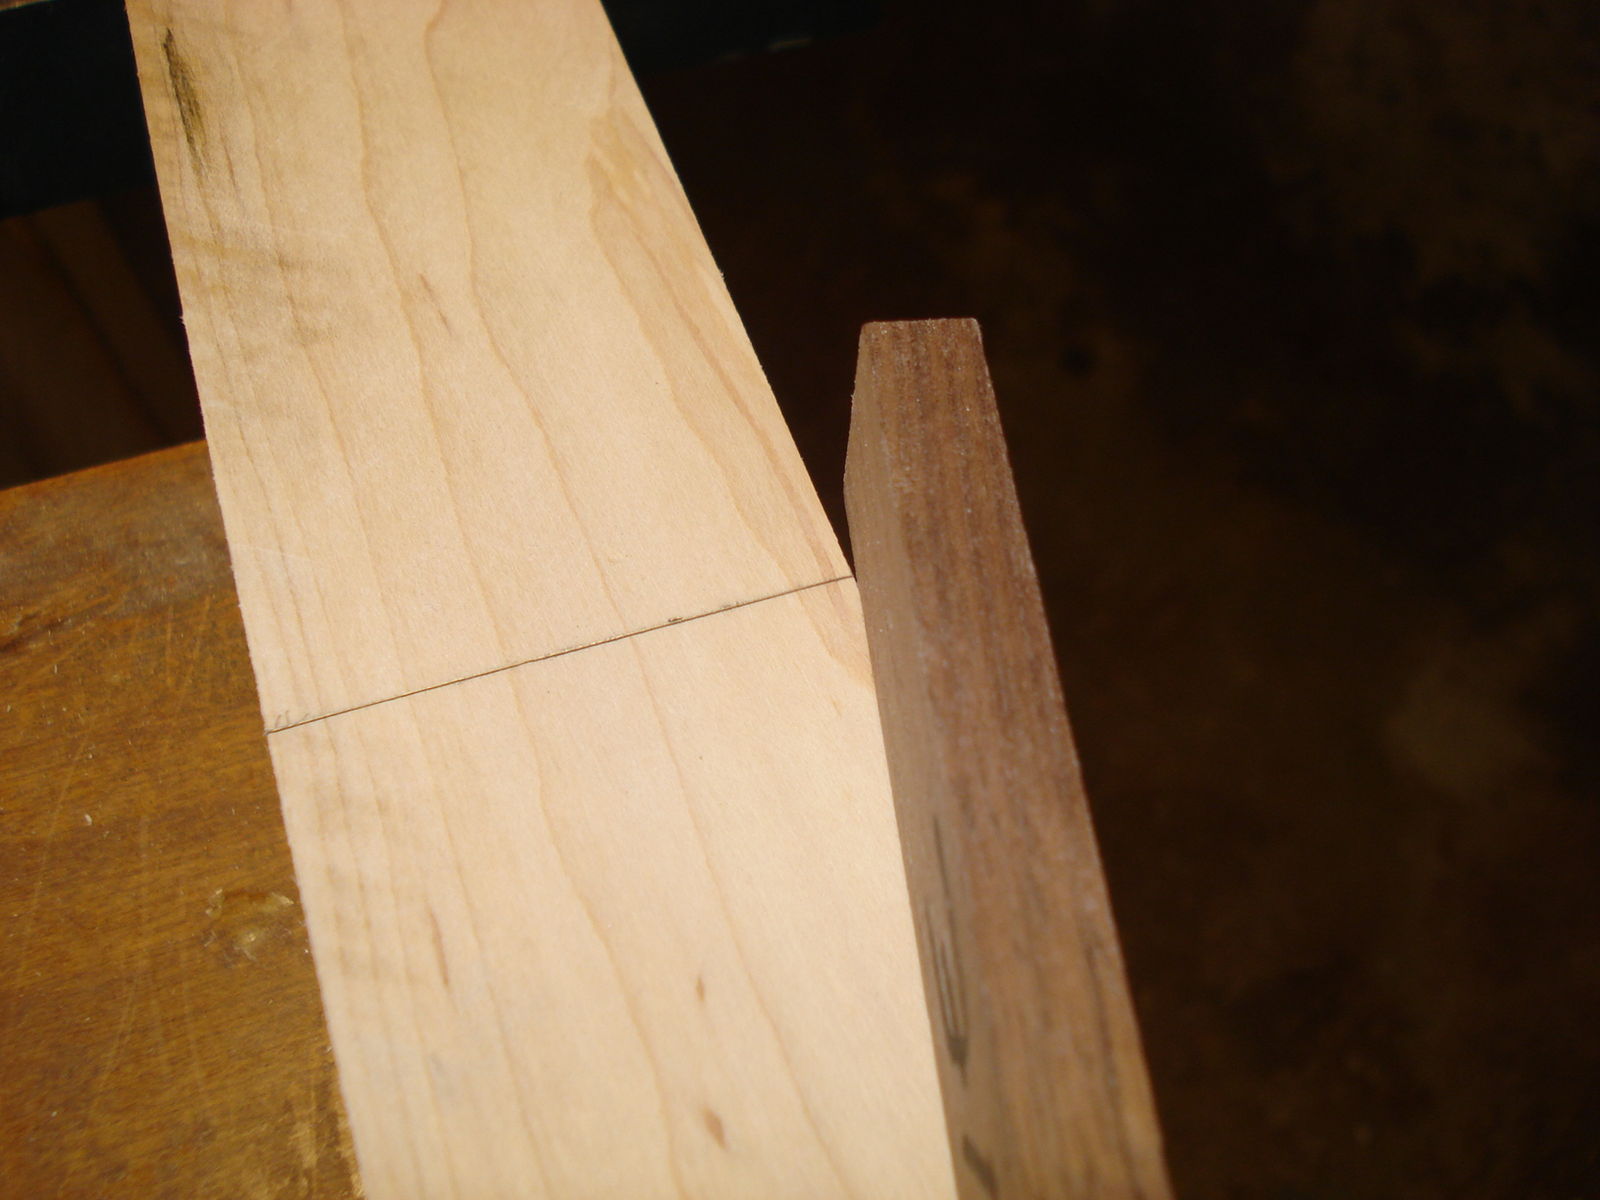
NOTE: the cut for the diagonal strips falls within the 11” layout lines


Rotate the blank 90 degrees and layout the location on the next diagonal cut.
Continue rotating and drawing the diagonals until all four sides have been completed.

1606244934_SecondInsertLayout.JPG.b495fc12f72a5925b0eee4c805f5d7f5.JPG


Each diagonal consisted of two drawn lines. One line intersected with the layout line that defined the end of the ellipse. The second diagonal line ends “short” of the ellipse layout line. The location of the end, of this diagonal line, must be carried around the blank. These lines define the location of the saw cuts for the strips that create the ellipse.


I have also begun to mark each end of the blank at the exact center of each end. This along with a centering line on the jig have helped reduce positioning errors as the saw kerf widens over time.

203293208_CentersMarked.JPG.0aff47438f322dc8353a6e521002c175.JPG


Accuracy is important when laying out these lines in order to get the ellipses to maintain continuity.


This drawing is not to scale. The measurements are what I used to make this rolling pin. The length and diameters were averaged from various baking supply websites for their rolling pins.

draw.jpg.4cbc66f364eec32159b667979331d499.jpg


3 Comments

Recommended Comments

Gunny Grand Master

Gunny

Members

Always have been curious as to how this is done and set up.  Looks much like I set up for a pen blank just on a larger scale.


Keep posting, looking forward to learning some more.

John Morris Grand Master

John Morris

Administrator

Thank you Lew! We really need to figure a way to make our blogs stand out, even I missed this! Great job on the republish!

Join the conversation

You are posting as a guest. If you have an account, sign in now to post with your account.
Note: Your post will require moderator approval before it will be visible.

Guest
Add a comment...

Account

Navigation

Search

Search

Configure browser push notifications

Chrome (Android)
  1. Tap the lock icon next to the address bar.
  2. Tap Permissions → Notifications.
  3. Adjust your preference.
Chrome (Desktop)
  1. Click the padlock icon in the address bar.
  2. Select Site settings.
  3. Find Notifications and adjust your preference.