Jump to content

Part #4 The Glue-up and Turning


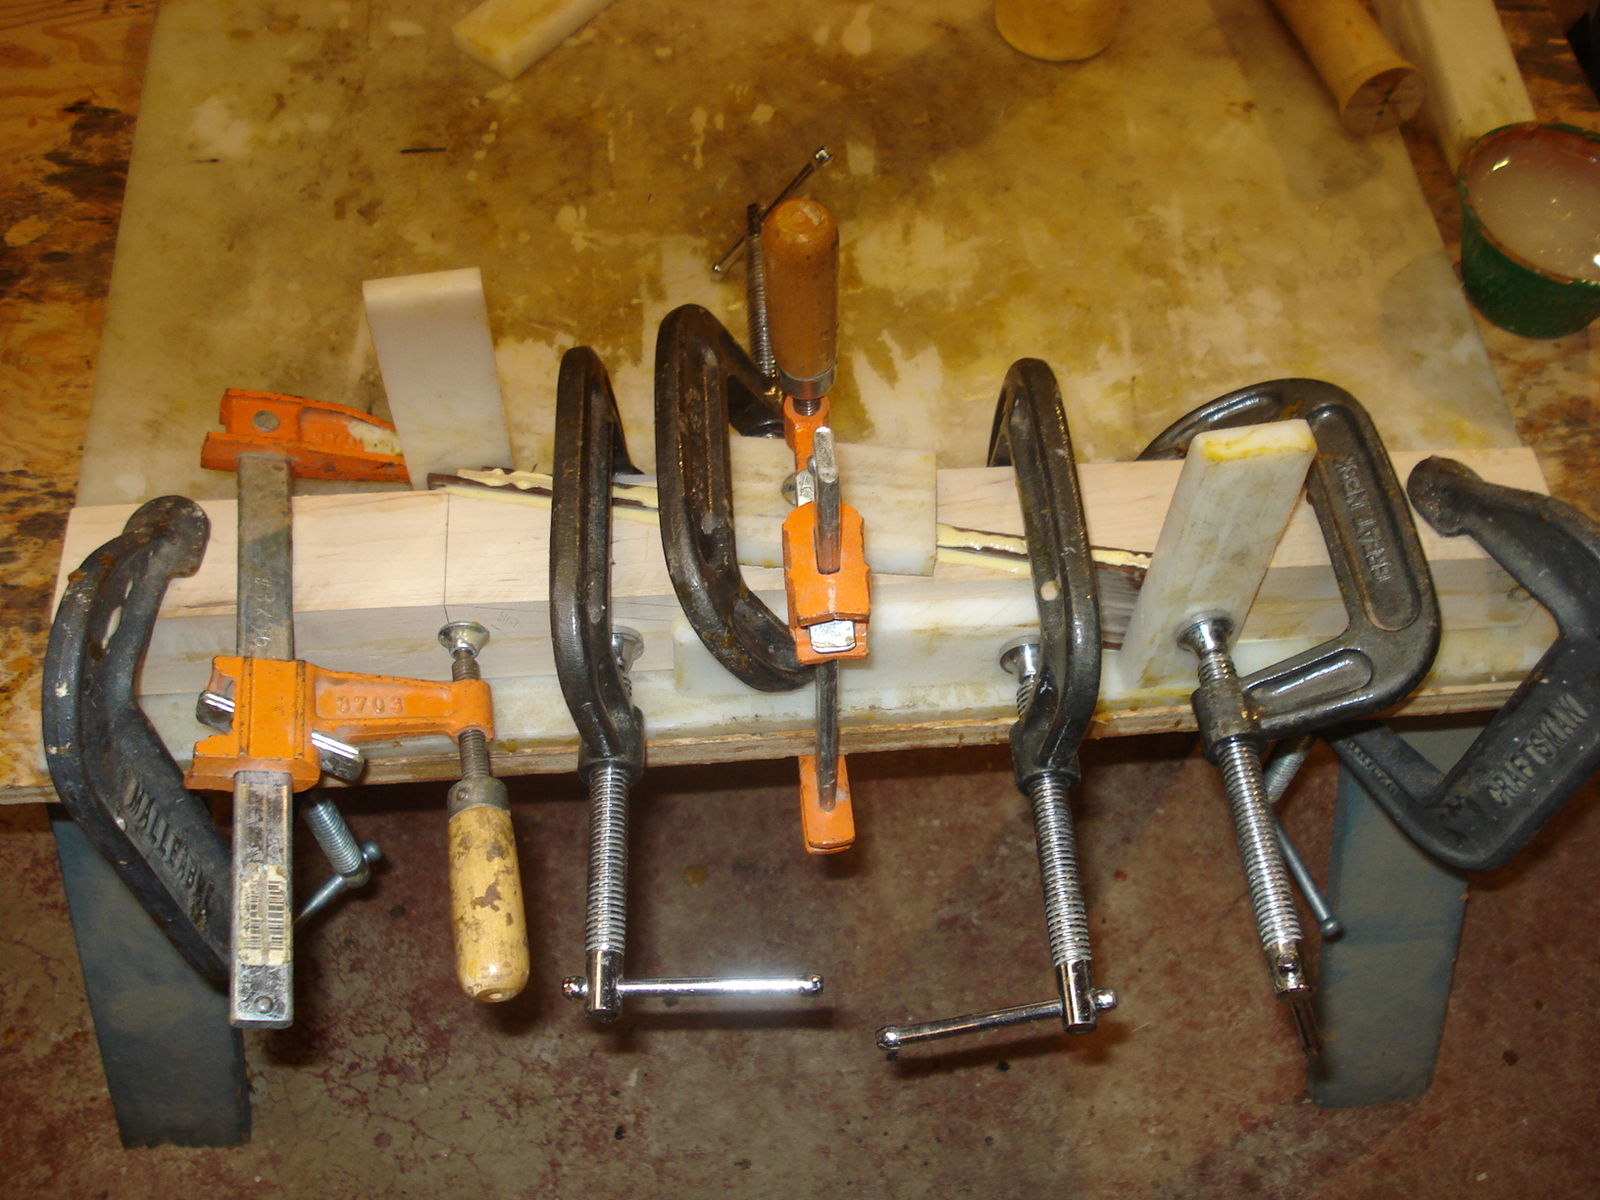
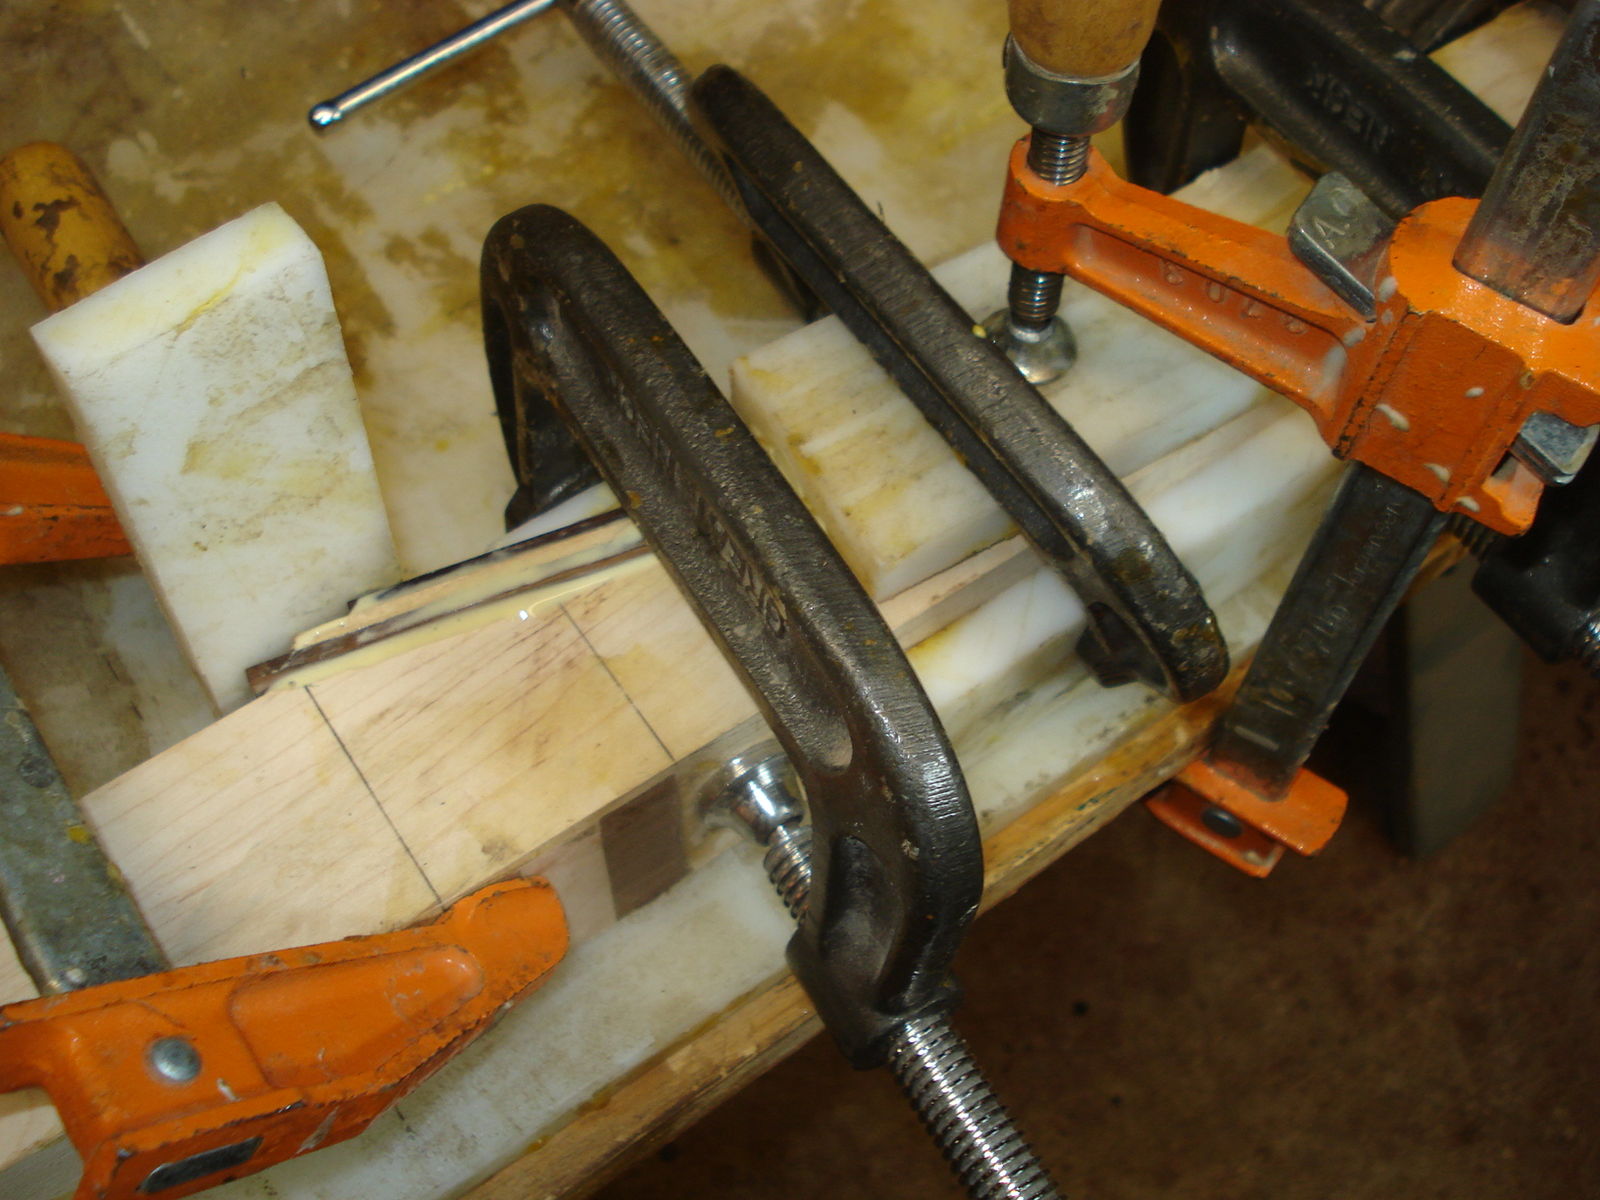
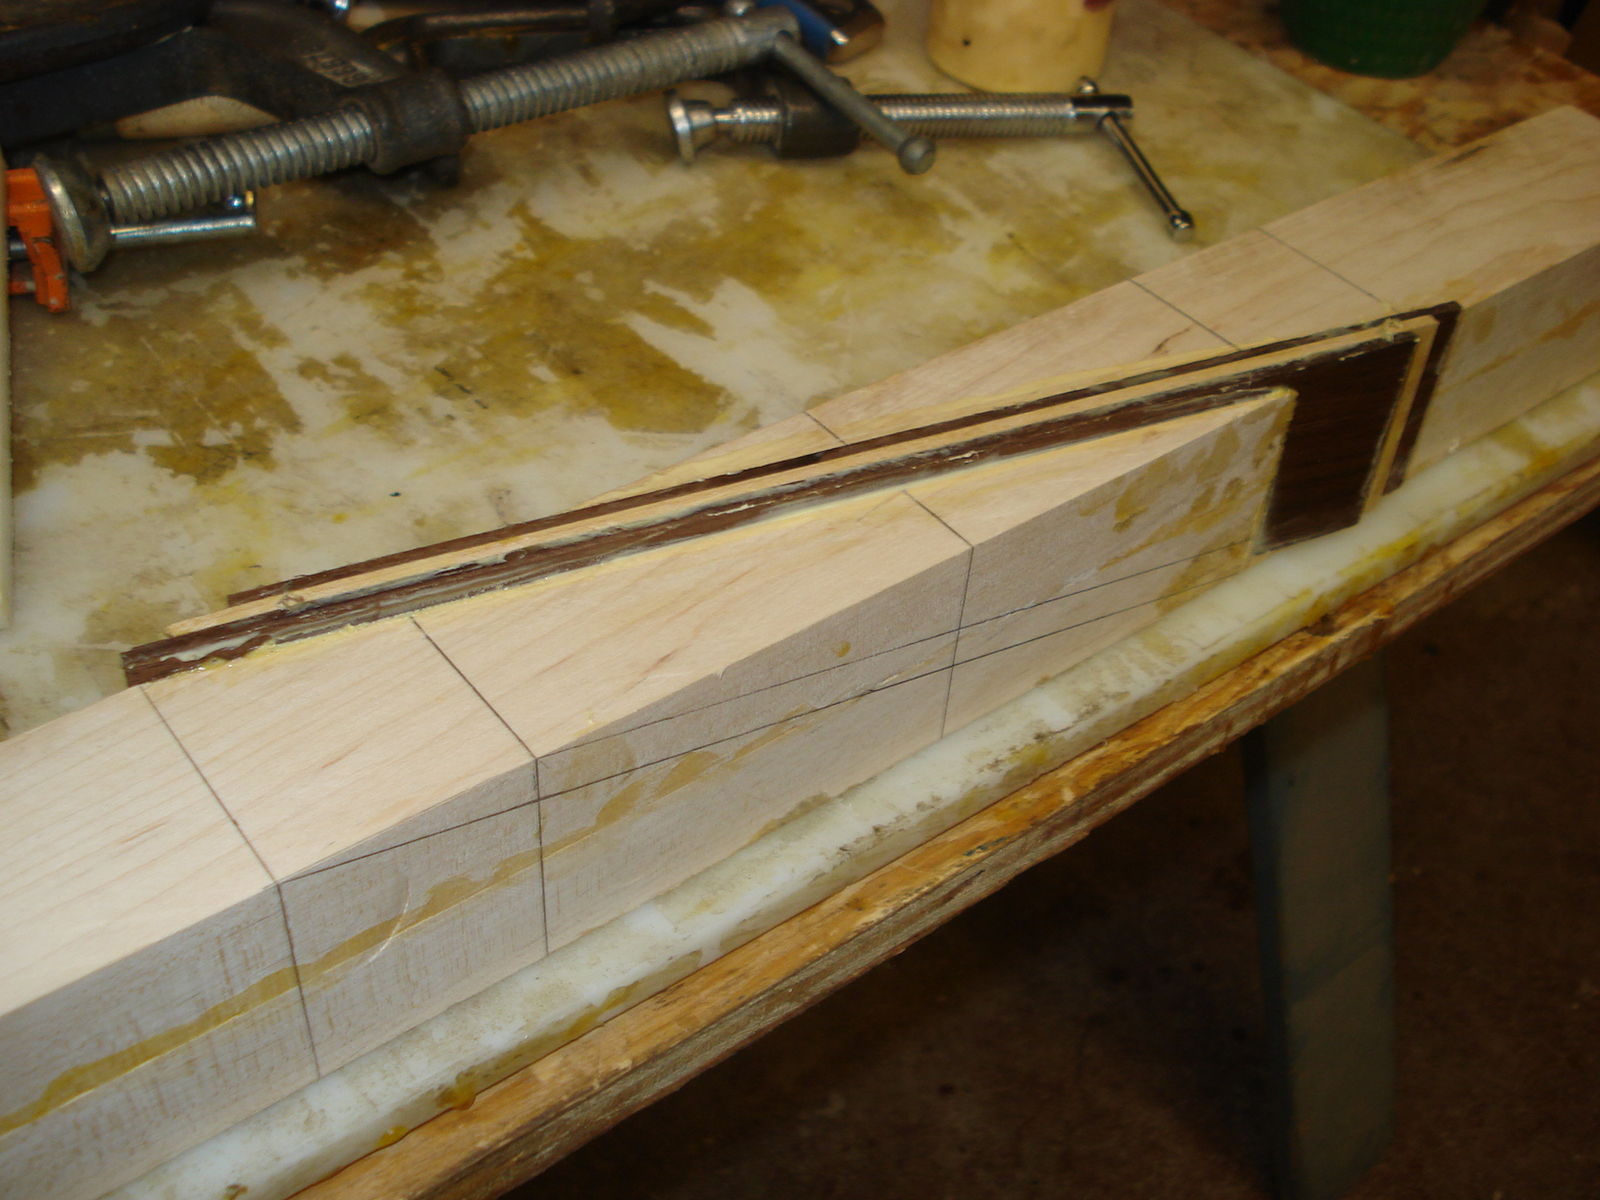
I found it easier to glue if I oriented the blank with the diagonal cut facing up. I use an old restaurant cutting board as a gluing work surface and pieces of the cutting board as culls and pads. In this picture, you can see the three strips to be glued into place. They measure 2” x 10 3/4” x 1/8”. Test fit the pieces first to make sure they will seat into the slot. (I now have a thick piece of Corian countertop for the gluing surface)

595834705_ReadyForFirstGlueUp.JPG.9c197c826a219118bc0f9129f580b1e6.JPG


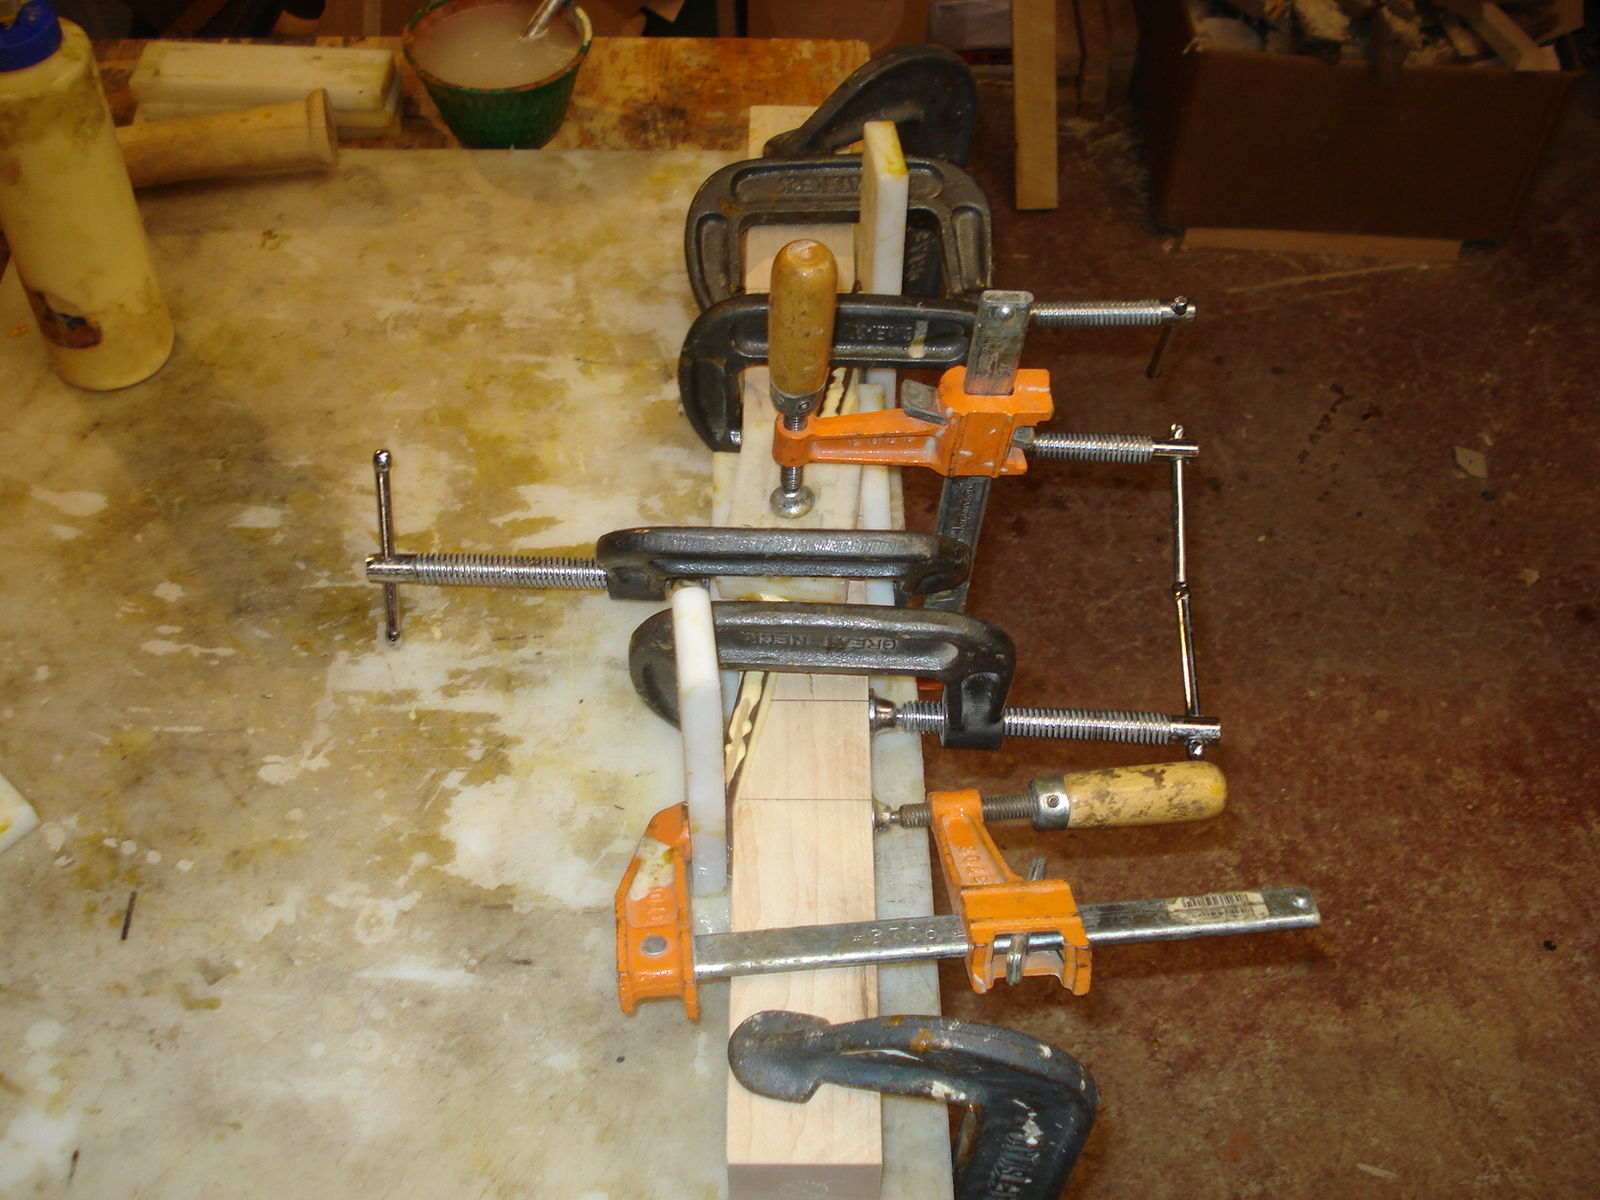
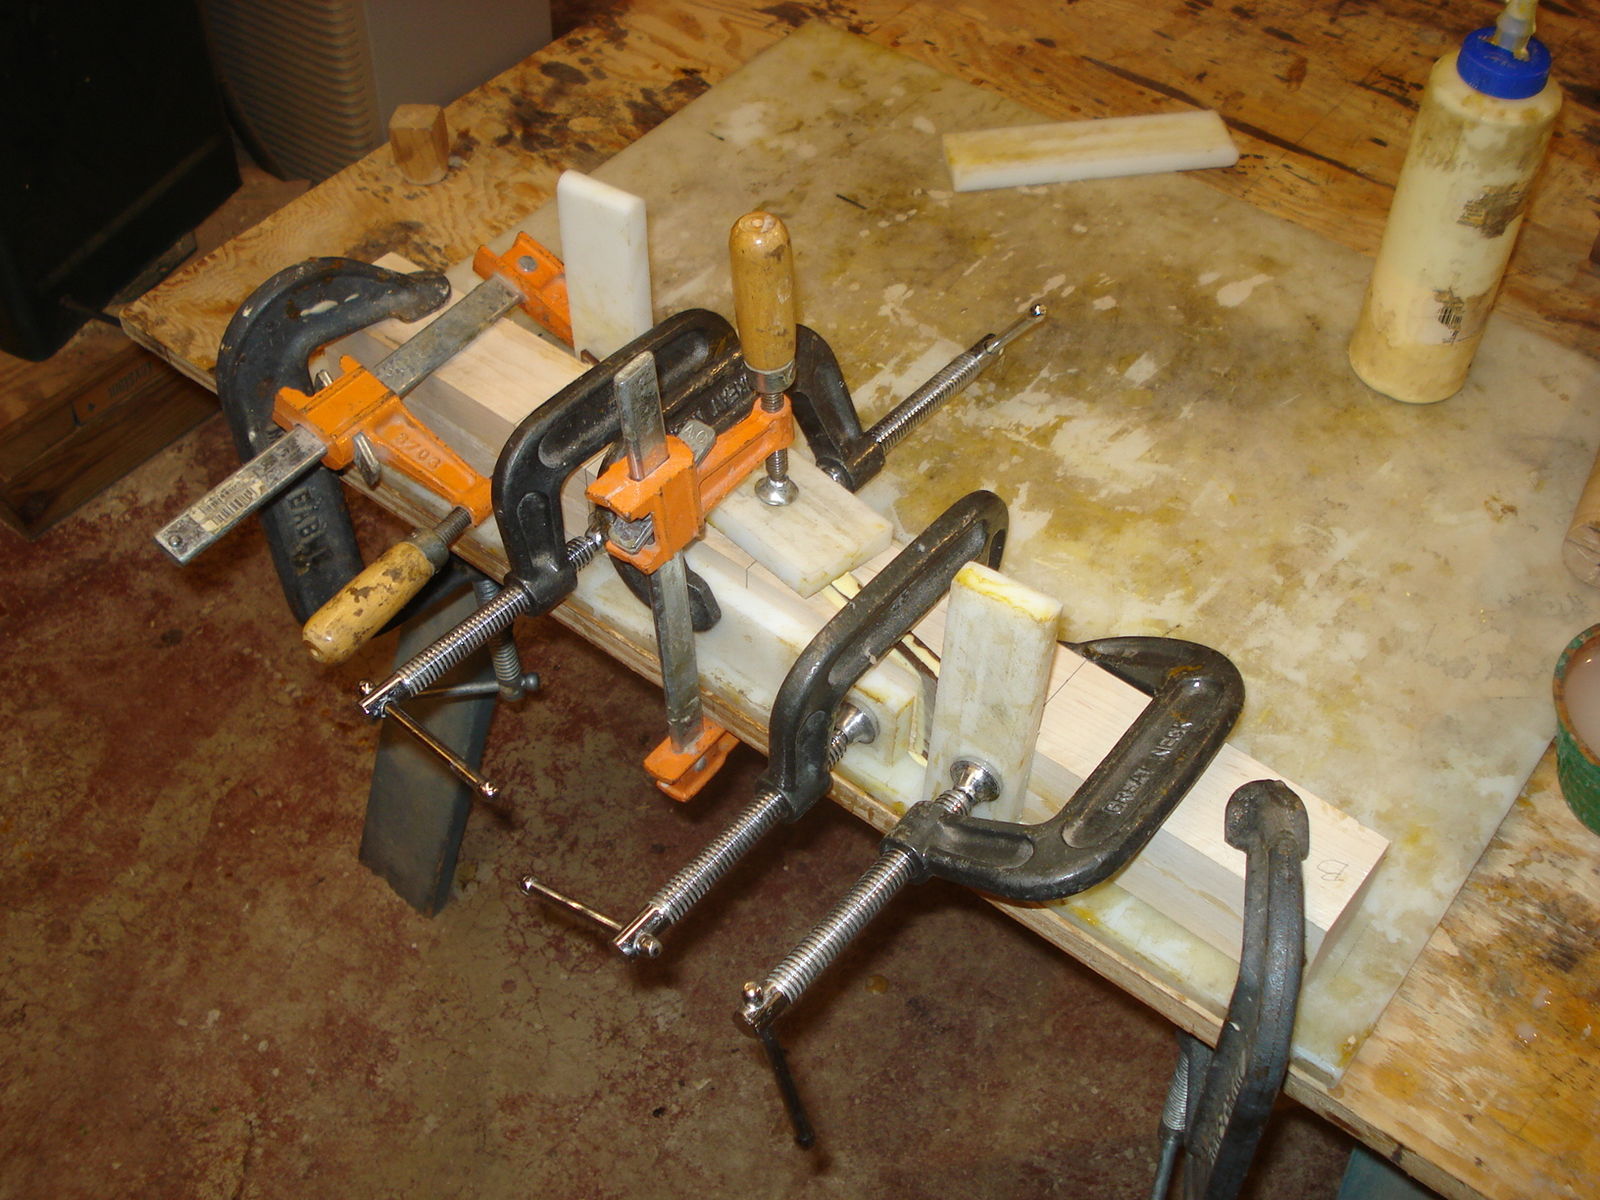
On my first attempt, I didn’t use enough clamps- using more clamps and culls assured that all of the joints were tight. I probably overdid it with the amount of glue. A liberal coat over all mating surfaces.


Clamped up

1411662670_InTheClamps.JPG.c53a087e5d4dfa611dfcc0f5e2bcdef7.JPG


277147257_InTheClamps1.JPG.ea2db67db9d97ad7e3aa5da0b022da60.JPG


1696205258_InTheClamps2.JPG.68f2d3fdb73595687d658ca38cdc1ddc.JPG


801964887_SecondInsertsInClamps.JPG.37658ab5f6db1b6342958e8e76ce2050.JPG


After the glue has dried and the clamps removed, the blank is ready for trimming. I used to use a special table saw jig for this but found it was easier and quicker to trim off the excess insert length on the bandsaw just free handing it. 


1974802016_FirstSetOFInsertsReadyToTrim.JPG.efe97d88f8c4dc74706fc686fe64431e.JPG


745383058_LastInsertReadyToTrim.JPG.918cb289996492c12c18889013fe9fc8.JPG


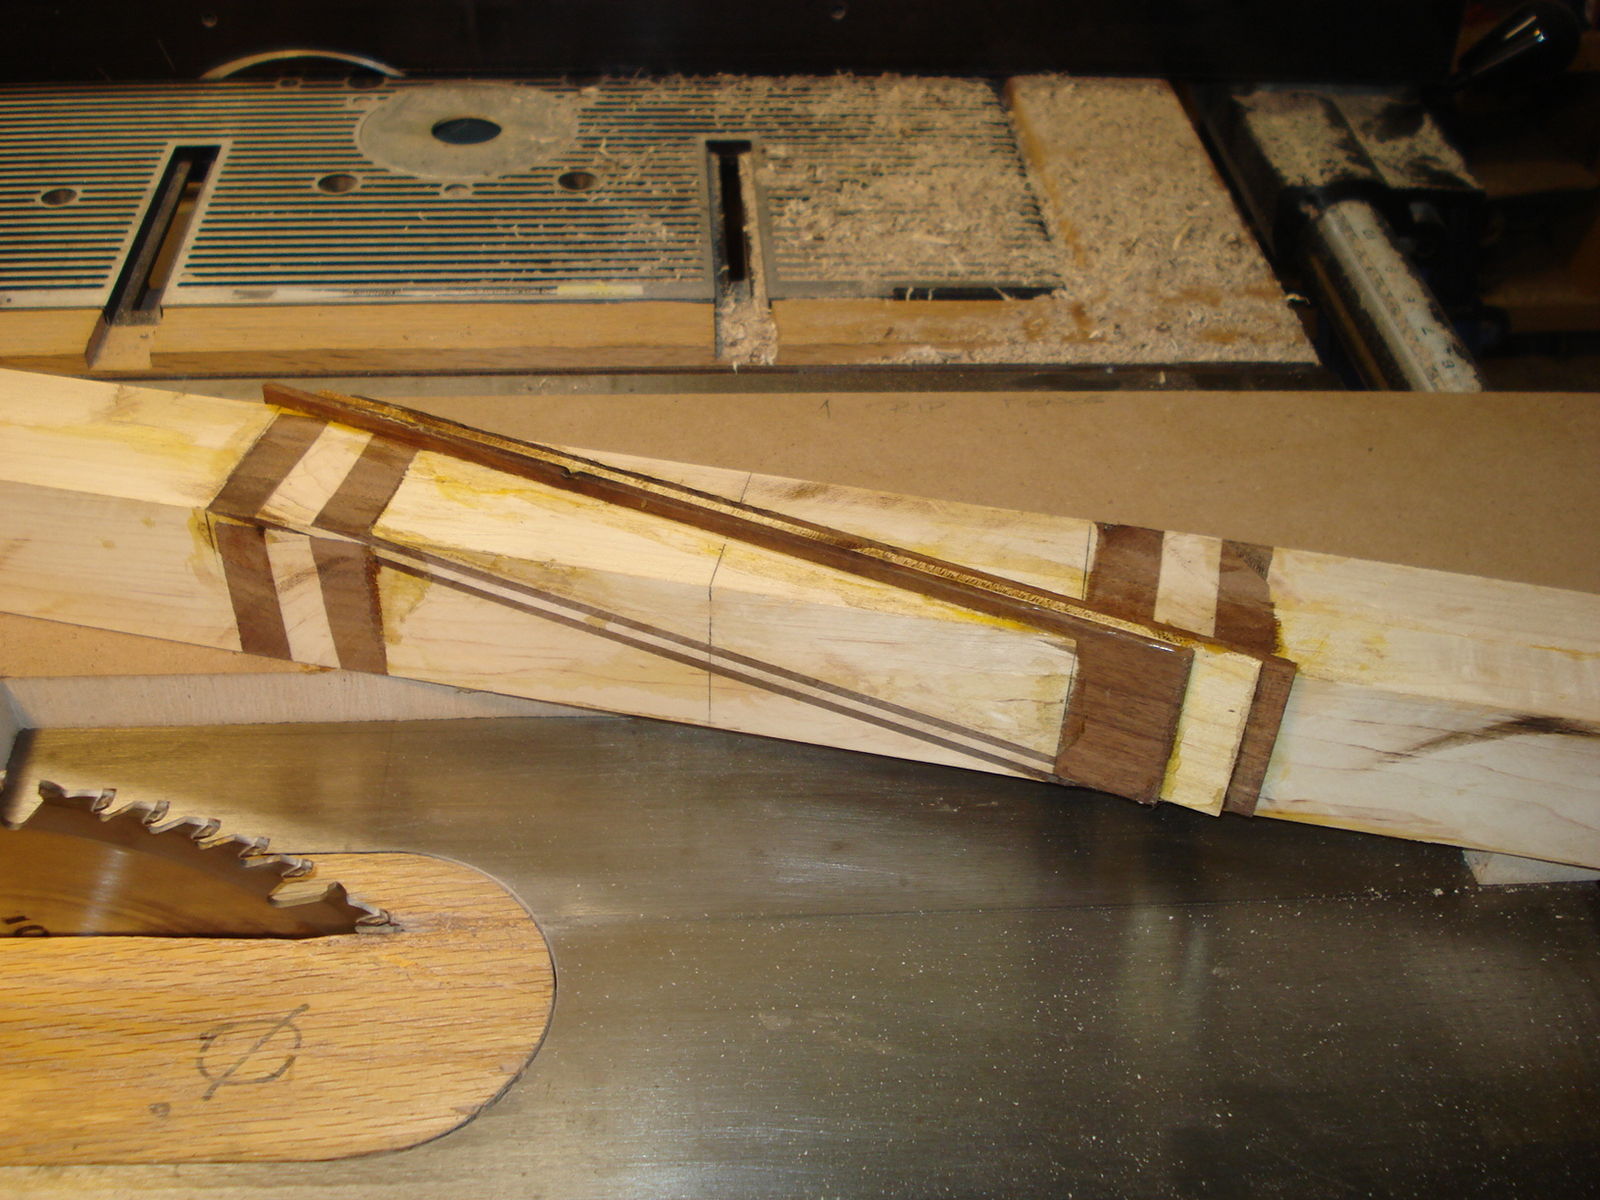
Trim both ends and the side.


At this point it is a good idea to “sweeten up” the layout lines, if the trimming operation removed them.


Now it is just a matter of re-mounting the blank on the diagonal cutting jig and repeating the operations for making the second diagonal slot.

The diagonal slots, glue ups and trimming operations are the same for each of the remaining three sides.


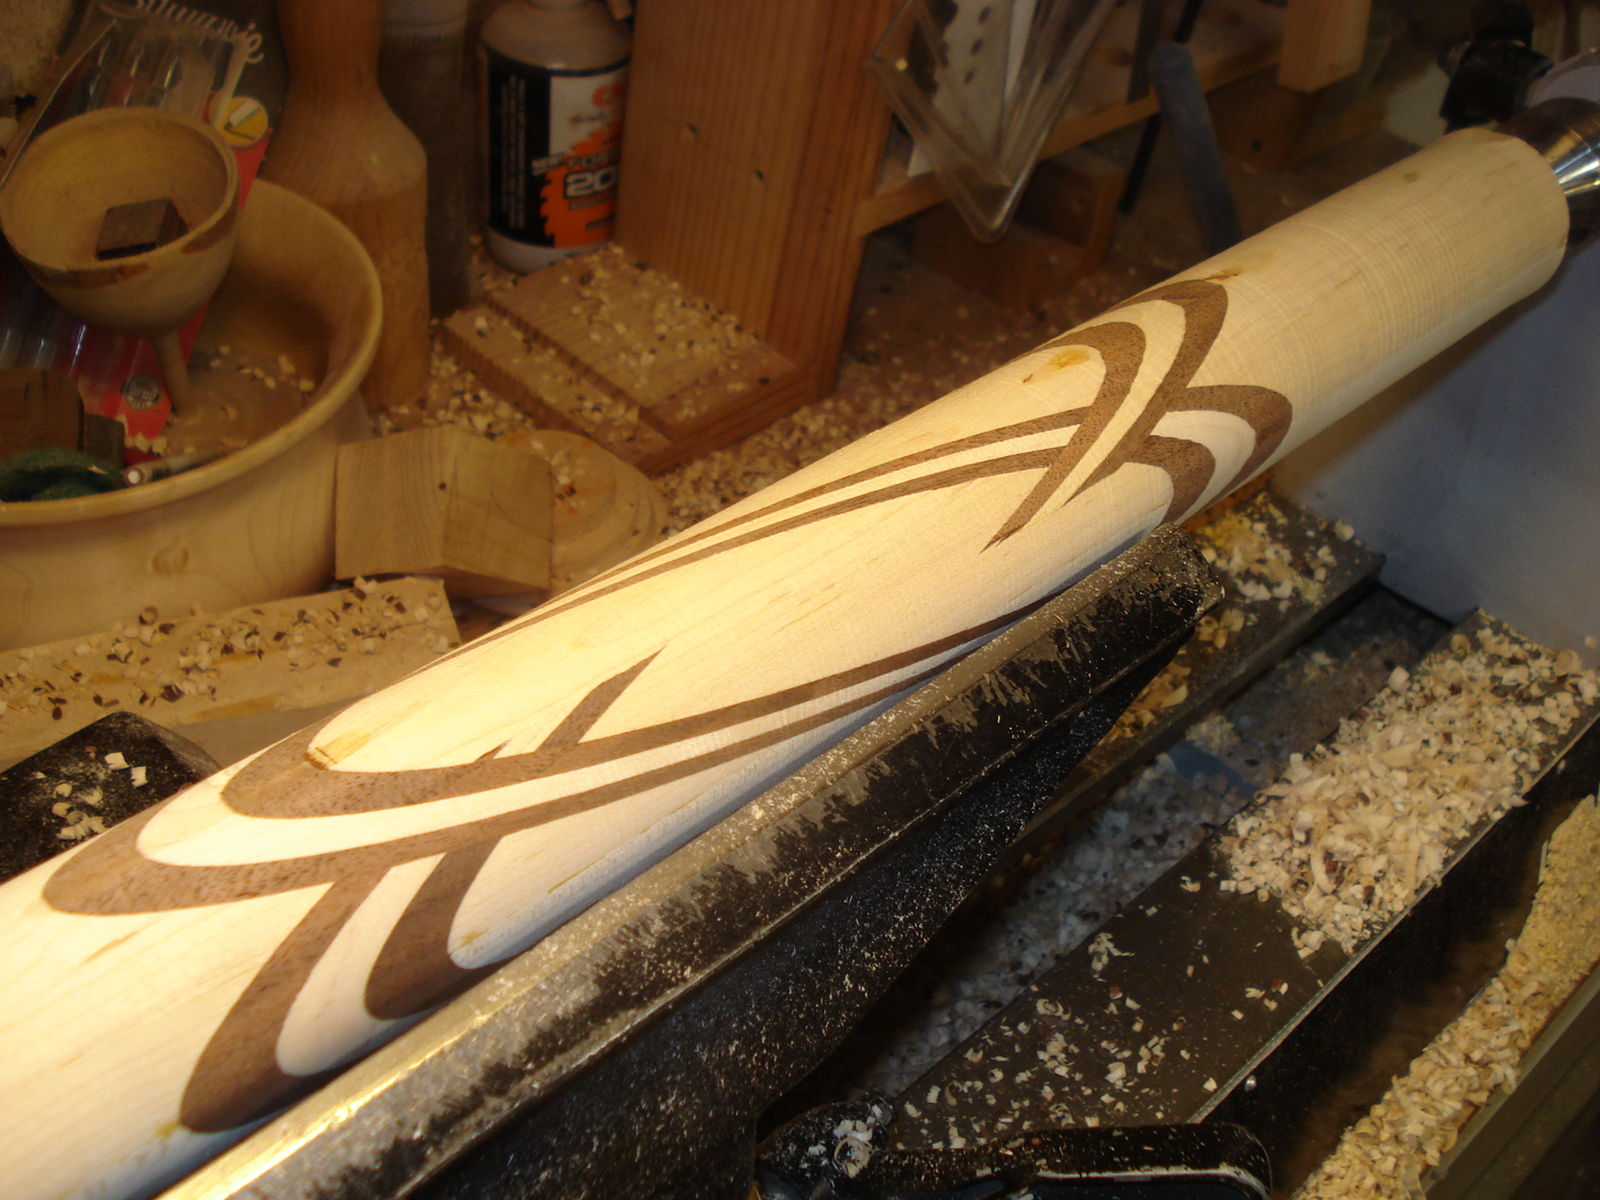
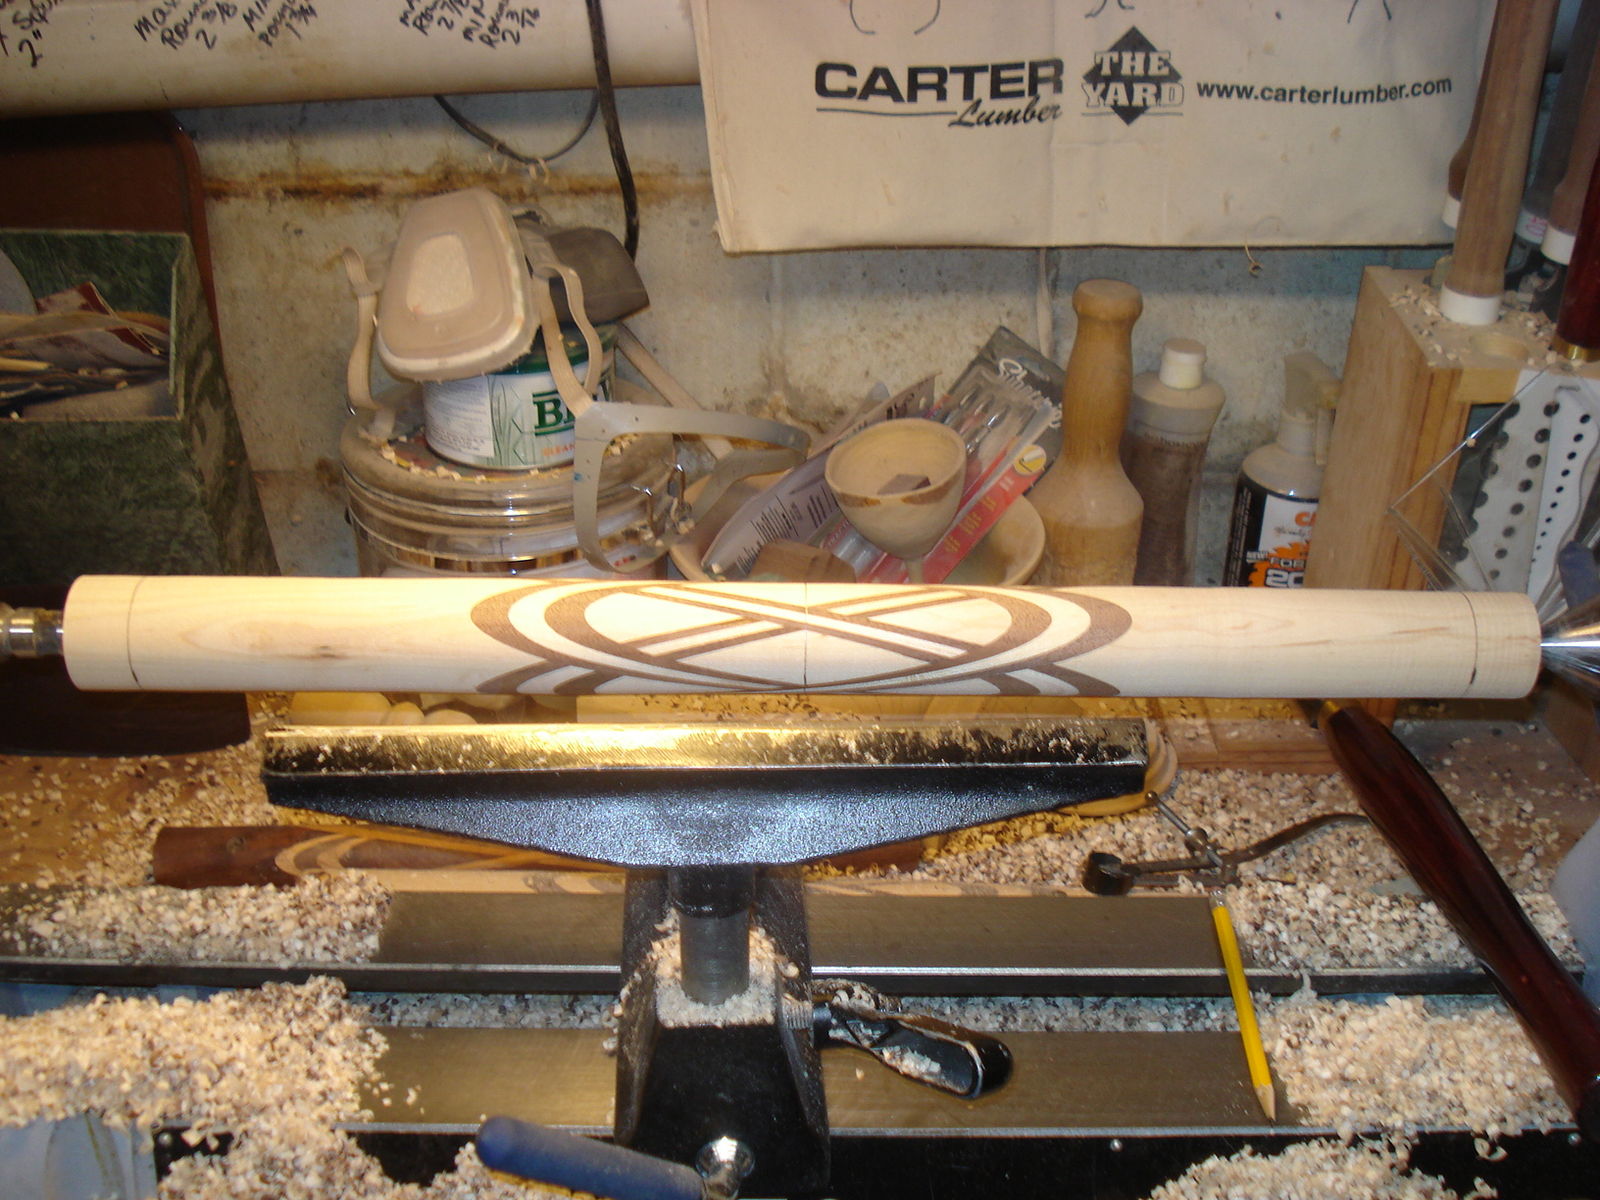
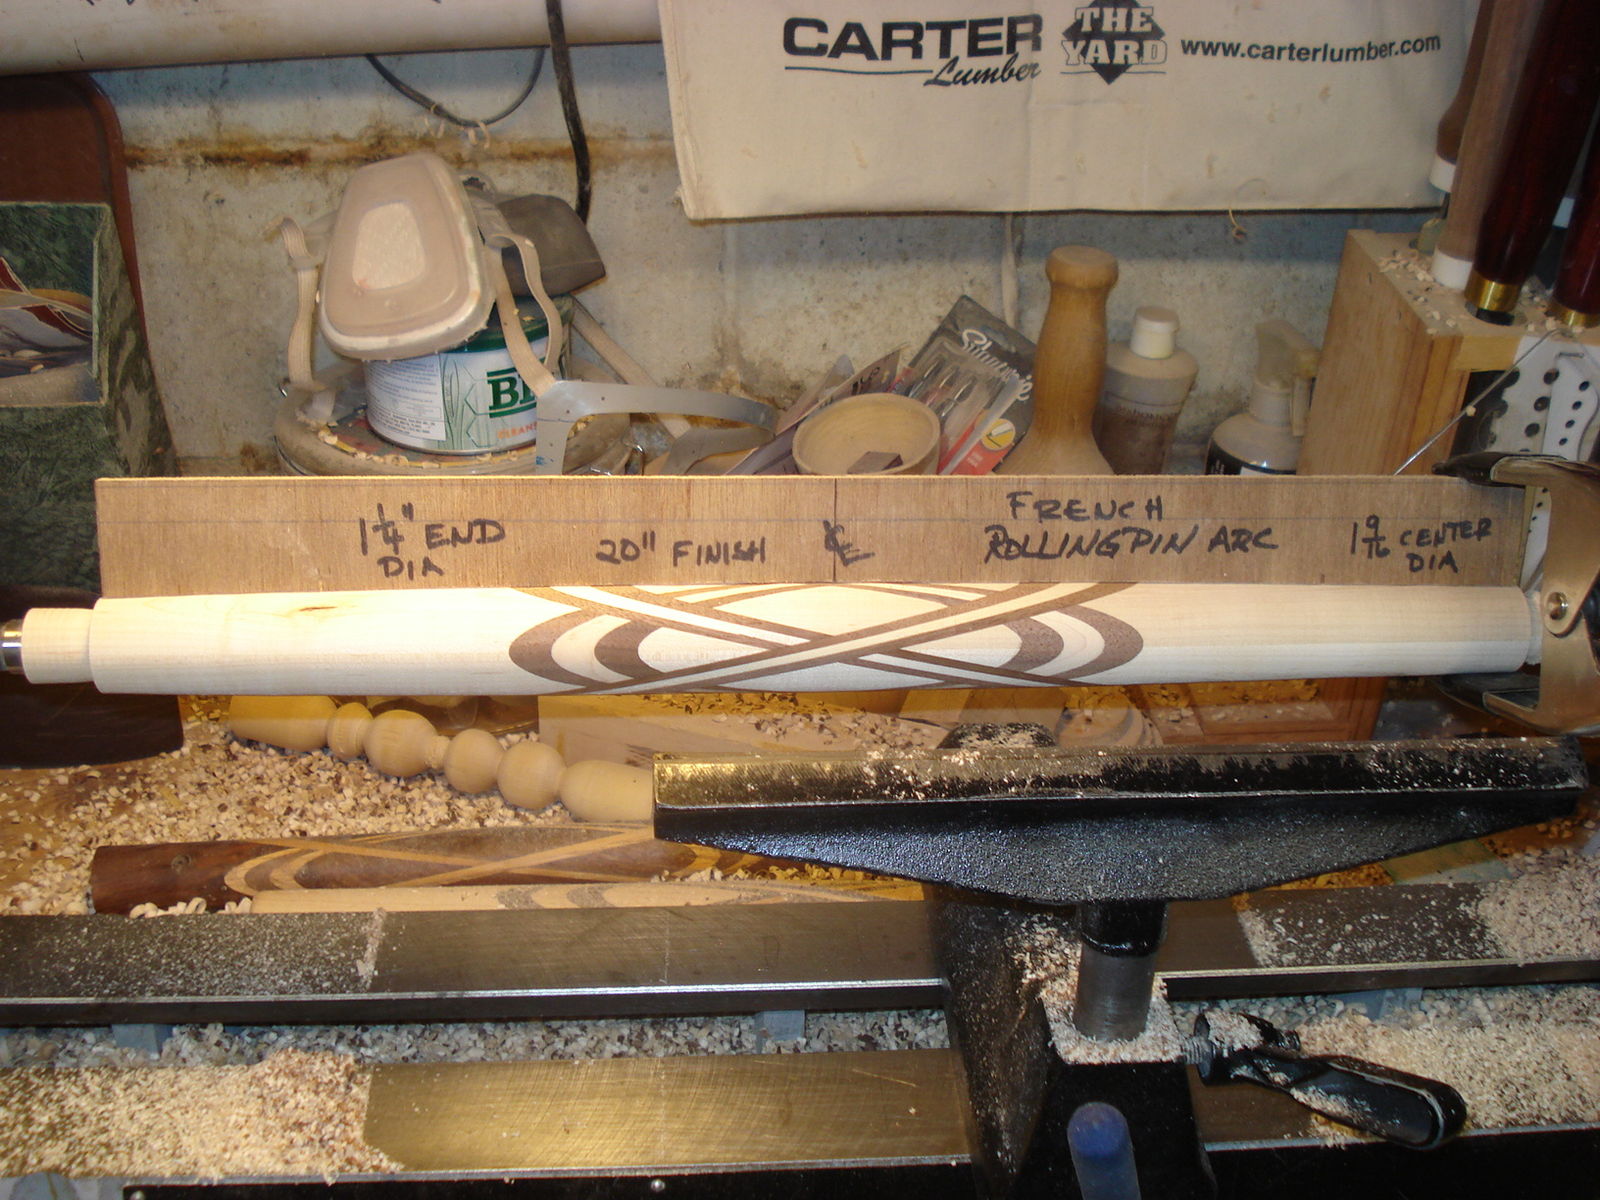
On the lathe, ready to be turned.

681240031_ReadyForTurning.JPG.35c0eb32829c44f89f69399bc5d2050b.JPG


The final dimensions on this rolling pin were: 20” long; diameter at the center: 1 9/16”; diameter at the ends : 1 1/4”. I have tried two types of tapers. One started at the center and continued to the ends. The other starts at the ends of the ellipses and continues to the ends. Personal preferences will determine the tapers.


After the blank is turned round, the layout lines for the taper can be drawn on the blank.


615455153_RoundButNotToProperDiameter.JPG.bff344697741b3166a4eb901271a4895.JPG


39218811_AllLayOutLines.JPG.b375551702efaf3c315d8becb376ed77.JPG


To aid in getting it symmetrical, I started with an arc template.

1657198908_ArcTemplateForShaping.JPG.d13ed2fdc3b6e5ac707f1bcba2e6eed3.JPG


 My turning skills leave a lot to be desired and there was too much variation from one pin to the next in diameter and symmetry. I considered purchasing a lathe duplicator but finances dictated this calls for another jig!

Most of the hardware is standard off the shelf stuff- ¼” x 20 threaded stock, wing nuts, T-nuts, deck screws. The only thing “special” was the ¼” tool steel- which I purchased from a local machinist for 25 cents and then ground a rounded tip. This shape worked better than a point because it left the wood with a smoother surface.

1555734325_DedicatedTaperDuplicator.JPG.01d786e1ed24344d2cd079333d6d9154.JPG


2003452715_DedicatedTaperDuplicator1.JPG.017f5bfe279a5a9d764528579fce5f07.JPG


1415816626_DedicatedTaperDuplicator2.JPG.9b0259e408d7f2ffda4c42fdfb47c21f.JPG


1141917589_DedicatedTaperDuplicator3.JPG.c8eb0310fb23f63d6131250c8fcbcad8.JPG


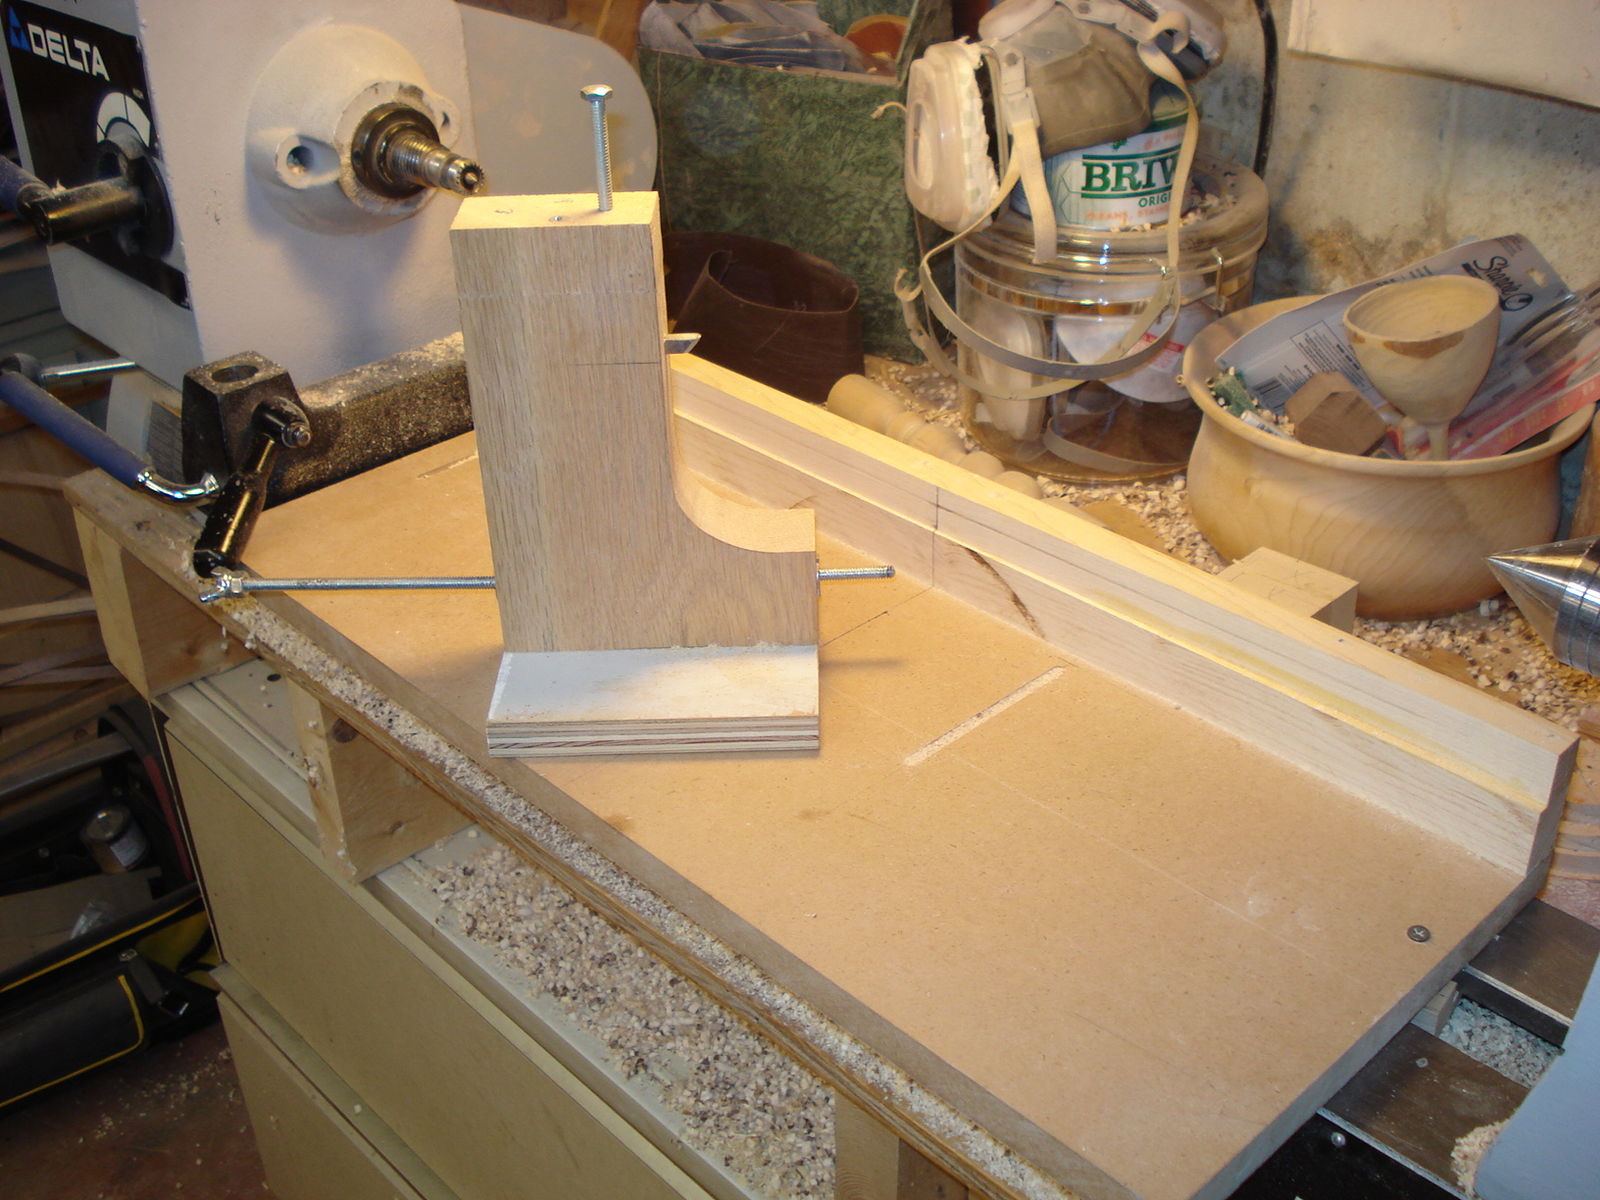
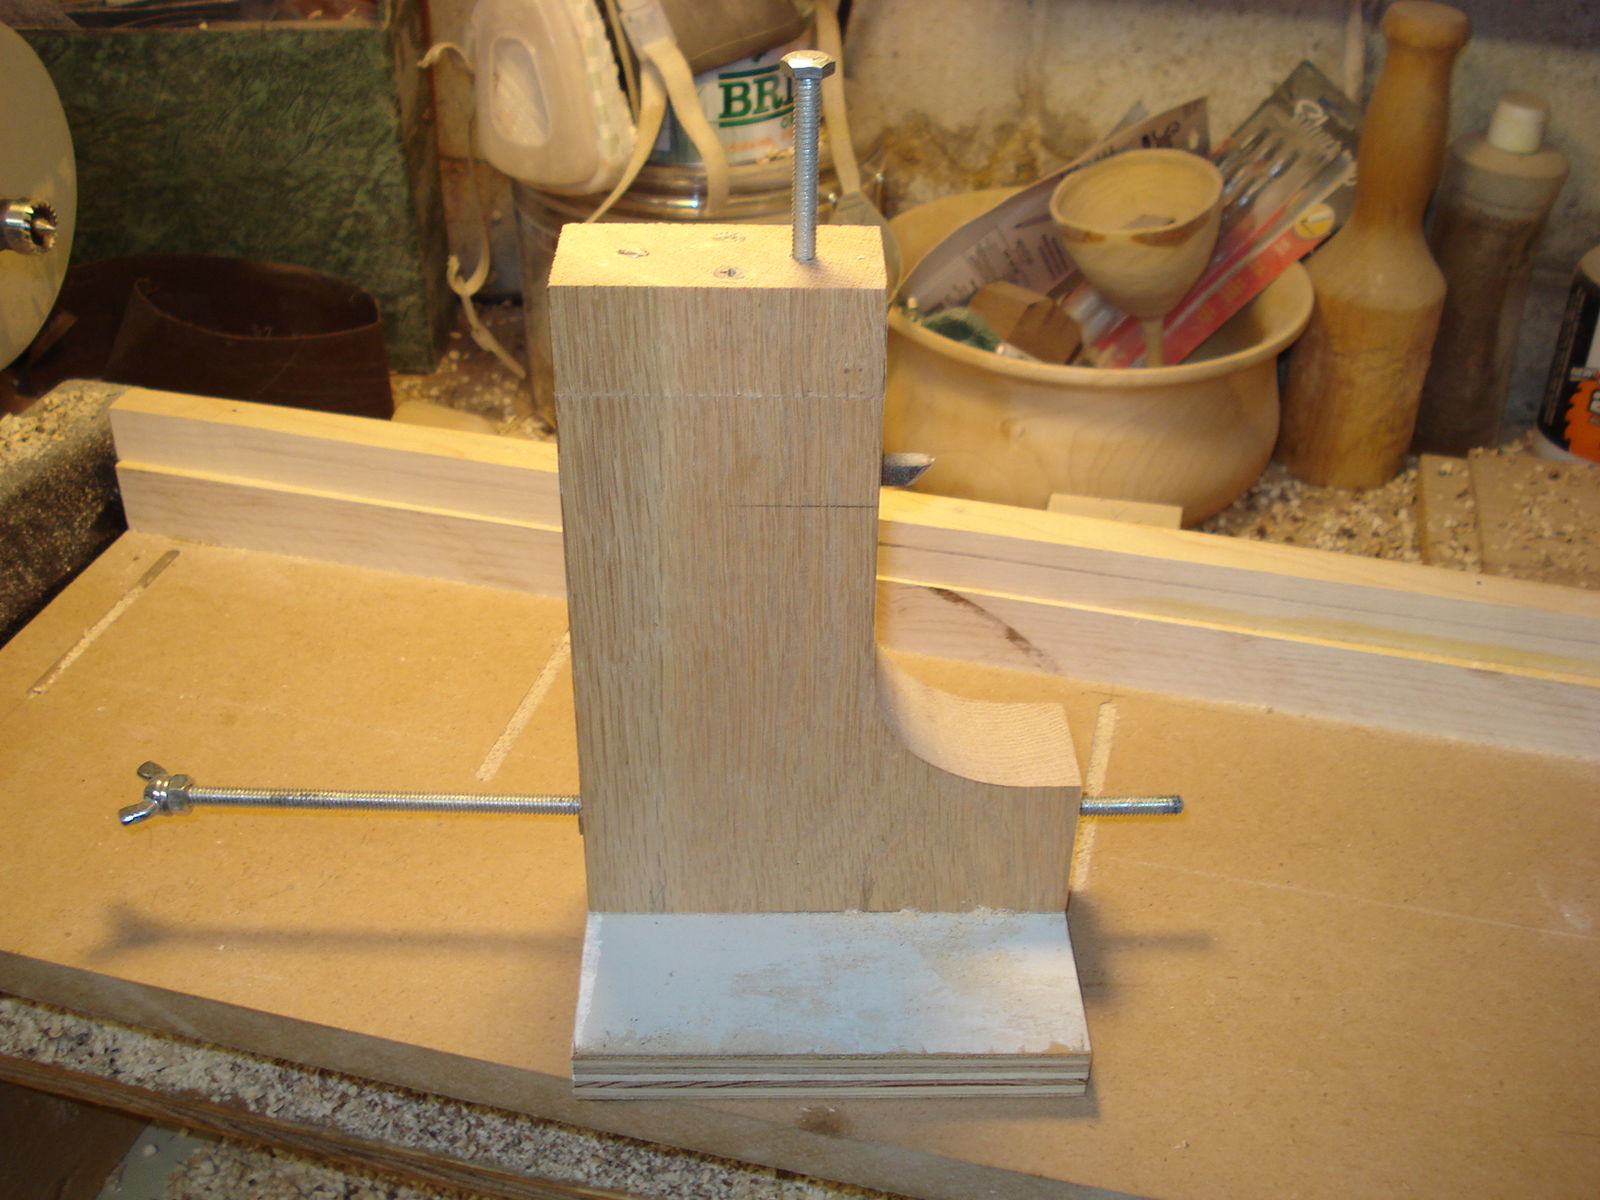
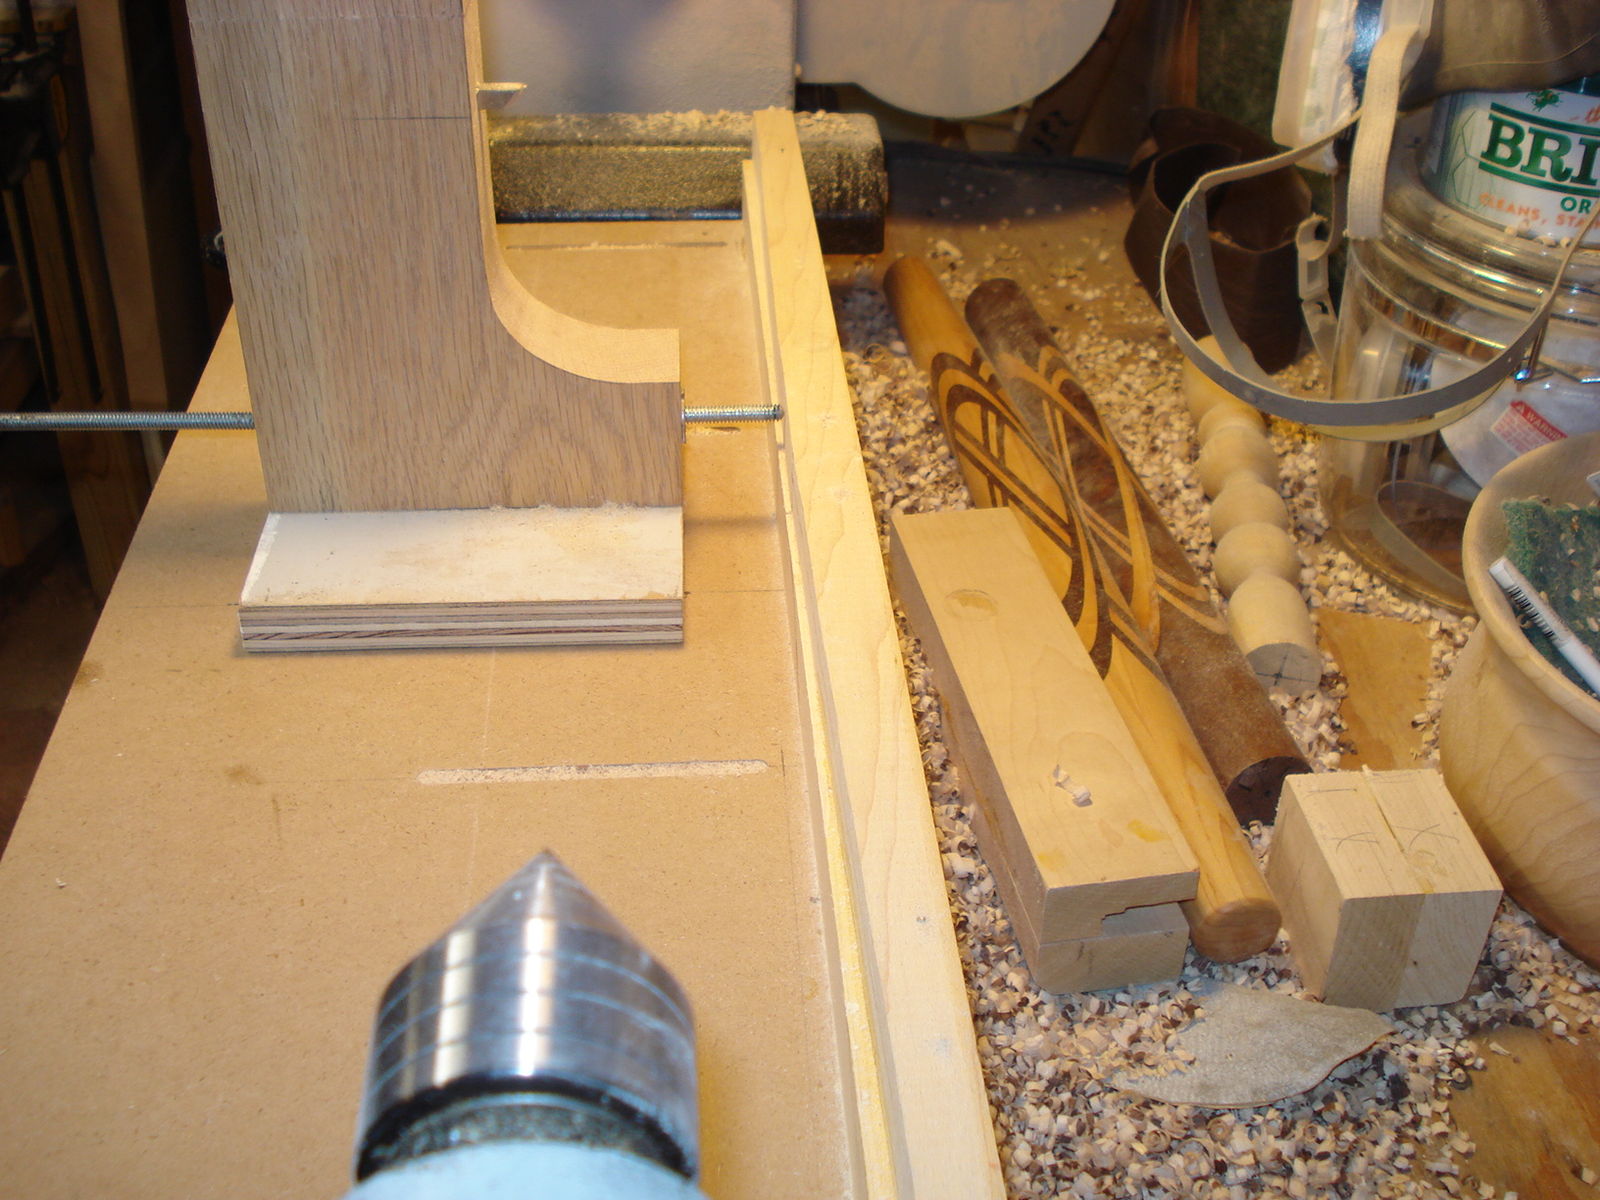
The base of the jig mounts onto the lathe bed. The back edge of the jig has the “reverse” arc of the rolling pin. The cutting portion of the jig sits on the MDF bottom and the bolt follows the arc to create the shape.


The long bolt can be adjusted to position the cutter depth.


13 Comments


Recommended Comments

Gunny

Posted

Man do I feel smarter already.  Also why am I exhausted???


Nice set of post lew, great stuff.  Very helpful!!

TJ44

Posted

Beautiful work and has motivated me to try it. I am having an issue though. The glued portions of my pins raise slightly after sanding it smooth and applying mineral oil. Is there any way to keep this from happening? Thank you for your time.

TJ44

Posted

Beautiful work and has motivated me to try it. I am having an issue though. The glued portions of my pins raise slightly after sanding it smooth and applying mineral oil. Is there any way to keep this from happening? Thank you for your time.

TJ44

Posted

Beautiful work and has motivated me to try it. I am having an issue though. The glued portions of my pins raise slightly after sanding it smooth and applying mineral oil. Is there any way to keep this from happening? Thank you for your time.

Cal

Posted

Welcome aboard TJ44, glad to have you here.  @lew ought to be along shortly with your answers.  In the meantime, what type of wood did you use for the project and in particular the accent strips?

We all like to see pics too...

lew

Posted

@TJ44 Thanks for the inquiry on the rolling pins!


Some questions to help us get to the same point:


What material(s) are you using for the construction?  Are the materials kiln dried? How long do you allow the glued blanks to dry before you turn them?


Lew

TJ44

Posted

Thank you for the warm welcome and your time guys.... I am using black walnut, hard maple and purple heart. The glue is drying for approximately 24 hours. I just retired and always wanted a lathe so I figured I would try some rolling pins. Any advice is greatly appreciated. Tim

IMG_1650.jpg

IMG_1651.jpg

lew

Posted (edited)

Love your rolling pins!! Those designs are awesome!!


I've used all of the same species as you although not so much purple heart- for no particular reason- but I do use cherry for accents. 


My opinion here- I think your drying time for the blanks might be a little too short. It takes a while for the glue to completely dry and the wood to shrink back as the moisture leaves. I usually let my blanks dry several days before final shaping, sanding and oiling. Some your designs contain lots of glue areas which adds more moisture that needs to dissipate.


Also, the side grain and end grains will expand/contract at different rates as they absorb/release moisture which may also contribute to what you are experiencing. Here's an article from a turner that does a lot of segmented turnings where he explains about the various gluing orientations- 


http://www.jlrodgers.com/uploads/1/2/2/9/122965359/glue-grain-and_-_joints.pdf


Hope this helps, let me know if can help more.

Edited by lew
TJ44

Posted

Thank you so much for the information and kind words. Patience has never been my strong suit but I will definitely give the glue a lot of dry time from now on. I actually just ordered some cherry so I am looking forward to see how that looks. I really appreciate your time. Tim

lew

Posted

4 hours ago, TJ44 said:

Thank you so much for the information and kind words. Patience has never been my strong suit but I will definitely give the glue a lot of dry time from now on. I actually just ordered some cherry so I am looking forward to see how that looks. I really appreciate your time. Tim

Let me know how it goes!

Join the conversation

You are posting as a guest. If you have an account, sign in now to post with your account.
Note: Your post will require moderator approval before it will be visible.

Guest
Add a comment...

×   Pasted as rich text.   Restore formatting

  Only 75 emoji are allowed.

×   Your link has been automatically embedded.   Display as a link instead

×   Your previous content has been restored.   Clear editor

×   You cannot paste images directly. Upload or insert images from URL.

×
×
  • Create New...