Search the Community
Showing results for tags 'groove'.
Found 7 results
-
With the club's long time charity deciding they don't want wooden toys any more, we needed to find a new place. One current place is the local children's hospital taking 30 small boxes a month for the patients to decorate while there and take home. So I started making some. The first batch (6 of them) was mitered corners with a sliding lid, used keys on the corners. Second batch (5) finger-jointed and solid top rabbeted. Looking for something a little more efficient in production. Third was a prototype with an inset lid held with a brass rod as pivot hinge. Ok, but finicky. Forth was today. Mitered corners and inset plywood top and bottom panel. Biscuits to reinforce the miter joints. I did another groove on the inside near the top. Then once the box was assembled and glue dried, did another pass with the 1/4" bit on the router table. This made a double rabbet to hold the lid in place. Saves having to do an inner layer insert. I'll do a run of these when I get some more lumber and plywood. I talked to a local furniture shop last week and they told me the set out their scraps on Monday afternoon for the trash man. I was there and picked some of their cutoffs from the scrap bin;. Most of it was 1/2" poplar, probably drawer sides. A bit of maple and some cherry. In another adventure, I got a bunch of leftovers from red oak flooring (one time find) . Well, started today to rip off the tongue and groove edges so I could do glue-up. Then I thought, hey, the ends are going to be hidden by miter joints, just use them to align the glue up and rip off only the top and bottom edges. Lesson learned. It appears that the groove side is slightly wider on the top than on the bottom. I'm thinking that's so the top joint is tight and the bottom does not matter so much. I got a lot of "cup" in the top that I needed to get out with cauls and now I looks like there's a gap on the bottom of that joint. Well, nice try. Wait for the glue to dry and rip them apart. On the other ones, I will try just trimming off a bit on the groove side to align it up.

-
 Hi All, I'm new here and need some help with an antique armoire I'm repairing. The back is a frame and panel design and I need to create some replacement slats. The tongue ends aren't like any I've ever seen and I can't find the proper router bit for it. Any suggestions on what I can use to cut this? Thanks in advance! Munsey
- 8 replies
-
- 3
-

-
- router bit
- router
- (and 5 more)
-
Well, the Christmas Gift Exchange list is out.....I have to find a present for my Grand daughter-in-law...... Bought about 25bft of Quarter Sawn Ash, today.... There are 11 boards in that stack..average width is just under 6"....all are around 3/4" thick. Hmmmmm, how about a Blanket/ Hope Chest build? Frame and panel? Or maybe a "6 board" style? been a while since I built a chest....maybe see what I can come up with? Give things about a week, or so...while the Single Brain Cell Sketch Up works things up into a "Plan" have to work around the snipes, though. grain looks decent enough....fellow did have a rack of these boards, so I might go back IF I need any more... Dovetailed corners? or, Tongue & Groove corners? Raised of flat panels....Bread board ends on a lid? Stay tuned..
- 82 replies
-
- 10
-
-
- project idea
- christmas present
- (and 11 more)
-
Thanks to being in too big a hurry. Grooves off-center, tenons not centered or square. More cracks and gaps than a Plumber's College. Dug around, found a 3/8" straight cutter bit for the router. Re-set the fence as well Re-cut ALL the grooves i had made up. Then went to work on those tenons. Do have a few test fits going on. Will try to post a few pictures tomorrow.... HATE RE-WORK!
-
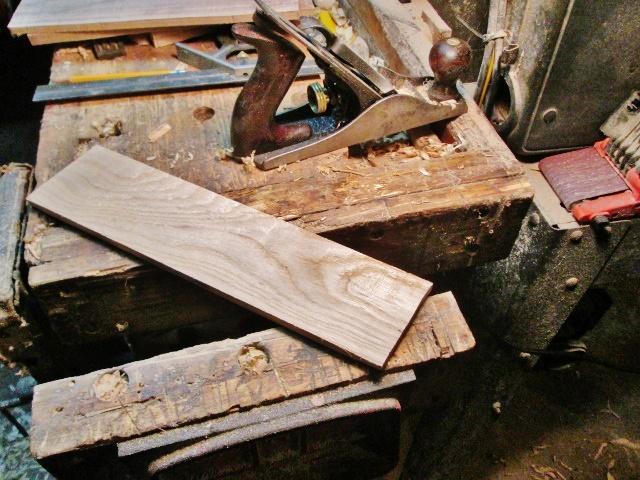
Something a bit different....as a way to use up a pile of scraps? One such pile. Have already sliced a couple of these scraps. I don't think the old 1/2" bandsaw blade will be of much use... Been a bit too beat up, lately.....I do have a 1/4" blade in the saw, right now.. Not really a new one, but it is at least...sharp. Maple tends to turn a bit brown. Cuts were a tad wavy. Motor at first didn't want to work this hard....and tried to shut down....until I pointed out to it, that the motor it replaced, was STILL in the shop...and YOU CAN BE REPLACED......motor started right up....imagine that Thought I could just jack plane these smooth....plane was a bit too big, for this job... The Stanley No. 3c that I had just rehabbed, happened to be sitting out, where I could grab it...seemed to do a decent enough job.. I even used it to joint a few edges... Got one looking decent enough as for width...needed trimmed on the ends for square, though.. Works for me. Got a few all the same width, mainly by bandsawing to width. was able to gang a bunch up.. Used the #3c again. to make them all the same width. Had two pieces, came from the same board.. Figured I could book-match these two into a panel for a lid....they needed a bit of work, one end being wider than the other end...bandsaw to correct that, plane to do the edges straight...try to make the grain as close as i could.. May need to add a bit, to get to the width I need. Set the thin stuff aside, for now.. These will be sawn down into 1" to1-1/2" wide strips....to make the frames to house those thin panels..had to set up a jig on the saw... Set for 1" width, for now....may go with the 1-1/2" instead....more to work with. Made a big mess today... May be about time to bring the trashcan back down to the shop? May need to do some glue-ups, and make some frames. Stay tuned...will see IF I can get this done, before next Tuesday morning...
-
Hi, new to this forum. Have been working on restoring hand tools and developing skills for a couple of years. Thought you might be interested in a project from last year. These Eleven Grooved Boxes are made, with the exception of preparing the original stock, entirely with hand tools. A big Stanley miter box, planes 4, 5 1/4, 18, two 45s, and a round side 606. Love them all.
-
Well, there is all the parts Frame & Panel parts. Just finished milling the last leg parts.Had some nasty stuff to cut away, though Just to make two back leg blanks for the end panels. Cleaned up some rails Set up a three screw jig to remove the "cope" from the tenon. Used a #3 handplane to "Chute" away the lip, and mill the shoulder back to square. Third screw is behind this rail. Most of the old parts had a two layer "veneer" , some even had a thick paper as the outer layer. Pried most of it off, to get down to the "real wood" underneath the glue. Milled a few last grooves, and will start to mill tenons tomorrow, I hope. Even tried a test fit Ok, so I still have some work to do on this.... Raised panels have been sitting around, awaiting to be installed in the frames. Trying to build this chest with just the parts scrounged from the old bed frame. Might even have enough left over, to glue up a fancy lid... Stay tuned...


.jpg.523ac7a860c3230843fd0b74a7f6f2f6.jpg)
.jpg.540bc6d3949173b35842cfcd2bcf58e8.jpg)