Search the Community
Showing results for tags 'white oak'.
-
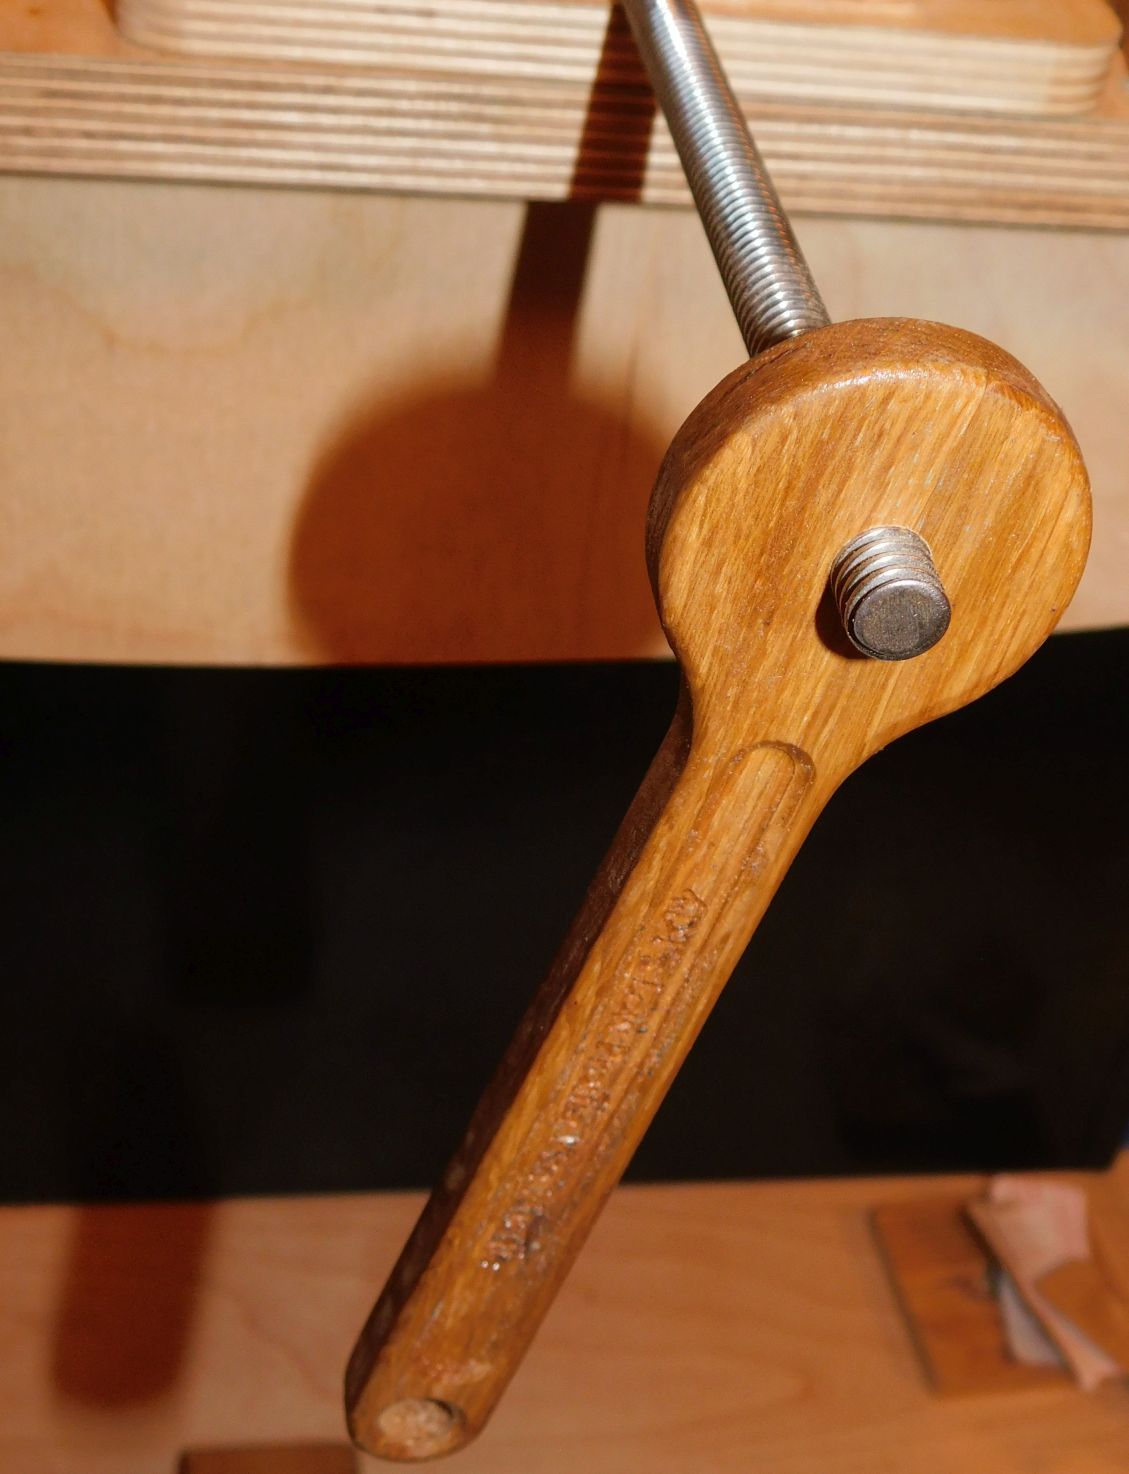
I designed and made a low profile vise for my CNC a few years back, but it needed a handle that would stay on but come off when needed, As I was looking through the wood scraps I have I came across a high density rather heavy piece of white oak that needed a use. And so was born this closed end wrench handle for my CNC vise. One the vise: Modeled it after an adjustable crescent wrench I'd been using that had been a poor handle to tighten the vise with. Coated it inside and out with some Deft to seal the pores. "Amateur Mechanic 18mm" is carved on one side. "4DTs Low Profile Vise Handle" is carved on the other side. Stays on nicely. Works like a charm. Can slip off with a little wiggling when I need to rotate it down so the CNC won't bump into it. 4D

- 4 replies
-
- 6
-

-

-
- cnc made tools
- white oak
- (and 1 more)
-
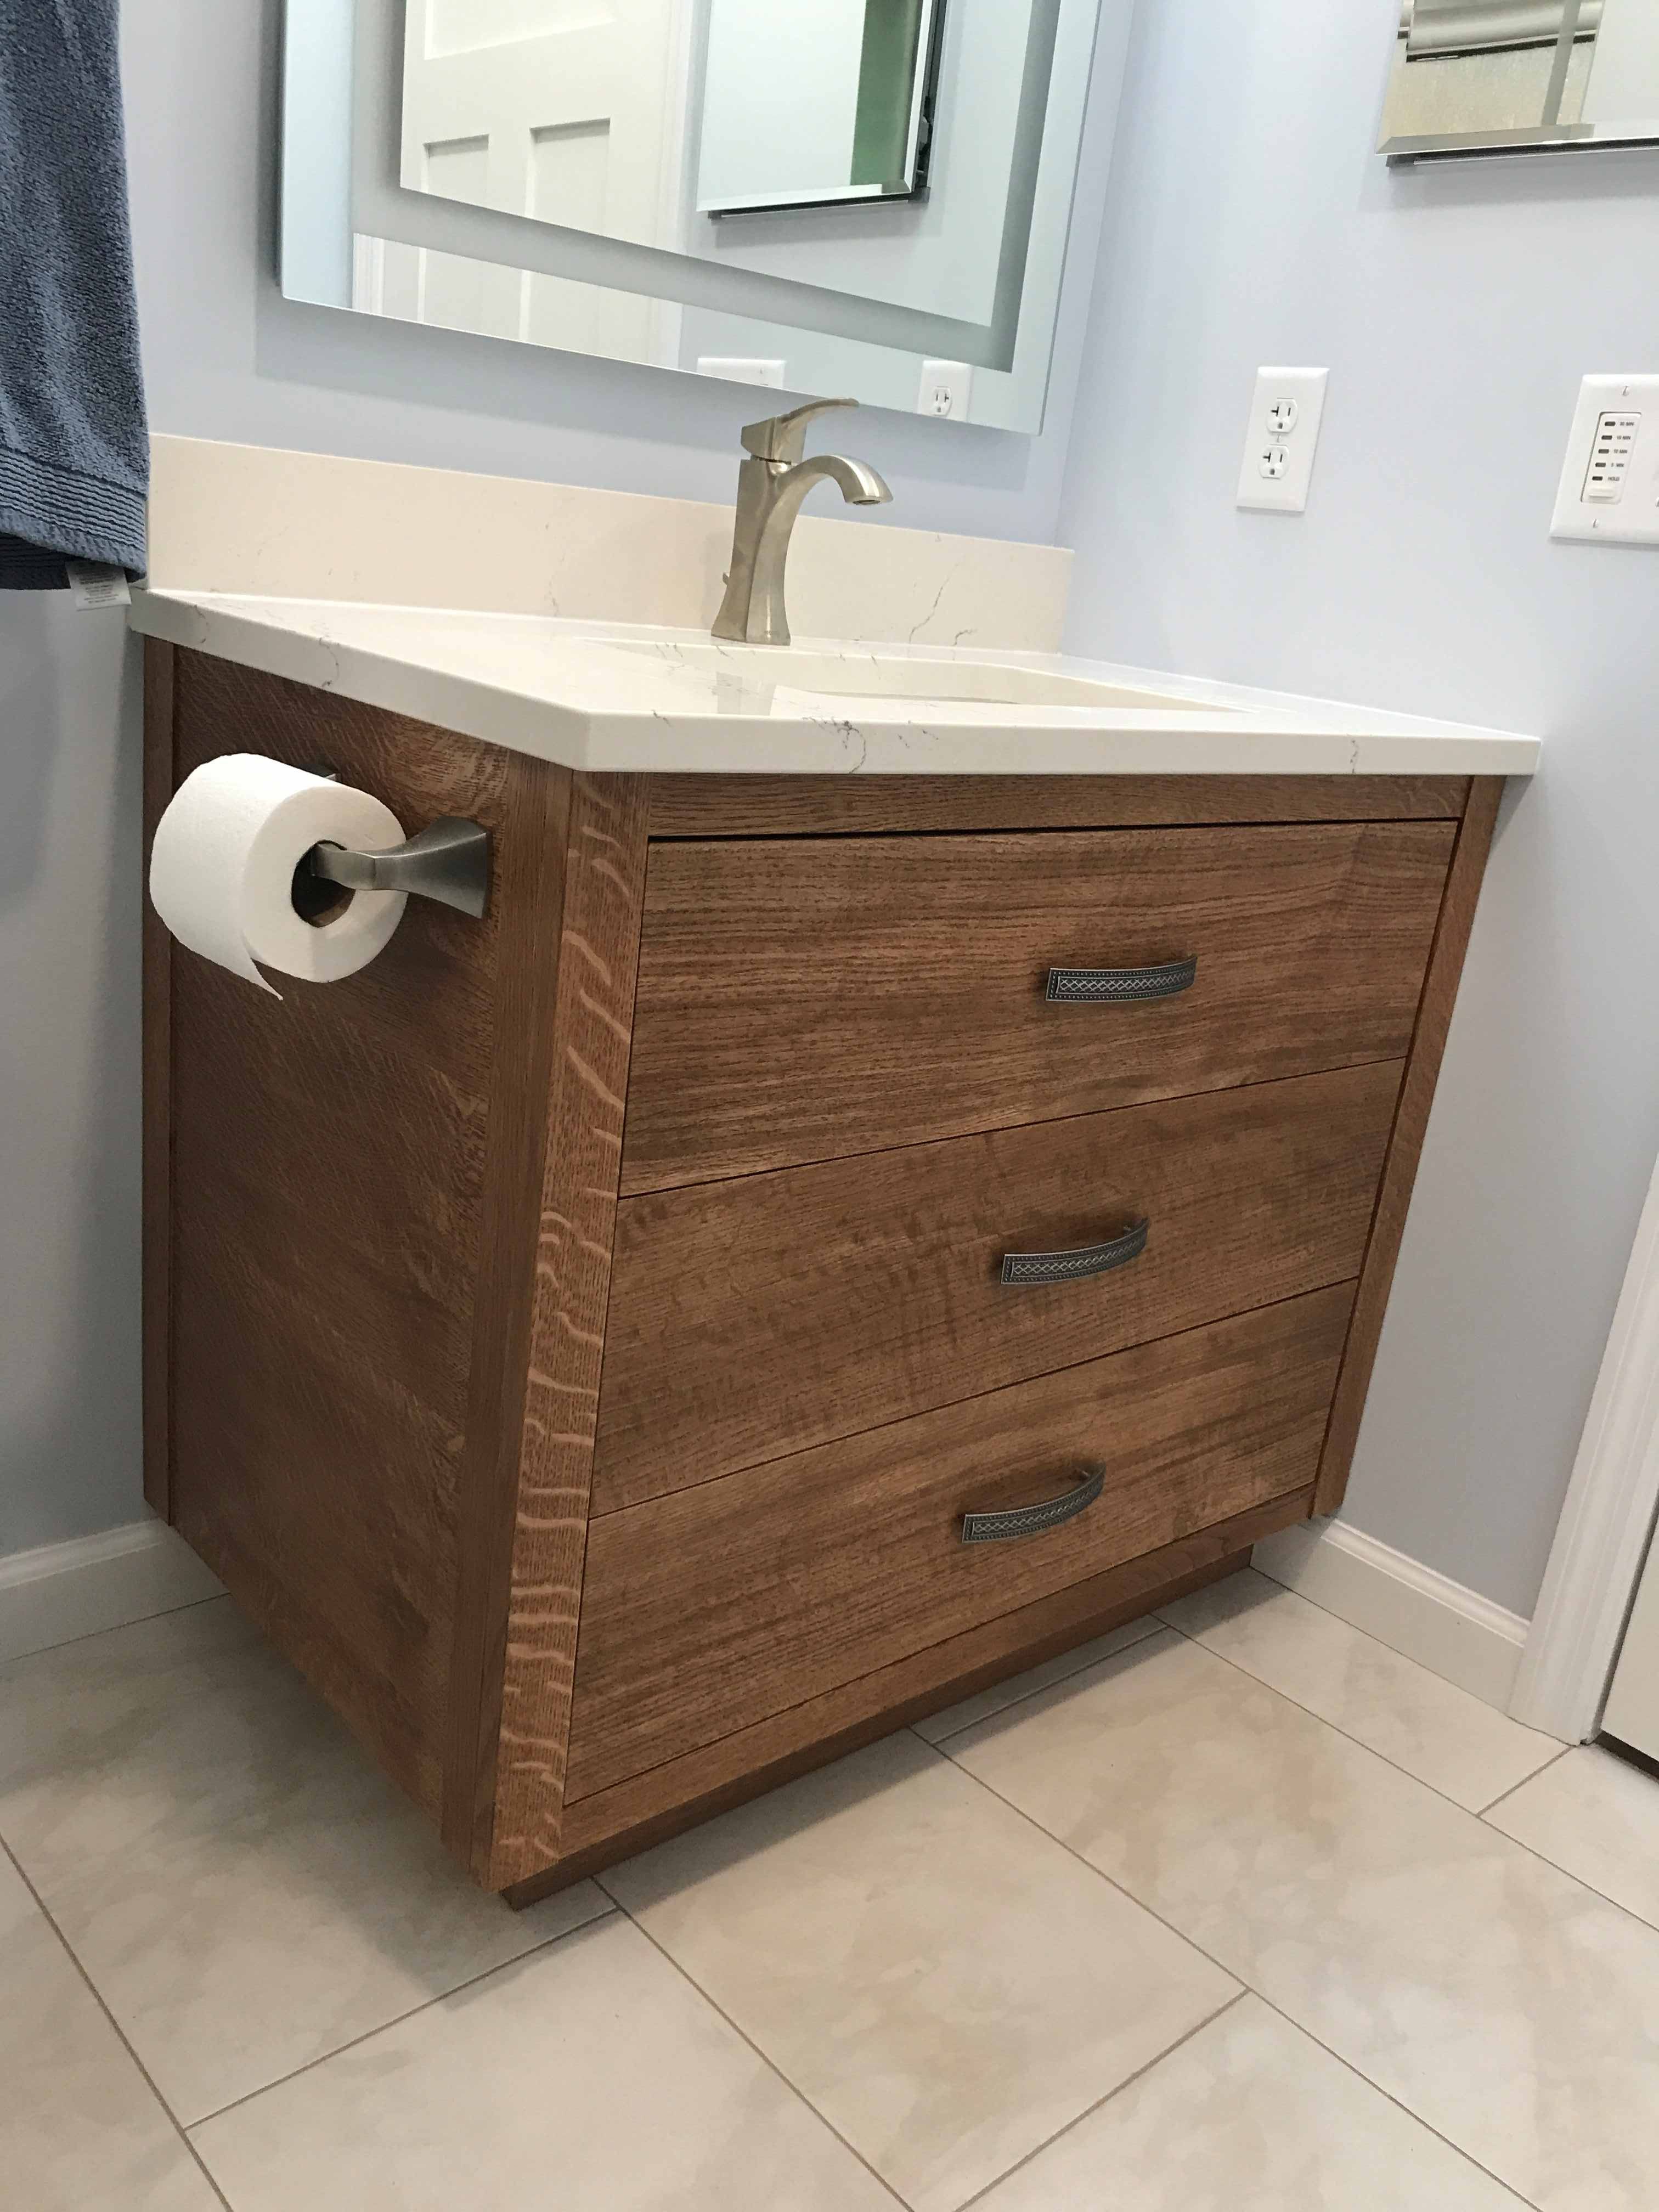
I have not posted recently but am happy to say that the master bath remodel is complete. This is one of the few home projects that I sat on the side-lines and watched the professionals. If you want to see the build pics, look here. Thanks for looking. Danl
-
First of all I would like to thank Jim Blume for his great pattern. This cutting is from 1/2" White Oak (very dense) using Pegus #3 blades Finished using Watco gloss lacquer Comments and questions are always welcome
-
It was in May 2024 when I completed the chest of drawers #1. I have not posted since then, but I have the second one in-work. It is not the same style but is similar. Just a few pics. The dovetails were made using my table saw. I have the tails (qty 100) done and have not started the pins. I choose to apply the finish before assembly. I only have the drawer fronts milled in rough dimn. I spray outside or in the garage and then carry every piece in to my clean rooms (kitchen, living rm, or use the ping pong table in the basement). Thanks for looking. Danl
- 14 replies
-
- 11
-
-

-
-
My Mission style chest of drawers is complete along with the bed and nightstand. I used QSWO for the primary wood and poplar wood for the secondary wood. All the dovetails were cut using a TS jig. The glue-up for the case was stressful; forty-four M&T joints (14 twin & 16 single) along with two dovetails, all in one glue-up. The drawers are supported on undermount slides. For the motif, the inlay is Mother-of-pearl and black veneer. Finish is dye, shellac, gel stain, and wb lacquer. The 4th piece to the set (chest of drawers #2) is in-work and it will be of a different design. Thanks for looking. Danl Posting log for the Mission style Bedroom set journey 1. Help me with my lumber hauling Feb. 15, 2022 2. White oak is here Feb. 28, 2023 3. Moxon vise May 15, 2022 4. TS - tenoning jig May 29, 2023 5. Double tenons June 5, 2022 6. Mission Bedroom set – making progress July 23, 2022 7. Mission Bedroom set – making progress – take 2 Sept. 18, 2022 8. Inlay lines & dots Sept. 30, 2022 9. Mission Bedroom set – Nightstand door Oct. 9, 2022 10. Table saw made dovetail joinery for a drawer Nov. 13, 2022 11. Mission Bedroom set – Nightstand is complete Dec. 23, 2022 12. Mission style bed – prototype March 7, 2023 13. Mission style bed – production -1 May 23, 2023 14. Mission style bed – production – 2 June 3, 2023 15. Mission style bed – production – 3 June 15, 2023 16. Mission style bed – production – 4 June 21, 2023 17. Mission style bed – production – 5 July 22, 2023 18. Mission style bed – production – final Aug. 13, 2023 19. Mission style chest-of-drawers – 1 Sept. 16, 2023 20. Mission style Chest-of-drawers -2 Oct. 8, 2023 21. Mission style Chest-of-drawers -3 Nov. 24, 2023
- 6 replies
-
- 11
-
-
-
-
- chest of drawers
- white oak
- (and 1 more)
-
I'm fixing to steam bend some air dried white oak in a pretty small radius I hope. Reading the Veritas instructions they say the moisture content should be 25% going into the steam box. My white oak is ~8% how do you get it back up to 25%? I saw in one video the chap had his wood in a vertical pvc pipe full of water. I'm shooting for a 1/4" thickness and 1 1/2" wide with a 2" radius on the inside of the bend. The part will be U shaped and it's to hold Sweet German Baloney in the fridge lol. I've been pretty distracted from wood working for the last few months... JT
-
The past weeks a little more progress has was made making the Mission style chest-of-drawers. Thanks for looking. Danl Mission style chest-of-drawers-1 Used a template to aid in making the corbels. It is the same template that was used for the bed. The top boards have been rough milled to 1" thick. Final thickness will be ~7/8". I have a good chop saw but not a good method to make repeat cuts to cut the rails to final length. So, I put together two shop made tools and had great results. Time to cut the twin tenons using another shop-made jig. I used a combination of two shims to get the desired spacing between the tenons and tenon thicknesses. They are the same shims used with the mortising jig. Test fit into a set-up board. Nice fit. Pro-tip: when testing the fit for twin tenons, have the mortises longer than the tenons because you want to verify the fit between the tenons, not the fit of the length of the tenons. Twin tenon before clean-up. Twin tenon after clean-up and making the tenon ends round using a bench chisel and a light sanding. Many of the casework mortises and tenons are complete. I know I still have more to make. Time for dry-fit. Thanks again. Danl
- 6 replies
-
- 8
-
-
- chest of drawers
- white oak
- (and 1 more)
-
Reflecting on this GIANT White Oak documented back in 2018 that eventually passed away due to old age.... It was in Strongsville, Ohio (near Cleveland) and it was over 245" in circumference and 64' tall.
- 17 replies
-
- 12
-

-
-
-
This will likely be the final post for the mission style bed but hopefully more posts will follow for the mission style chest-of-drawers; all apart of the mission style bedroom set. The bed was put into the spare bedroom yesterday alongside the mission style nightstand. Thanks for looking. Danl Posting log for the Mission style Bedroom set journey 1. Help me with my lumber hauling Feb. 15, 2022 2. White oak is here Feb. 28, 2023 3. Moxon vise May 15, 2022 4. TS - tenoning jig May 29, 2023 5. Double tenons June 5, 2022 6. Mission Bedroom set – making progress July 23, 2022 7. Mission Bedroom set – making progress – take 2 Sept. 18, 2022 8. Inlay lines & dots Sept. 30, 2022 9. Mission Bedroom set – Nightstand door Oct. 9, 2022 10. Table saw made dovetail joinery for a drawer Nov. 13, 2022 11. Mission Bedroom set – Nightstand is complete Dec. 23, 2022 12. Mission style bed – prototype March 7, 2023 13. Mission style bed – production -1 May 23, 2023 14. Mission style bed – production – 2 June 3, 2023 15. Mission style bed – production – 3 June 15, 2023 16. Mission style bed – production – 4 June 21, 2023 17. Mission style bed – production – 5 July 22, 2023 18. Mission style bed – production – final Aug. 13, 2023
-
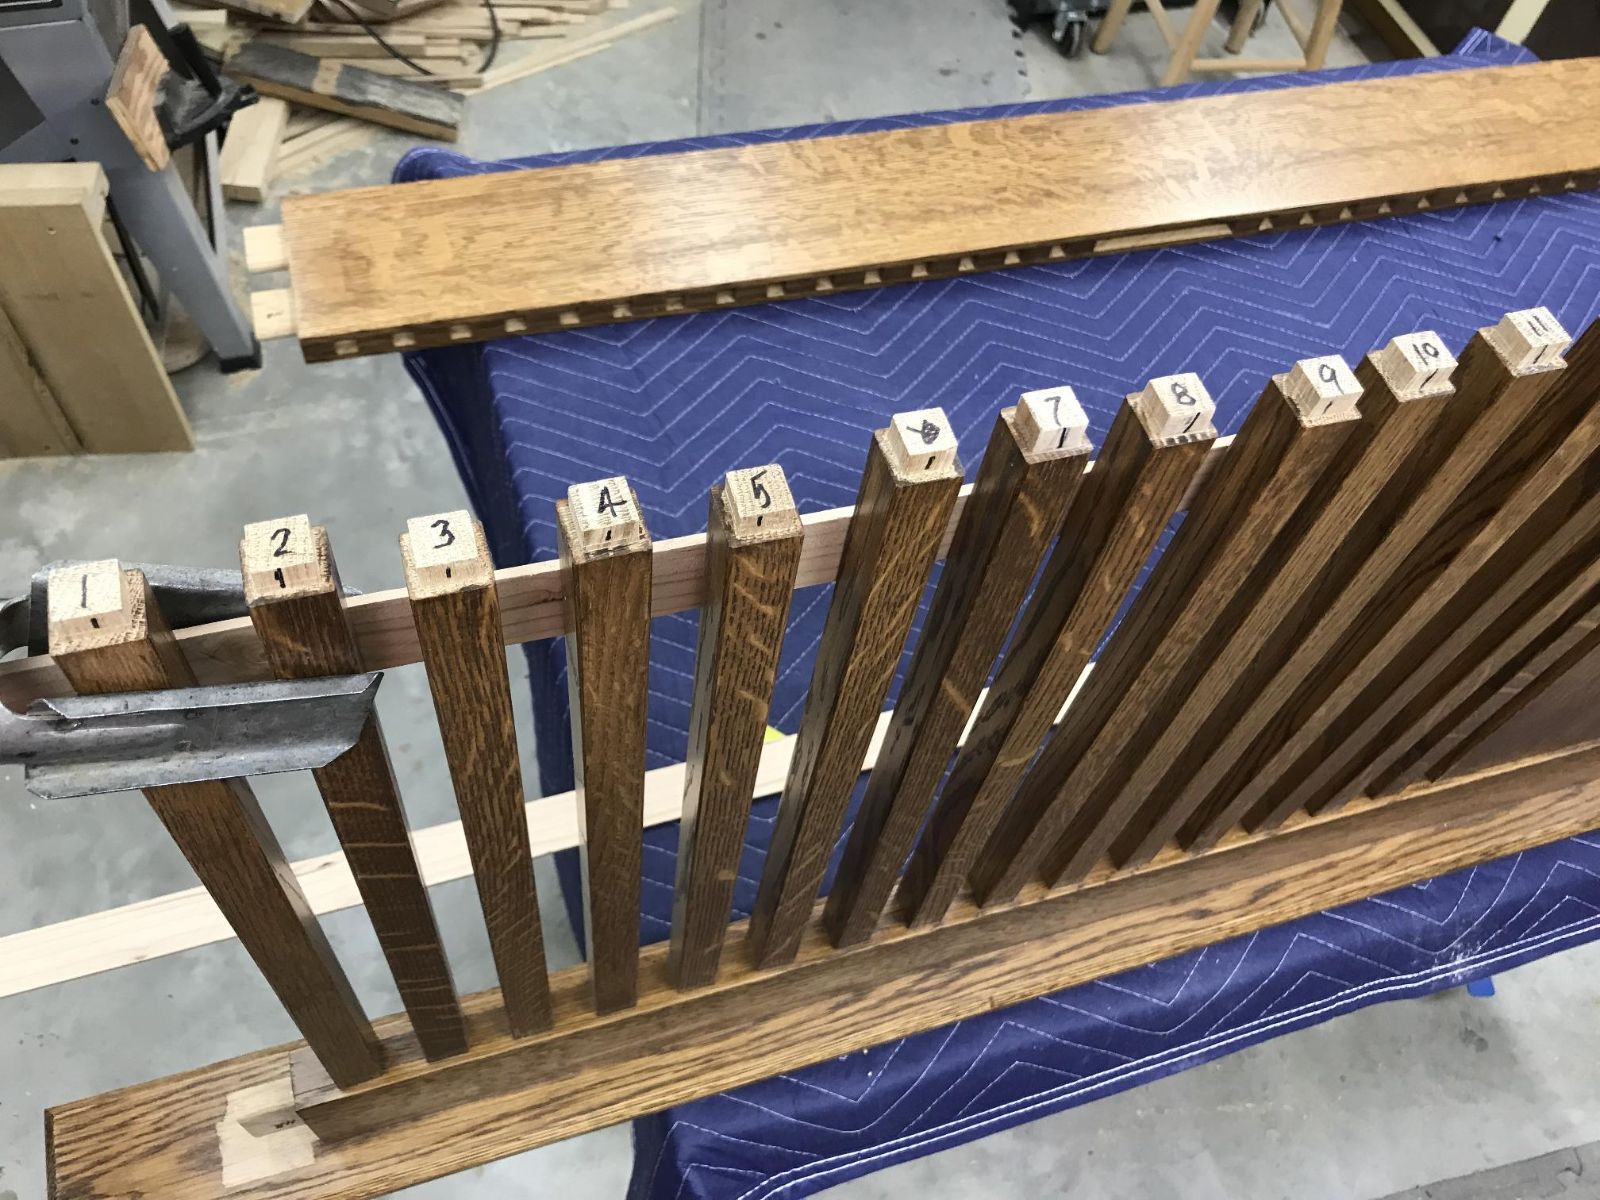
A few more progress pics of the Mission style bed build. Danl I do not have a pic of the side-rail cleat before glue-up to the side rail. This is a pic of the final assembly of the side rail with the cleat being attached. I made a simple jig to help make the cleat dove-tail. The dove-tail will accept the bed slats. The cleat is being held in my Moxon vise. I removed most of the material with the table saw and then used a router with a trim bit. The temporary tenons in the side of the rails will aid with the spray finishing. The rail slats are made from poplar wood. Sample board showing the progression of the finishing process. Raw QSWO, one coat of Transtint medium brown in DA, then sprayed with 1-1/2# seal coat, then one coat of General Finishes Antique Walnut, then sprayed with 1-1/2# seal coat, then three oats of Sherwin Williams Sher-wood Kem Aqua plus (WB lacquer). I spray in my garage and the weather is hot. Cure time is in the kitchen. Now time to assemble the footboard. The first dry-run took 1 hour by myself. My wife and I were able to get the spindles glued in 10 min and final glue-up in 1/2 hour. I used Titebond hide glue for the adhesive. The two pine strips aided in holding the spindles in location while flipping the top rail and strips 90-deg and then positioning the lower rail. The footboard had 68 joints. The fit-up of the spindles to the rails were fairly tight before adding the glue. The pine strip closes to the lower rail was made 1/64"-1/32" thinner than the gap measurement to aid in the assembly. All of the spindle were numbered and had a reference mark to assure clocking orientation to get the "pretty side" on the correct side. Numerous glue aids were made. Most were painted red. The next day I glued the headboard assembly. It is similar to the footboard except with the addition of a 3rd rail and longer legs. To aid in the assy, I made the tenons on the lower rail 1/4" shorter than the upper and mid rail. I also made the tenons on the middle spindle, or center slat, 1/4" longer, top and bottom, than the other spindles for both the footboard and headboard. Now time to add felt pads to the bottom of all the legs. I still have to spray finish to the top cap of the footboard and headboard, spray finish to the side rails, and spray shellac on the bed slats. All of this before final assembly. I did trial install the side rails to the footboard and headboard. Pics will be forthcoming. Thanks for looking. Danl
-
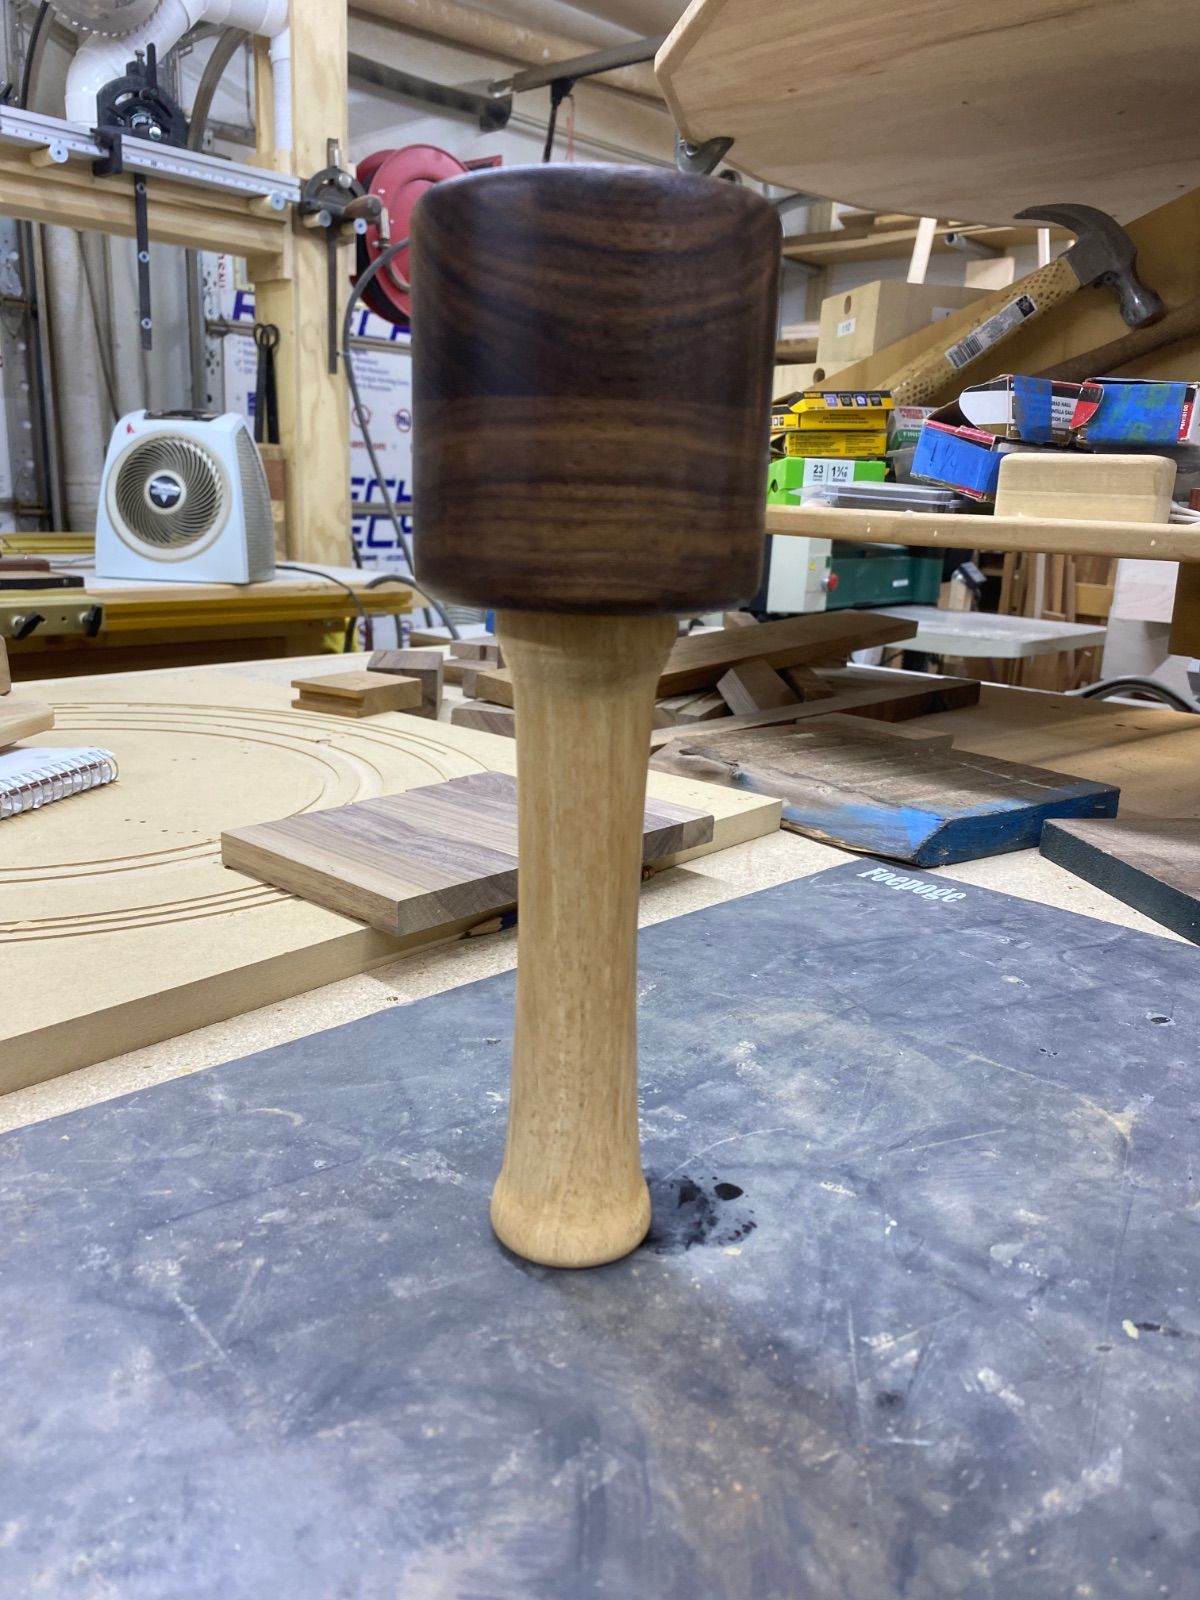
Our daughter has some auto immune issues and when she's having a flare up she needs a cane. Couldn't find one with a handle she liked so she asked to make her one. This is one of those turnings that isn't real flashy and doesn't look like much but it is one of the most difficult things we do as a wood turner IMO. That long taper is tough to do, at least for me. The wood portion is about 33" over all, 1" at the top and 3/4" at the tip. Our son did the resin cast for the knob. The shaft is white oak and looks good at a glance, hands will find some low spots though.
- 8 replies
-
- 12
-
-
-
- lathe
- woodturning
- (and 4 more)
-
A few more progress pics of the Mission style bed build. Danl Qty (60) 7/8" x 7/8" spindles with 1/2" x 5/8" x 5/8" tenons, both ends. 1/8" x 1/8" chamfers routered on the bottoms of the legs. Headboard dry-fitted. The 1st time I tried the dry-fit it took 1 hr. This time it took 10 min. It should be adequate time with the Titebond hide glue. Headboard, footboard and side-rails dry fitted with the slip tenon also not glued yet. Epoxied the weld nut to the bottom of the slip tenon Glued the slip tenon into the mortise and drill hole for peg (belt and suspender approach). The peg will be hidden when the headboard and footboards are assembled. Used the cut-off to help make a gluing caul. I attached cork the side that touches the corbel. The corbel is splined to the leg. Getting ready to apply finish. I will be finishing most parts separately. The finish schedule is (1) coat dye, seal coat, (1) coat stain, seal coat, and then 2-3 coats of WB lacquer. Thanks for looking. Danl
-
A few more progress pics of the Mission style bed build. Danl I added a profile to the footboard lower rail, similar to the design feature on the night stand. Clamped a router jig to the side-rail for the 5/8" x 4-1/2" x 7/8" deep mortise which goes into the end of the side rail. Using a router guide bushing and a spiral 1/2" up-cut router bit. Clamped the router jig for the mounting hardware access 'T-slot Clamped the router jig to router the mortice for the T-slot cover plate. Added identification marking to the side-rail. Added the identification markings to the legs. I added masking tap to the TS fence to allow me to remove 0.004" from the slip tenon material to allow for a nice fit. Temporary installed the slip tenons into their respect leg mortice after holes were drilled for the attachment bolt and hidden encapsulated nut. Thanks for looking. Danl
-
A few more pics of the Mission style bed build. Danl When I sawed the Head and Foot board rail checks, I used my TS tenoning jig. The boards cleared the ceiling by ½.” I used my TS with a flat bottom blade to make the tenon shoulders. I decided to have two tenons for the wider rails instead on one. I used a jig saw and a chisel. Trial dry fit. I made (4) corbels and used a routing template to help clean-up the rounded profile. I will use splines to help attach the corbels to the bed legs. The bed spindle are located by using spindle strips. The strips were match made using a dado stack on the TS. A few more dry fit pics. The footboard was done the same processes.
-
Early March I shared with you a prototype of a leg assembly for a Mission style bed. Much progress has been made. The design for the bed intentionally has many of the same dimensions between the headboard and the footboard. I used a router to make all my mortises. The 1/2” leg-to-headboard and footboard rail mortises were made with the aid of my mortising jig and the 5/8”and 1-1/4” mortises required new jigs to allow me to use a router bushing. I used the mortising jig clamping surface and clamps to hold the legs when the mortises were routed. . When I sawed the HB & FB rail checks, I used my TS tenoning jig. The boards cleared the ceiling by ½.” More pics to show in the next post. Danl
-

From the album: Hollow Forms
White Oak from a tree a friend planted some 35 years ago with his children- 2 comments
-
- 3
-
-
- turned bowl
- white oak
- (and 1 more)
-
Just getting started on the late fall craft show inventory. Found some interesting designs online and decided to try them out. Will get to making better versions of these when I can utilize specifically cut wood selections rather than just what's in the 'remains' piles. The usual culprits - walnut, maple, mesquite, alder and white oak. The white oak was recovered from a JD barrel planter that was retired and replaced. 'Bout time I actually posted something rather than just click on an emoji or make a smart - @&% remark!
-
I am making a Mission style bed, from quartered sawn white oak, for my wife. The design was inspired by Tom McLaughlin, Jeremy Zietz, Kevin Rodel, Jeff Miller, Fine Woodworking magazine, WOOD magazine, and Woodsmith magazine. I hope it is not a lesson in making expensive scrap. I finished the matching nightstand a few months back. You can see it here. This design allows for a queen size box spring and mattress and will have the same veneer and mother-of-pearl inlay as the nightstand. To help me with the joinery, I made a full-size prototype of one leg and its interfaces. The design uses grade-8 bolts and weld nuts to attach the side-rails to the legs. I incorporated concentric mortises and a slip tenon so the bolts would not be visible from the front. The tenon will be glued into the leg. The side-rail to leg appears to be a little complicated, but with a few shop made jigs it all should fit together. The leg double mortise requires three jigs. The 1st jig is used to route the 5/8” mortise for the slip tenon. The 2nd small indexing jig positions into the 5/8” mortise and then the 3rd jig is positioned over top the small jig. The 3nd jig is clamped secure and then the 2nd jig is removed. The 3rd jig is used to route the 1-1/4” mortise, which will accept the side-rail. The bolt & washer T-slot mortise and the cover plate mortise are routed using separate jigs. These two jig are located about the rail center line and the T-slot jig has a locator on the back side to assure the longitudinal position. The mortises routed in the end of the side-rails uses the 1st jig with a ½” thick shim. I plan to use heavy duty furniture levelers in the bottom of each leg to assist with any unevenness in the bedroom floor. Handling and correctly positioning the long and heavy lumber will be a challenge for me in my small basement shop. Thanks for looking. Danl
-
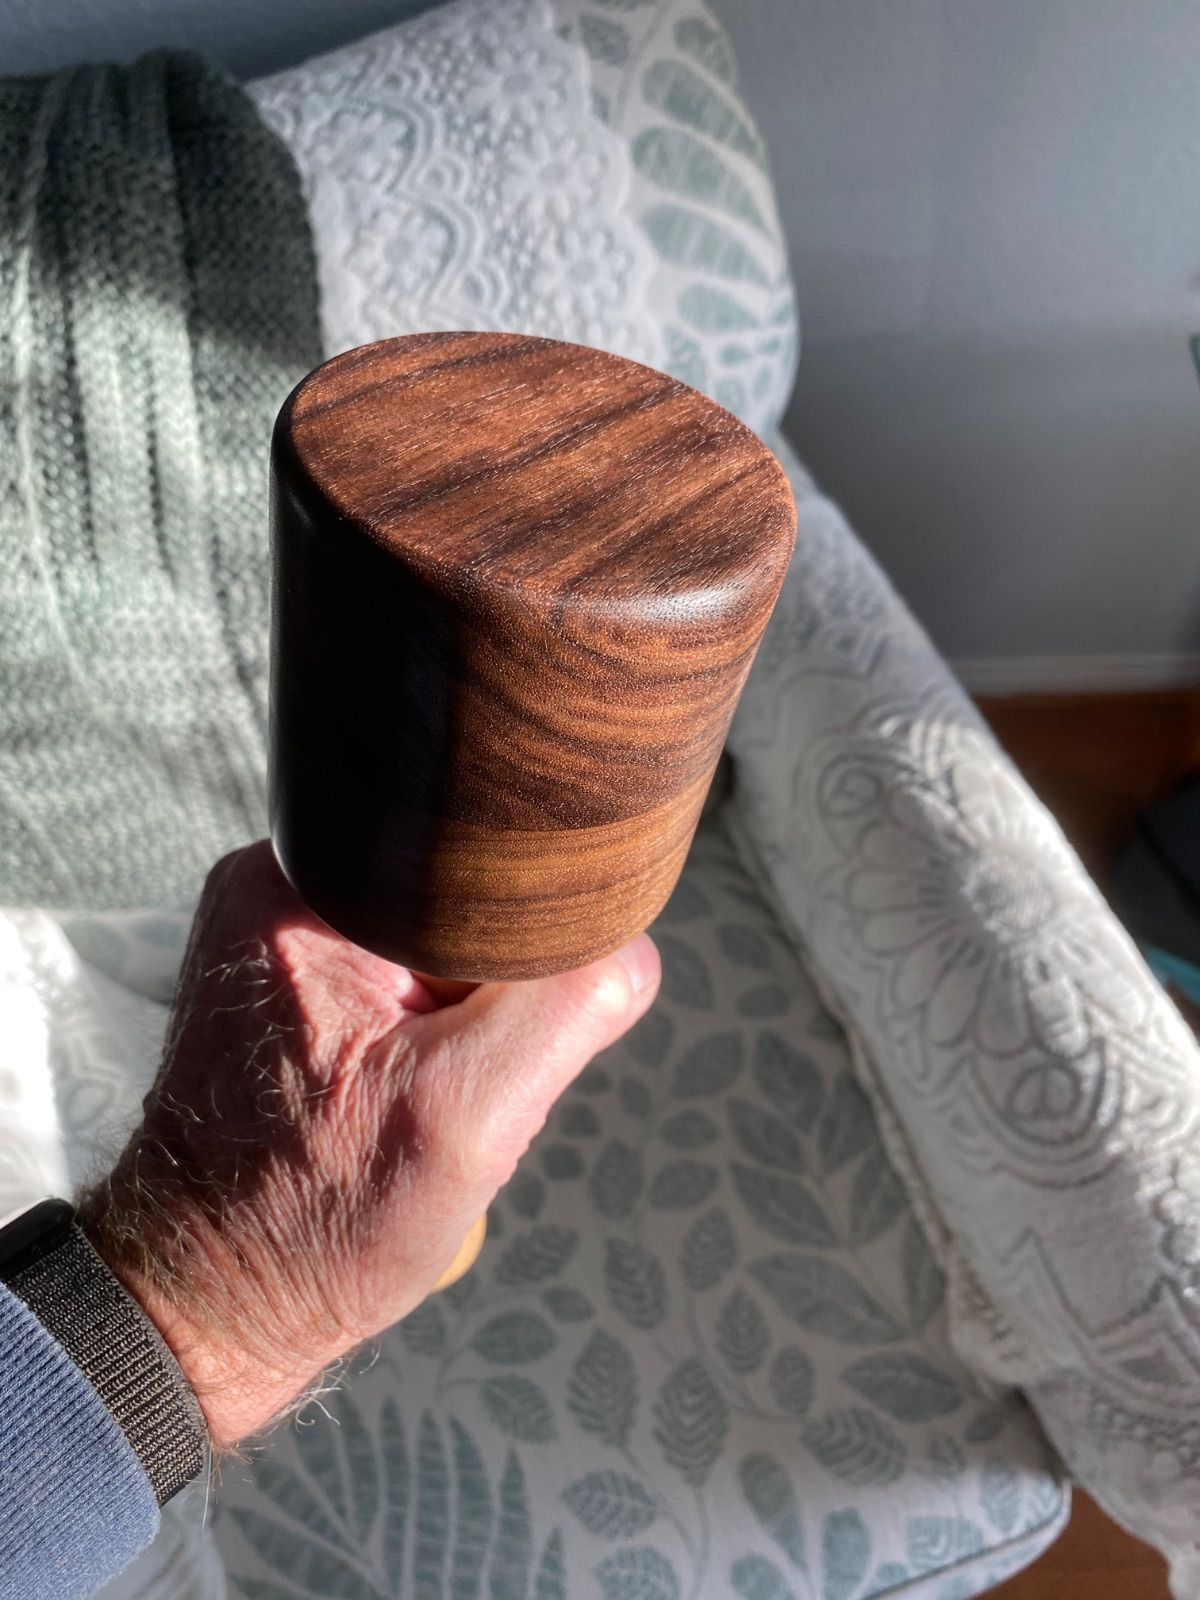
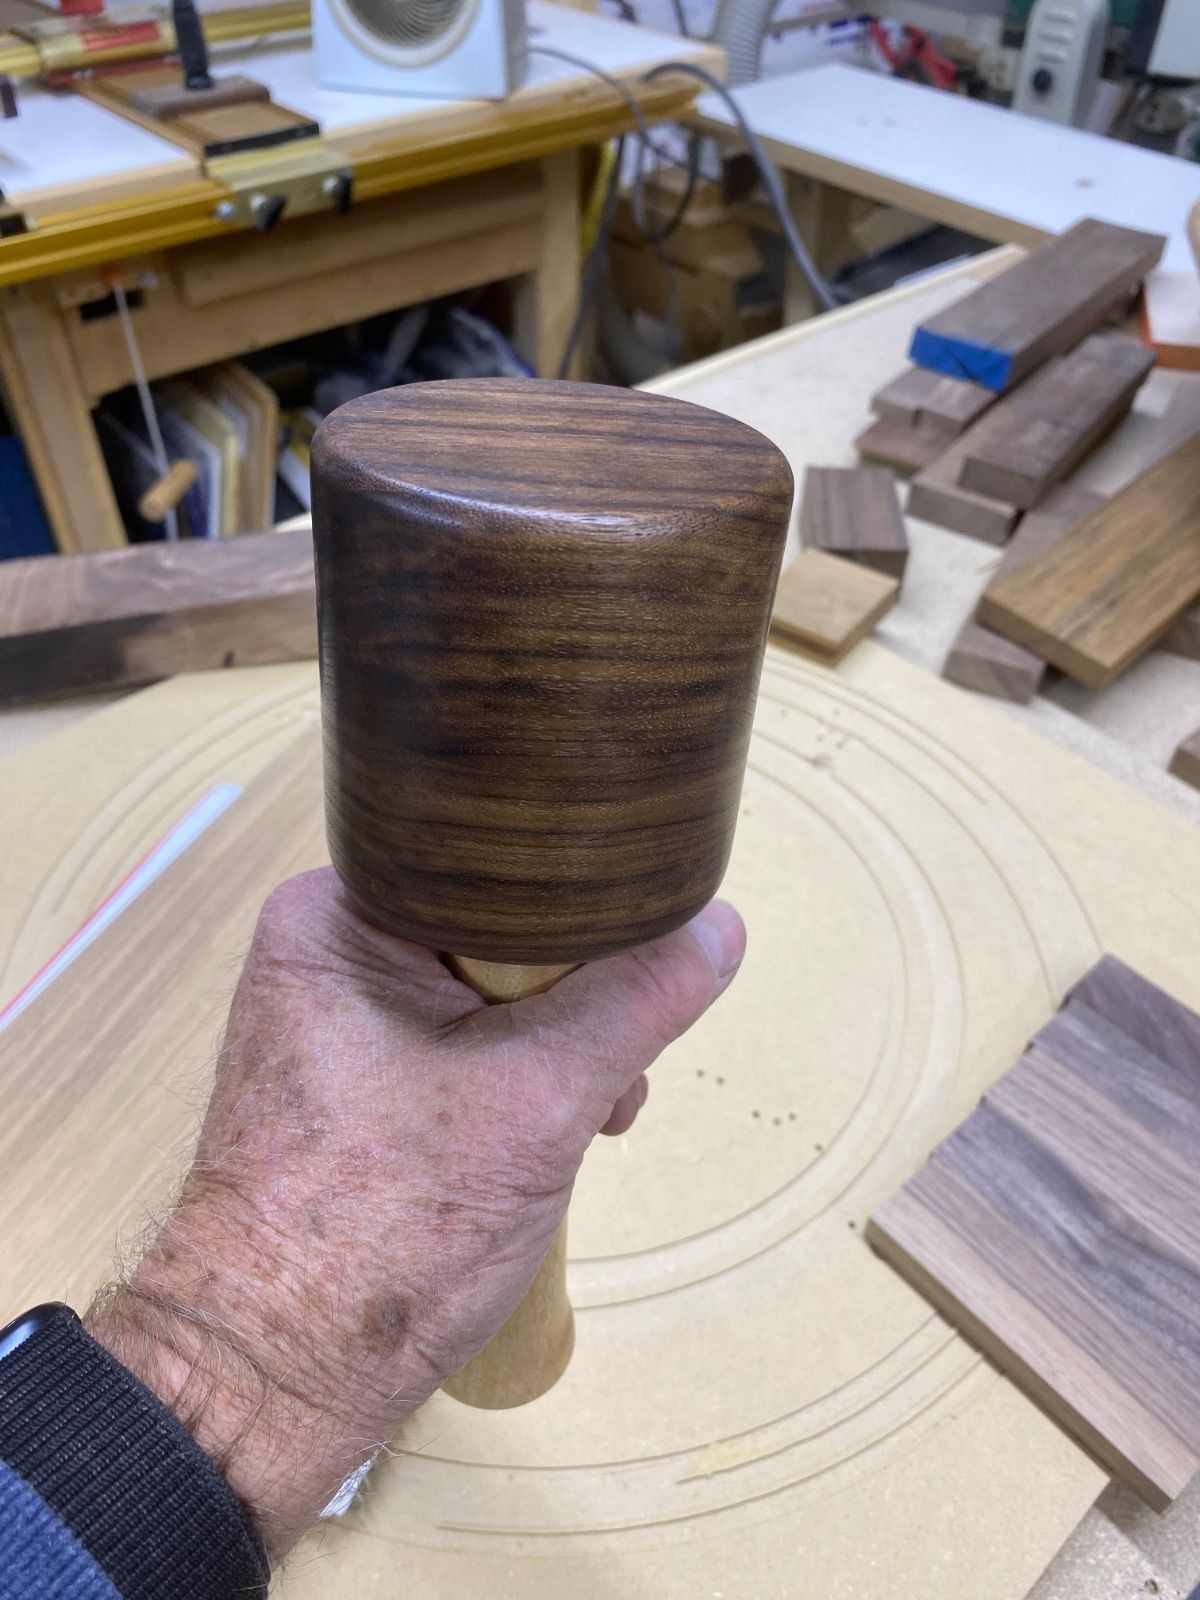
My middle size mallet has been looking pretty sad so it was time to use up some scraps and make a new one. The top is two cutoffs of black walnut and the handle is made of white oak I rescued from the stack of firewood. Paul
-
I was asked to help with making an accent piece of some-kind for an interior decoration. My wife went to an antique store and purchased a unique item, not knowing what it was. Later, I discovered that it was a wheel wright’s traveler. I made the wooden plaque and mounted the traveler. The wood plaque is ¾” x 12” x 16” flat sawn white oak inlayed with 1/42” x 1/8” black veneer. General Finishes High Performance satin was used for the finish. Guess how many boards were glued to make the 12” wide plaque? Clue: more than one. Thanks for looking. Danl
-
I really thought I had finished this post and discovered today that was not the case . So here goes. Now the lumber was finally here and cutting parts to size and glue up for thicker parts begins. These wider pieces were real fun doing the glue up on. Kinda like holding a snake who wants to run. The next photo is the legs. Note I used a waxed spacer to keep the slots open and spaced properly for end cross support. Now the fun begins with the heavy lifting. Three pieces of MDF half sheets 24 X 72 glued up for the top. And then this is what the wide pieces look like after glue up is cured. Time to edge band the top and a look at the legs with stretcher ready for assembly. Top is now banded and work begins on adding the vices and some heavy trim to hold the vices. Now to assemble the legs and put the base together. This is a look at the bed bolts holding the base together. The top has a layer of 1/4 masonite to allow changing is damaged. This is secured with brass screws. This top is so heavy there are no fasteners holding it down . It is simply sitting on top of the frame. The drawers units were built later with the top two drawers being added after the others were done. The dog holes were drilled using a block of scrape oak to hold the drill straight. Then they were countersunk to male insertion of dogs easier. This last pic is the back where you can see the addition of two drawers clearly. I did not take pictures of the mounting of the vices and building the front faces, a "fun" job. The drawers now have Kaizan foam lining . Planes drawer is the last photo.
- 6 comments
-
- 5
-
-
- white oak
- shop fixture
- (and 1 more)
-
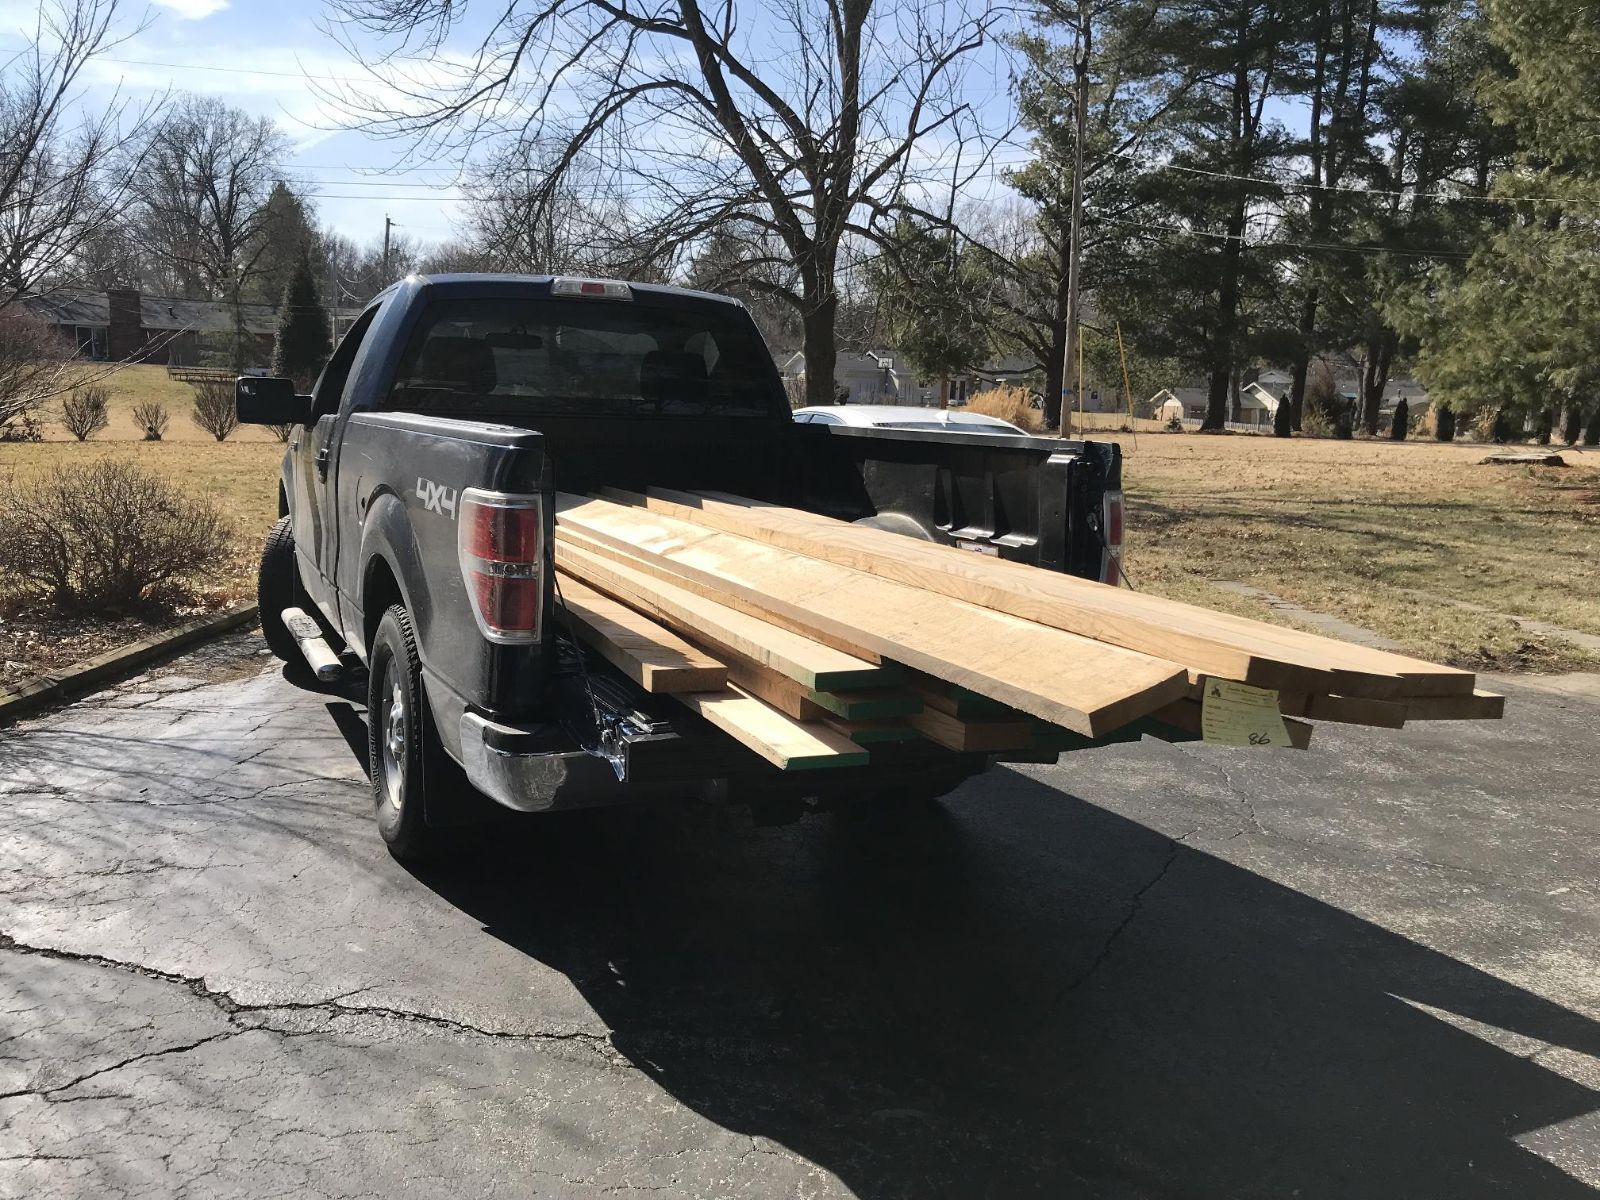
Two weeks ago, I asked you for your help with hauling a load of quartered sawn white oak 720 mi. round trip. Frank Miller in IN did not have any but I found a mill only 200 miles away, Schaller Hardwood. They had “no charge” to deliver the lumber 20 miles from my house to a distributor warehouse and $25.00 to deliver it from the warehouse to my house. The driver parked his truck on my driveway and we hand lifted each board from the truck onto my pickup. Then my wife and I hand carry each board into my basement shop. I know that I purchased more than I needed but due to all of the supply-chain-issues, I only wanted to make one purchase. 290 bd ft weighing 1314 lbs. 4/4, 5/4, 6/4, and 8/4. The 6/4 are 12 ft long. Organic gold. Now the problem is purchasing drawer slides. I wanted to use Blum undermount slides. There are none. CSH removed the BLUM undermount slides from their website. Another site said 7 – 9 months. I called a friend who is a professional cabinet maker. He has a kitchen set of cabinets waiting for slides. He placed an order in December and they are telling him they may arrive sometime in April. His distributer suggested KV undermounts, but the distributor does not have any of those either. He hopes to get a sample set from another site tomorrow. I will look at these when they arrive and maybe we can place one order. I am getting one 15” Blum set from my friend. I will use this for the nightstand. Thank you all for your support. Danl
-
I am planning to start the build of a Mission style bedroom set. The complete set will have a bed, nightstand, chest-of-drawers, dresser, and hanging mirror. This will be a large project for my small basement shop. I have the design near completion and am working to determine material quantities. My wife has asked me to make it from quarter sawn white oak. Currently, my local lumber distributor does not have what I am looking for, so I am thinking about driving to Frank Miller Lumber in IN. This will be a 720-mile round trip for me. I have never been there and have not spoken to them. I have estimated that I will need 174 board feet. This quantity has not been factored for waste. So, if I need 200 bd ft of white oak, what are my transportation requirements and options? I have a F-150 short bed pick-up which has a plastic bed liner and covered with a tonneau cover. The bed is 6’-6” long with the tail gate closed and 8’-9” with the gate open. I have never transported anything of this size with the gate open. Two hundred bd ft of lumber is an approximately 4’ x 8’ x 7” pile weighing in at ~800 lbs. I know I will have varied thicknesses, widths, and lengths. All which will contribute to a less than perfect situated load. Usually, I hand select my lumber and take the design into consideration for the board selections, i.e. I have a few 8” high dresser drawers and I would like the fronts to be one piece and I want to minimize cut-off waste. I have a few 5” drawers. These can be made from a 5-1/2” wide board but I would like for all of the 5” drawers to be made from the same board. I know not every board needs to be quartered-sawn. Plain sawn will be okay for some usages and will save me money. Being my shop is small, I will have to store the purchased lumber in the recreational area of my basement. I want to be mindful of my wife’s desire to not make the whole basement my playroom. One option is to only purchase enough lumber for the nightstand and the bed and make a 2nd purchase for the chest-of-drawers and dresser. Approximately 100 bd ft would be needed for each trip. This option would help me (not eliminate) with the basement issue and help me calculate my waste percentage, but would create the need for two trips, which adds to the expense. If I purchase the material in one trip, I do not anticipate being able to hand select many boards. Hand selecting 200 bd ft would consume many hours and would be frowned upon. I could rent a U-Haul trailer. Then I would have the trailer expense and the hassle of pick-up and return. A U-Haul trailer would nicely protect the lumber from any road grime, rain, or snow. If I used my truck bed, I could use a tarp and wrap my lumber bundle (a hassle). I am not concerned about the weight, but I am concerned about securing the load inside the bed with the tail gate down. I am not certain how to do it. Am I over thinking this entire issue of lumber hauling? I would like to hear your thoughts, concerns, ideas, suggestions. Danl
-
I am getting bored beyond tolerance routering those ceiling tiles. At end of day I decided to put a chunk of firewood on the lathe and turn something. It turned out a mallet. Something about turning that soothes the nerves. Paul
- 10 replies
-
- 12
-
-
I've just delivered this book stand to my college library rare book room. It now sits in the front large window of that room where it can be seen from the general library space. I was asked by the chief librarian to design something original and representative of the creative design environment our college is. These photos are of it in the finish room of our fabrication lab where I teach different sections of woodworking and furniture design to students in Interior Architecture and Industrial Design. CNC created aspects of this piece include the VCarved quotes cut into the two stretchers, the soft curve on the front of the dark front ledge, and all joinery including sliding tapered dovetails to slide the side support of the back shelf into, bowtie tenon rows between stretchers and feet stretchers and posts, and also between feet and posts. You can see a 4-tenon stacks of thru tenons bowtie shaped piercing the top. The thumbnail curve on the top edge of the feet was also done using the moulding toolpath in Aspire.
- 57 replies
-
- 7
-
-
- furniture design
- white oak
- (and 4 more)