Search the Community
Showing results for tags 'red oak'.
-
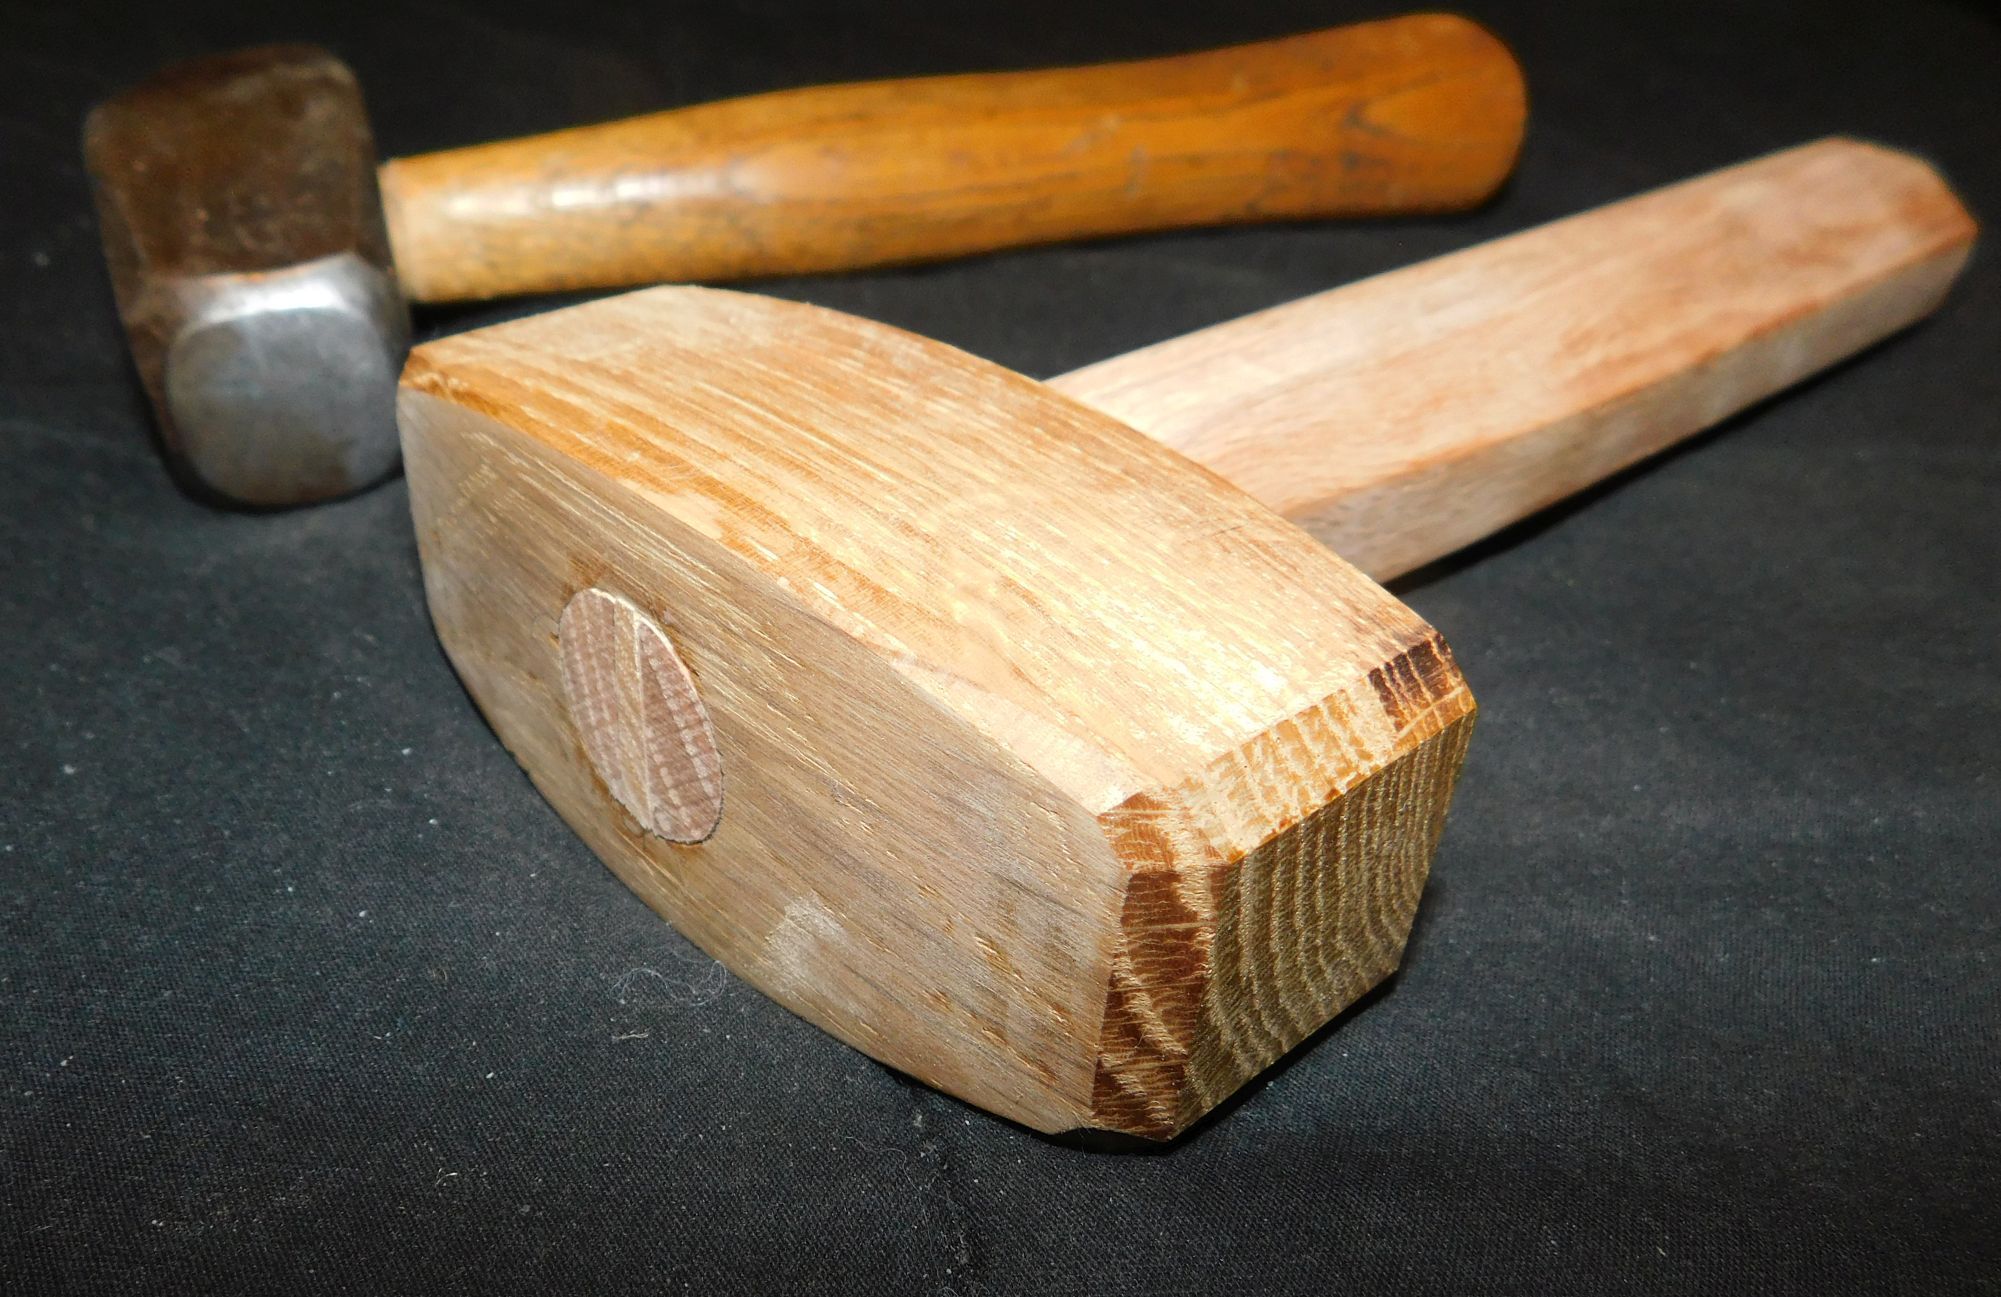
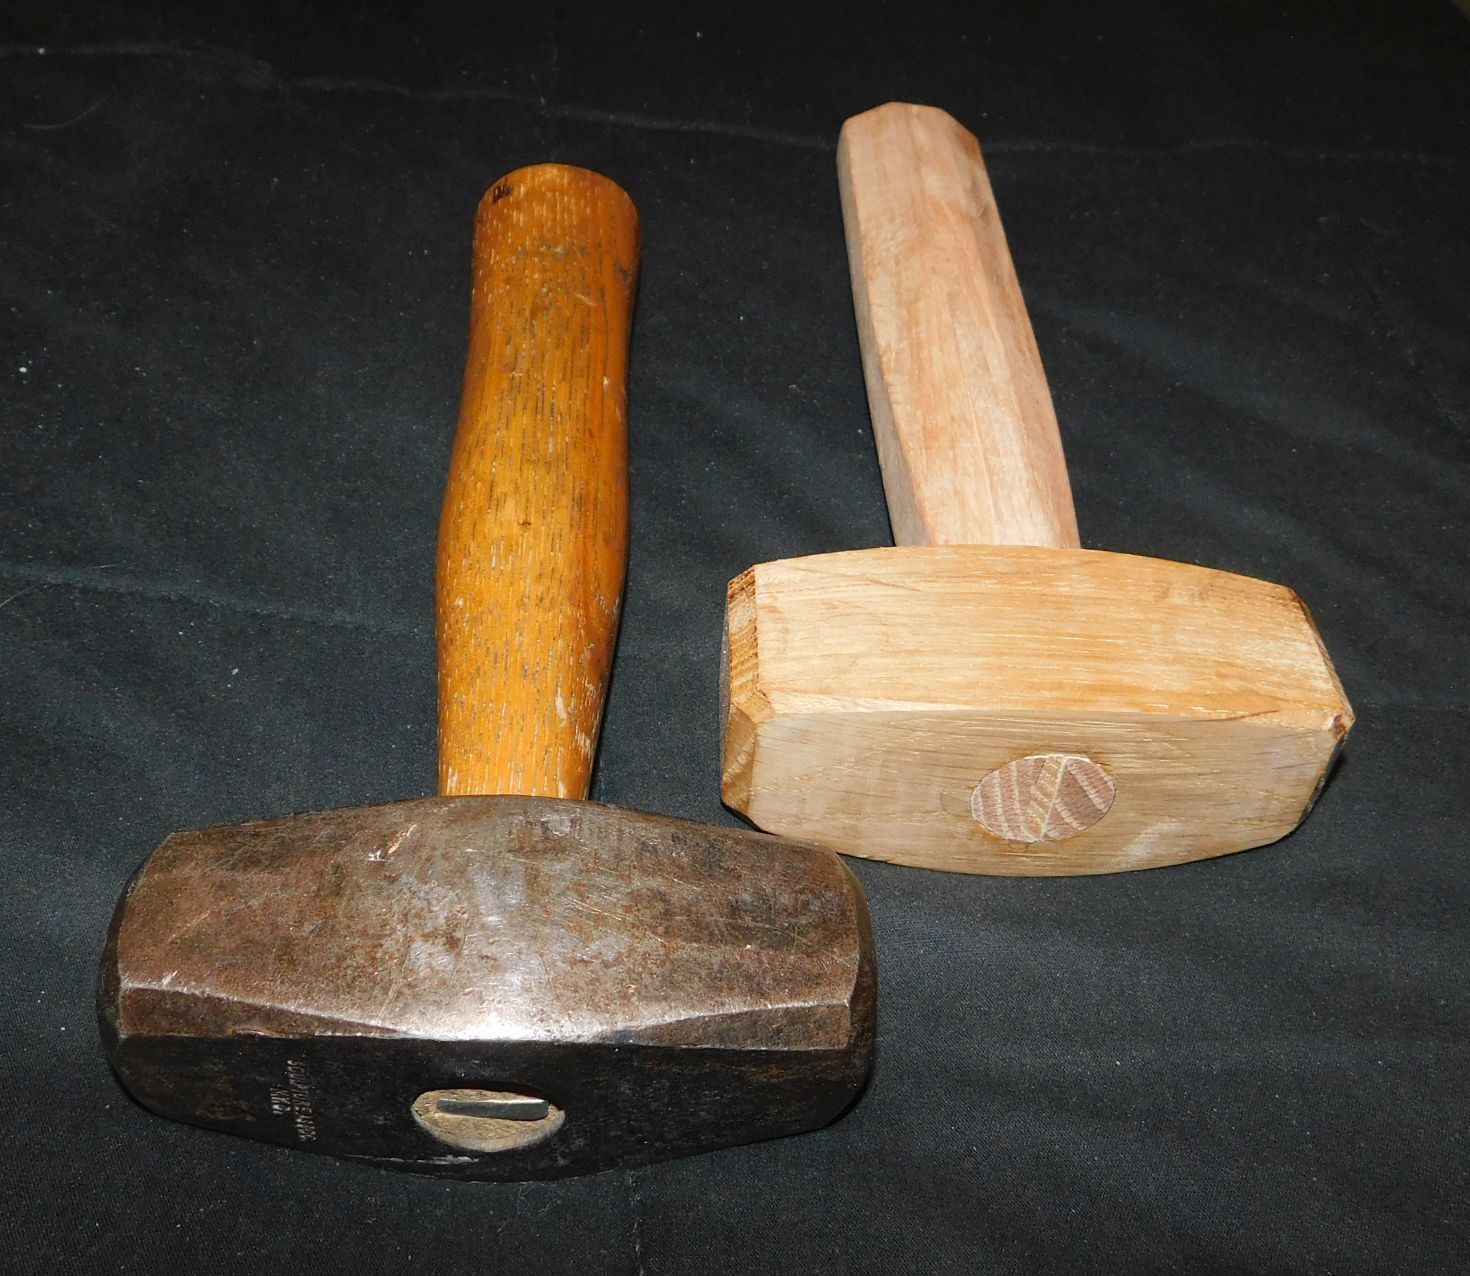
Noticed when I dropped a block of dense white oak on my desk that it made a dent. Figured that density might make a good mallet head. I've had a steel baby sledge hammer for several decade that I liked the look of, so I modeled the head after it. All details on the head were cut with my CNC. Curved sides and top, chamfers, and the hole for the handle tenon. Flared the hole using the fluting toolpath to make room for the split tenon to spread into with the wedge. The handle was stick of red oak octagon profile that had been a sample to show my student that could make a good tool chest handle. Feel good in my hand. Tapered it using my band saw and considerable sanding. It doesn't have the patina and aged grace that the steel mallet has, but that may come with use and time and handling. 4D

-
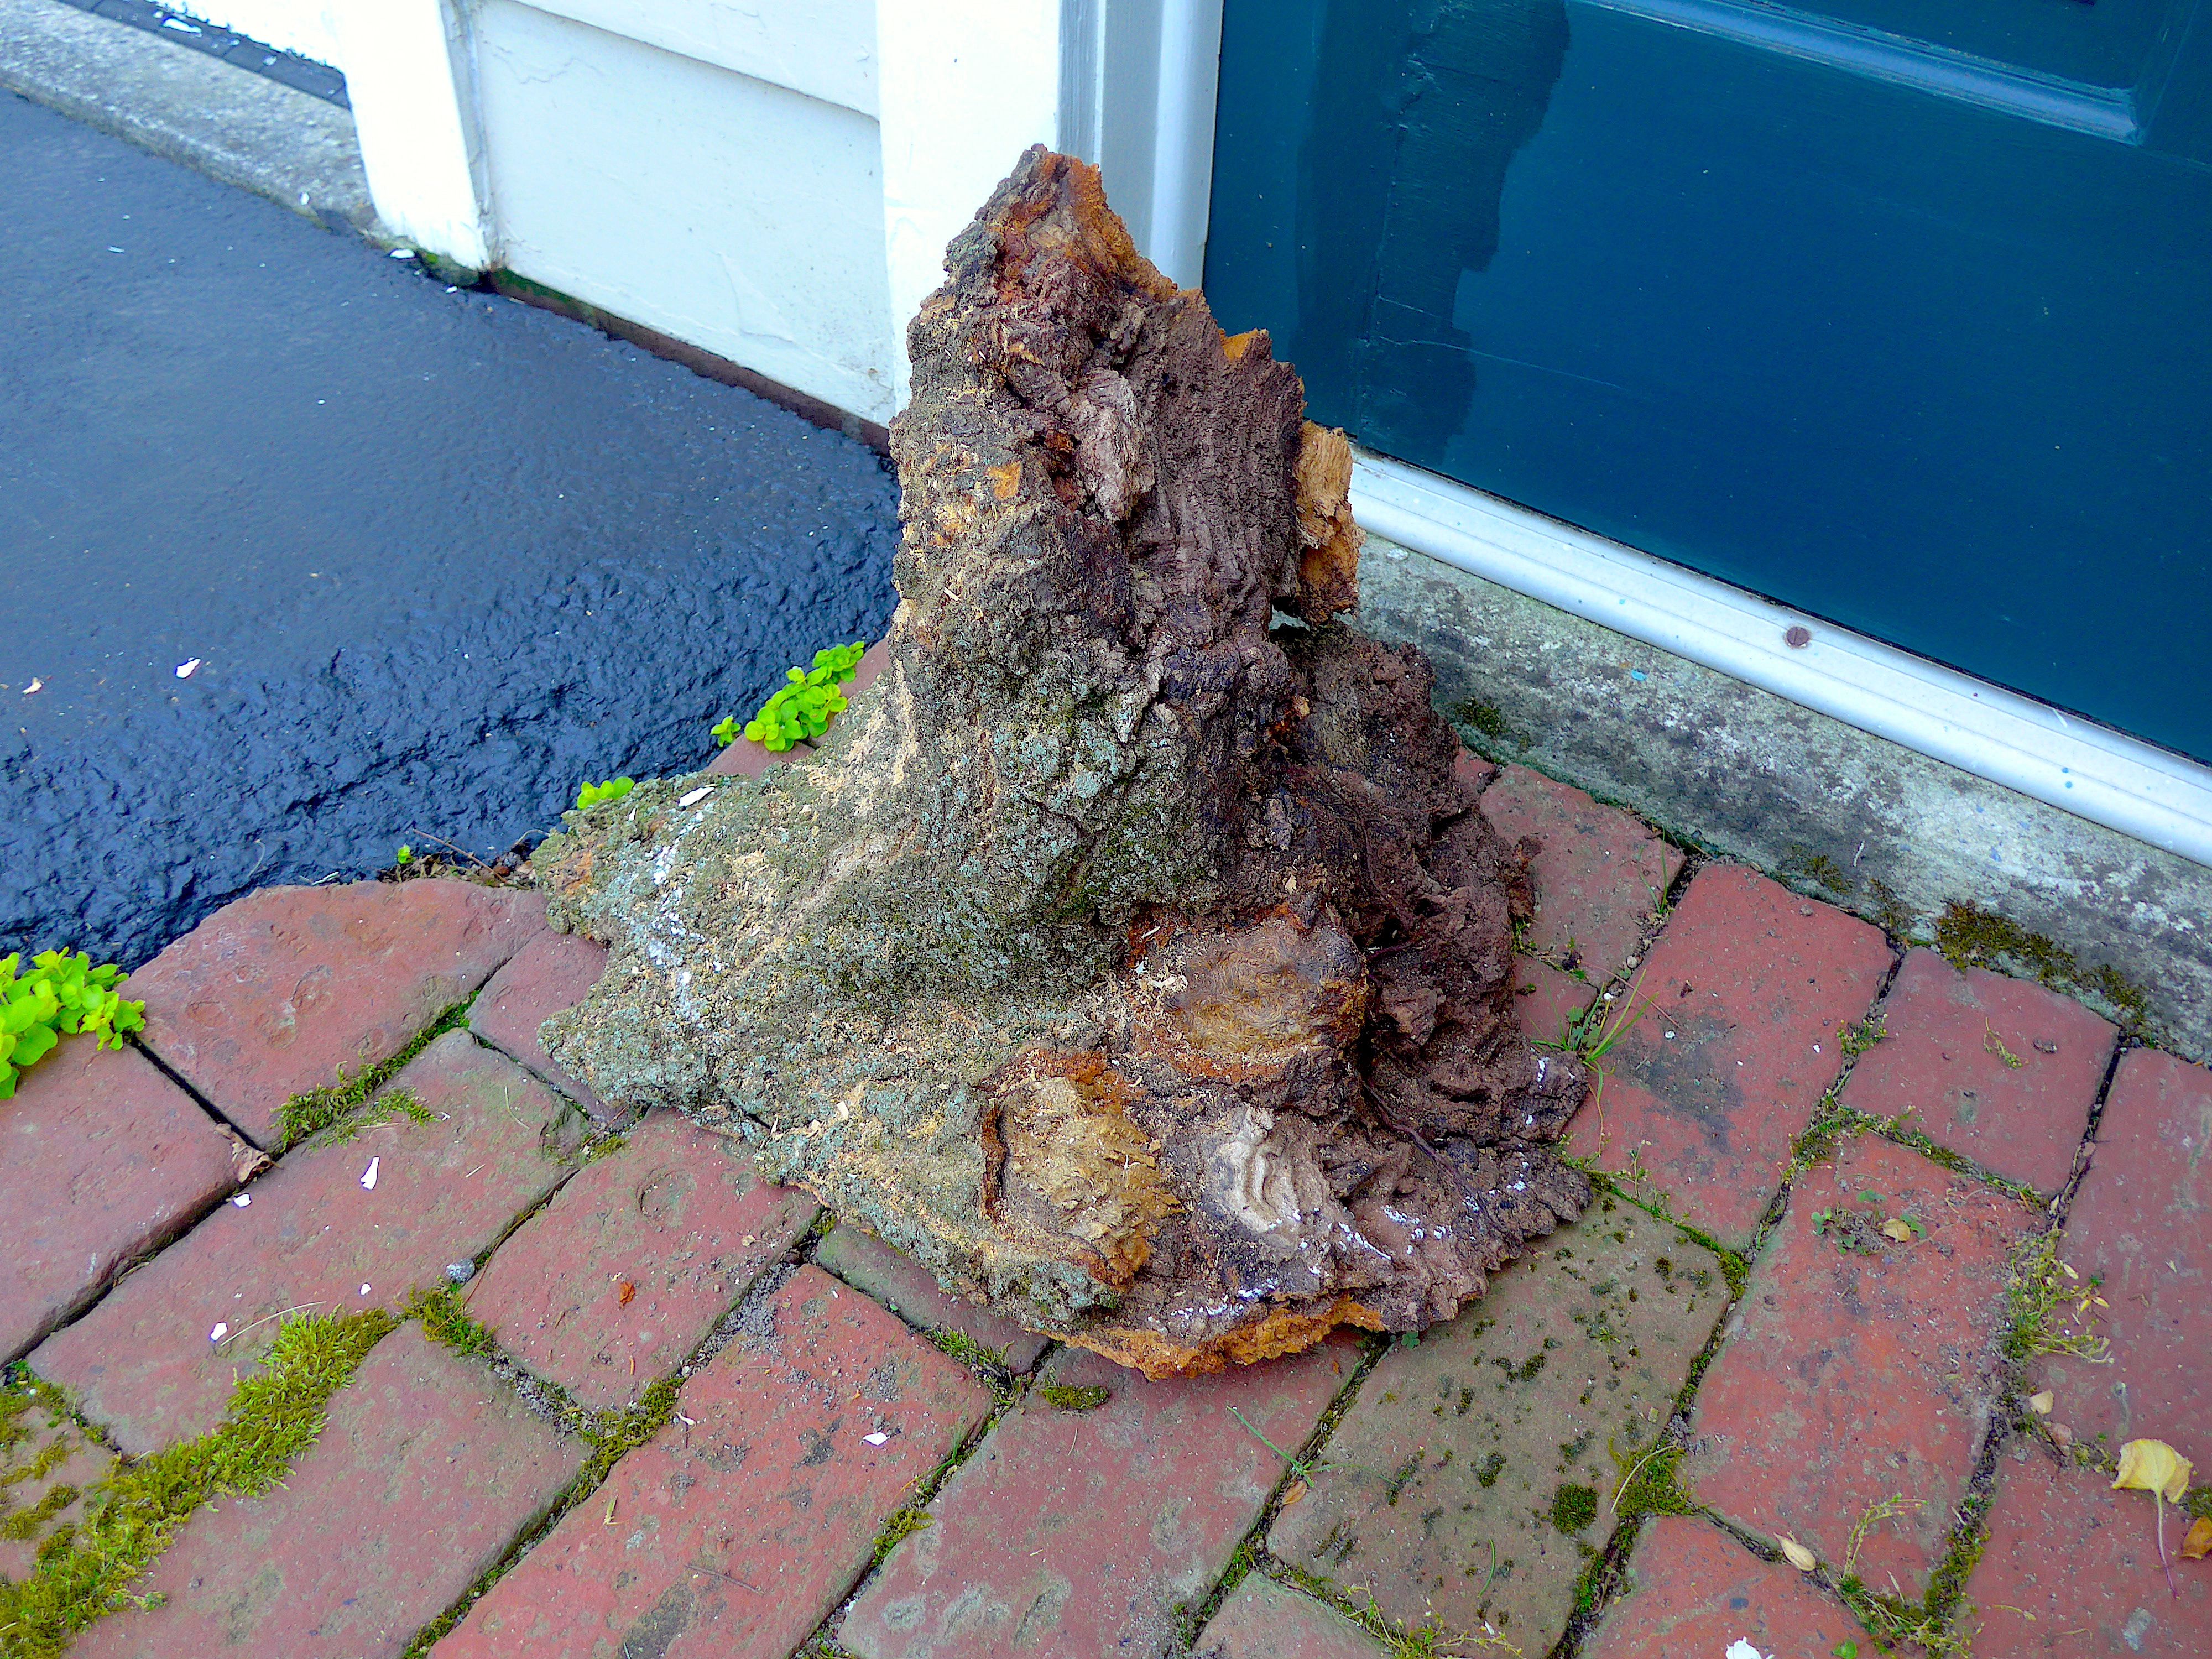
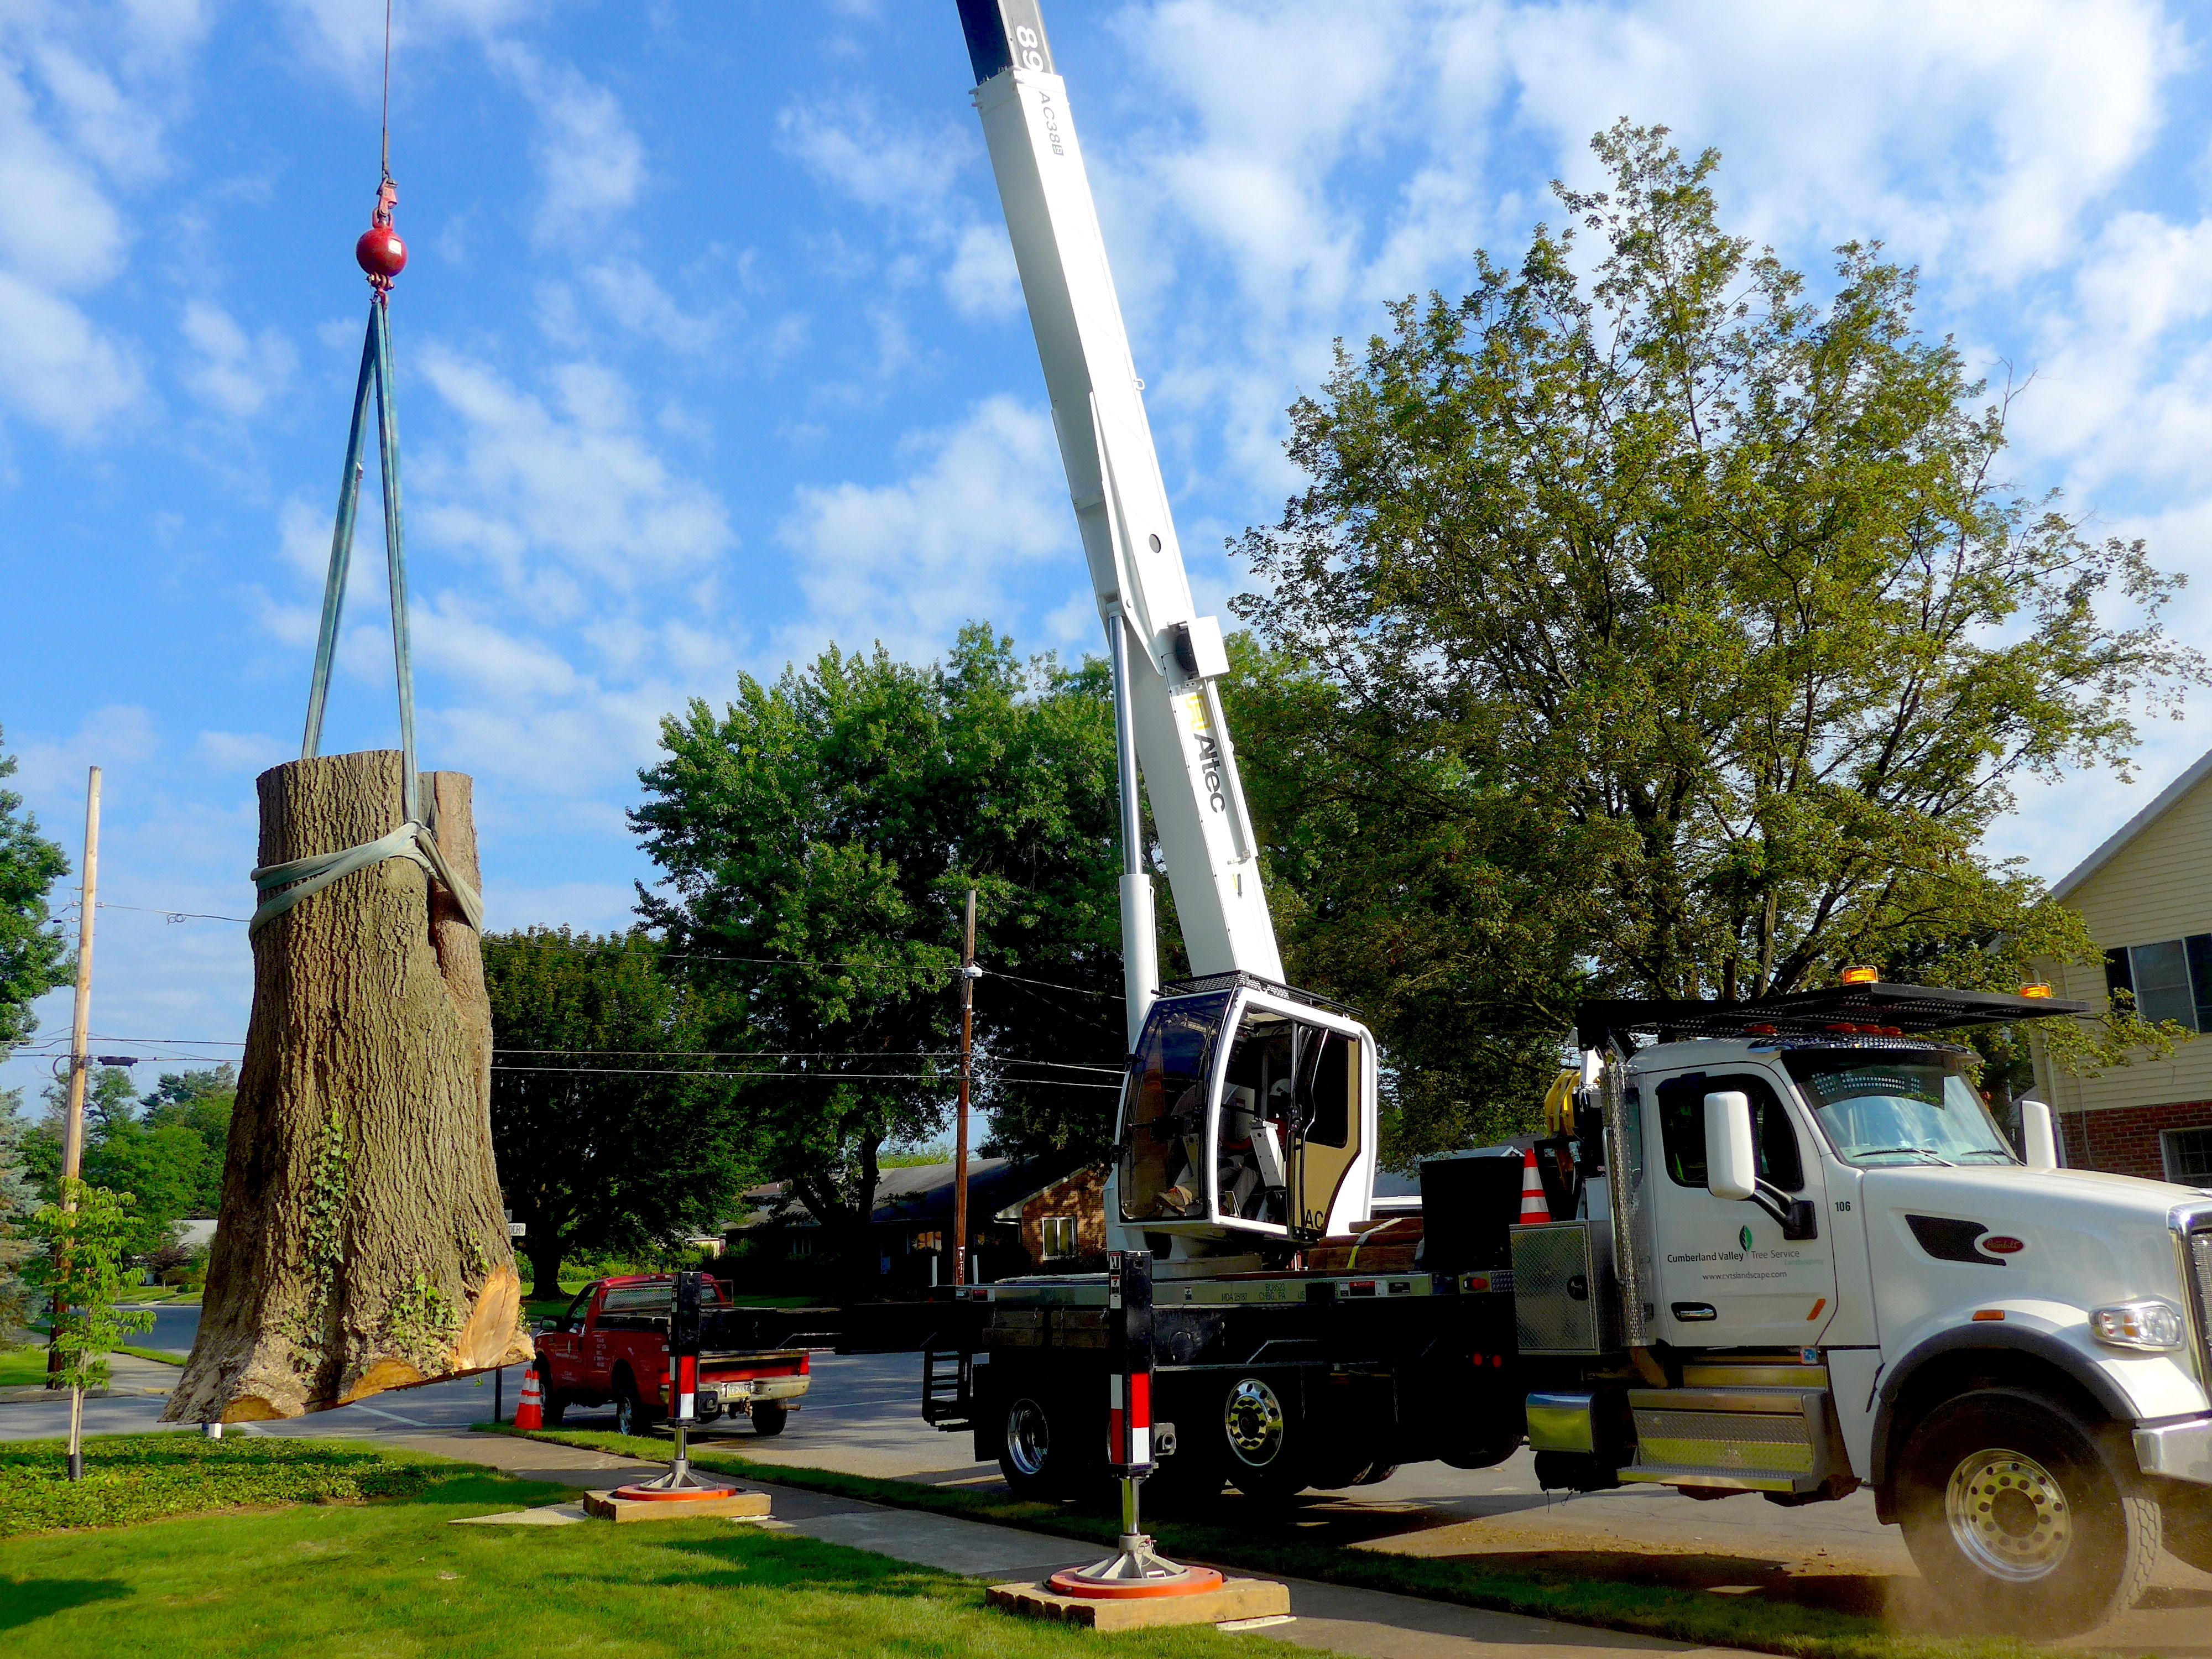
Here's the burl that came from the trunk section of our red oak. Any suggestions on what to turn??? The last photo shows 1 of 3 trunk sections that came down today, along with my burl.
-
I can't seem to be able to locate my original posting about this burl. Here's the finished project, as promised. It awaits some light sanding to knock down the shiny spots.
-
Not sure I should post these after seeing what Rusty is just "throwing together". Seems I may have a problem. Almost everything I make recently is full of large holes. Maybe I'm not doing something right? A little more mesquite and red oak.
- 11 replies
-
- 10
-

-

-

-
- ringmaster
- mesquite
- (and 2 more)
-
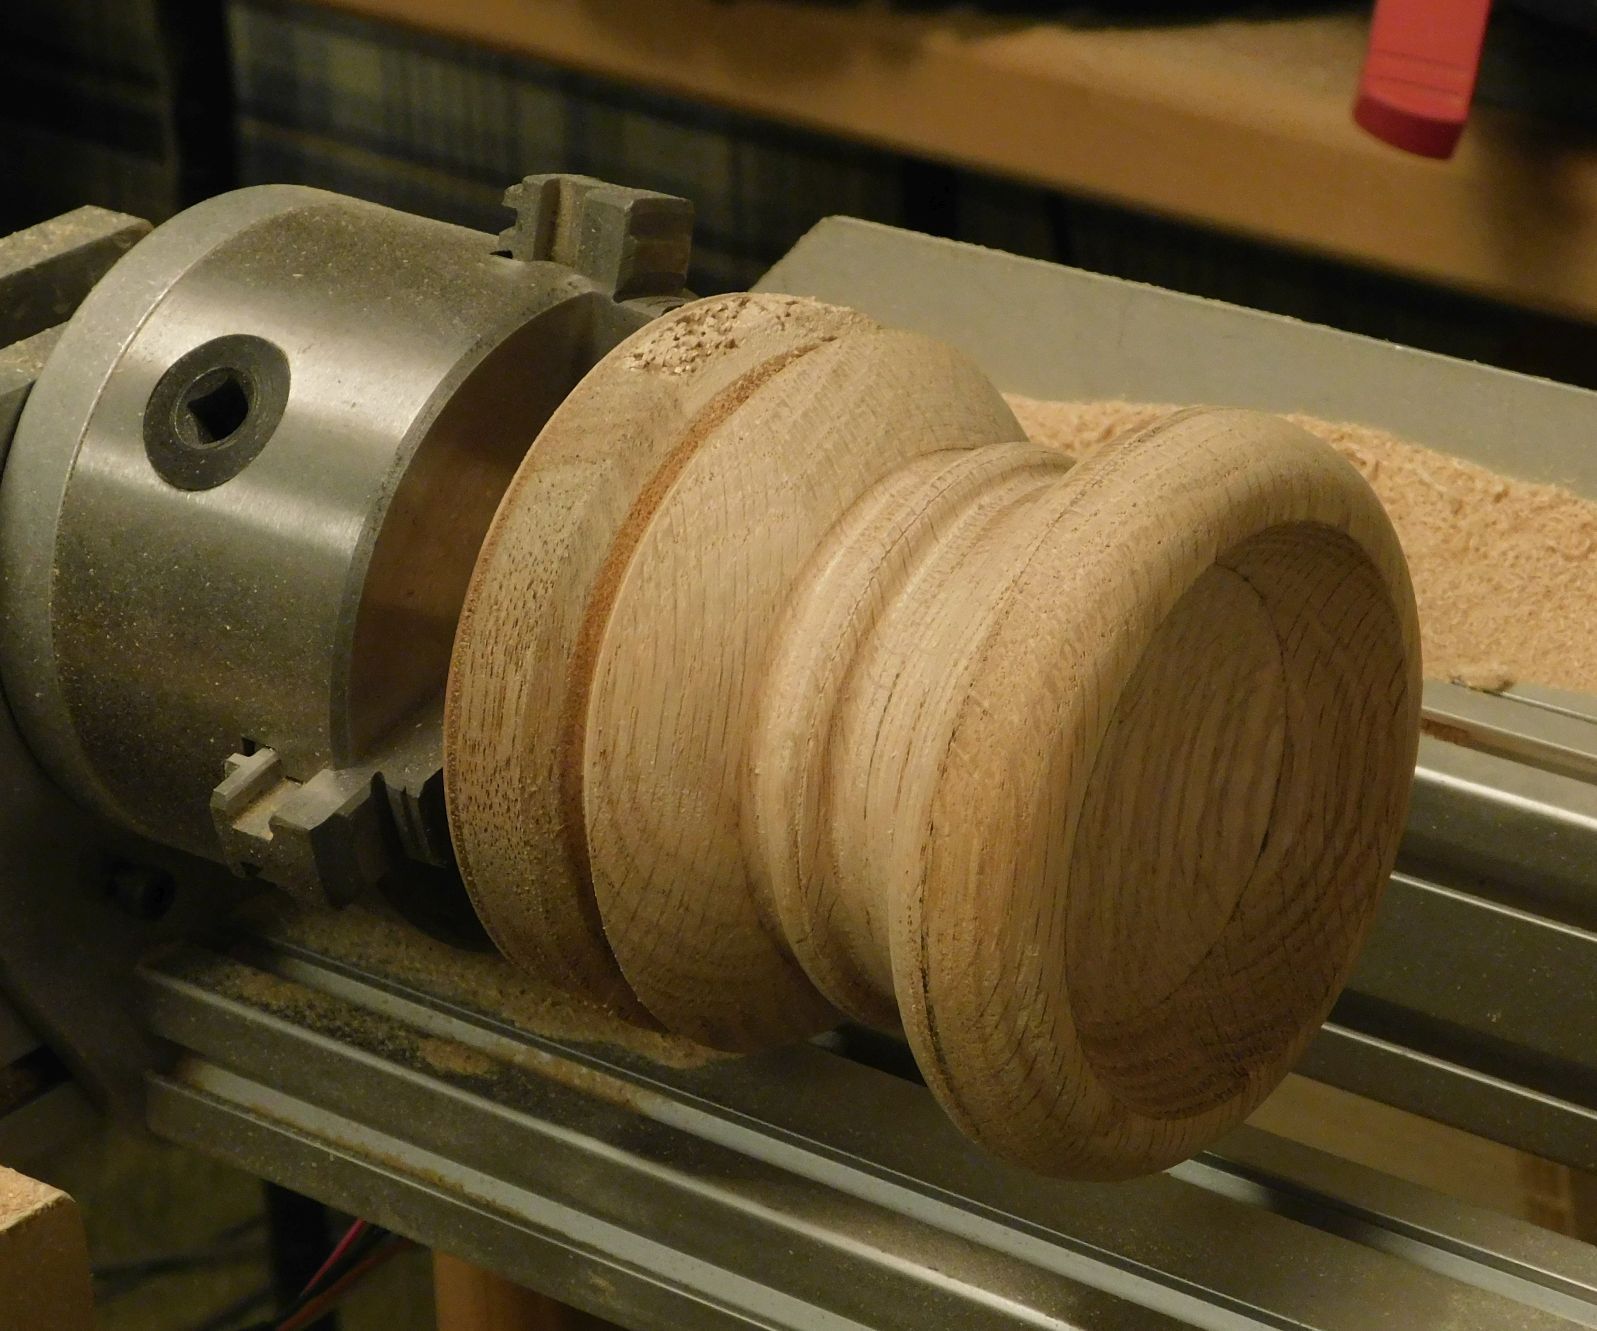
This is a coin/key cup. One example of a project I used to have my students make on our lathes. Found this oak block already glued up and assume I made it 5 or six years back intending to show my student as an example that could be cut using the CNC rather than the lathes. No better time than now to actually cut it. Pushed the limits of my CNC. I had to set the Z clearance down to 1/16" so the bits I used would start above the wood blank. 4" diameter, 3" tall. Glued to a plywood scrap with paper in between so I can split it off cleanly with no screw holes in the bottom. The bowl center I did with the block standing up and a typical moulding toolpath. The contoured perimeter is all done here on the rotary axis. Shot taken just as it finished being cut. I'll take it out to my garage lathe to sand clean and down to 300 grit. 4D
- 5 replies
-
- 3
-
-
-
- rotary axis
- red oak
- (and 1 more)
-
Just the latest batch of bunnies. More variations on the slotted bowl design. Tried one with walnut and spalted pecan and the other in mesquite and red oak. Then a simple basket bowl in red oak and mesquite. The last one is alder and mesquite as a variation of a suspended bowl, Got the proportions a bit off but will get that sorted out on the next ones. I'm waiting as fast as I can for the guys with the butterfly nets to take me to the room with rubber wallpaper.
- 8 replies
-
- 7
-
-
-
-
- walnut
- spalted pecan
- (and 7 more)
-
My diabetes medication doctor asked if I could make her 3 year old twins a step stool. One for each. So I found a photo of a two step stool that is also a chair for the child. I made these out of some red oak I had left over. I thought these would be a little difficult to make, but, to my surprise, they were relatively easy. They are about 18 inches wide and about12 inches tall. I have some letters that my wife is painting for me. They each will have there names on their own stools. My doctor is one of the few that are very caring for veterans, so I have no problem doing this for her. In the photos I have not yet put their names on them, and I have not applied any Arm-R-Seal on them as yet. That will happen tomorrow…hopefully.
- 33 replies
-
- 15
-
-
-
- step stool
- stool
- (and 3 more)
-
Mom used to collect teddy bears and the last count that I'm aware of was somewhere north of 500. After dad passed last year, the collection had to be broken up and she's down to just an even dozen. The door to her apartment at the assisted living facility is rather bland so I built this to add to her collection. This way everybody gets to share in a bit of her hobby. This is mesquite, red oak and ERC. Approx. 9 1/2" high by 7 1/2" wide. Used my bandsaw since the crappy little scroll saw I have wouldn't even scratch the mesquite. Not the best fit-up but I can live with it since it's the first try into the intarsia world. I did learn a lot and may even try some more in the future.
- 14 replies
-
- 11
-
-
-
- intarsia bear
- mesquite bear
- (and 7 more)
-
Finally got some time to do something about all of those non-domesticated bunnies that I seem to be overrun with. These are Mesquite with Red Oak and Spalted Pecan. One of the bunnies was an idea for a different way to do open rings. And that led to another way to do the other way. So, this is what you get. Remember. You guys let me stay so this is all your fault!
- 18 replies
-
- 13
-
-
-
-
- ringmaster open ring bowl
- mesquite
- (and 3 more)
-
I haven't posted any projects lately because I have been working on a snack tray cabinet. It's from the December 2008 issue of Woodsmith Magazine. First appearance of the project looks like a small cabinet that would go by the end of a sofa, for example. It looks like it has five drawers, but it actually only has 1 drawer 4 fold up smack trays that inhabit the other four "drawer" slots. In the magazine, it was made from cherry, but I made it from red oak. I used red oak because that is what my wife wanted. I never got started on it before she passed, but I decided to honor her wishes anyway. I used two different stains on it, Minwax Golden Pecan, and Minwax Honey Maple gel stain. I wanted to experiment with the gel stain to see if I liked it. The jury is still out. I also tried some gel polyurethane, with the same resulting opinion. The colors of the two stains were almost identical. I didn't want a heavy stain, just light tint to match the coffee table I made from red oak several years ago. This is the cabinet as it will normally look. This is showing the one drawer pulled out. And this shows one of the snack trays opened up, with the other three partially extended from the cabinet.
- 20 replies
-
- 16
-
-
- gel polyurethane
- gel stain
- (and 3 more)
-
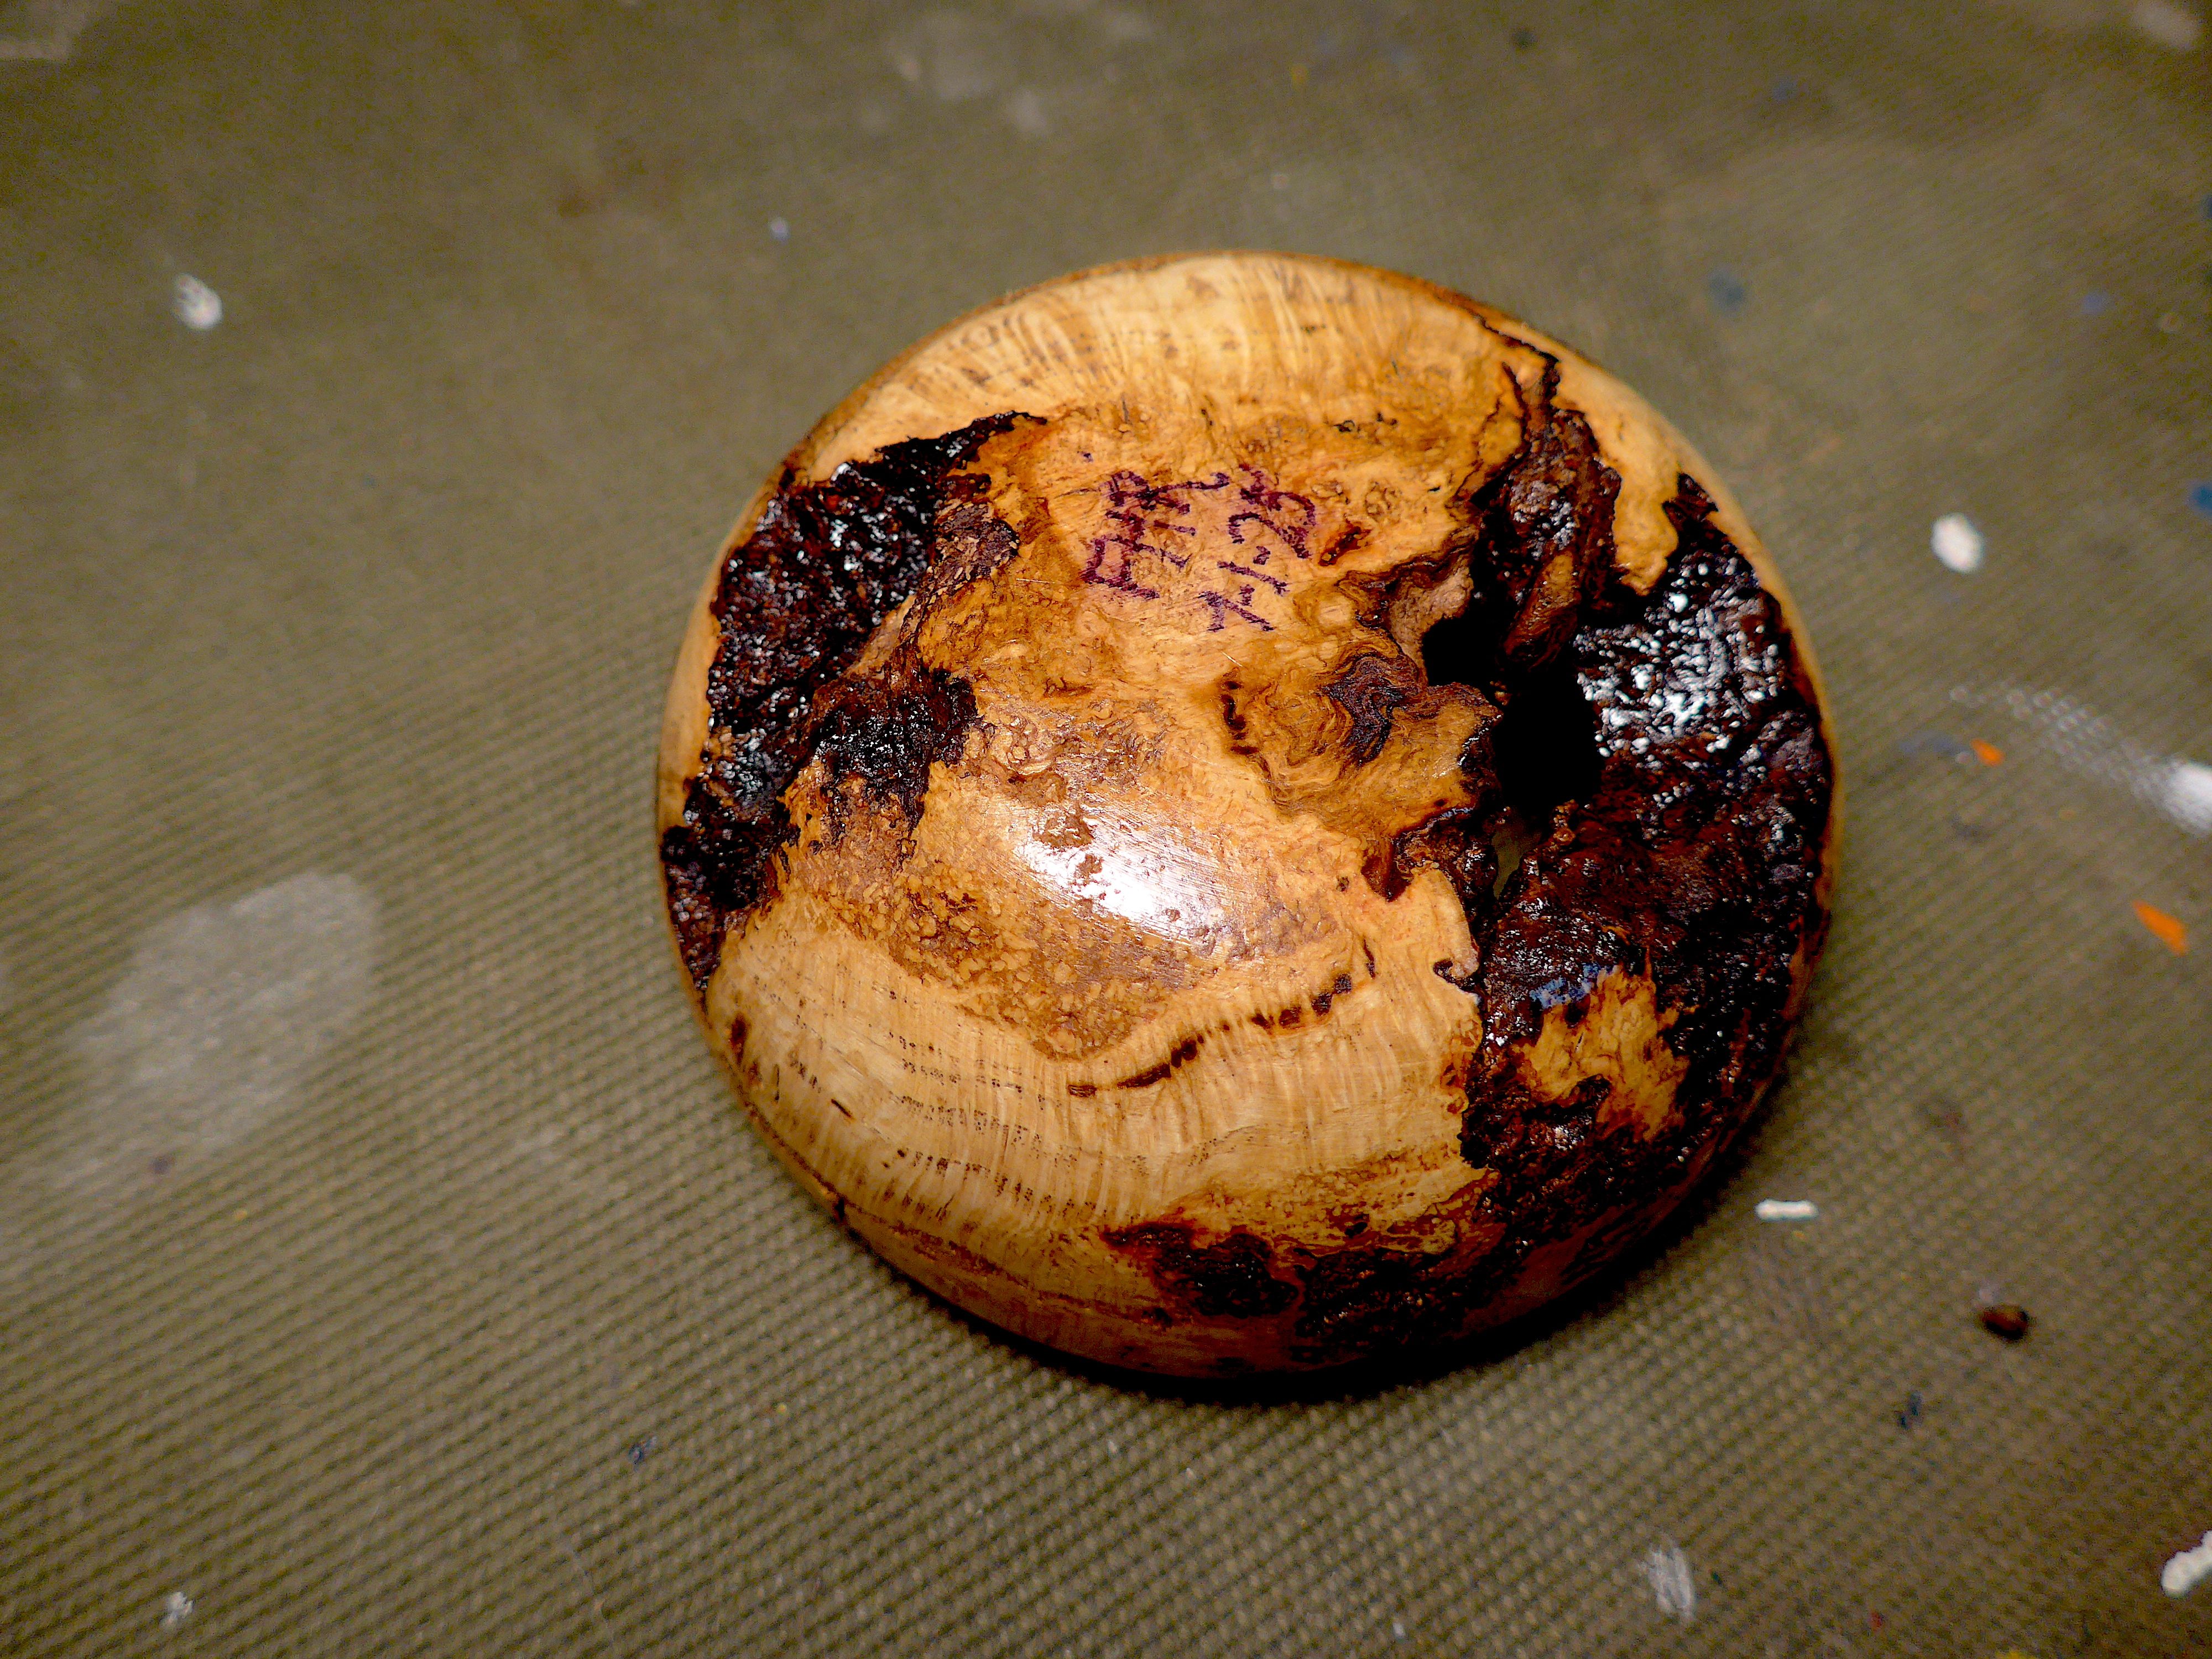
Had a piece of Red oak screwed to a small face plate for another use and decided to make it into something so turned it end grain. Still working with beeswax as a finish. You can't see it but I spilled some coffee on it coming up the steps with it after the pictures. The moisture depleted it immediately so not very durable. Have to redo the finish, feels like it needs a lid too.
-
Another blast from my past. I still have and use this chair. I designed it when in college in 1981. Do you have a favorite seat in your house? I've helped hundreds of students design and build original chairs. There is a greater expectation we have for chairs compared to table or cabinet designs. Structure, comfort, are not as obvious challenges when the projects holds a dynamic human. Usually there is at least one, and often two rough prototypes made before finalizing details for chair designs. A solid seat that is uncomfortable to sit in gets a "C" at best in the advanced furniture design classes we taught. More details and background about this chair are now on my blog here. 4D
-

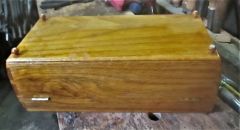
Desktop Project Post, lid closed.JPG
steven newman posted a gallery image in Small Crafts, Boxes, Picture Frames, and Lighting

From the album: Desktop Organizer, in Red Oak
-
Desktop Project Post, lid opened.JPG
steven newman posted a gallery image in Small Crafts, Boxes, Picture Frames, and Lighting

From the album: Desktop Organizer, in Red Oak
-
Desktop Project Post, end details.JPG
steven newman posted a gallery image in Small Crafts, Boxes, Picture Frames, and Lighting

From the album: Desktop Organizer, in Red Oak
-
Desktop Project Post, drawer is open.JPG
steven newman posted a gallery image in Small Crafts, Boxes, Picture Frames, and Lighting

From the album: Desktop Organizer, in Red Oak
-
Desktop Project Post, front view.JPG
steven newman posted a gallery image in Small Crafts, Boxes, Picture Frames, and Lighting

From the album: Desktop Organizer, in Red Oak
-
So..after getting that Paul Sellers' Keepsake box done...I still had this on my bench... Mainly Red Oak..and one Ash.. Ash is a bit on the thin side, the rest are 1/2" thick...remembered a Desktop Organizer sellers made a while back...thought maybe I could cobble another one out of this mess....downloaded the 3 page Plan.. Be the starting point... Then I'll worry about that drawer....cutting list? have already been modifying to suit what I have... Letters are in the computer screen shot only, not on the boards themselves. These will be the bottom and the lid... Back is a full 4" tall, as are the sides...front is just 2" tall. And it will go above the drawer opening. And that was as far as I got, today....going to go and watch Episode #1, Desktop Organizer..... Stay tuned...will try to have this done before March gets here...
- 44 replies
-
- 12
-
-

-
- red oak
- desktop organizer
- (and 1 more)
-
Had a request from the church manager back in early November to build a set of steps to the stage. Note there is a set build in on both sides and a portable set on one side for the pastor. Turns out the worship leader (used to be music director ) wanted a set on his side of the sanctuary also. I basically copied the design from the existing. They used a treated stringer and now I wish I had not taken the easy route but that is what we have. The existing used brads for construction and I used screws and pocket screws. I did a glueup for the sides to attach to stringer via screws from inside. Yes this is the part I later had second thoughts about , attaching dry lumber to wet PT wood. Already a crack on one side but it is small. Did not have any larger dimensional lumber so U cut up a step scrap for the back stretcher. Here you also see the screws attaching the riser to the step center. Pocket screws did all the other connections to steps and riser. Front view with extra touch. That strip of walnut was inserted instead of oak to bring the riser up to height. Stair treads were also rounded on the ends. the completed unit And the stain applied. Was fortunate to find straight grain red oak. Got the wood at Lowes and after purchase looked at Marketplace on FB. Sooo much red oak and a lot cheaper than I paid, Oh well that is life. Will probably use Polyurethane as the hard coat next week.
- 15 replies
-
- 10
-
-
Sooo, bought some Red Oak, and needed a project idea... Three planks, at $22.98 each ( OUCH!) 1/2" x 5-1/2" x 48"... Grain details, of the top board...other 2 are a little more plain....so, watch a series of videos by Paul Sellers' Masterclass. Downloaded the plan for a Keepsake Box with curved sides So, I'll give him the credit for the design. I'll have a few small details that will be a bit different. Cutting list as provided.. Where he used 9/16" thick stock...I'll have to use 1/2" thick stuff.....I'll have to see about that 5/8" thick stock... So, here we go.."Start up" phase....details? Curved corner details....looks like fun? Applied feet (to make)Lid gets sawn free of the box, note the cut line. Bottom and the panel for the lid are to look like they are floating, but.. They sit in a narrow groove..3/16" at that...we'll see how that works in 1/2" thick stock....he uses a plough plane even on the end grain. He also cuts a stopped dado for that divider to sit in. There is a carved, curved finger grip for me to gouge out(up) Had a pair of Hinges I thought about using.... Maybe....would be surface mounted, and inlaid flush with the surface....we'll see.. Need to haul the Plans and the Planks to the shop. The Masterclaases are Free, just log onto Paul's site....He also has a pay per view Masterclass....but, since I am a bit on the Frugal side (NOT cheap) I went with the Free site. Might be worth checking out...? Boss has errands to run, whenever the "Fliver" gets warmed up (16 sunny degrees outside, about 50 degrees too cold for me) Stay tuned....this might involve a small bit of cussing.. (ya think?)
- 61 replies
-
- 12
-
-
-
Sellers Project, close the lid.JPG
steven newman posted a gallery image in Small Crafts, Boxes, Picture Frames, and Lighting

From the album: Keepsake Box, with curved sides
-
Sellers Project, Mini-bun feet.JPG
steven newman posted a gallery image in Small Crafts, Boxes, Picture Frames, and Lighting
From the album: Keepsake Box, with curved sides
-
Sellers Project, no gap back.JPG
steven newman posted a gallery image in Small Crafts, Boxes, Picture Frames, and Lighting

From the album: Keepsake Box, with curved sides
-
Sellers Project, end view.JPG
steven newman posted a gallery image in Small Crafts, Boxes, Picture Frames, and Lighting

From the album: Keepsake Box, with curved sides
-
Sellers Project, Chained Lid.JPG
steven newman posted a gallery image in Small Crafts, Boxes, Picture Frames, and Lighting

From the album: Keepsake Box, with curved sides