Search the Community
Showing results for tags 'jack plane'.
Found 17 results
-
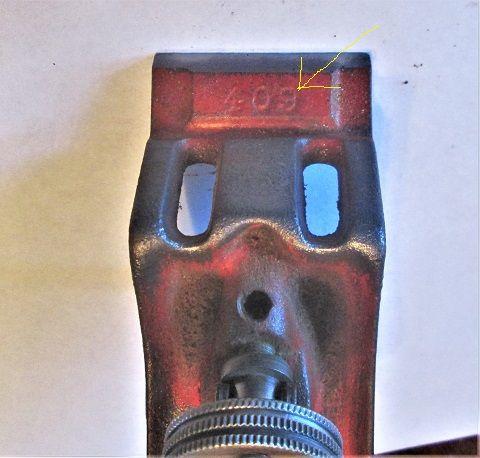
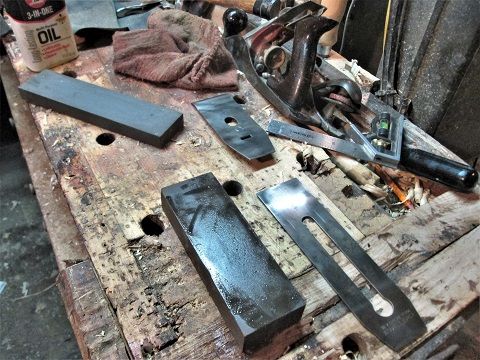
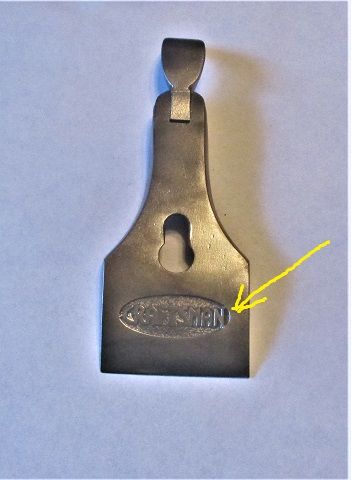
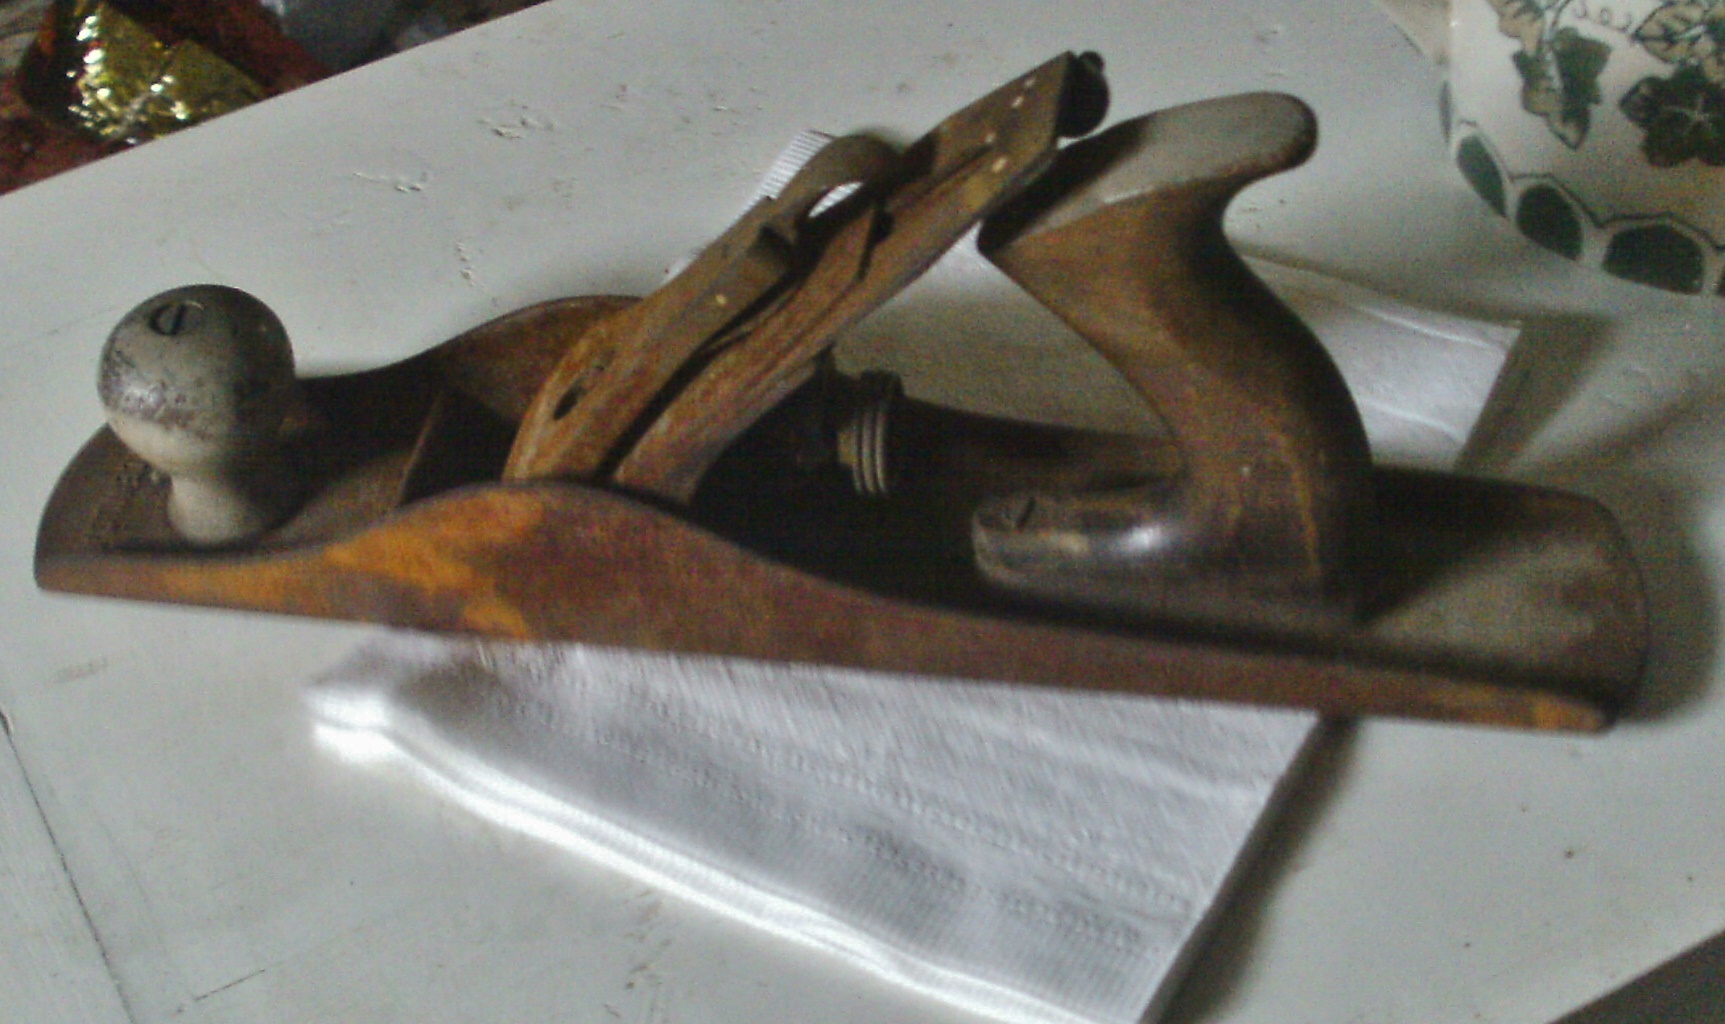
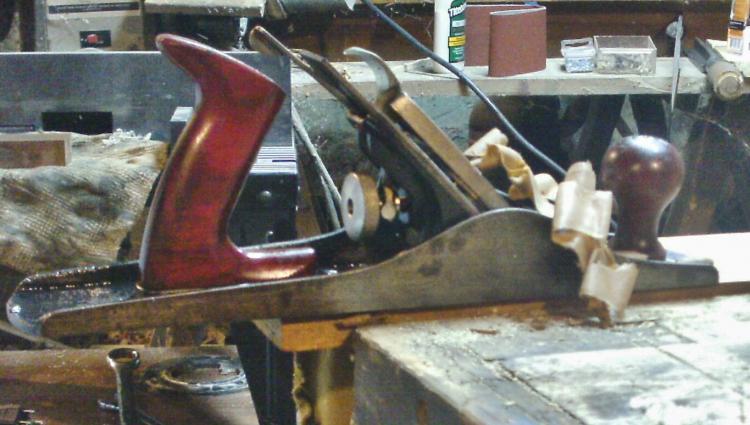
A while back..picked a $15 Jack plane at an estate sale....been trying to clean this thing up.. Made by Sargent & Co. and sold at Sears as a Craftsman brand tool... Even was marked as Craftsman on the iron... The "BL" was a Sears code for Sargent..... First things I do is tear the plane down to just..parts...and clean each up...metal parts see the wire wheel on my grinder... Frog...bolt and the rest needed a bit of cleaning... That "409" is because Sargent 409 and 414 planes used the same frog. Steel adjuster wheel took a bit of cleaning. Same with where the frog sat...after a bunch of crud was removed... Bolts....used a pair of visegrips to hold these, while the wire wheel went to work....at one time (WW2 ?) the nuts had been blued. A large,brass wire wheel was chucked into a drill, and all rust removed here...then a paint brush with 3in1 oil was used all over, to keep the rust away... Sides were cleaned up with the wire wheel on the grinder..then oiled. the sole? A few scratches...checked it for flat.....sit it on a know flat surface, index finger on each hand...one on each end, try to press down and see IF it rocks...this one never moved...flat enough for me The handles were stripped of the old finish, and ugly paint...smelly BLO was brushed on, and rubbed down...then a coat of varnish. Which left these three.. Had a burr on the bolt's slot to remove, and rust in the knurling....Wire wheel to clean the rust off. I adapted a sander to be the sharpening center... Table was adjusted to a 90 degree to the disc. And a large cup of water was nearby... This is Snaggletooth....what I started out with... Cleaned up, back is now flat...worked on the chipbreaker, too. Then, oil stones.. Long one is a COARSE, small one is 600 grit...rag to keep things clean, and the 3in1 oil as needed.... Then 2 grits of wet or dry paper...a 1000 grit, and then this 2000 grit....we getting there.. Then the strop. Had to work on the chipbreaker a bit..until it sat flat ( no gaps) on the back of the iron. Rest of the plane was still upstairs...happened to have another Sargent Jack plane IN the shop...used it as a test bed, of sorts... Almost done... Took a few trips...took the iron and such upstairs, and re-assembled the jack plane... Look any better? Trying to decide what colour was used on the lever cap.. To make the "CRAFTSMAN" logo stand out better.....blue? Red? Gold? Have seen all 3... Not too bad, for a $15 plane?

- 2 replies
-
- 4
-

-
- jack plane
- rehab
- (and 1 more)
-
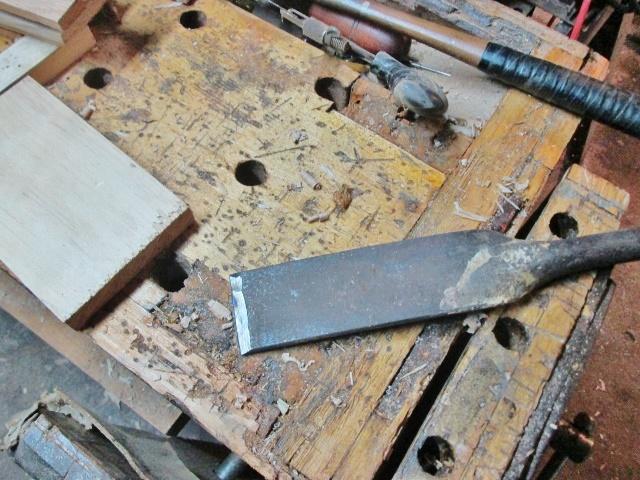
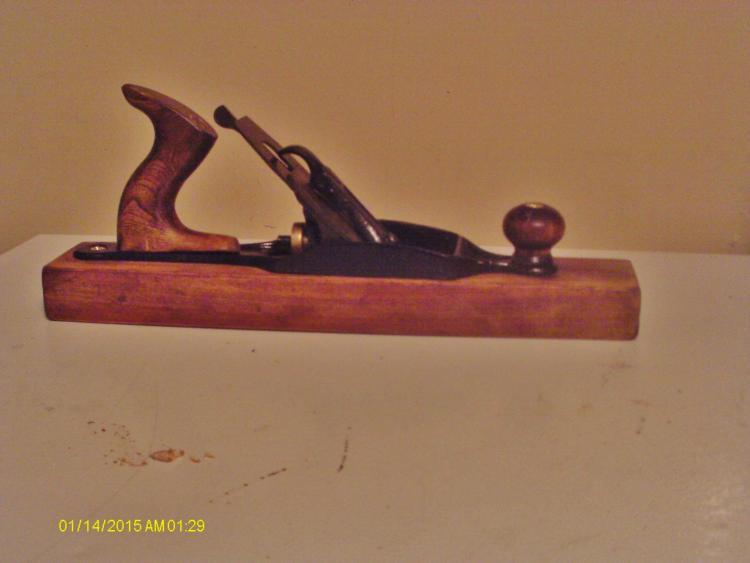
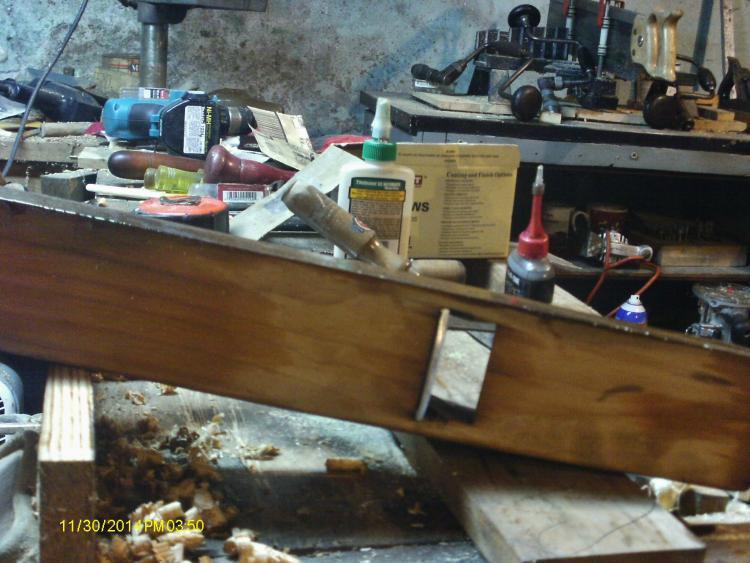
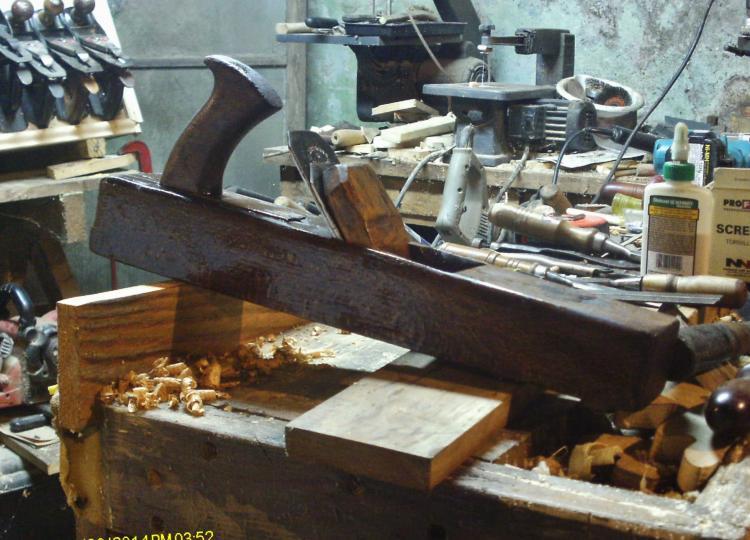
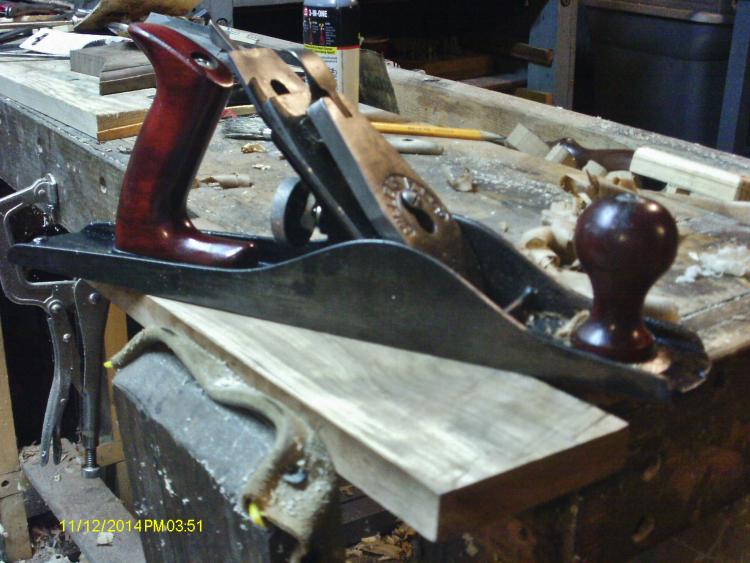
One of the "treasures" brought home from Wapak.. I've already rehabbed the Defiance plane, and cleaned the drills up...which left that wood bodied Jack plane... Needed a blade/iron/cutter.....Well, I did have a chunk of decent iron handy.. This is the half that is "leftover"...went back as far as this was flat....used the grinder to cut a deep groove.. Because this chunk of steel was laughing at my hacksaws...got as deep as I could, then snapped the "good" part off. Beginning to think someone had re-worked an old lawnmower blade. More grinding.....beltsander......more grinding...wound up with an almost flat "back" and a cambered bevel... 2" wide iron....could have been a tad wider. Will work on the sharpening later... Had to trim the wedge a bit....will refine the cut later. It was sticking up further than the iron was. Finish the sharpening, may see about tightening the handle a bit...finish the wedge a bit..will do for now. May try to find out how thick the iron is..... Stay tuned....
- 8 replies
-
- 7
-
-
- iron
- jack plane
- (and 1 more)
-
Not too long ago, I bought a #5 Veritas jack plane from Lee Valley. I'm realizing now that I don't really know how to use this tool effectively. For example, I tried to flatten a board that was too wide to run across my jointer, so that I could run it through my planer, and it came out looking worse than when I started. What I am looking for is a comprehensive guide for someone who is a newby regarding bench or jack planes. Or just planes in general. I realize I have other options, such as ripping the board to fit my jointer, flattening it, and gluing it back together for the planer, or building a "shimming sled" to use on the planer, but I would also like to be able to use the plane to do this. Any recommendations would be appreciated.
- 12 replies
-
- 3
-
-
- book
- hand plane
- (and 3 more)
-
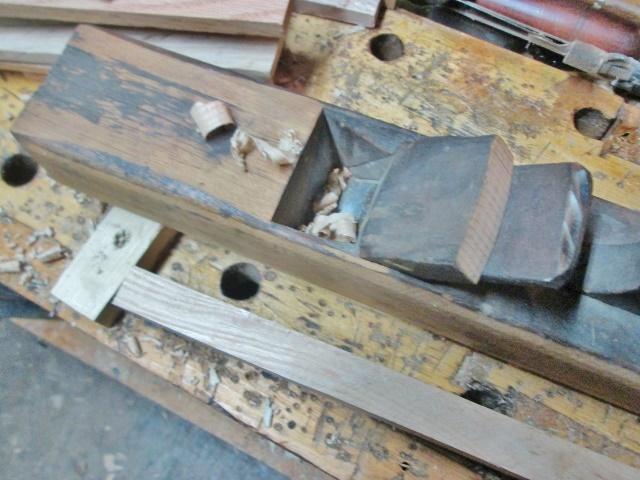
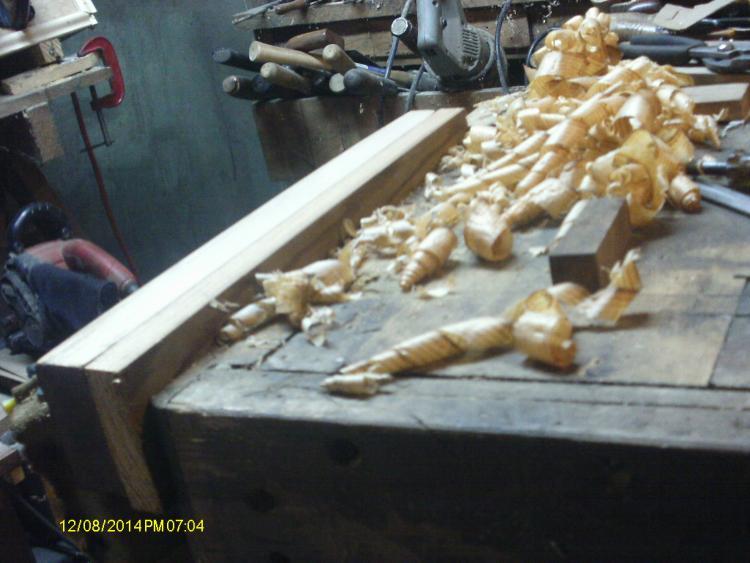
Been watch a Chinese set of vids lately.The fellow in these has some SERIOUS chisel skills. While some of his videos do have Closed Captioning, most do not. Sometimes, you just turn the sound off, and just sit and watch. First in a series of three on building a Jack Plane The one bench he uses makes my rearend hurt.The "Hammer" he uses is very nice. He does start the swings BEFORE the chisel is set, sometimes, and still hits the mark. Got a piece of Oak, all marked up, and awaiting MY poor chisels. I'll just use my "Normal" hammer for mine. A look at the iron, and a side view of the blank. Irons sit in the rear third of the body, on these. Top view. Lots of lines to cut at. The triangle area is the escapement area, with the two "eyes". Not all that big a plane, either.Still have to make a through mortise for the crossbar "handle" to go through. Now, I think Arlin is lusting after this chunk of wood 11/4 by 11/4 by 22" long. Yep, it is a green colour. Know of any use for it???
-
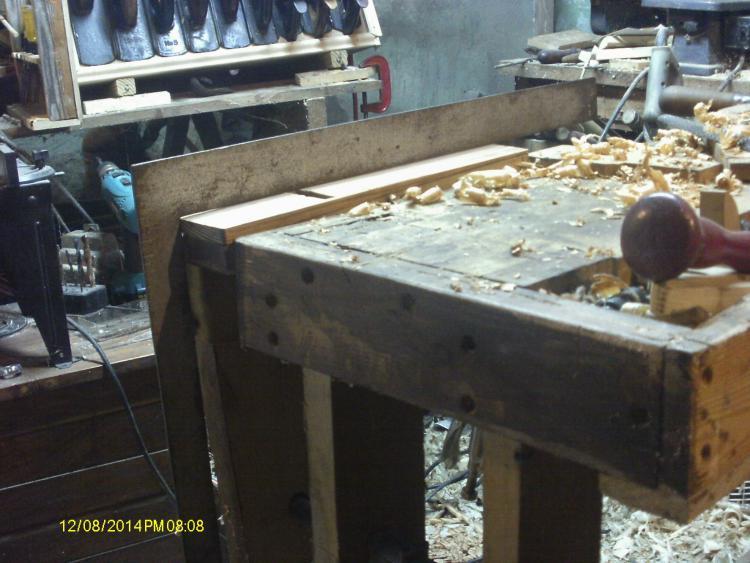
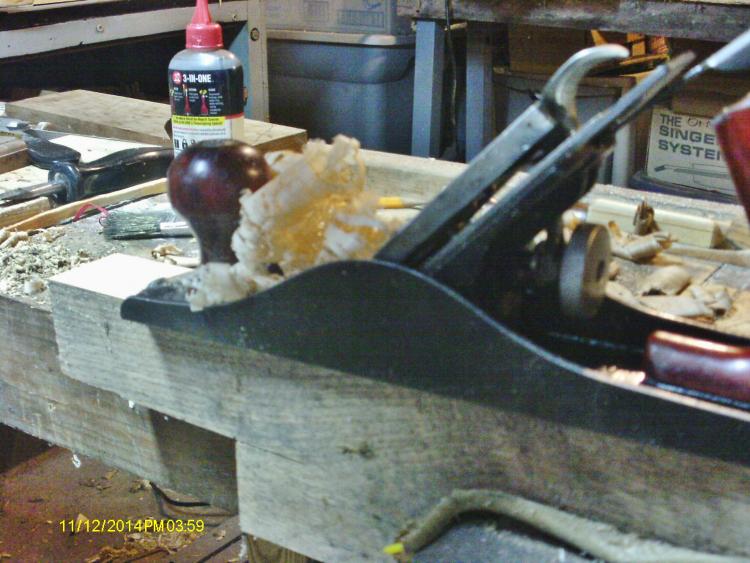
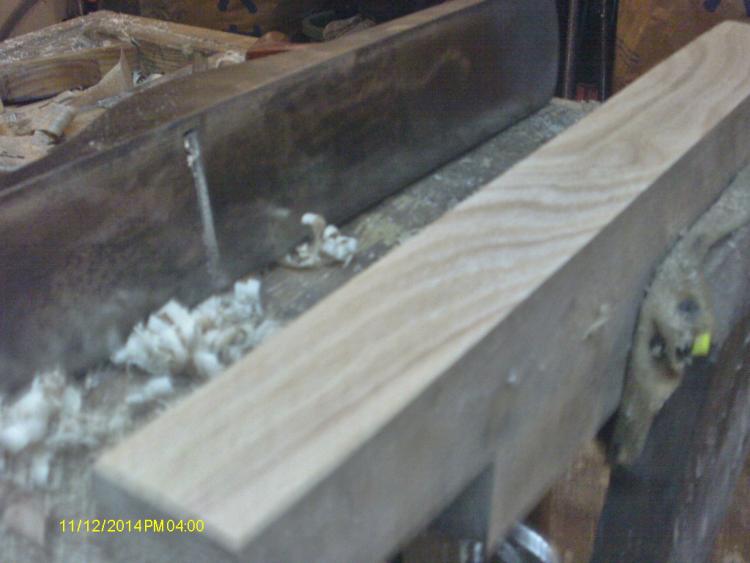
Did not go too well. But, that is why they have a test drive for. First the track. Old Barn Siding, with the tongue still in place (almost) and a trip along with the #31 Jointer to get things leveled out for the test Seems there used to be a groove thing going on here.  Anyway, after a bit of hammer work to set the iron just so Ah, little curlies? Hmm, got the tongue planed down to get a wider base for the plane A little bit better.. Found out a few things from this test drive 1) wedge is way too short, allowing the iron to chatter along ( the short curls0 2) mouth was cut WAY too big by the idiot with the saw (guess who that would be) Fixes planned for this plane: 1) make a new, longer wedge. And adjust the eyes a bit, as one is a bit bigger than the other (happens0 2) make a 1/4" or so thin patch, chisel out a spot ahead of the mouth opening. insert the patch close to the edge of the iron. This will close up the mouth, and still allow mr to plane the sole to keep thing flat over time. Lessons learned.Will apply these to any more i build. Might make a smoother later....
-
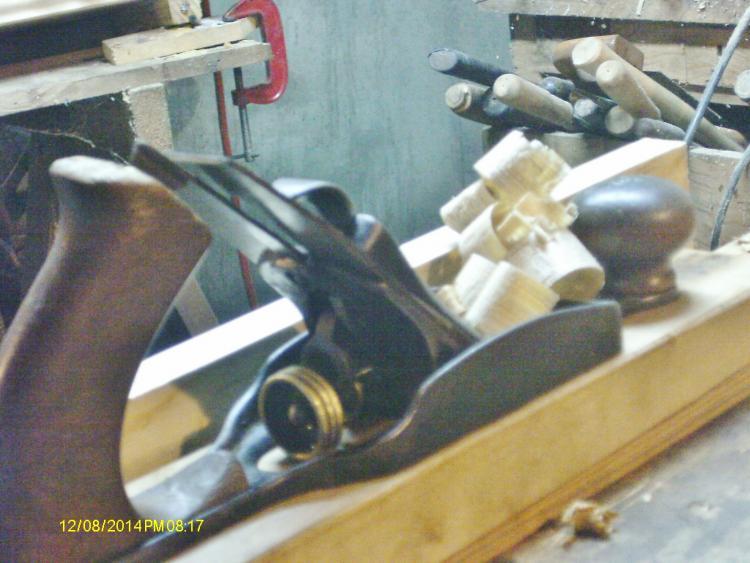
While I'm awaiting the oil finish to dry side view. Wedge is some walnut scrap. Handle is oak. almost has Tiger stripes, don't it?
-
Came in the mail today Lovely, ain't it? And, this was it's best side.. Ah..yeah. Well, this MIGHT take a bit. Found a spider's nest in the frog. Didn't find anything broken. Found a "Whale Tail" though.. Got all the rust, most of the gray primer paint, and the spider nest cleaned off...found some orange paint... Well, I missed some of the gray paint. Lever cap was nickle plated...at one time. gave the base a coat of black paint where it needed it. Put this old Jack plane back together.. iron is sharp, but it has a camber, ala Schwarz. Sole even cleaned up nicely... Guess it wasn't so ugly after all...
-
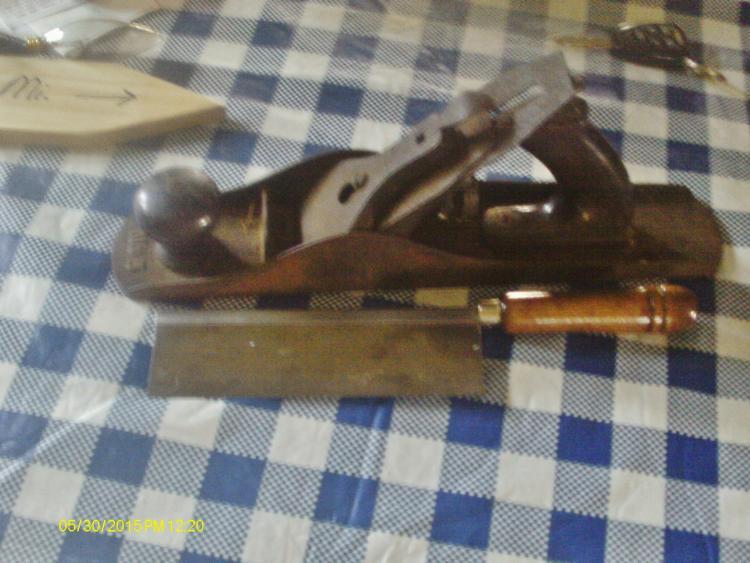
Been a busy yard sale season so far. Never spending all that much each time, though. Case in point, Found a small dovetail saw on a Thursday sale, they wanted too much...$8 Came back on Saturday...price was now $5...sold. More on that later. Started out the saturday morning run with a stop at a garage sale...not much there....wait, what is this? Looks like a stanley #5 jack plane. Well got these two home, the jack plane was just $3, and started to clean up the jack plane......took the rear handle off....piece of folded paper? Unfolded it, faded lines, and some faded words.. HW Eaton Miamisburg, Oh March 18 1899 A Sales Reciept? Got to checking the thing over. Turns out it is a Type 6 No. 5. This after a bit of clean up. Rust is cone from the sides. There is a downside to this find Seems someone had drilled two holes for a fence to be added, and even countersunk them. Same patina as the rest, might even be as old. Tip of the horn is missing, as usual with these planes. The Stanley logo on the iron is a STANLEY Pat.Apl 19 92 Three patent dates on the lateral, couple on the right hand threaded wheel. Rosewood for the handles. Not too bad for $3? That saw was nice and sharp, just under 7" long, maybe 2" wide counting the spine. Cost more than a 100+ year old plane?
-
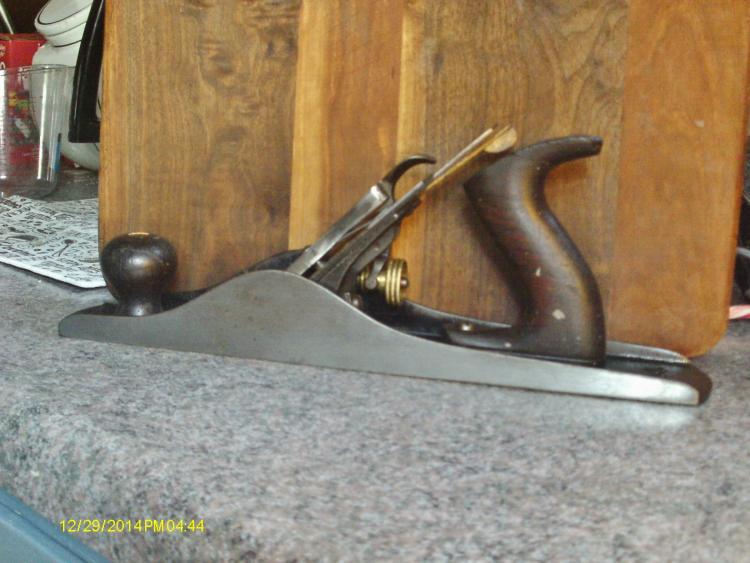
Well one of the three plane from a swap, a trans jack plane. made by Sargent, and sold as a Fulton. Yeah, that one in the center of that motely group. Already had refurbbed it a bit, so how about a little show & tell? How this thing looks now. Removed the crud off the rear handle, and found a wee bit of grain going on. As for the sole, it needed a good flattening, as in my level was a teeter-totter sitting on it. Handplanes soon had that problem fixed, right behind the mouth was a tall hump. As for now? Not bad looking Beech wood. The frog needed some new bolts, since the one was MIA. New ones are BRASS, but still round headed, with a slot. Not sure what size Sargent used, But this one used 1/4" x 20 threads. Frog seems to be a type two, late 1890s. Rest of the wood screws have a Phillips head to them, for now. IF I can find some with slots, I will use them. Had to go up a size, as the old ones were stripping the holes a bit. There IS one just under the Brass/steel adjuster wheel, too. Front knob got a new brass screw as well Left the finish alone on it, though. Iron is sharp. This is a Sargent made #3416 Jack plane, 16" long, with a 2-1/8" wide iron. iron is stamped as FULTON WARRANTED. Weighs about HALF of the IRON bodied Sargent #414 I also have ready to work. Might have over did the "Glam" a bit, but, it is MY plane for now...
-
The sargent #414 just needed a hone and a clean up. The Bailey #5 Type 11 needed a wee bit more work. It had a crack in the side, wrong lever cap, and a bit of rust. Lever cap was changed out with a one I had in the "spares" box. That crack took a trip to Wallie-world. Brought home a tube of Loc-tite epoxy for metal. Dremel made a "V" groove along the crack. Applied a bead to both the inside and outside of the crack. Let it set for over a day. Beltsander to flatten the area back to smooth. Area is now stable, but doesn't "hide' the crack. Sole was flattened a bit as well. All the other parts were cleaned up. And now, the "Reveal" The Left side, without the crack. And the right side, with the epoxied crack. The "gap' under the plane is from the curved counter top. next a look at the back. Some paint is still on the woodworks. Wood is Rosewood. And the flattened sole Finally, the frontend With a more correct lever cap... Still need to hone the iron. Sargent is also completed, and working...
-
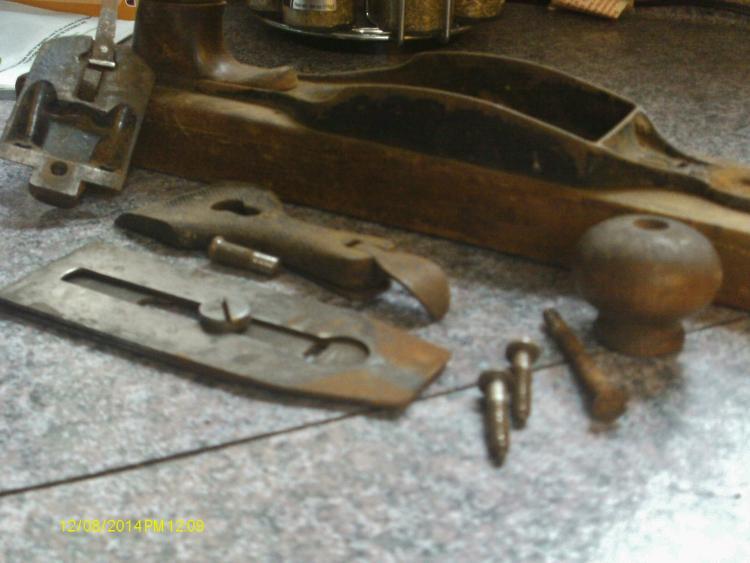
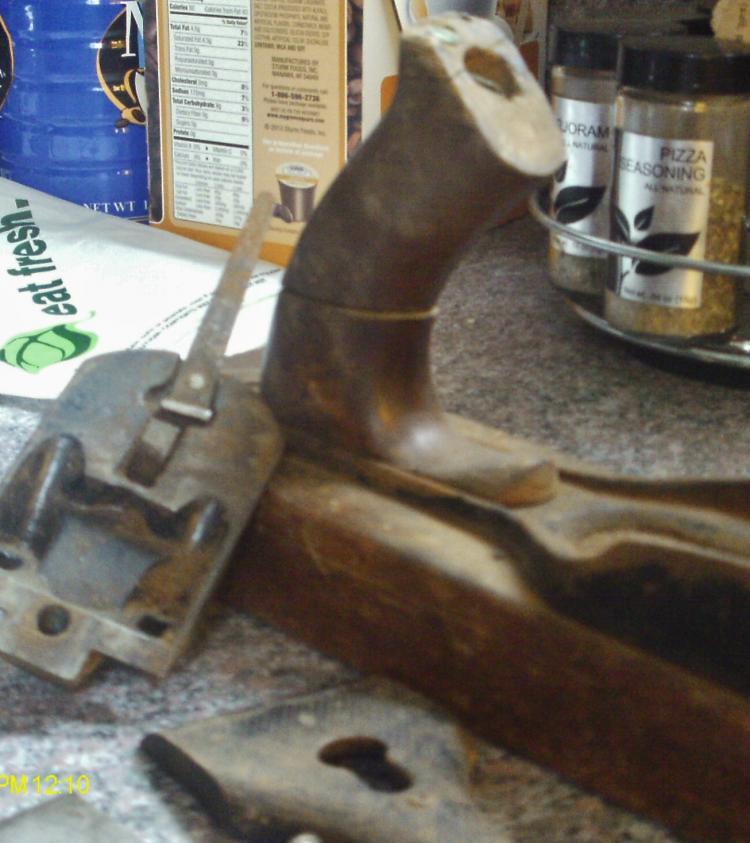
Well, spent $15 on a Stanley #26 Jack plane, with FREE shipping. Yeah right, I paid for the shipping and about $3 for the jack plane. Plane arrived this morning's mail. Lots of nasty looking parts. Broken and repaired, and broken again rear handle. Lots of other problems. A look at what came in the door ( can't help it, they seem to sneak in)and again There is actually two more brass screws holding what is left of the horn in place. Note #1 : Replace The yoke was ground off, so it didn't connect to the chipbreaker. Note#2: Have a spare, replace the yoke Iron was almost used up, had about 1/2" left until the edge hits the slot Note#3: replace, stow the oem one in the drawer. Sole was not only too thin ( screw for the front knob almost showing through) but it was tapered along it's length Note#4: re-sole, adjust for the taper Screws, bolts were rusty & crusty. Cleaned them up with the wire wheels. Glued a barn wood fir plank to the sole, and set it aside. Found a spare yoke, and installed it in the frog. Found an older tote, missing it'd horn. Found a chunk of walnut, and did a glue up on the replacement tote. After dinner, went back down to the shop. Glue had set up on the wood body repair. Ends were trimmed flush with a saw. the overhangs along the sides? "Ve haft vays.."Clamp the body into the vise, grab another Jack plane, and plane until flush. Got the sides done, time to open the mouth. Clamped the body flat to the benchtop. A few chisels to chop out the waste. Bed for the iron to sit on and the escapement inthe front, was roughly chopped out. mallet wasn't making any headway against the HARD 100 yr old woods, so a HAMMER went to work. Much better. Then a rasp, a couple files, and even some folded up sandpaper, to smooth it out.Then in checking the body, discovered that the body was STILL tapered, and too thick ( now) Laid out a line around the body, about 1-1/2" down from the top of the body. Turned the body sole up in a vise. Grabbed a big old try plane, and removed the high end. Then a #5-1/2 Jumbo Jack plane to smooth things flat, and to the lines. Almost, because the top had a curve up right in the middle. So, I just made thing s flat from end to end. Checked as I went with a straightedge and checked at the diagonals too. Re-assembled the plane, for about the fourth or fifth time. set up a pine test track. I guess i had better sharpen the Dunlap iron? Original iron is being stored away. The dunlap one is the same size, but almost new. Still need to carve on a new tote, and redrill a hole. I have one coat of BLO on the wood parts at the moment. Still thinking of repainting the ironworks, as about 30% of the OEM paint is gone. Plane is 15" long, and uses a 2" wide iron. Chipbreaker has a stamp that says "L. Bailey's Patent DEC 24 1867" The lateral has a STANLEY and a patent number. As soon as i finish cleaning the brass wheel, I can read the stamping inside it. Lot of work, so far. I am bushed! More tomorrow, maybe?
-
Went on a walk-about ( about six blocks, total) and discovered a few "Gems" Was looking for a decent OLD door knob. I had a hand brace that needed a new knob, as the pot metal one was shot. Picked up a white porcelin knob for $3 +tax.. Next, was on the look out for a wood bodied plane. One place had LONG jointer planes, some even had an iron on board.....@ $20 each....YIKES! Next store had a Try plane size, but it had seen way better days, and at $20, not even worth the effort to clean up. Went across the street from those two stores to a third store. Found an old Jack plane, no price on it. Asked at the counter IF they would take $5??? They made a phone call, answer was YES! So, I walked back home, with a door knob in me coat pocket, and cradling a wood jack plane in the crook of me arm. Took the iron and chipbreaker apart. Thick tapered 1-1/8" wide iron. Was a might tight in the slot. A few taps on the wood body's backside, out came the cutter parts. Both parts were stamped with a logo. This is a W. Butcher iron an chipbreaker. Chipbreaker has a HUGE bolt. It also hasn't a hump like normal chipbreakers. Last 1/2" it angles down. Allows the wedge to sit better. Got the sole half way flat. All them years of owners planing at an angle wore the sole at bit...crooked. Handplaned to get the worse of it off. Gave the top of the body a few passes as well. Gave the body about 6 coats of BLO. Sanded the wedge a bit, to get a better fit. Now, this being a Jack plane, it does have a BIG mouthMight even be a little too big? I ground a better edge on the tapered iron, and gave it a bit of camber. maybe 9" radius? Installed the iron and chipbreaker back into the plane, along with the wedge. A few taps with the hammer to set things just right. and a test drive Cleaned up nicely, too. Sat the try plane beside it Not sure IF I will add a front knob to the new guy. Makes some decent curlie things, though Oh, as for that white door knob? Ground away what I needed to get rid of on a hand brace. Locktite CA to attach the new knob, for now. No, it doesn't turn, it won't need to. Plan to use a screwdriver bit and drive screws with this one. Brace was made in Japan, but the chuck is still in excellent shape I think I can get a bit moe torque with this, than the two Stanley Handyman 133A I have. Now, IF I can find a few bits....
- 4 replies
-
- 2
-
-
- antique store
- door knob
- (and 1 more)
-
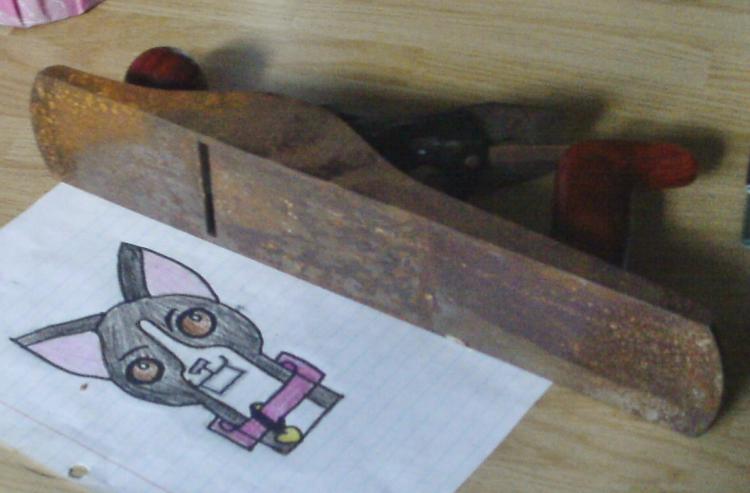
Well, one did show up in the mail today. Auction price was $0.99 Looking a bit rough around the edges. Drawing is by one of the GrandBRATS. Sole was a little rusty So, maybe a trip through rehab for this plane? About an hour later, a test drive on some cherryand a look at how this plane cleaned upthen tried some squirrelly white Oak And a look at the resultsNot too bad for a dollar jack plane? Plane is by Millers Falls, about the last Good planes they made. Number stamped on the side is: Millers Falls No. 14-01B iron had a slight camber to it, chipbreaker had to be fixed, as it curved up like a smile. Needed a #3 Phillips screwdriver to tear things down. And a couple straight bladed ones too. Might be .....OK
-
Assembled and in the clamps. Awaiting the glue to cure, then add a couple trim pieces, and a pair of hinges. Lid was a frame (Oak, mostly) and a raised panel of pine. Have to use what I have around the shop. Lid's panel was glued up, then planed flat. Needed to raise a panel, with just a handplane or three.Tried the old Jack plane, seemed a bit too large for this. Got out a smooth plane and set it a might deep I marked a stop line about 1" in. Going at a diagonal to the grain,"downhill" as it were. Get near the stop line, ease up on how deep the setting is. Back to a smoother feels. Clean up any marks with a small block plane I did both end grain ends first, then went after the long grain edges While I was at it, gave the flat areas a going over, until it shone. Next, needed a rebate around the inside edges. Happen to have just the plane for that, too rather shallow, so this didn't take too long. Got the ends done, then the long grain edges were done Makes some nice curlie things, too. Frame pieces had the old finish still on them, along with a few other things. Clamped each piece into a jig on the bench, and planed off the old finish. Of course, the other things were the witness mark to tell which tenon went where. Re-test fit and add some Elmers I have a VERY bright overhead light, helps these old eyes, but the camera doesn't like it. Anyway, set this mess aside, and drag out a mitersaw A CORDLESS one. Needed tomake some trim pieces. These go around the underside of the lid. They add as a dust seal. Trim still had that old finish, had to plane off what I could. And, find a staple.... Gave the trim pieces a place to sit, and a test fit of sorts. Hard to get a decent one with a clamp in the way So, maybe tomorrow, I can get this finished up, add some "lost" hinges, and then figure out what trays to build. Bottom flor of the Tool Chest #2 has been reserved for any and all drill items. After that.....we will see. So far, the only store bought items are a pair of hinges, and a bottle of Elmer's. Not saying I'm CHEAP, just frugal... Planer? I'm the 'planer', and these are what I use...
-
Got the second front/back out of the clamps. Got a panel glued up for the ends. Just some pine 1 x10, and two on by threes. Figured I could get it back out of the clamps this afternoon-ish. Well the ends needed to be trimmed square, and then the panel needed to be cross cut into two identical panels. I happen to have an old, wooden Speed Square. And a circular saw. Clamped the panel to the planer stop jig on the bench top The fence is where the sole of the saw runs against, so I had to allow the distance between the edge of the blade, and the edge of the saw's base. Couple clamps, and shove the saw through the cut Nice and clean, and square. Flipped the panel around and clamped it up again Ugly thing, ain't it. Sawed off the nasty part. and put the jig up for a bit Not a whole lot to this jig, It was made as a fence for jobsite table saws. Worked real good, too. Anyway, jack plane to clean and flatten the faces of the panels needed to be able to see the center line marks. Marked out the center of the panel for a crosscut. Clamped it back into the jig, and make a cut Ok, now have the panels ready to be fitted to the frames, and handplaned into raised panels. Frames? Oh yeah, needed to make a few tenons, and then some mortises, I had one mortise all chopped out, so a tenon was made to match it Ugly groove, though. It will get filled with a raised panel, though, Got this end done, and the other end done. The "jig" for this was a block screwed to the planer stop, and a stop to help with the chisel work. One clamp to hold the victim in place. Coping saw to cut the lines, wide chisel to pop the waste off, and a #78 to clean it up. Scrollsaw to make a miter cut on the groove part, and a test fit Not too bad? Got things set up to do at least the rest of this end piece.....Uncle Charlie ( HORSE) paid a visit to my feet! Toes, and arches....barely made it back upstairs and poured a glass of milk. Seems to get Uncle Charlie to ...GO AWAY. Well, that shot the shop time for today, have to work the next three nights at my Day Job....Stay tuned...
-
have a pile of auger bits laying around, getting beat up. Got to do something about that. Had a 2x4 of pine. Planed until squared up. laid out a center line between the two knot infested areas. Chucked up the largest bit in to a 10" brace. Turned out to be a might small, but i drilled a hole anyway. Kept changing out for the next size smaller, until a tiny #4 was used. A #4 is 4/16" in diameter. largest was a 20. There was even an expansion bit, not a very good one, but it worked. Yeah, yeah, a bit of a blowout on the big one. Most are as deep as I could get them. Might chase the holes with the Forstner bits, to make pulling then out easier. You see,they sit like this lovely sight, ain't it? anyway, I'm building a tray-like contraption to hold this strange looking thingy A bit of Barn Siding stuff, the 2x4 rack, and a plywood filler. Plan right now is to make the rack pivot like any other Drill Index. Then lay back down into the tray. Might get two pivot pins, might be two hinges. Won't be some fancy-schmanzy dovetailed tray, either. Have a whole series of trays planned. Lots of files and rasps to find a home for, lots of screwdrivers, pliers, wrenches, and other doo-dads. Might even make something to house these clowns, too All Jack planes. 5 #5s in the middle, a 5-1/2 on the left end, a 5-1/4 SW on the right end. Might have enough of these? Then, there are a few drills Two of the three braces, and an eggbeater. Getting a might crowded down here?
-
A little work in the shop. Work nights, so this is MY day time. Almost lunch time! Anyway, have been trying to get a bottom panel made for a full blind dovetailed box. Ran some grooves with a plough plane, that Might even be older than me Fancy set-up, I guess. Just for a few 1/4' by 1/4" grooves. been using a rebate plane along the edges of a piece of pine scrap. I was hoping to make a bottom panel out of it. The wards 78 wasn't too bad doing that, but the panel was way out of square. Ran over, and picked up a couple more items for the bench top. A homemade shooting board, and a Sargent #414c Jack plane. Laid one edge against that Oak stop, and shot the end grain. Rotate towards the freshly shot edge, and shoot another, repeat until all four edges were done. This kind of threw the rebates off a bit, so I had to go back over all of them. I also ran a smoother over the face grain of the panel Just hate it when a board is too smooth, and shiny.The glare is worse than the top of my head. Got things about ready for a test fit Hmmm, GRRRR! Back to the shooter jig. That big, ole knot was causing a problem. Narrowed the board a bit. Try this a second time well, at least there is SOME progress going on. At this rate, I MIGHT, just might be fitting a lid to this box in.....June? Might have a shot of the rebates, somewhere. Man, the glare off that.......board, yeah, off the board. Remind me to start wearing a hat outside....