Search the Community
Showing results for tags 'prep'.
Found 4 results
-
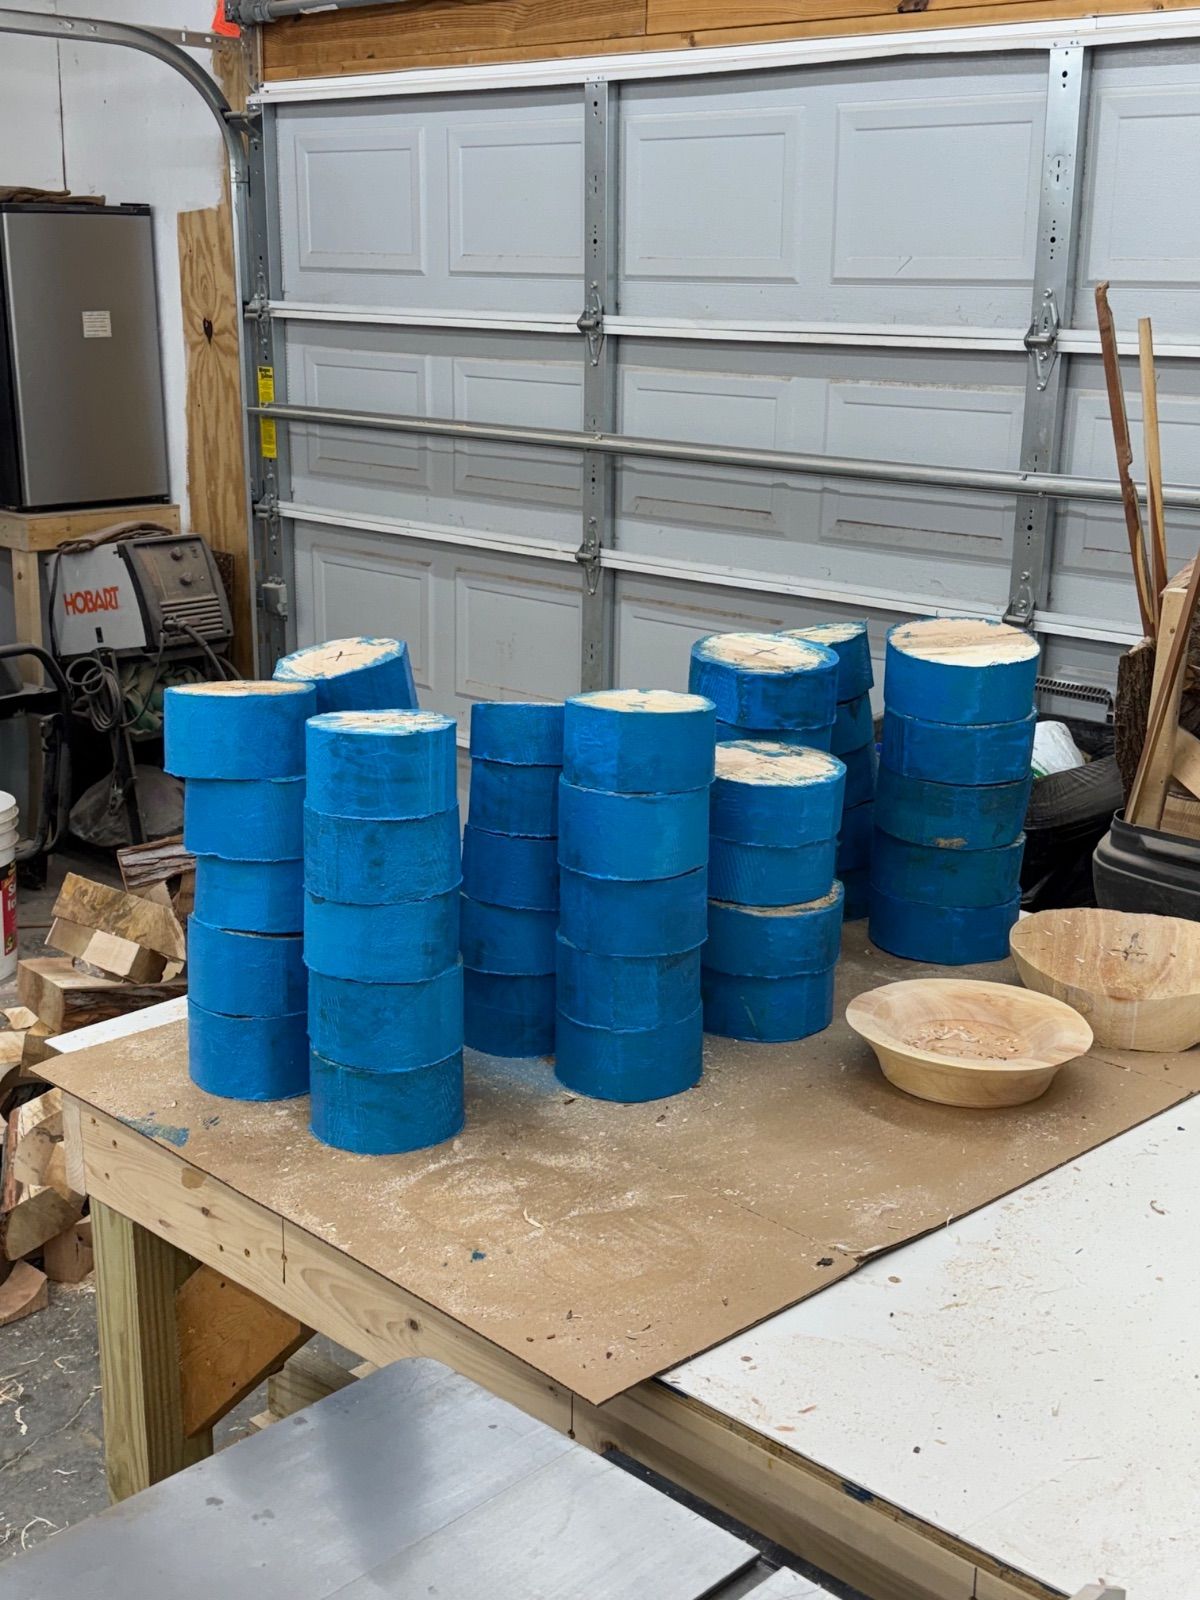
A friend of mine called me and said a co-worker had a maple tree cut down and gave me the address. I went to check it out and everything was cut 8” to 10” thick. Too small for what I like to turn. My mentor gave me the idea to cut a bunch of small blanks for my Woodcraft classes. I thought that was a great idea. I brought home 4 pieces around 2’ in diameter. I got 25 6” blanks and 17 7” blanks all around 3” thick.

- 12 replies
-
- 8
-

-

-
- maple
- bowl blanks
- (and 1 more)
-
Son in law presents me with a walnut stump. It is freshly cut and dug out. About 20 inches across at ground level. There is about thirty inches from above the ground. I know how to handle that part. There is about 30 inches of the root ball from below the ground, possibly 20 inches across for a couple of feet before roots start branching out. I already know how to dull my chain saw cutting wood with dirt in it or rocks surrounded by root growth. So, before I start, any wisdom about the value of working the portion of the stump that was below ground? I may have to make a new friend of the fellow who has a contract to take down trees and pull stumps for son in law's city.
- 8 replies
-
- 2
-
-
- stump
- bowl blank
- (and 2 more)
-
Just wanted to throw another topic out there for us to discuss. Blade Preparation. Do you do anything to your blades when you put a new one in your saw? Most of the time, I DO prep the blade. Our blades are fresh from the factory and usually contain all kinds of stuff on them - even though the manufacturers do a great job of getting 99% of it off. Probablyh even chromium blades have stuff on them. The blades are secured in our machines by friction - meaning we tighten the screws down onto the blades tightly. I see quite a few threads about blades coming loose at all the wrong times (Murphy's Law). That being said, I have gotten into a routine of prepping my blade before inserting a new one. Let me explain: 1. Cleaning top and bottom (especially bottom). I have my Dremel tool hanging on a nail right close to my saw. Use it mainly to get rid of any feathers I might find (saves me from getting up to get it ). I use it to also clean both sides of my blades (as shown in the pictures below. By doing this, I get rid of any residual oils and crud that may be on the blade itself and there by not transferring any to the screw heads. Keeps the blades good and secure when cutting ( don't come loose any more). The blade on the left is fresh out of the factory bag and the one on the right is shined up. Takes about 5 seconds to do both sides. 2. The blades have a square end on them. When putting a #3 blade into a #60 pilot hole don't ya see. (Hense, putting a square peg into a round hole.) Of course, I have come up with a quick way to take care of this as well. Whilst having my trusty Dermel in my hand, I simply "shave" off a little steel on one side. Makes it a whole lot easier to insert. See pix below. 3. And finally - our blades also have a square back on them. Sometimes these are very sharp when cutting tight corners and will, therefore, try to cut into the wood. Quite often, this dull cutting edge might burn the wood. How do I prevent this, you ask? By "honing" the back edge when first putting the blade in and tightening it down. Takes only a minute of your time but well worth it in my opinion. I keep a little "diamond" honing pad next to the machine, turn the saw on, lay the pad next to the blade, a little on each back edge and it's done. Hope this helps some folks out that may be experiencing these problems. OF COURSE, comments are always enjoyed on this forum. We want to know what Y'ALL think, too. Ciao - back to make some talcum power sawdust.
- 6 replies
-
- 4
-
-
- blade
- scroll saw
- (and 1 more)
-

From the album: Pine Is Fine Custom Cabinets and Furniture
This prep table is handcrafted from solid red oak. The legs are constructed using 4 pieces of 1x3, planed down to measure 3x3. The top is a solid red oak cutting board, sealed with salad bowl finish. And for additional storage I added a bottom shelf.