
Search the Community
Showing results for tags 'dovetails'.
-
And a small cut-off of 1/4" Plywood... 1/2" thick Maple scraps...2 ends, 2 sides...Needed to set out a few tools.. Lay out some dovetail pins, and saw the lines... Chop out the waste, use these Pins to lay out the Tails, and saw the waste away from the tails...then a dry fit was attempted... 1 corner done, 3 to go.... Maple scraps started out like this... After resawing off the nasty side of 2 boards (still have one to do,,) Ripped down til they match for width... Planed off the saw marks... To come up with 4 sides of a box... Plywood was a left over from the last 2 Projects...might have a second one, lurking around in the shop...1 for a box bottom, one for a lid's panel? Stay tuned..

-
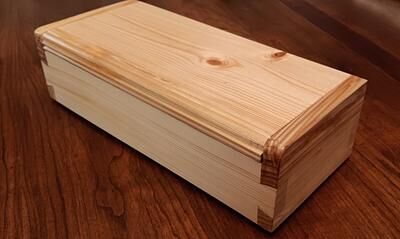
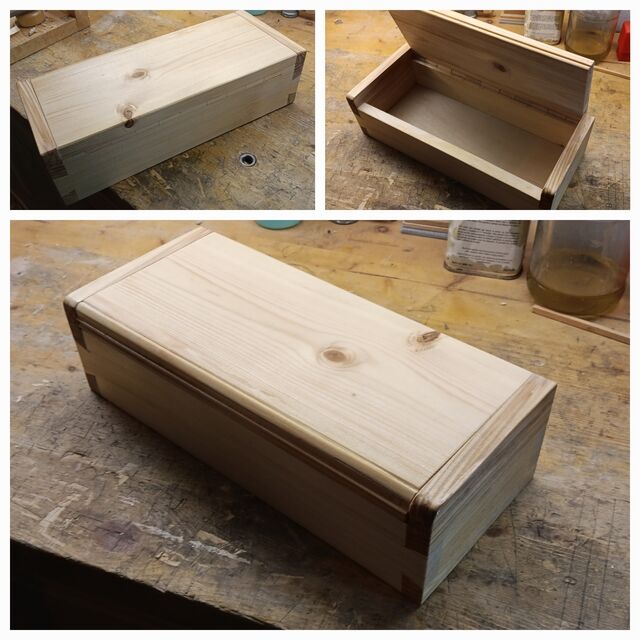
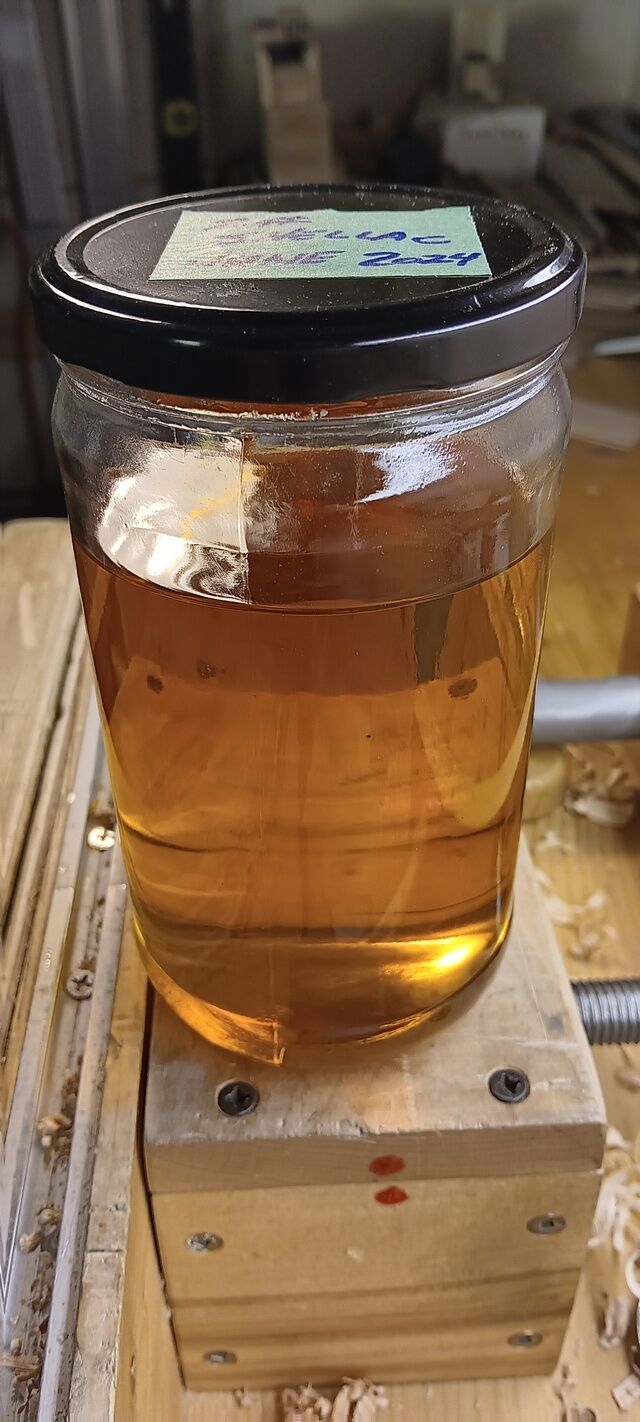
It amazes me how shellac can transform a box into a beautiful gem. A simple pine box. All done with hand tools. I used a LV backsaw, chisels, moulding planes that I have made, and a smoothing plane. The hinge is a flush invisible hinge. Corners are dovetails. Before My beautiful elixir (shellac) I buy shellac flakes from Lee Valley and mix up my own. Usually a 2lb cut. After (the complete finished shellacked beauty!!) Thanks for looking!! Cheers! MrRick
-
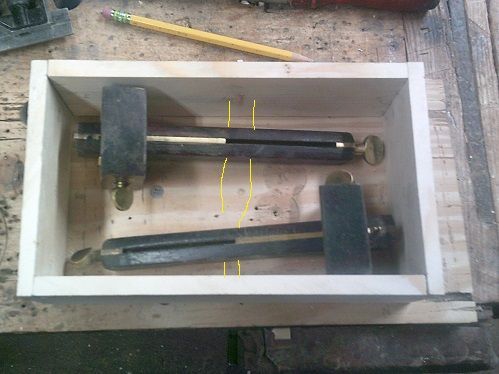
Remember these? That have since been resawn down a bit.. Faces flattened.. Marking gauge, the "New & Improved" one..to lay out for dovetails... Then a little bit of layout work.. Yep, I do "Pins First" then a wee bit of a saw... Chisels and such to chop out the waste, mark the tails by using these pins to trace around...saw and chop.. First dry fit... So, in 90 minutes of shop time today...rinse and repeat, until.. the other 3 corners are done... So, what will be going into this case? these 2 Stanley No. 77 Mortise gauges....yellow lines? I need to make a holder/rest for them long arms to sit on/in...will add 2 notches. Need to also cut a bottom panel..and work on the lid a bit After that? I might just see how fancy I can get? Stay tuned...
- 12 replies
-
- 9
-

-
- box making
- dovetails
- (and 1 more)
-
Have some "left over" Pine....not all that much... Figured I could cobble something up? They have a few bad spots to get rid of.. And.. Maybe cut the offending section out with the Mitersaw? Note the reflection on the saw plate? Shows I am cutting almost a perfect 90 degrees...depth stop were a hair too high, though.. Kind of rough right at the end...Didn't take all that long to do.. About 10 full strokes usually was enough...Results? That pine panel will be the bottom of the box...4 sides? Cut to match that panel...beside these parts.. Should be enough for a panel for the lid, and a collar? Things look a bit too thick...at 3/4"? We have ways.. Set up the tablesaw for resaw work... Fence was reset, as it WAS set up to resaw 1/2" thick....like these.. That's a bit better? Along with the lid parts.. 3 pc panel...almost ready to be glued up....there was ONE kickback, today.. Yep... 2 ends, and will cut the rest out of that long strip...Glue up? Already? Vise works as a 3rd hand...kind of skimpy on clamps, today...will cut to final size and for square, tomorrow... Busy day? Tablesaw thought so... Not too much at the Mitre saw...(Cordless ) Corners for the box will be through Dovetails...Bottom panel will sit in a groove, same as the lid's panel... Stay tuned..
- 20 replies
-
- 7
-
-
- dovetails
- box making
- (and 1 more)
-
When last seen...this pile was needing some work ( Rehabs got in the way) So...today's Tasks was to dovetail the back corners...and see about a base for it to sit on.... Lay out a few pins...saw a few pins.. Chop out the waste...outside face first... Chop down about halfway...flip over.. The chopping was done on a piece of 3/4" plywood.....that needed flattened once it was tied down to the bench.. Put to work fresh out of rehab.... Used the completed pins to lay out the matching tails....bandsaw the waste out between the lines..ON the WASTE side of the lines.....the more of each line I leave, the tighter the joint.. First dry fit.. Not too hateful? Repeat the above for the other corner... Getting better? This is to be the back of the case...the front will have a couple shallow drawers, and the front of a tray under the lid. Will fit up the drawers next time.....while I am getting the panel for the base square up and leveled...right now? It is waiting on glue to dry....6 strips, resawn to ~5/8" thick, edges ripped square and parallel... Double cauls to try to keep things close to flat.....toes were starting to cramp up, Mountain Dew Zero was about empty....time to stop for the day... Stay tuned....it just night get "Very Interesting"...
-
Well, the Boss wants a shelf under her end table....to replace that UGLY, plastic tub with a lid thingy....and wants the shelf a bit lower, too.. Hauled 3 planks to the shop.. Yeah...I have seen better ones... Going to take some selective cutting.. Some will be heading for the burn barrel...lay out a bunch of cut lines... As I need 3 @ 1 x 6 x 26", and 6@ 1 x 6 x 12" Goal being to have a 1 x 16 x 26" panel for the shelf, and two panels @ 1 x 16 x 12" for the legs....was a bit awkward to use the tablesaw, so.. We have ways...Disston No. 112, 7ppi crosscut. And a VERY COMFY, well worn handle...I cut the 26" long pieces first.. These are rough sawn...will need a bit of work to get flat and smooth...right now, this is a bit too wide.. Then, whatever was left over, was cut up for the leg blanks.. For right now, I'll set these aside, and work on the main panel... Cleared for action. Need a Jointer.. Junior Jack to help out... One of the 3 blanks was narrower than the other 2, made that the center of the panel. I Jointed both edges, and then flattened both faces...As for the other 2...also got face planed..but..only one edge was jointed...as the other edgewas getting a little trim....about 3/4" ..then it was jointed... Flipped the board around a few times..looking for the best match of the grain... Work in Progress...2 out of 3...left one? May get moved a bit more....as for how close to 16" width? Close enough for the girls I run around with... Sunday Morning...Clamps & Cauls...even brought a NEW glue bottle to the shop! Middle... Other end.. And a view of the top.. So..how well does the grain line up? letting this sit a day or 2...right now, it needs to be off of my tablesaw...as I will be needing it, again... Note on the clamps...2 go under, out near the ends..the 3 goes over, and is about centered....seems to work best for the large panels I make... Stay tuned..
-
Tools in use? Needed this to set how far above the floor the stretchers will be.. This to set the angles...Stanley SW 6" Bevel gauge Before the rest of the tools can get to work.. Just some basic tools.. When working on something like this...
-
I love perusing second hand furniture, I love the quality and the patina it has on select pieces I'll see, and I came across this Ethan Allen Made in the USA Solid Maple China Cabinet. As far as production furniture goes, this is a really nice example I believe. I love the color, the style, it has clean lines, I love the imitated old glass, and if you look close enough there is even some curl in places. The price, 850.00 on Craigslist, this is the furniture that I wish younger folks would look out for, or even older folks who are more prone to going to the more conventional furniture sales stores. Because for this price, the quality you'll find at the conventional stores is not even a quarter of the quality this piece is. I don't want to start a topic bashing the IKEA's of the world, or the Levitz and Ashley's, because they have a place, I remember when I was younger, and my wife and I were just starting out on a single man income and barely above min wage, the IKEA's helped us out a lot, not that we had an IKEA at that time, but you know what I mean. Back to my rambling, this is just a wonderful example of what folks could find if they get a little creative with their home decor, and try not to perfectly match everything in the house, I love a home where nothing really matches, eclecticism is wonderful in a home, where nothing matches, but they all appear to be in harmony. This Ethan Allen China set, would go lovely with a Danish Modern dining set, or a Mission style dining set, or?
- 13 replies
-
- 5
-
-

-
- curly maple
- ethan allen
- (and 5 more)
-
Nice how-to from Rob Cosman for cutting dovetails. Lots of tips https://youtu.be/5q8LRJWSSds
-
-

Desktop Project Post, lid closed.JPG
steven newman posted a gallery image in Small Crafts, Boxes, Picture Frames, and Lighting

From the album: Desktop Organizer, in Red Oak
-
Desktop Project Post, lid opened.JPG
steven newman posted a gallery image in Small Crafts, Boxes, Picture Frames, and Lighting

From the album: Desktop Organizer, in Red Oak
-
Desktop Project Post, end details.JPG
steven newman posted a gallery image in Small Crafts, Boxes, Picture Frames, and Lighting

From the album: Desktop Organizer, in Red Oak
-
Desktop Project Post, drawer is open.JPG
steven newman posted a gallery image in Small Crafts, Boxes, Picture Frames, and Lighting

From the album: Desktop Organizer, in Red Oak
-
Desktop Project Post, front view.JPG
steven newman posted a gallery image in Small Crafts, Boxes, Picture Frames, and Lighting

From the album: Desktop Organizer, in Red Oak
-

From the album: Just a Tool Chest
- 1 comment
-
- 1
-
-
- dovetails
- ash lumber
- (and 2 more)
-

From the album: Just a Tool Chest
-
- 1
-
-
- tool chest
- ash lumber
- (and 1 more)
-

From the album: Just a Tool Chest
-

From the album: Just a Tool Chest
-
Project Post, Tool Chest, opened lid.JPG
steven newman posted a gallery image in General Woodworking

From the album: Just a Tool Chest
-
Project Post, Tool Chest, black chain.JPG
steven newman posted a gallery image in General Woodworking

From the album: Just a Tool Chest
-
Project Post, Tool Chest, front view.JPG
steven newman posted a gallery image in General Woodworking

From the album: Just a Tool Chest
-
Project Post, Tool Chest. all locked up.JPG
steven newman posted a gallery image in General Woodworking

From the album: Just a Tool Chest
-
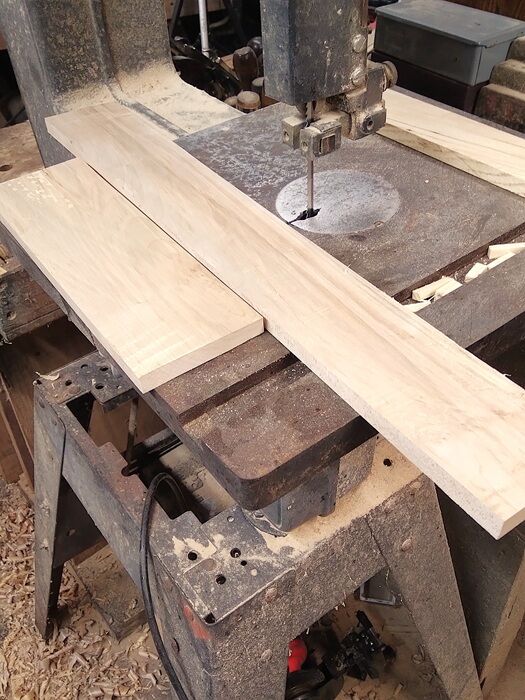
So..sitting around, half awake, watching the Woodwright's Shop re-runs....came upon one was Chris Schwarz showing off how the old sty;e "Campaign Furniture" was made....there was a corner joint he was demonstrating how to make....Didn't look like much on the outside.. Just a half lap joint? Until he showed the inside of the corner... Mine is in Pine, had a bit of some chip out....out the joint up just a bit... Dovetails?...could be... Yep, a bit of chip out going on there...May try the other 3 corners, and do a bit of Pract-izing... The only power tool involved, was the bandsaw, had a scrap of Pine 1 x 6, line of nail holes along one edge, big old knot on the other edge...ripped those off, then had to joint the sawn edge straight, had to make some shavings. To make all the edges the same... Jack plane is the one I just finished re-handling....seems to work nicely enough... Crosscuts? Yep, it was busy, today....then some shoulder cuts were needed... Saw down to the line, and stop....take the oard to the bench.. Wide chisel to pop the waste off, (Schwarz used a rebate plane, meh) Clean up with the chisel... Rebates are done...lay outs are next.. Marked as to which is the waste side of the lines...turn this around, so I can see better, and do a bit of sawing.. Now, you see that Red Devil putty knife? That gets hammered down into the kerf. Since the saw can't quite reach into the back corners... Chopping block....and chop out the waste....the other "half" of this joint also needs sawn, and chopped, half blind style....( first time through, I made the mistake of cutting the tails as a through dovetail joint... Cut the mistake off ( and the other end piece to match)...try again... Back to the saw, chop and fit...had to trace around the "pins" to layout the tails...Then check the result....had to use the mallet to assemble things... Have 3 more corners to work over...maybe I'll get this figured out by then Stay tuned... .
- 27 replies
-
- 11
-
-
- dovetails
- c. schwarz
- (and 1 more)
-
Lew suggested: This would probably make a great thread. Tips, jigs, processes, etc. on hand cut dovetails. Well, here it is. Let's see some postings. Here are some of my trials and errors. Let's start the meeting. Hi, I'm Keith and I have a hand cut dovetail problem. (all) "Hi, Keith." I have read about the "blue masking tape technique." I tried that last week once and (stupid me) I pulled off the wrong part prior to cutting the pins. I few years ago, I practiced a joint-a-day prior to making some boxes for coasters for Christmas presents. They turned out well, but I got out of practice. I recently did some through dovetails on the tool totes I made and they came out "OK". I also read a "handy hint" about using a mortising machine to chop out the last bit of a half-blind pin, the chiseling the rest. Hmm, not convinced that's not just a gimmick. My first lesson in hand-cut dovetails was at a Tage Frid seminar. If you know much about him, you know he used a large bow saw. And if there were gaps, he had two fixes: 1) saw in a kerf at the gap and put in a shim or 2)take a hammer and pound the end grain to push it into the gap. Neither appealed much to me. Second lesson was a Frank Klausz video. Frank prides himself on speed. That's great, but led me down the wrong path for a while. Skill first, then speed, not vice-versa. "You don't need to mark, just cut. You know which side is outside and which side is inside, just cut the angle. Etc." Popular Woodworking once had an article on making a couple of cutting guides, sort of "training wheels for the dovetailer." I made them but only used once or twice. Next lesson was Paul Sellers who introduced "knife wall" that helped me quite a bit. The one thing I've never tried is (I think Chris Schwarz's) method of putting a rabbet on the back edge of the tail piece. I guess that makes a neater joint (no visible gaps) on the inside and helps align up for scribing the pin cut lines. Somewhere in there I got a P-C dovetail jig. It makes nice uniform dovetails, but I learned you need to plan your joint height (e.g., drawer height) to the spacing on the jig. And it only makes half-blind. Then I got another jig that was supposed to be a great, adaptable jig. I went to a day long class and it still took me over two days of studying and making notes and diagrams that are not in the 50 page manual before I could do my first set. Its main problem is its complexity and you have to make constant changes and adjustments from one cut to the next. It's easy to screw things up. My long-standing statement is, "Every time you have to change something, it gives you a chance to make an error." With it, even though I think I've done everything right and double checked, I do get some gaps once in a while. So now it mostly sits on a shelf of regretted purchases. The last time I used it, I managed to fill in the problem areas with my burn-in skills. So, I occasionally persist but fall in the same camp as Fred, for now. Recently, I decided to try the "Joint-a-day" for a month and see what happens. But the real question, "Pins first or tails first?" I find it easier to mark the pins from the tails than vice-versa and it's easier to make a 90 degree cut to fit than an angled one, so if I'm off a bit on the tail angle, I can just adapt the pin.
- 54 replies
-
- 4
-

-
-
- blue masking tape
- hand cut
- (and 1 more)


.thumb.jpg.573d1497d0675219908c85aabefd797a.jpg)


