
Search the Community
Showing results for tags 'claro walnut'.
Found 9 results
-
Ya know, I've never been one to criticize a fellow woodworker his/her worth, I've always said more power to em if they can get it! Go for it!

-
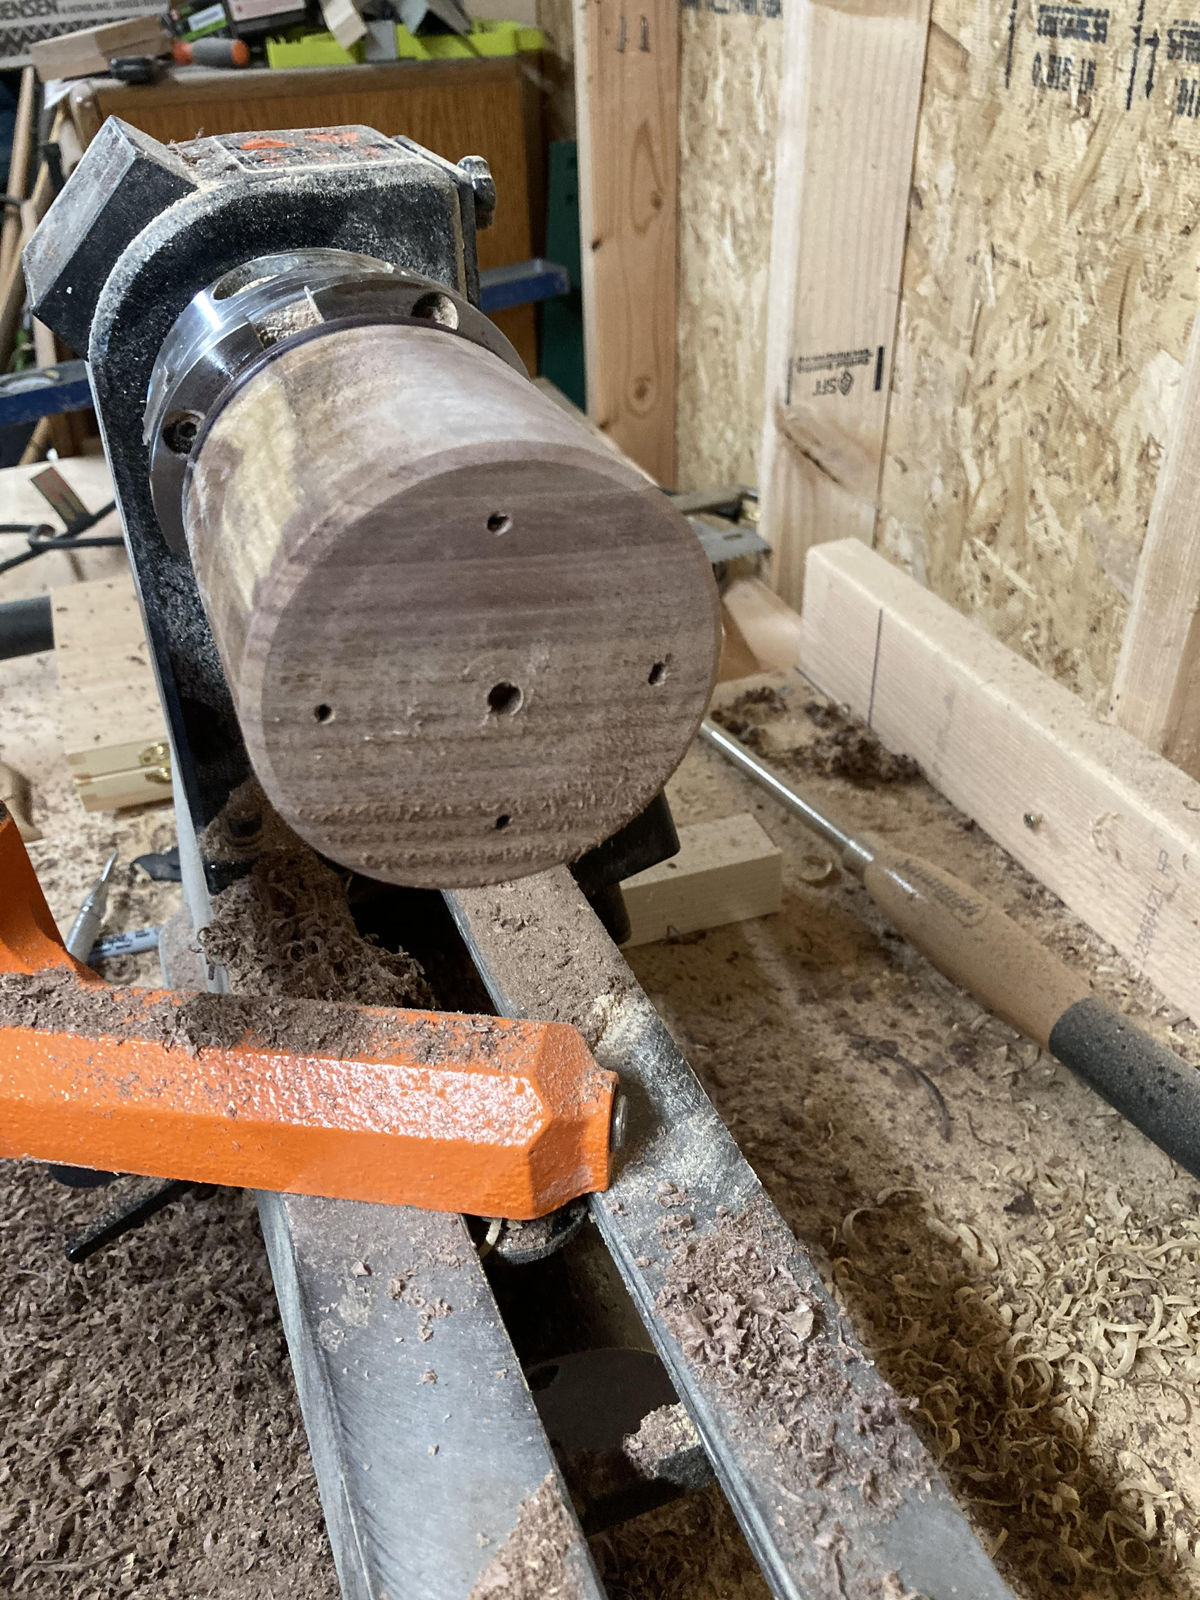
Seeing that I had took all the tips off of my EWT tools not including the rougher. I started on a new project while I'm waiting for a couple tools and parts to get here to finish off the last project. I decided to go with the Walnut Claro again this round. I had a minor problem in the beginning that I didn't realize that the blank was off angled cut and was well some what lop sided to start with. Even still burned through that issue at the start and had a go with it. I had to take off quite a bit of material to get more of a cup shape with this one. For the bottom I didn't go with the mortise route since I seem to have been cutting those too deep. I guess that needs more practice on my part. I decided to go with a tennon so I could just hack it off with my new hand tooled crosscut saw. Also with some of the pointers I received in the last project I am definitely going to be trying the sanding before hollowing portion on this one as well. I'm not quite sure but I'm semi starting to like the offset pattern of the grain on this one.
- 19 replies
-
- 3
-

-
- ewt
- easy wood tool
- (and 3 more)
-
I had a nice day last weekend, I was in my shop for most of it, just tooling around and getting reacquainted with my clean shop! So I started back in on my claro walnut rocker. I had some issues with the legs to the seat joint so I spent some time truing up the joint's (different post later tonight) and after wards I still had some considerable shaping to do with my right angle grinder. So I put a 60 grit disk on the grinder and went to town on the rear portion of the seat, I had some dishing out to do that I started last year but got side tracked away from it. It took me about 15 minutes to get it to where it was evened out, and ground out past the depth gauge holes I drilled in at the beginning of the project. Grinding these seats out is fun, you get to see a shape take shape quickly, but you really have to watch it, don't get over zealous, there is a point of no return that will trash this seat in a millisecond. There is a pucker factor when you get to a certain point. But the end result is rewarding. I sanded the seat out to 80 grit with my new USA ROS Sanding disks and the seat is looking good, more pics later. The seat is really rough right now, we are just starting to create the chiseled lines around the front edge and sides that we'll hold too throughout the project, once established you cannot hit them with anything, they need to stay sharp and crisp. You can see how lines need to be held once established in this image of the last walnut rocker I built. Those lines are established very early on, and sometimes it's easy to sand through them if you are not alert. Don't ask me how I know!
-
Interesting article from Woodworker's Journal eZine today. No doubt @John Morris is familiar with Gene Kelly's works. Some exquisite turnings too for you wood spinners... http://www.woodworkersjournal.com/gene-kelly-sculptured-furniture-segmented-turnings-always-learning/
- 6 replies
-
- 3
-
-
- segmented turnings
- sculpted furniture
- (and 3 more)
-
Today I started on the final shaping on the headrest for the rocker. Photo below is the roughed out coopered headrest. I had to plane down the glue squeeze out because the next step is to joint one end of the headrest and I need a relatively unobstructed surface to ride against the joiner fence. There, all clean now. Now that one side is cleaned up pretty good I made one end of the headrest nice and flat for a good reference surface for the band-saw operation. One end is nice and clean now. I traced a nice arc on the rough end with my pattern I use for all the rocker headrests. Remember I need the clean end to ride on the band saw table. I hung my 3/4" 3 TPI re-saw blade on my 14" band-saw with riser-block. And I cut on the pattern line. My band saw is well tuned, it has to be in order to make cuts like this. I am however looking for a set of new guides, these are a tad worn. But they seem to be holding up fair for now. I can saw veneers with my 14" Grizzly Bandsaw, it's a good saw. With my sanding block sawed and shaped to the same radius as my headrest, I need to sand the lumps out by hand and also level the surface, this is a long process, it typically takes about a half hour or more to get this arc nice and smooth with zero imperfections and lumps. I use 60 grit for this process. I can get a ton of leverage when I clamp it up to my bench and I am able to exert body weight down onto the surface. Thanks for following along!
-
Last night I managed to get one of the rockers glued up and in the form. I have to work fast for this process, so all my clamps need to be near by in reach, and I had to spread my glue on 16 surfaces, each side of each lam except for the top and bottom of the rocker. I used Titebond III which typically has a longer open time than traditional white glue. So it gave me about 10 minutes to work with, but I may have only taken 5 minutes, but it's a long 5 minutes! After getting the lams glued up, and set the stack on my rocker form. Then the clamps were applied I'll be able to remove this rocker from the form this morning, and I can then prep the next stack of lams and get them into the form as well. This next set of lams (below image) will go into the form this morning. I also set my alternative rocker "top form" in the picture too, I departed from the original design of the rocker ("top form" in image above) and created my own design "top form" to extend the rear of the rockers out, and arcing downwards, I love that look. My original intention was to use my modified top form for this chair but I could not, because after my rocker lams had set for so long, the ends split, and I did not have enough material to accommodate the longer rockers, so I had to cut them down, and use the "per-design" top form, much shorter, but still a nice look. There is a lot of room in the making of these chairs to inflict your own design pain over time, eventually I'll have a chair that reflects more of my own thoughts with just a trace of the original design, one step at a time.
-
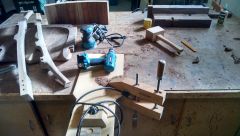 I love a bench at the end of the day, it has so much character, here is my bench after working on a Claro Walnut Rocker.
- 2 comments
-
- 2
-
-
- rocker
- claro walnut
- (and 1 more)
-
Working on the rear legs of this rocker. I am planing the faces true and flat for the seamless leg to arm joints. This face must be dead on flat and smooth in order for the arm to mate up properly. The imperfections must be planned away. Got it. Arm blanks in the back. It doesn't look like much yet. But it will be!
-
.thumb.jpg.573d1497d0675219908c85aabefd797a.jpg)
Dug Out an Old Friend (Claro Walnut Sculpted Rocker)
John Morris posted a topic in General Woodworking
Well again I made it out to my shop today, it seems to be a rare occurrence these days, absolutely criminal if you ask me! But I am trying my hardest to just get out there, wind down, and pick back up my old projects and get some shop time in. I will be out there more and more as the new year unfolds and a couple big projects start up for some customers, I am happy to be able to get things fired back up, and some additional income! I dug out my claro walnut rocker from the corner and I am going to get back on it. All the parts are roughed out, the arm billets are not shown in this image, I just forgot to put them in there is all. I snapped this shot an hour ago. The joints still fit nice and snug, and they look good in place. The first shot is obviously the chair seat, roughed out, the joints are cut in and the holes are bored for the back slats. The next image is the chair seat with the rear rocker legs set in place, they rest in their home nicely. The bent lam back braces are to the left below the headrest, the two front legs are in the back ground to the right of the head rest and rocker lams are to the right wrapped in white tape, they still need to be glued up in my lam press formed. Really it's all cut out, I just need to shape and fit from here, still about 30 to 40 hours left in this chair but it's ready to be tended to once again. I am going to finish it, and auction it off to benefit our community here. I'll keep a follow along going on this project.
- 5 replies
-
- 1
-
-
- claro walnut
- sculpted
- (and 1 more)


.jpg.bc407fe219b4216dcbad44b40a8f97b1.jpg)
.jpg.ac6defb05ad4021b2ec1ad089a72e99b.jpg)
.jpg.136986a22b2a3a4d0e805db3e4697489.jpg)
.jpg.ca1643a4b6fe8f8c96ee7a6efaa0a122.jpg)
.jpg.e5f14927b08547f0bc17a086c4a8570f.jpg)
.jpg.32ed375a94781b1ec3856e4b05060a5c.jpg)
.jpg.40a809793bf7f0d0d5bc920bb5a91ad6.jpg)
.jpg.df2c64efc353357bd7c1ce9c4346de05.jpg)
.jpg.68f4b7449f879b93f607bfce077fb829.jpg)
.jpg.b6dd1b574efe4394b40da9584d39ae1f.jpg)
.jpg.73f3b3f2576b5305bf3a1373642ac23f.jpg)


