
Search the Community
Showing results for tags 'block'.
Found 6 results
-
for many years i've had several (3) 1-2-3 blocks in my shop. very handy for checking the zero of the fence, the zero of the miter gauges (with stops for repeated lengths, and also for use as a +1" stop block when cross cutting against the fence. you can get these on eBay for about $18-20 for a pair. i see recently that woodpeckers (think red) has their own version of this common item, calling it a plus 1" block, it's red of course, and they want $30 for one. i think i'll stick with 1-2-3 blocks from eBay. i also have some fractional blocks, 1/8", 1/4", 3/8", and 1/2" that are very useful for setting the fence with a stacked dado set, and also setting the blade height. don't recall where i got them.
- 8 replies
-
- 6
-

-
- setup block
- block
- (and 5 more)
-
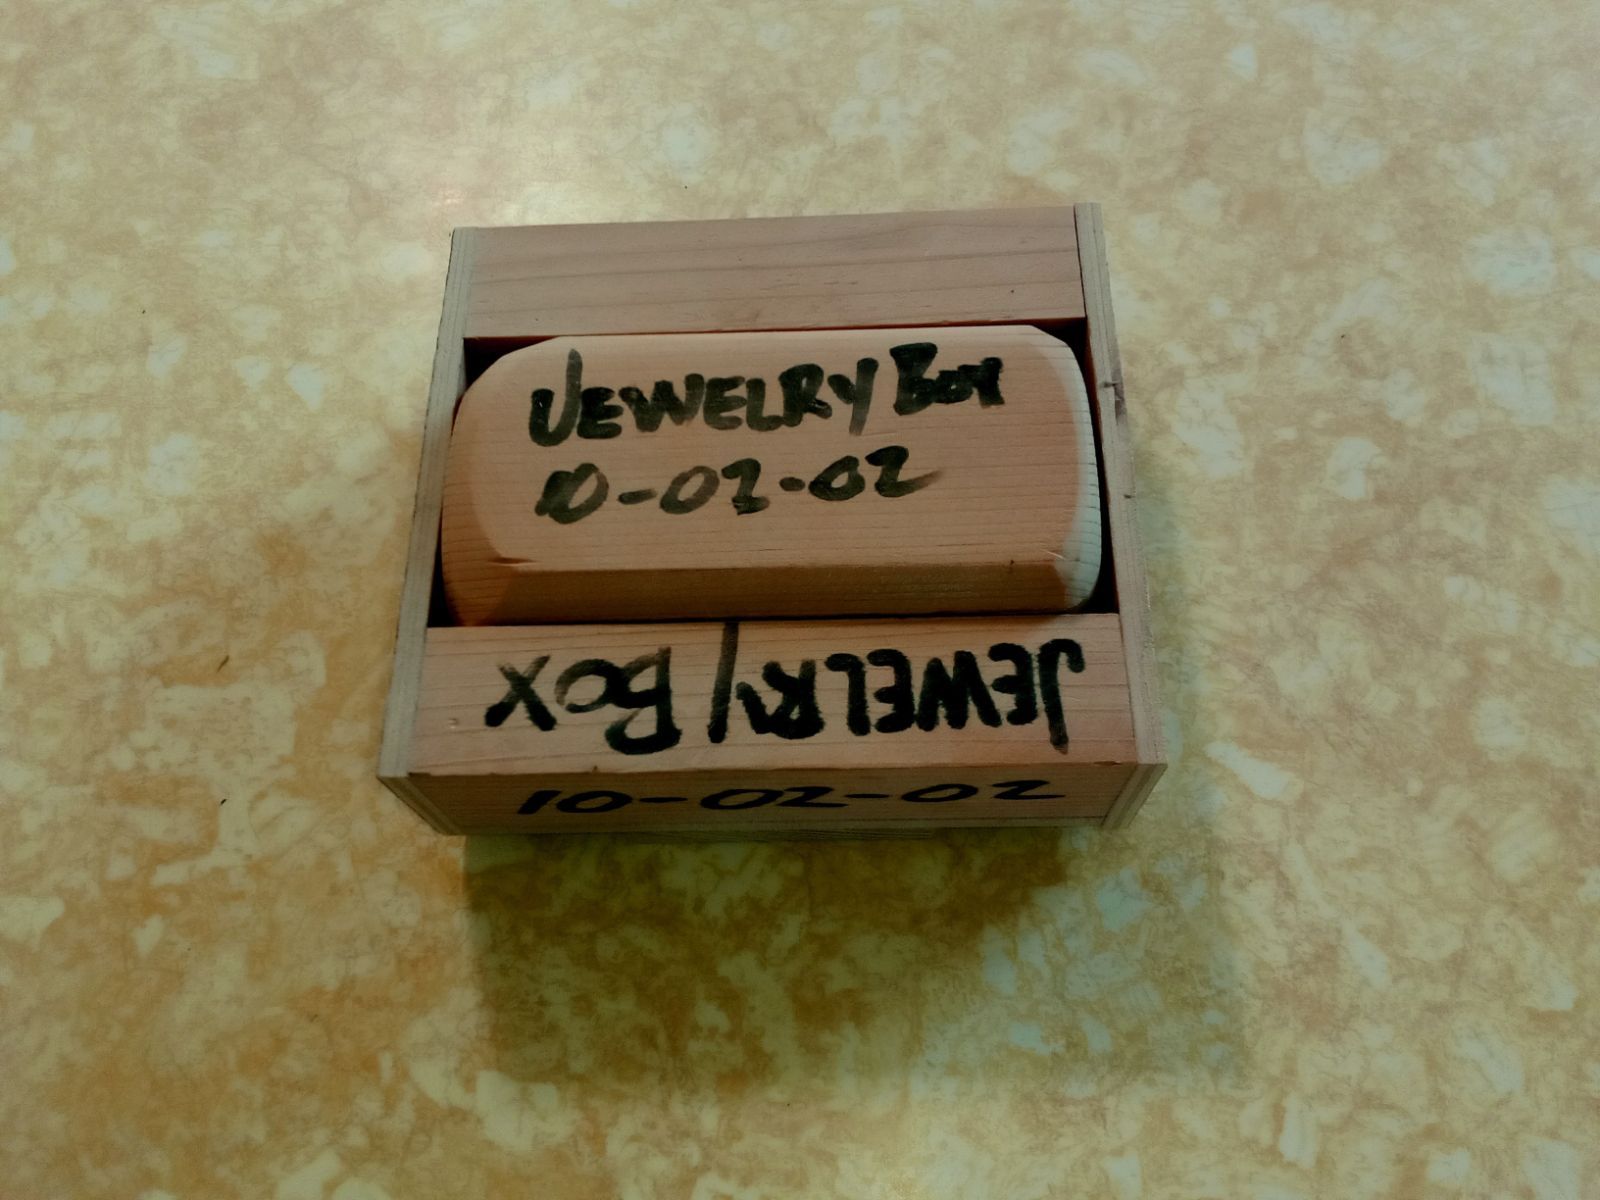
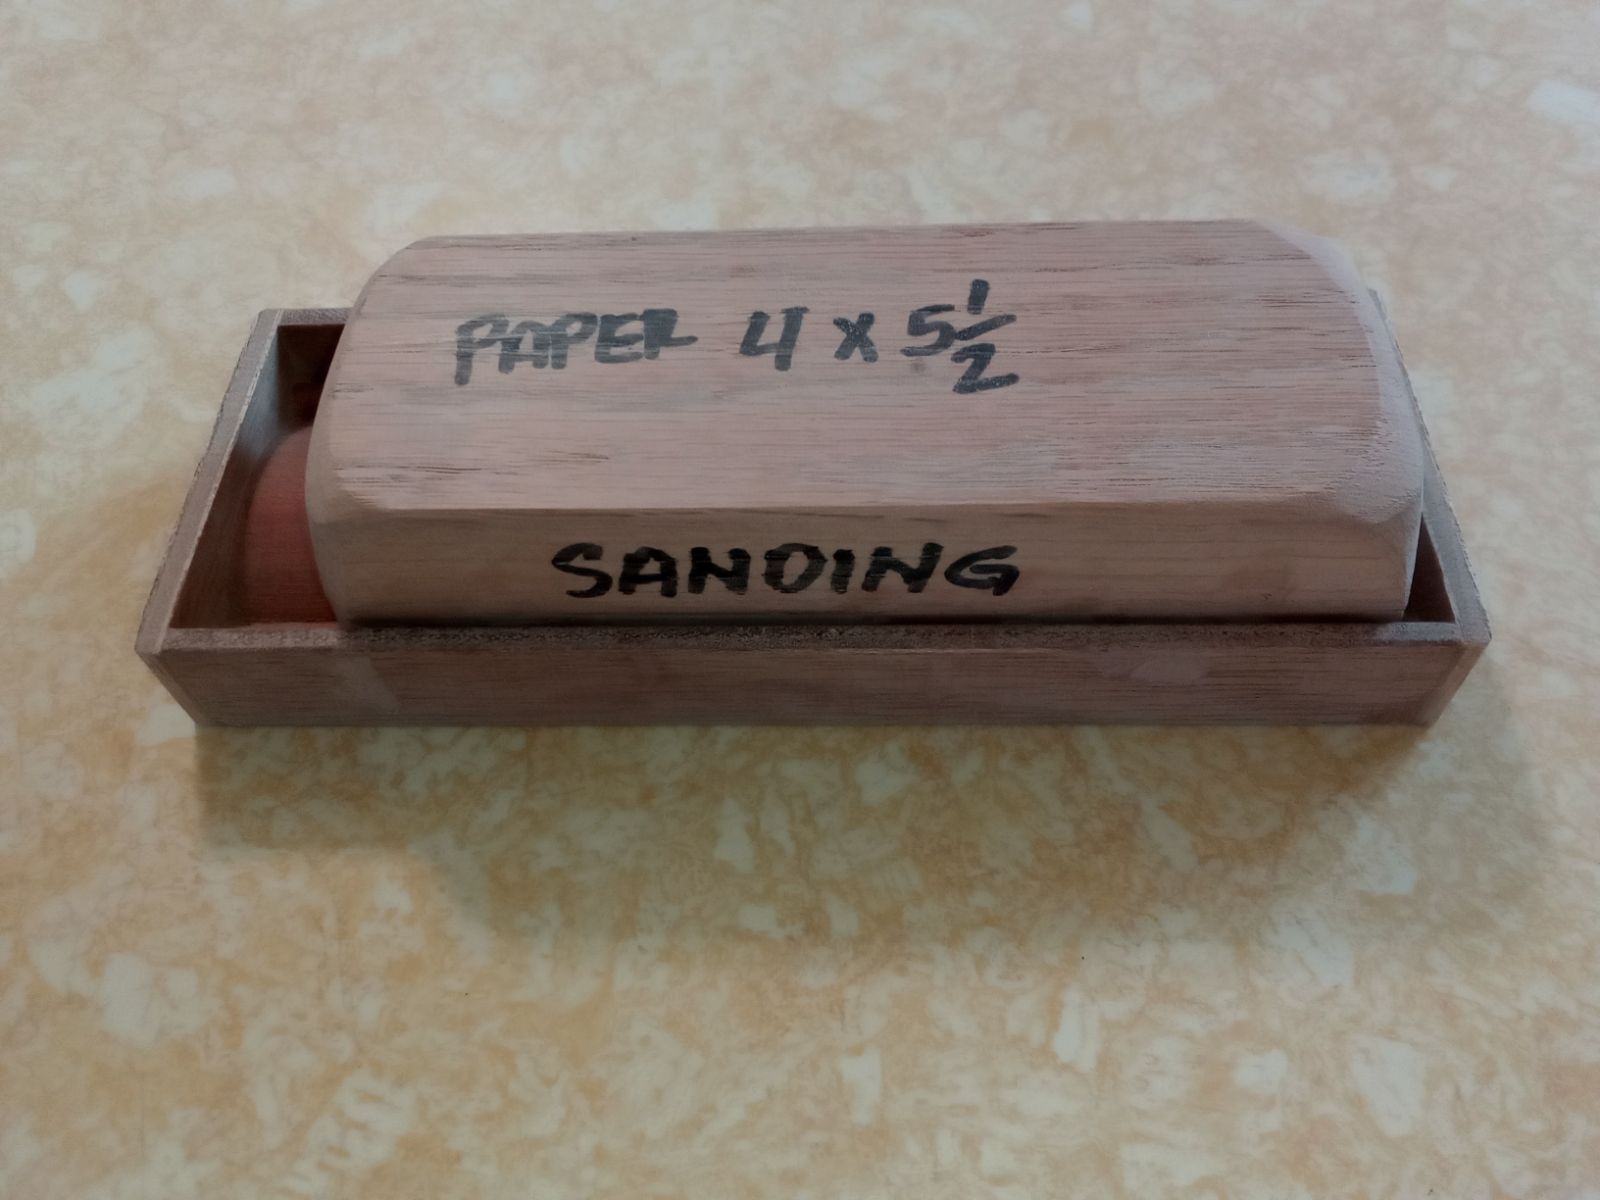
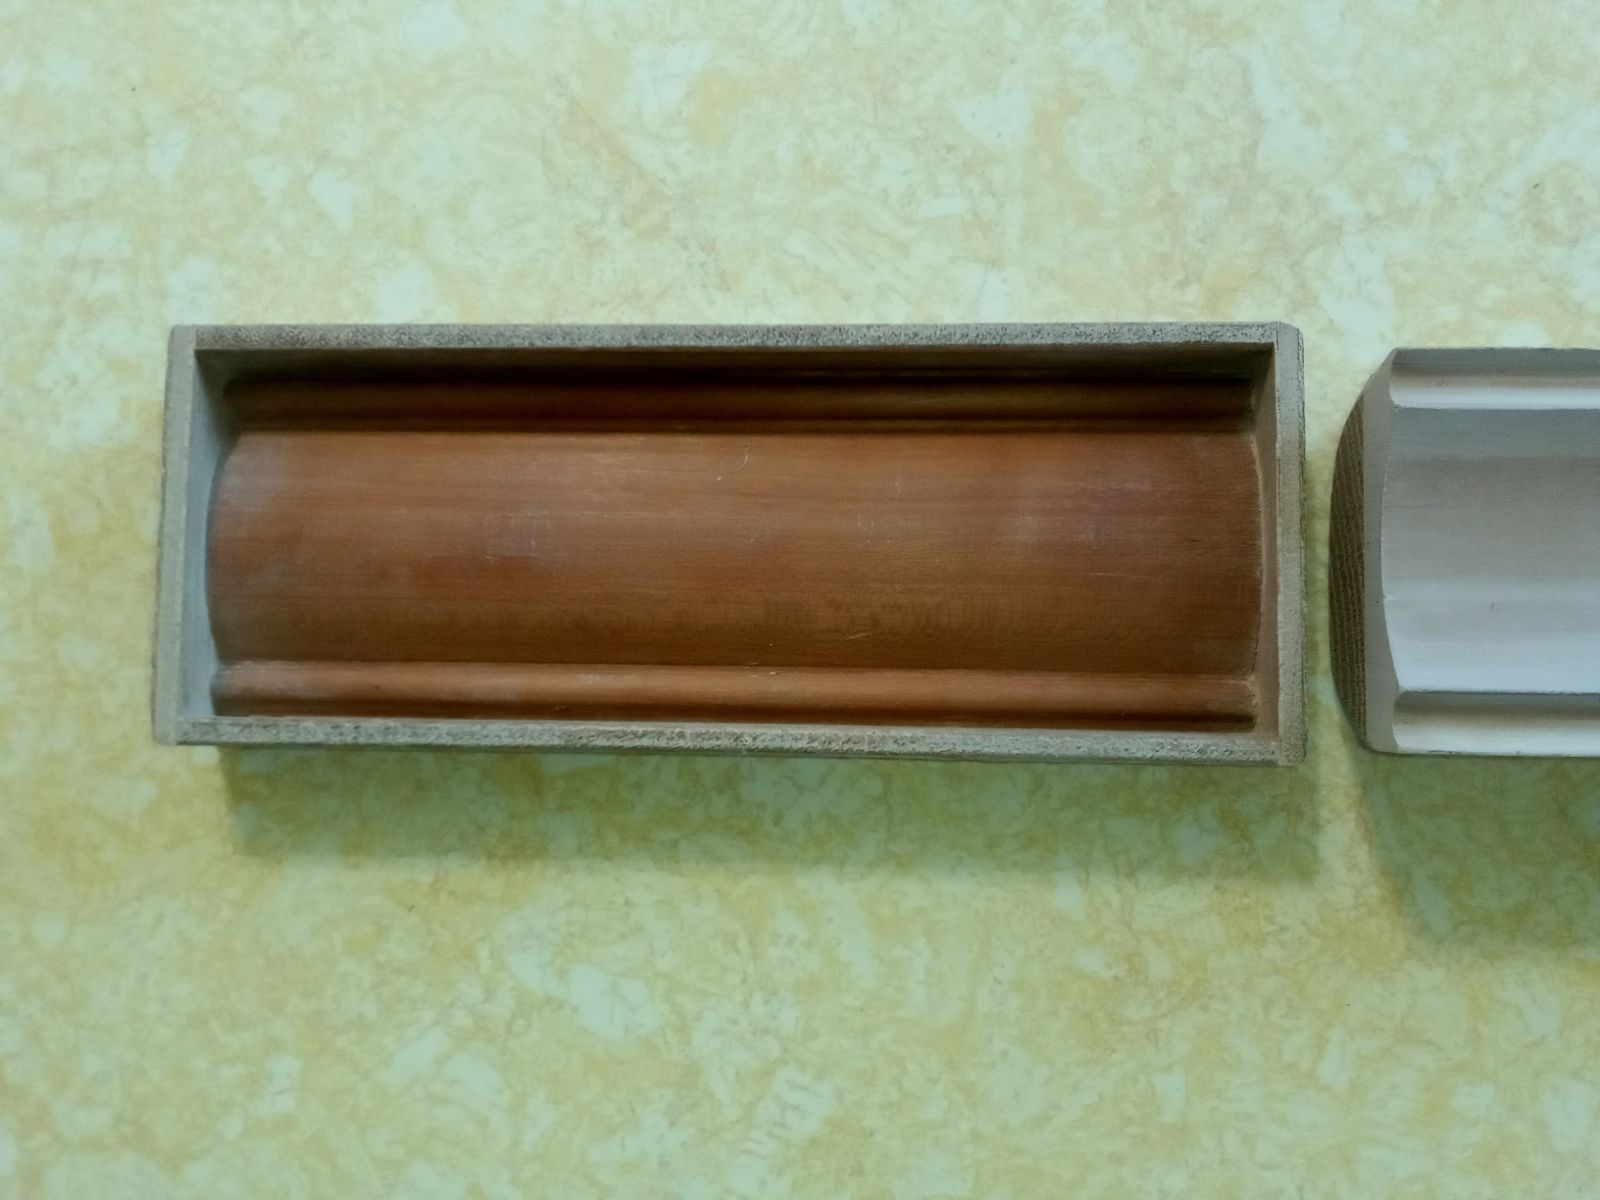
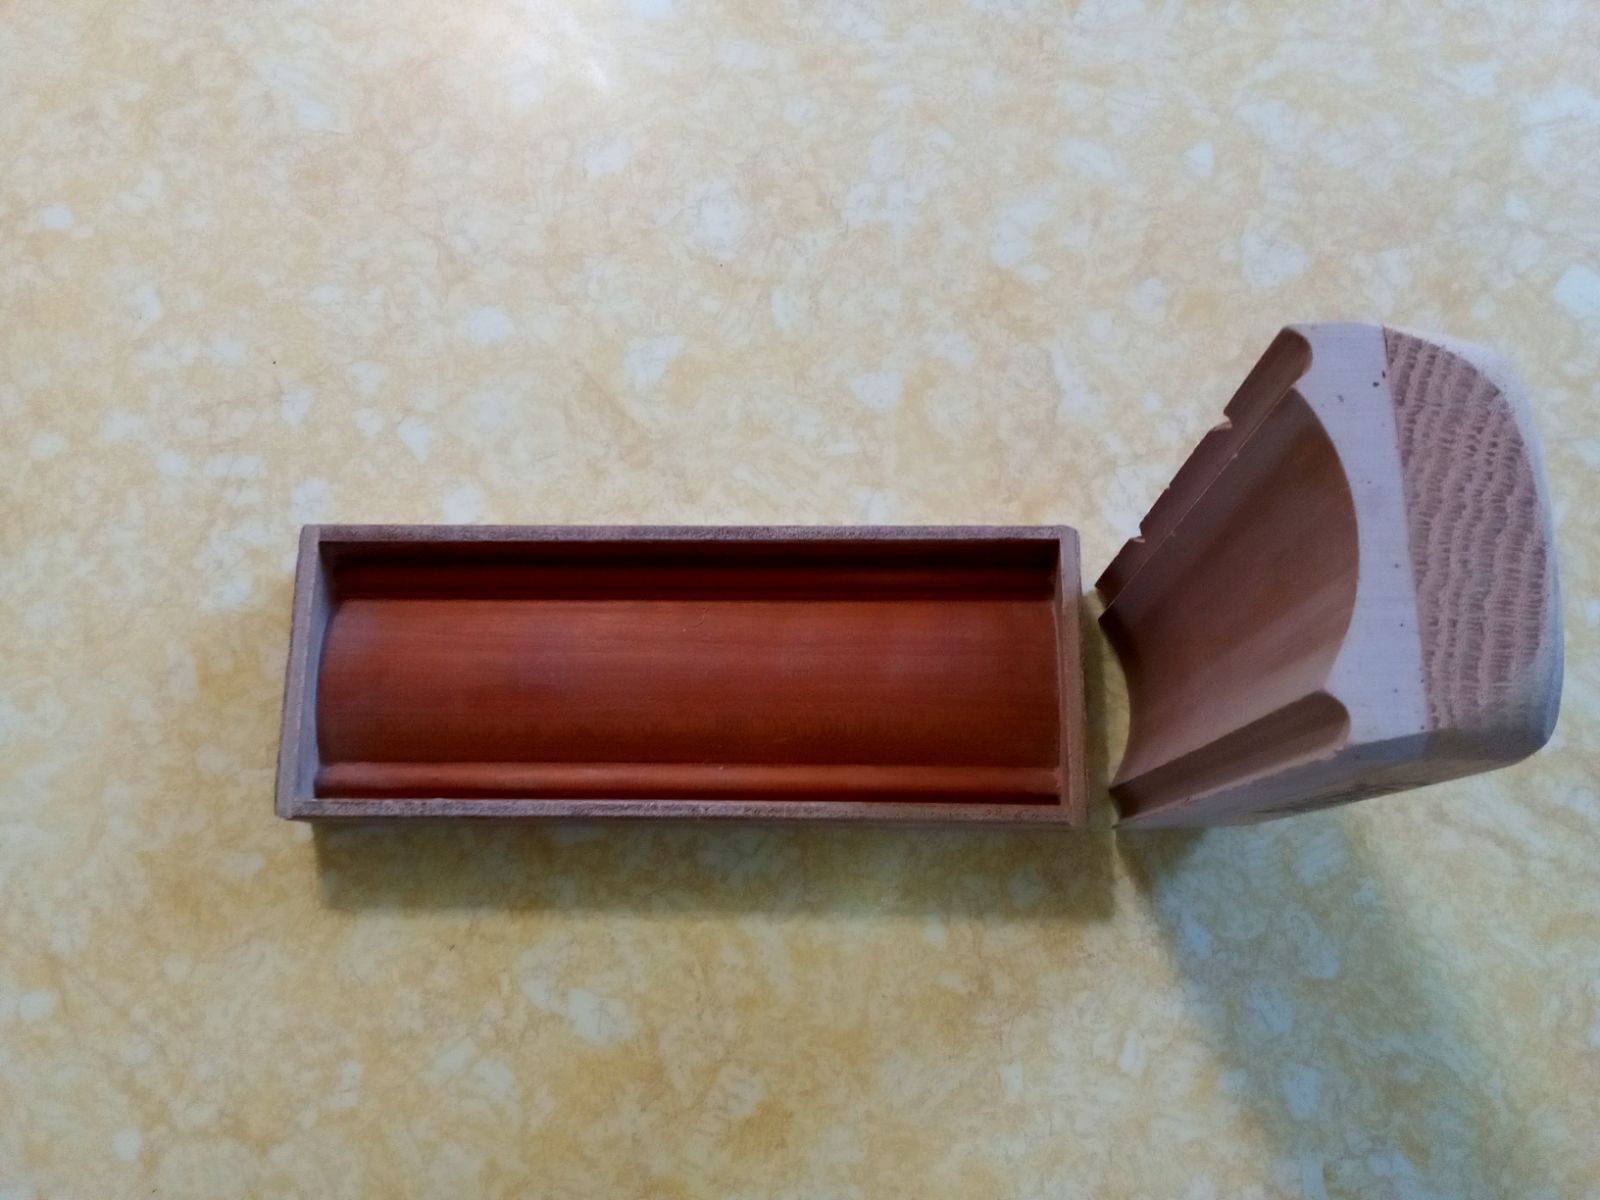
Today I stated working on a jewelry box something I had not made in many years. I remembered I saved several boxes of sanding castings / patterns I made way back when in the early 2000's when I was making these boxes quite often. I located them and had a look after nearly 22 years. The jewelry boxes and humidors back then were constructed with profiles of some complexity using various router bits to make separate profile components and then assembling the components into one piece from several pieces to obtain the profile I was looking for. This worked very well but created a problem specifically how to finely finish sand the profile without ruining it ! OK that was the problem how not to screw it up at finish sanding. I thought if I could mold a custom sanding block that matched the profile exactly I could maintain the finer deatil and get the finish I needed. The Fix For every profile I would make several extra running inches . I then took a length of the profile usually 2 to 3 or 4 inches long squared it up on the ends and glued up a box around it. Please see the pics. The next step was to apply 2 or 3 coats of paste wax (Johnson’s Paste was around back then and it workrd great) to the boxed up profile. Here comes the magic, from there simply make a casting using BONDO the auto body filler stuff. Simply fill the box with Bondo covering the complete profile within let it cure and pop it out of the mold. You can kind of see the BONDO the light pink color stuff in the pics. When cured it is pretty hard and a perfect reverse of the profile. . Square up the Bondo casting glue on a hardwood block to assist handling / holding and lay in some sandpaper. The result was amazing, the profiles on the jewelry box sanded perfectly with all the details and sharp and crisp edges. If you have some similar projects that would be difficult to finish sand give this a try. Please ask any questions. Calabrese55

-
Got this in the mail today, luck of the draw in the lottery from our Annual Fundraiser. Not being a hand plane guy for a long time I confess I only have ever had a cheap HF special. Never had an interest till I returned from Iraq but the pins in my wrist really did not like the activity of planning. Late last year I met a customer that also had same problem and he gave me a hands on tutorial of the ins and outs of holding the plane so it doesn't aggravate my injury. Okay, so I tried it at home and have been playing with the thing getting it tuned in and all. It makes nice ribbons, which I am told is unusual for a HF special, but hey miracles happen I guess. So I opened the box and took this Wood River Block Plane apart and got acquainted with all the parts, tuned up the blade a hair and back together it went. Makes some nice shavings. Did research last week on this particular plane and found out it's common uses, and what not to try. Impressive little guy. Thanks to the folks at Wood River for the prize, it will get used and if I get decent at using these things I might have to upgrade the HF special. Budget permitting.
- 5 replies
-
- 10
-
-
- wood river
- plane
- (and 2 more)
-
Hi Everyone Here are a couple of photos of my newest commissioned knife block. Made from walnut with holly accents. 11.5" x 11.5" x 13" and weighs 26 LBS.
- 7 replies
-
- 1
-
-
- holly
- knife block
- (and 3 more)
-
As I posted in another thread I have started making 18-20 wooden block planes that I made 4 several years ago copied from a Wood magazine. Since I have a presentation at our local WW club, I plan on giving a presentation on how to make these. I figure if I give each member that comes to the meeting one of these to hold and examine while I go through the steps of building one, it might be more clear in their mind how to do it themselves. And they might not fall asleep during the presentation. Yesterday I showed the blocks glued up for the bodies, and the one I am using for the pattern. The next step was to roughcut out the 1/4" thick sides and sand edges to finish size. After they were sanded close to size I cut the blocks I had previously glued up 4" from the heel of the plane to the mouth of the blade slot on a 45°angle. The cut-off is then turned over and butted up tight to the heel piece,thus creating a "V" for the plane blade to rest in. and the sides are glued on to hold the assembly together. It takes lots of clamps to dlamp these up , I ran of two planes short and had to wait to finish the final two.
- 56 replies
-
- 14
-
-

-
Tonight after work I got the two panels sanded on the drum sander and ready to glue up. I need to pick up some couplings so I will have plenty of long pipe clamps. I should be able to get it glued tomorrow night and then clean up the joint and oil and sand it smooth. It is coming along and those two panels were heavy, When this is finally one large panel, it will sure enough be heavy. After it is cleaned up, I will cut to size and round over all of the edges.


.jpg.eb3f2e86dce729b39d23987598155d85.jpg)
.jpg.bad34875717ad2918b9e27ed2b703416.jpg)


