


- 2 replies
Featured Content
Top content from across the community, hand-picked by us.

Mortise gauge
Like my "simple edge beading tool" here's a simple way to make a mortise gauge. A block of scrap wood and two flat head screws. It helps to face the screw slots vertically facing down. It cuts better.
It doesn't get any simpler or easy to make and use!!
Very effective. Cost: pennies. If that.
" If you like it give it a 👍 "
Cheers!
MrRick
It doesn't get any simpler or easy to make and use!!
Very effective. Cost: pennies. If that.
" If you like it give it a 👍 "
Cheers!
MrRick
- 8 replies
.thumb.jpg.573d1497d0675219908c85aabefd797a.jpg)
Featured by John Morris

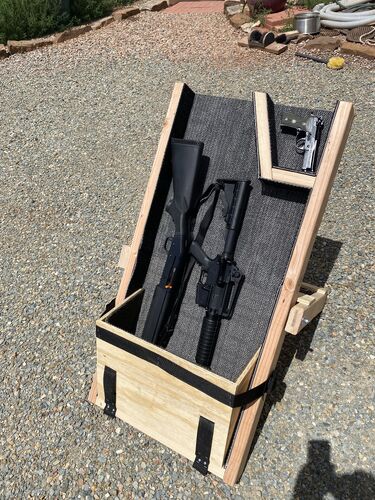
Workbench Magazine July-August 1968 Combination Camp Chair and Tackle Box
This is a scanned document of the now defunct Workbench Magazine of this era. Permission was granted by the new Workbench Publication for The Patriot Woodworker community to copy and use the old Workbench Magazine at our pleasure, and for free distribution and re-use.
- 0 replies
Featured by John Morris
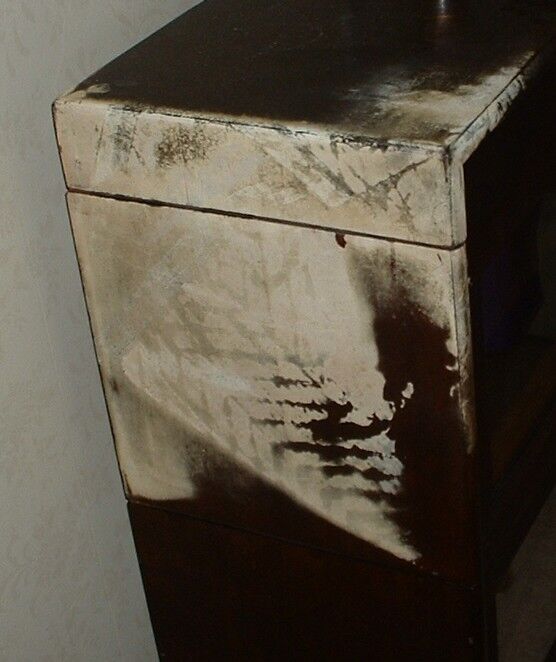
Removing water marks (blush)
A common fix I had to do was removing a blush from finish caused by water. Often a glass, flower pot, etc. would leave a white mark.

- 8 replies
Featured by John Morris
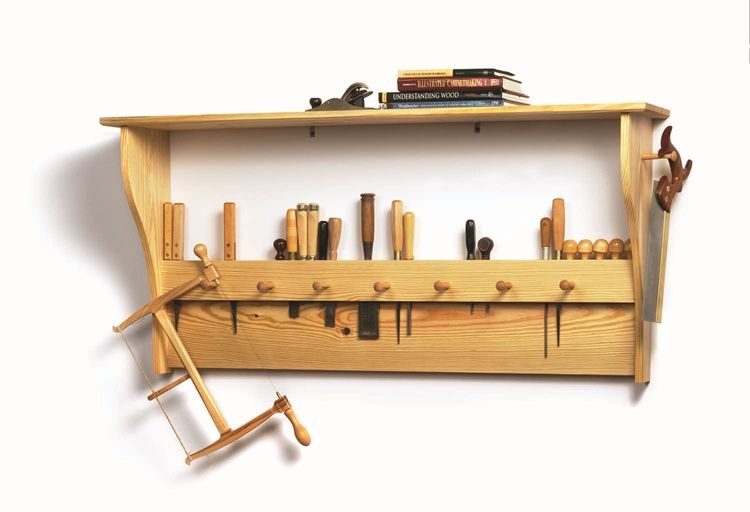
I Can Do That by Popular Woodworking
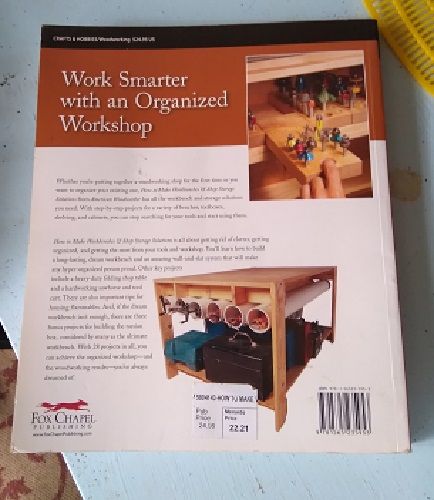
Before it fell apart and before the main editors left, they put together a beginner's guide to woodworking, including a starter tool set and a few projects. Now it appears the guide is in book form and for sale, but the PDF version is still around and free.

- 3 replies
Featured by John Morris
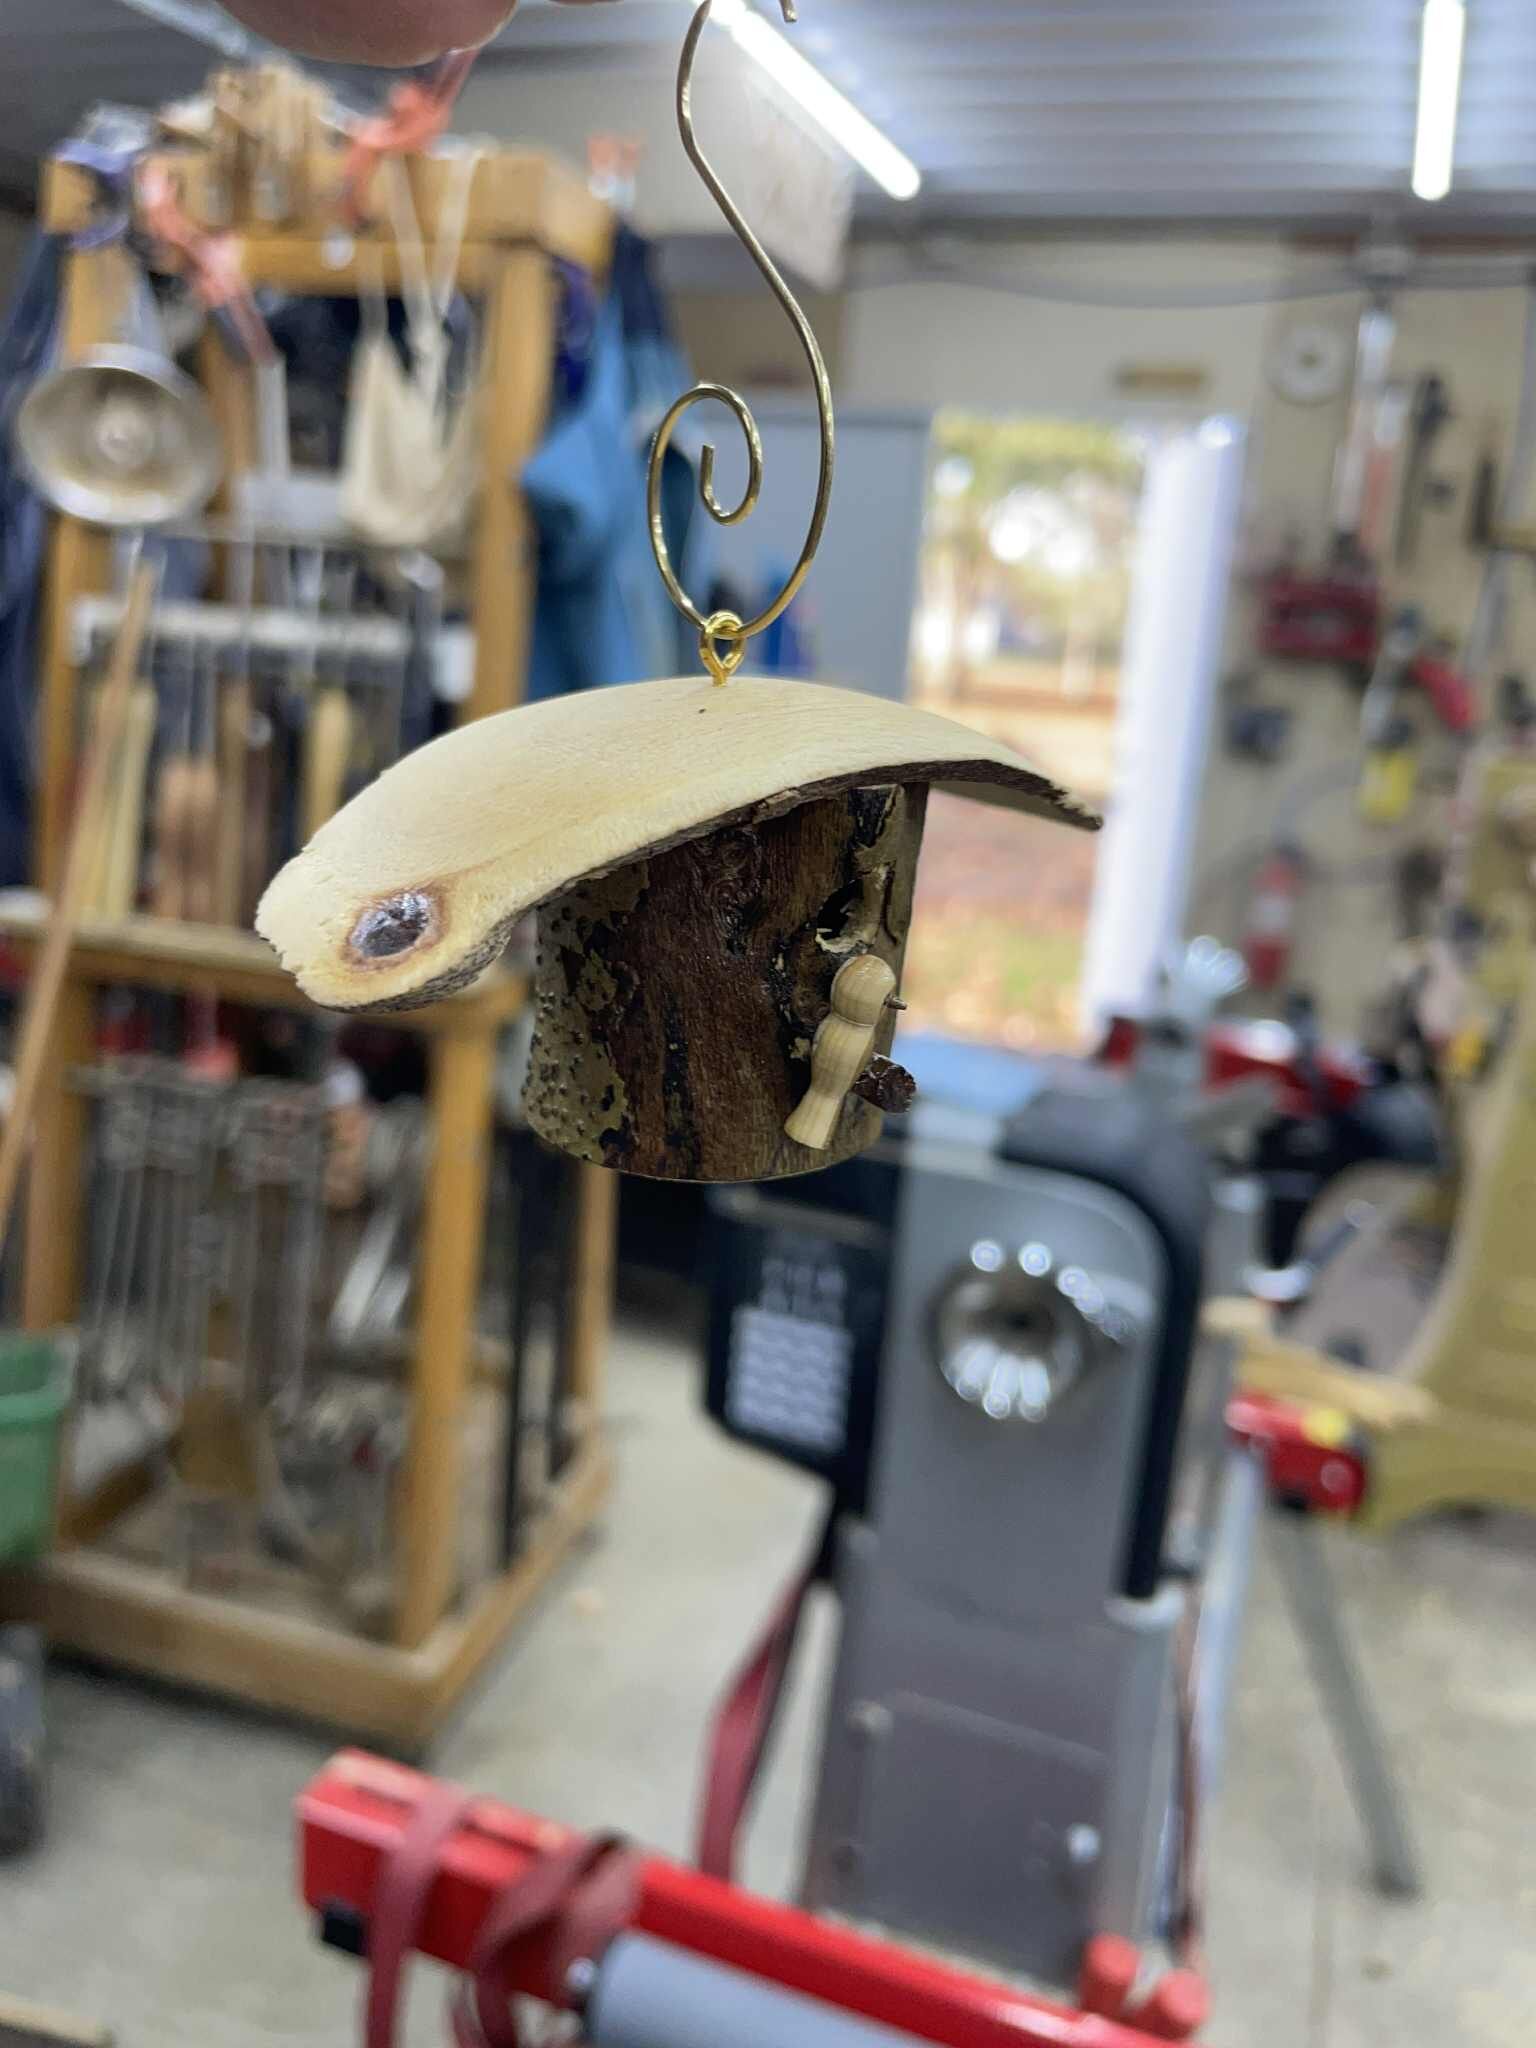
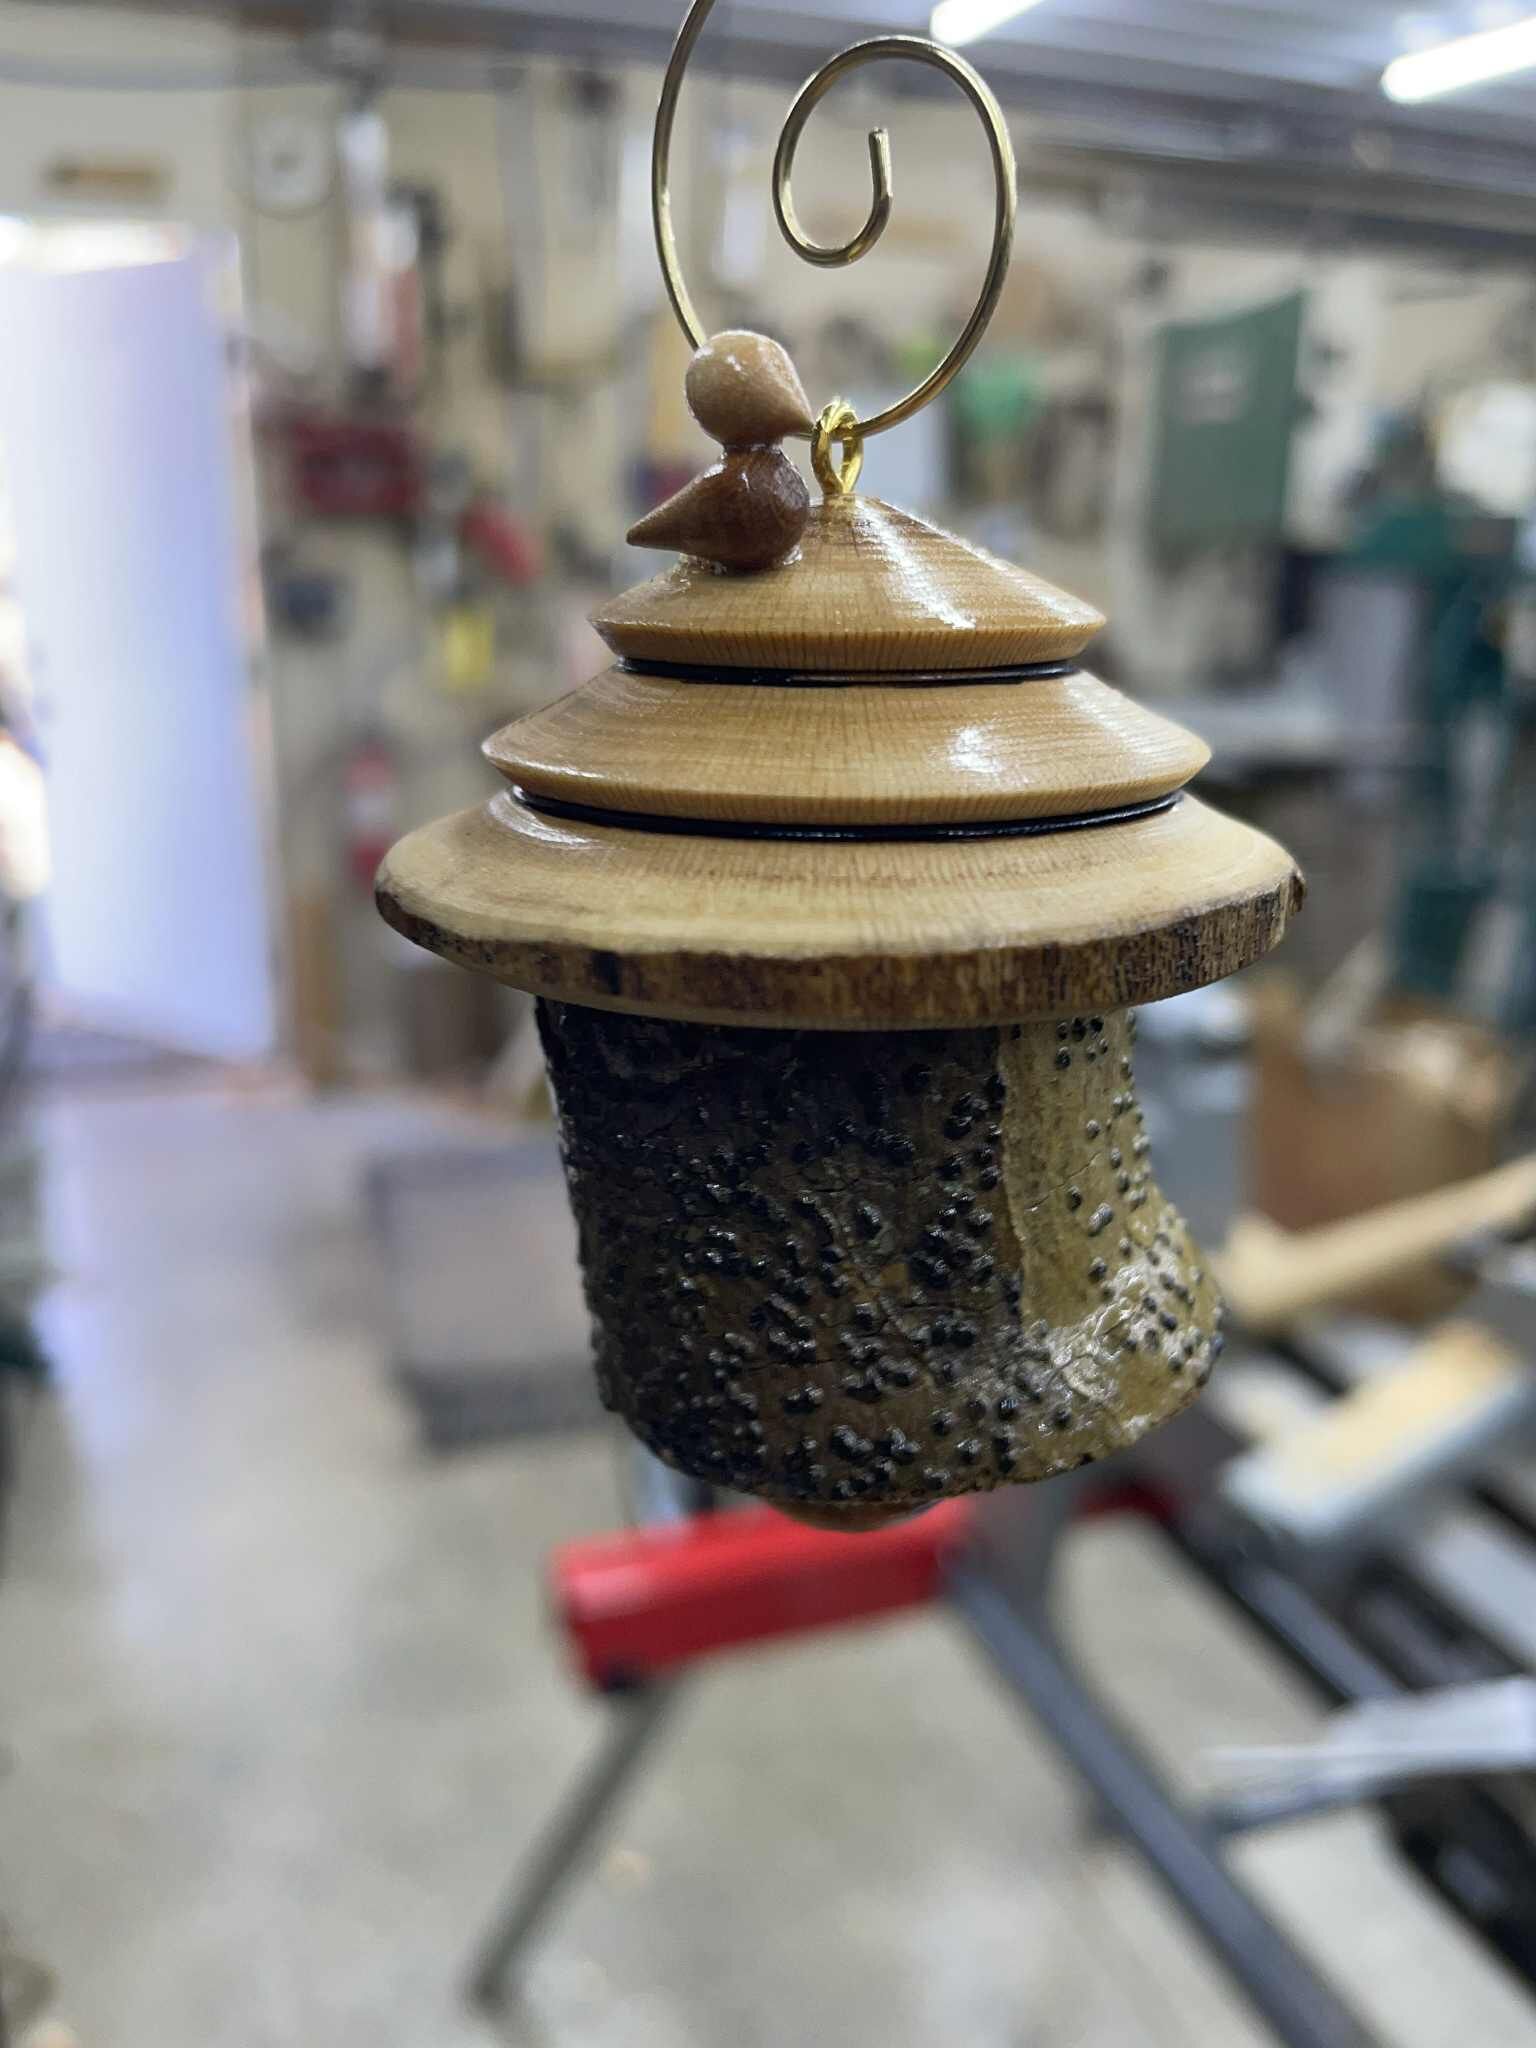
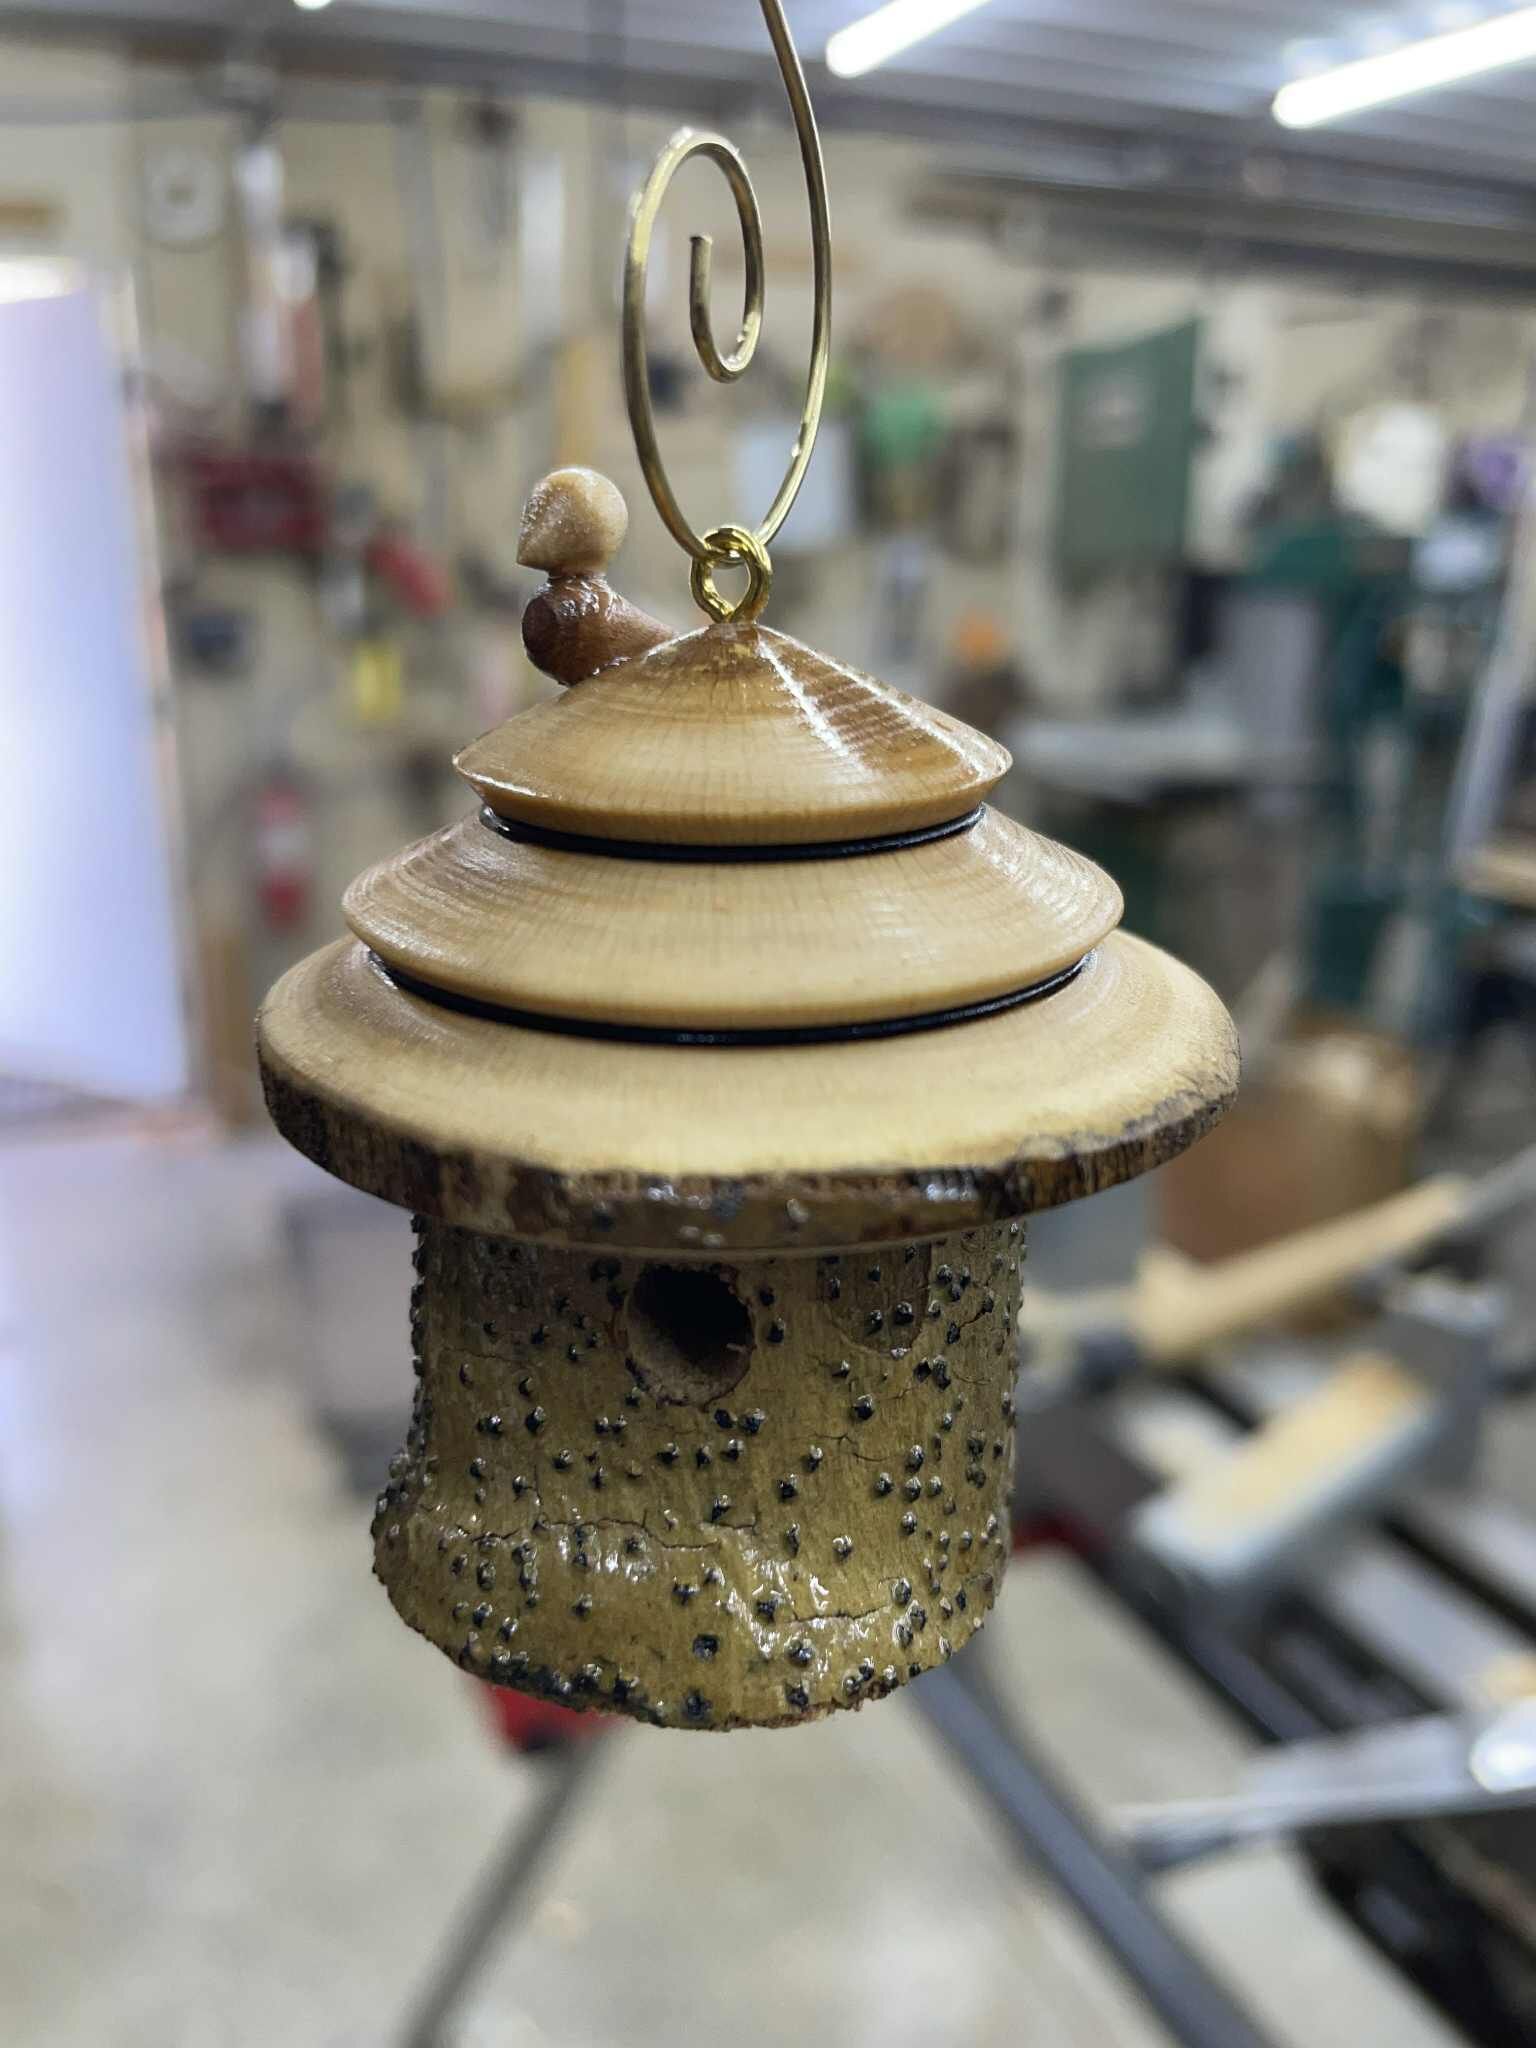
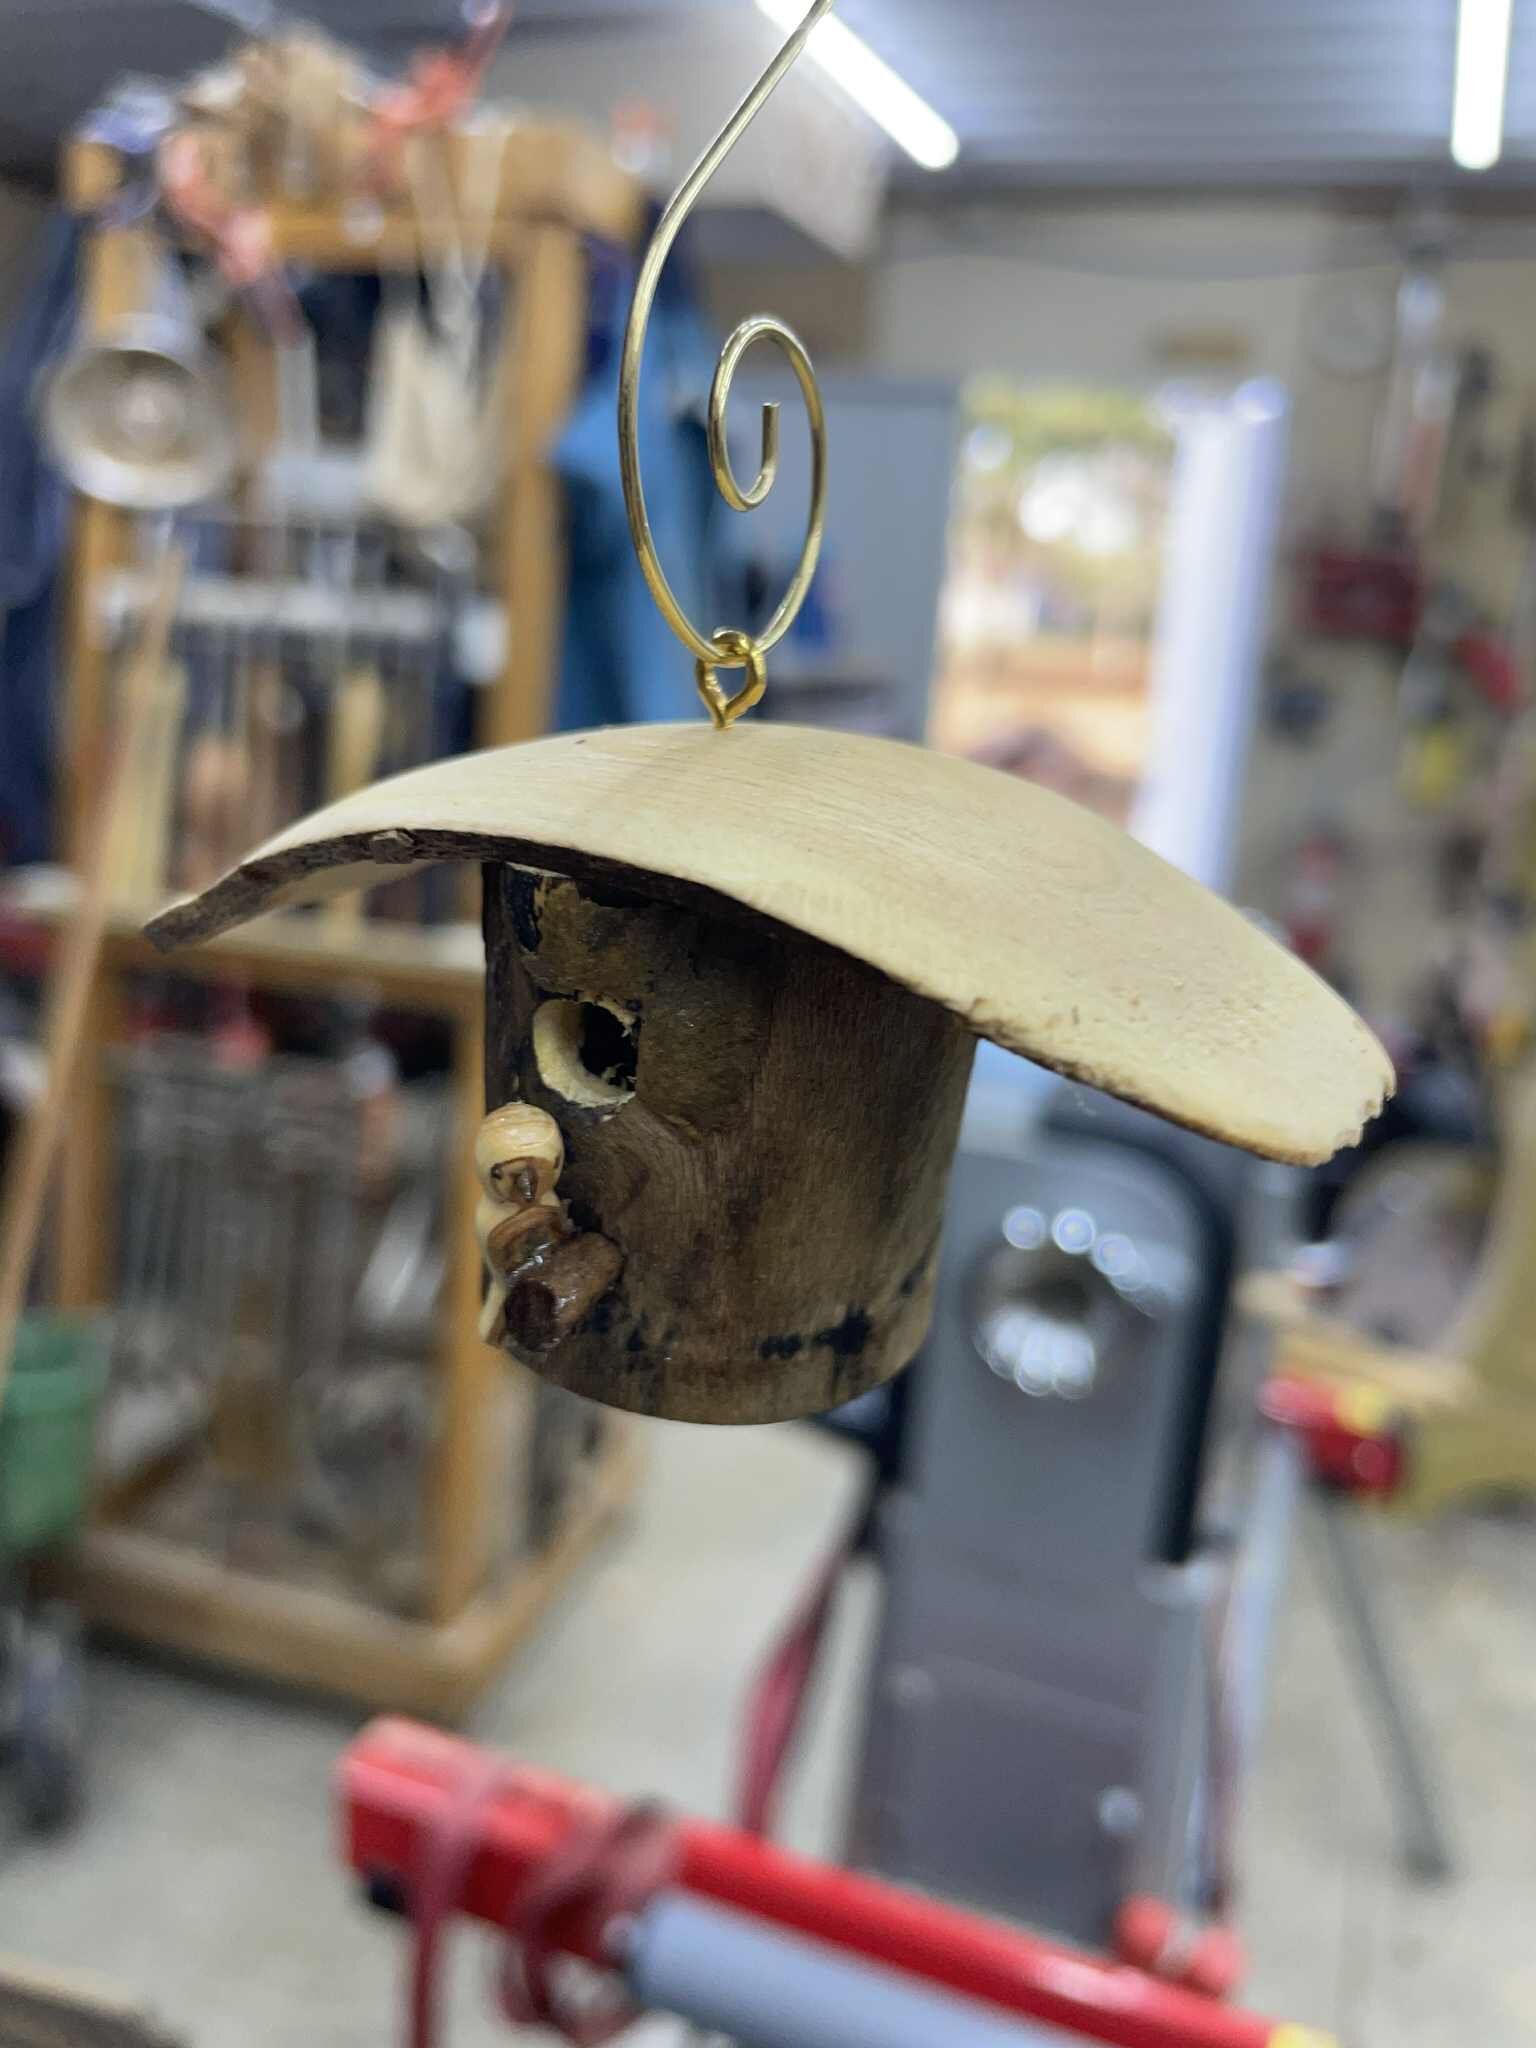
Sycamore limbs.
Sycamores are always dropping limbs and the limbs are almost always gnarly, misshapen, and often spalted before they ever hit the ground. In other words, they are ideal for turning little rustic birdhouse ornaments.

- 9 replies
Featured by John Morris
Sycamore limbs.
Sycamores are always dropping limbs and the limbs are almost always gnarly, misshapen, and often spalted before they ever hit the ground. In other words, they are ideal for turning little rustic birdhouse ornaments.
- 9 replies
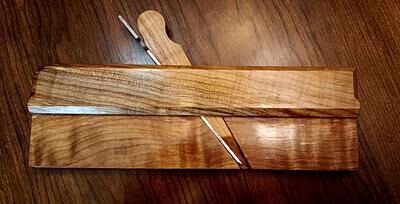
#2 (¼”) Round Moulding Plane
Introduction
I enjoy doing most of my wood working projects with hand tools. I feel that I've become adept roughing stock with handsaws and squaring all four sides by hand planing. I've also become much better at joinery over the years with my favorite being handcut dovetails.
One area that has intrigued me is creating mouldings with hollow and round moulding planes. Pursuing this has taken me down the road of making moulding planes. It has been a delightful pursuit. In addition, I make the blades or cutters and go through the whole heat treatment process.
The Beginning
I started by cutting two finished blanks out of Spalted Maple. These two blanks make the complete body of the plane.
The first one (Part A) was milled to 5/8" thick x 3-1/8" high x 10" long and is the main body and left side in one piece.
The second (Part B) was milled to 3/8" thick x 1-9/16" high x 10" long and is the right side that is laminated to the first piece.
This plane will be a No. 2 ( 1/4") Round Moulding Plane.
In Fig.1, it's mating plane, a 1/4" Hollow Moulding Plane sits on the right. It was used to make the 1/4" round groove as shown for the new plane on the left. When done this will make a matching set of 1/4” Round and Hollow Moulding Planes. See the closeup of the new plane's bottom in Fig 2.
Mortising the Escapement Area
Now it's time to mortise the escapement area for the blade's bed, cheek, throat, mouth, etc.
I made this jig, see Fig 3 below, that I use for locating the bed angle at 50° and the wedge face at 60° on Part A. The jig has an adjustment screw that allows me to fine tune the mouth opening for Blade and Wedge. I can explain further how I use this jig if anyone is interested.
Once I have the jigs placed where I want them (see Fig 4), I clamp them down on Part A to the bench and scribe the mortise cavity to be cut.
Initially I cut the mortise cavity boundaries using my chisels (see Fig 5) Then I use my Lee Valley Veritas Large Router plane to excavate the cavity as shown in Fig 6 and 7.
Here in Fig 8, I’m refining the mouth with the router plane.
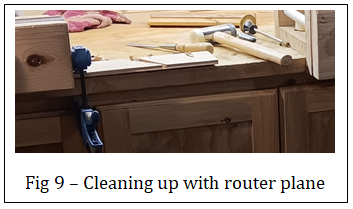
Fig 9 shows how I’ve clamped it to the bench while mortising.
Laminating and Shaping
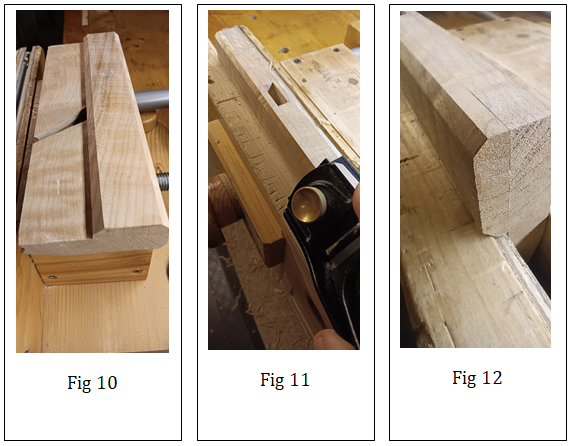
Next in Fig 10, I laminated the Right Side (Part B) to Main Body (Part A). I then started chamfer detailing . In Fig 11 - 13, I am chamfering along the top edges and bottom edge of the Right Side (Part B). In Fig 14 & 15, I have done Stopped Chamfers for the front and back corners.
The Wedge
Next I shape the wedge Per Fig 16. As mentioned earlier the bed angle is at 50° and the wedge face at 60° on Part A. The wedge will be a 10° angle and is approx 6” long. Making the angle slightly larger initially then fine tuning to fit the mortised area is advisable. Detail A shows the curvature required for the shaving to climb up and out as you are planing.
Fig 16
Per Fig 17, this is the notch, Detail B, for assisting in wedge removal.
Blade
This is the complete 1/4” round blade per Fig 18. I didn’t go into detail here with the whole process of shaping, heat treating, honing, etc. Again if anyone is interested and has questions please let me know.
Fig 18
Finishing
To start I coated all the plane body (except the bed) and the wedge with two coats of 50/50 cut Tung oil. Per fig 19. I let this cure for one week.
Fig 19
Then I brush coated with two coats of Shellac and allowed to dry overnight. The actual sole is left only with the tung oil coating.
After this, I French polished with shellac to make the grain “pop” per Fig 20.
Fig 20
Finally per fig 21, I coated and buffed eveything with wood butter except the bed and bottom of the wedge.
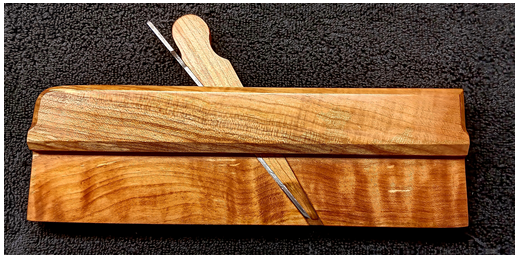
Here’s the completed 1/4” Round Moulding Plane per Fig 21 and Fig 22.
Fig 21
Fig 22
Thanks for Looking!
Cheers!
MrRick
- 7 replies
#2 (¼”) Round Moulding Plane
I enjoy doing most of my wood working projects with hand tools. I feel that I've become adept roughing stock with handsaws and squaring all four sides by hand planing. I've also become much better at joinery over the years with my favorite being handcut dovetails.
- 7 replies
Featured by John Morris

Workbench Magazine 1965 Jan-Feb Childs Rocker
This is a scanned document of the now defunct Workbench Magazine of this era. Permission was granted by the new Workbench Publication for The Patriot Woodworker community to copy and use the old Workbench Magazine at our pleasure, and for free distribution and re-use.
Have fun with this wonderful throwback child's rocker. You'll have a some patterns for chair parts, all you need to do is scale them to fit your needs. Have fun!
Have fun with this wonderful throwback child's rocker. You'll have a some patterns for chair parts, all you need to do is scale them to fit your needs. Have fun!
- 0 replies
Featured by John Morris

Workbench Magazine 1965 Jan-Feb Childs Rocker
This is a scanned document of the now defunct Workbench Magazine of this era. Permission was granted by the new Workbench Publication for The Patriot Woodworker community to copy and use the old Workbench Magazine at our pleasure, and for free distribution and re-use.
Have fun with this wonderful throwback child's rocker. You'll have a some patterns for chair parts, all you need to do is scale them to fit your needs. Have fun!
- 0 replies

Stanley Type 14 No. 5-1/2 Plane and Frog with "467" Casting Mark
Recently came across a No. 5-1/2 Stanley bench plane which has all the characteristics of a Type 14 with the exception of the frog which shows both 5-1/2 and 467 castings on the bottom. The frog is non-ogee type and has machined tabs at the base which align perfectly with the machined bearing surfaces on the plane's base. From what I can determine based upon my research, the "467" casting mark is indicative of Type 18 planes.
I've posted some pics showing details of Frog/Body interface and casting marks.
Has anyone ever come across the anomaly before?

- 12 replies
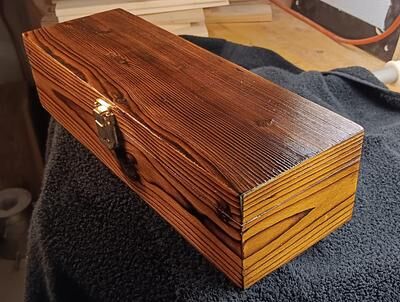
Fully Mitered Shou Sugi Ban Box
INTRODUCTION
It's been a long time since I made a fully, all sides, mitered box.
As miters go, It is the ugliest box I've ever made. I mean "butt ugly"! Okay...okay...maybe not that bad but challenging!
I think many of us may take mitering for granted and sort of dismiss making a whole box this way. To tell you the truth, I don't know why I did and then to add insult to injury I decided to finish the surface with the Yakisugi technique or "Shou Sugi Ban" as we call it in North America).
MAKING THE MITERED BOX
I started by cutting all sides on my tablesaw. Yes!... my table saw! As hand tool crazy as I am, I couldn't imagine doing all these miters and bevels by hand (hereafter just called "miters"). My blood pressure is high enough. And then I still could not get the miters as perfect as I wanted all around. Even using my tablesaw! LOL.
Then it dawned on me... I'm going to torch the thing so perfect miters may not matter! It is highly likely there will be some separation from burning and minor gaps on the corners. But it will add to the rustic look I was after with this technique. We'll see.
Next... I glued it all up. I'm usually very strategic and meticulous gluing up. However by the time I completed mitering, I didn’t mind being messy and just slathered it on.
Here it is ..... "Plain Jane" in Fig 1.
BURNING THE BOX
So why am I doing this? I dunno. I like challenges or maybe I'm just "bonkers"!
Next, I started the "Shou Sugi Ban" process and torched all six sides, edges, and corners.
I wasn't after a deep "alligator skin" burn but rather an even medium surface burn. Some alligator skin char was acceptable. The look I was after was the "Kimo - Tora" as some call it. This is a good site to see the different ones. See Fig. 2 and 3.
WASHING THE BOX
With the grain, I then brushed away as much of the dry blackened ash surface as I could on all six sides.
Next I washed all sides with the hose and brush cleaning away the dirty surface. See Fig 4 and 5.
APPLYING THE STAIN
After it completely dried out, I decided I wanted to give it a yellow dye stain followed by shellac.
I went everywhere looking for a small size can like 236ml. Do you think I could find it?
And on top of this the ones I did find were like $15 -18. But no yellow or orange. Man 'o man!... things have really gotten expensive and limited.
The heck with it!! Anyways I made my own using Tumeric. One coat on all sides was all I needed. However Tumeric is a fugitive stain. Though you wouldn't agree if you got some on your clothes or the rug not to mention your hands. LOL.
See Fig 6 and 7
FINISHING WITH SHELLAC
To prevent future fading it was sealed with four coats of blonde shellac. First coat was a one pound cut. Second, third, and fourth coats were a two pound cut. Then brass hinges and clasp was added.
Here's the results:
See Fig 7, 8, and 9
Hope you all enjoyed this!!
Feel free to comment, ask questions and thumbs up if you like it!
CHEERS!
MrRick
- 4 replies

Good Monday Morning Patriot Woodworkers! September 22, 2025
Good Monday morning!
Good Monday morning Patriot Woodworkers! What did you get done over the weekend, and what have you planned for the week ahead! Inquiring minds want to know. Please tell us what's happening in your shops, your life, and any events going on with you. Thank you for being here folks!
Good Monday morning Patriot Woodworkers! What did you get done over the weekend, and what have you planned for the week ahead! Inquiring minds want to know. Please tell us what's happening in your shops, your life, and any events going on with you. Thank you for being here folks!

- 24 replies
Featured by John Morris
Classic Ogee Moulding Plane
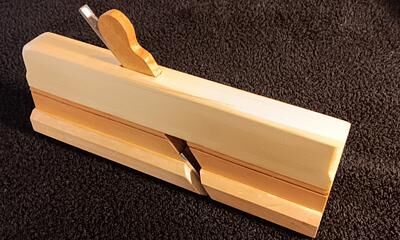
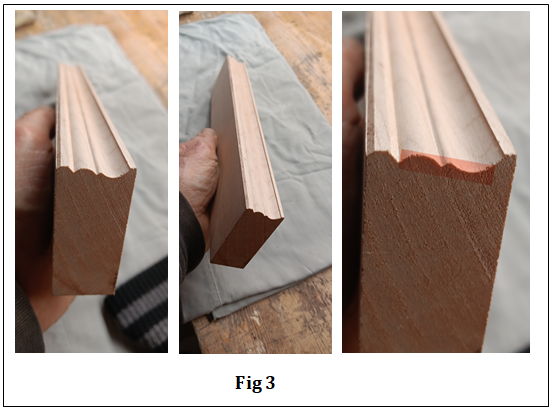
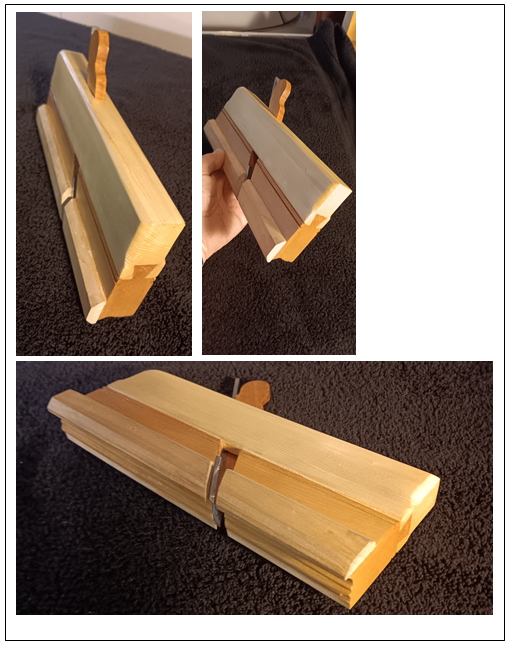
I’ve made a number of moulding planes now but have always had it in mind that one day I’d make an “ Classic Ogee” moulding plane. I knew it could be a challenge because it’s a step up from making Rounds and Hollows. This seemed true to me because an ogee is the combination of a Round (see “a”) and Hollow (see “b”) on the same blade (see “c”) and sometimes with a quirk in between. Think of a quirk as a little stepped recess. Cutting the “Round” portion for the blade (see “a”) is finicky but not too difficult because you are using a round file for shaping. However, cutting the “Hollow” portion (see “b”) can be difficult because a number of small files are required to shape the curve and you are placing a quirk in between.
- 7 replies
Featured by John Morris
.jpg.46ce4e2cbb9417577def6994b4d90052.jpg)
Handsaw Portable Till
Had a little fun, a nice break from my chair build and finally did something to benefit the shop, I just happened on a simple hand saw till by Lee Valley and on a whim I decided, what the heck, I have some scrap, and a little time, and a few saws that are currently hanging on nails on my wall. They need a home, and I liked the idea that it sits on french cleats and I can remove it and have it nearby where I am working, if needed, I seriously doubt it, my shop is small enough that a little 10 walk to the wall where the till is hanging, aint gonna kill me.
.jpg.32a3e4ed78211973c9f28258c3152f09.jpg)
.jpg.d99021b4781270a5ed0941460814068c.jpg)
- 41 replies
Featured by John Morris

Deep Burn Shou Sugi Ban Box
The Japanese have a wood burning process called " Shou Sugi Ban"
With this Shou Sugi Ban process, I did a "Deep Burn" on a fully mitered Pine box. Then wire brushed it
Zoom in and check out the grain.
I then dyed it.
Afterwards, I gave it three coats of 2 pound blonde shellac.
I made a lift handle.... look closely.
Installed brass hinges....
Here's a view of the bottom.
Feel free to comment, ask questions and thumbs up if you like it!
Thanks for looking!
Cheers!
MrRick
- 9 replies
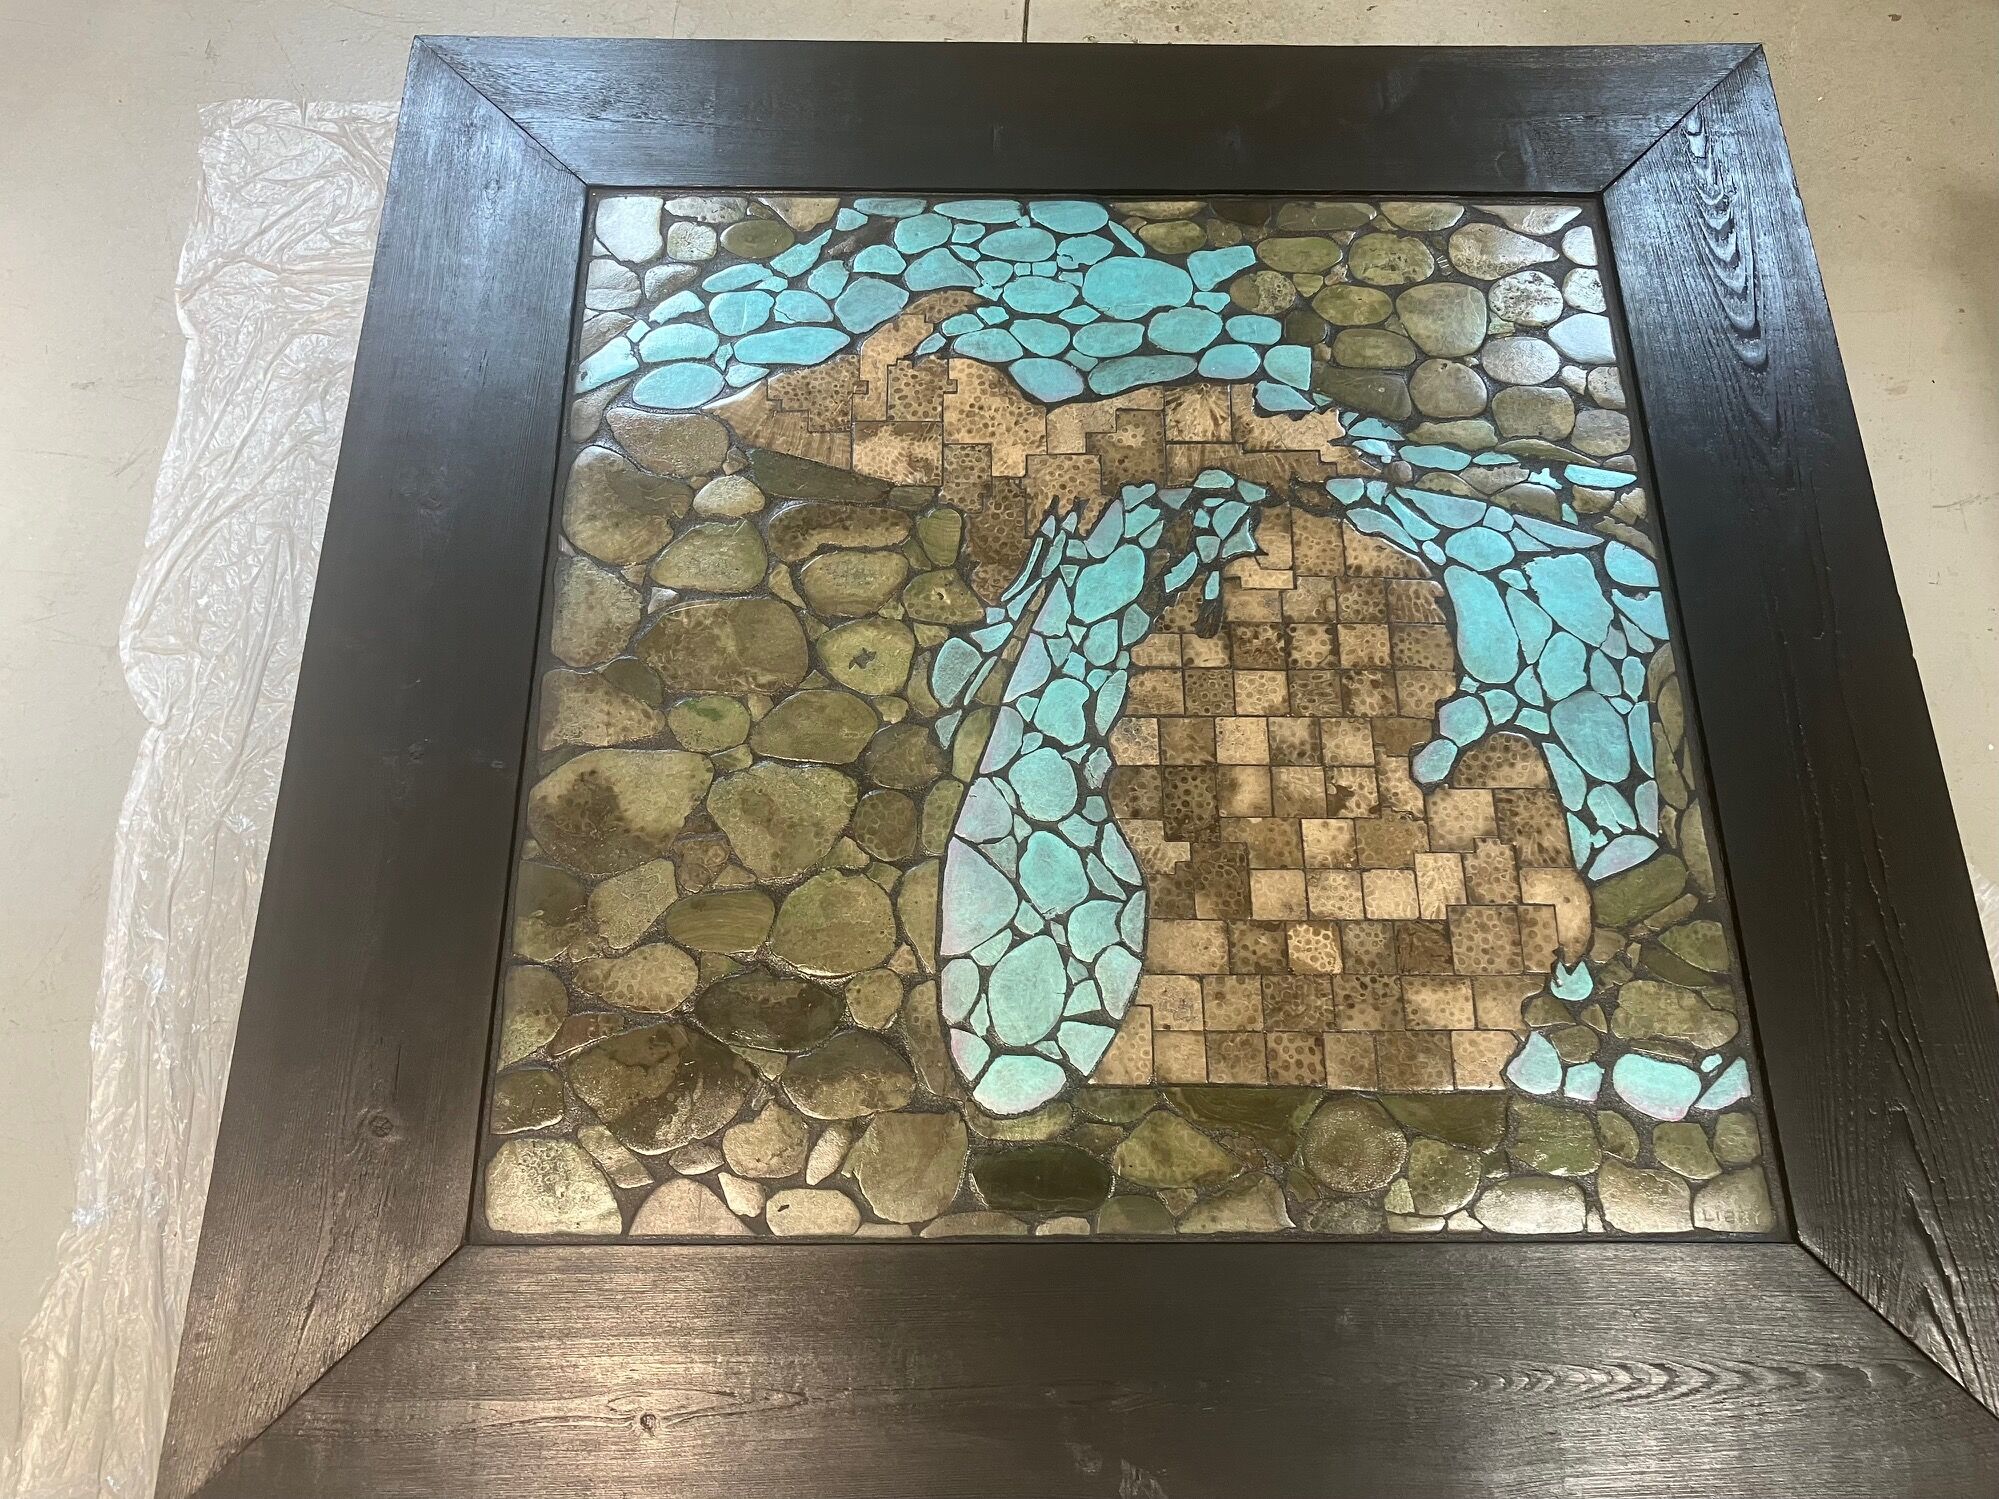
Unique Even For Me
This came from a retiring judge's chamber. It's a map of Michigan surrounded by the Great Lakes made completely out of Petoskey stones (It's a Michigan thing). The state is made up of cut stones in the shape of each county. I have no idea how old it is, but it's not a teenager. It measures about 42" across, including the 1 x 6 frame, which is connected to the 1/2" plywood the stones are fastened to.
- 9 replies
Featured by John Morris
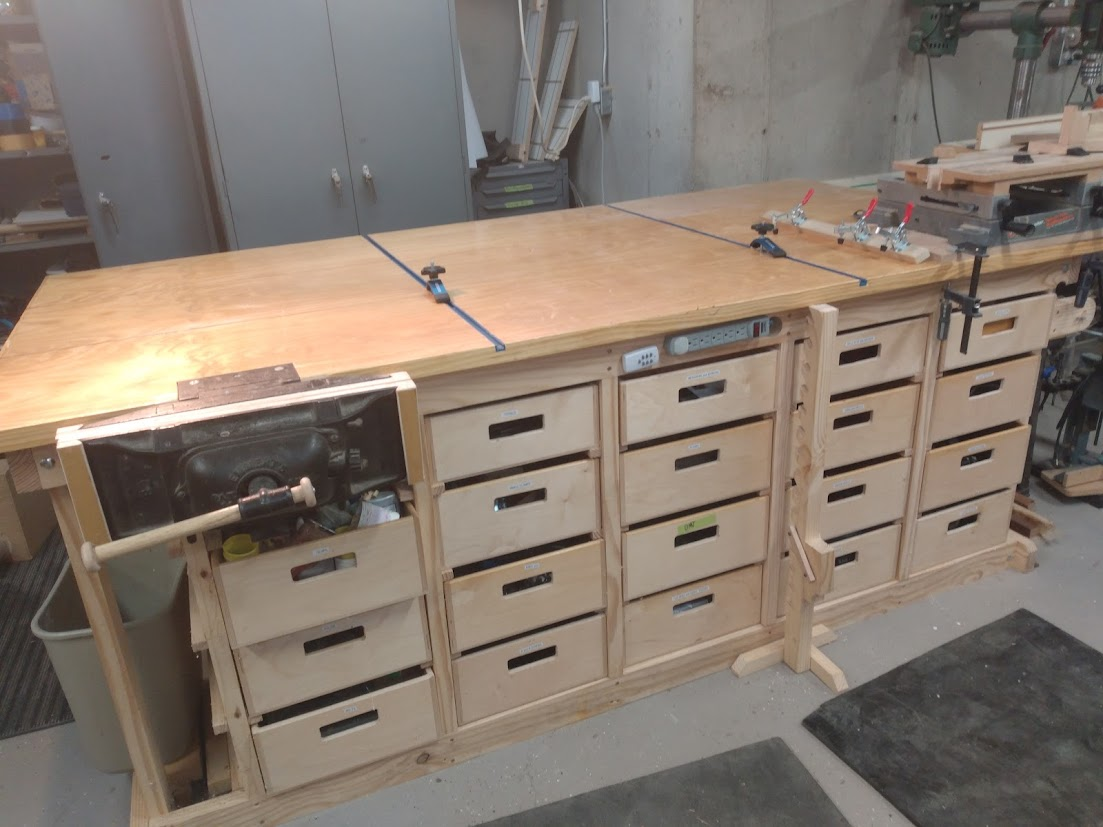
Workbench 6 year anniversary
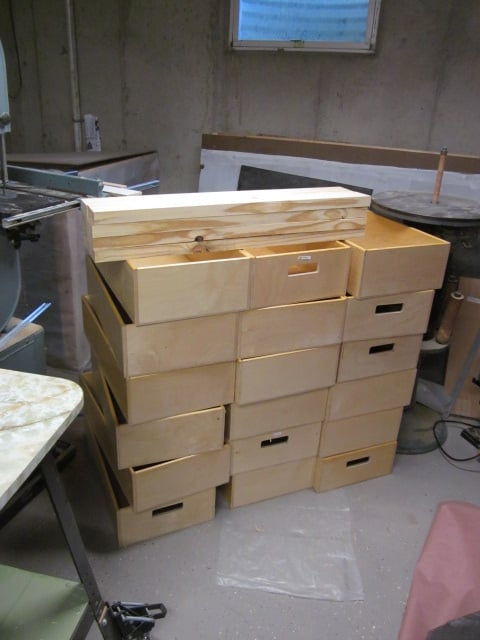
It started off with a bunch of Baltic birch boxes from an auction of a Sam's Club where I got the whole wine display rack for less than $8. Besides the 30 or so boxes, I got some 2x4s, some plywood, a box of 100 or so square-drive screws, and a metal rack that I gave to a friend who has a feed supply business.
- 3 replies
Featured by John Morris

Today’s bowl
Not sure what kind of wood this is, it sanded easily which is good because I had some deep end grain tear out. Worth the effort as it has a lot of character.
- 6 replies
Featured by John Morris

Jan/Feb 1964 Workbench Magazine Contemporary Club Chair
A plan schematic from the old defunct Workbench Magazine. This issue was January-February 1964.
Workbench Magazine was contacted and permission was given to display these file types here.
Workbench Magazine was contacted and permission was given to display these file types here.
- 0 replies
Featured by John Morris
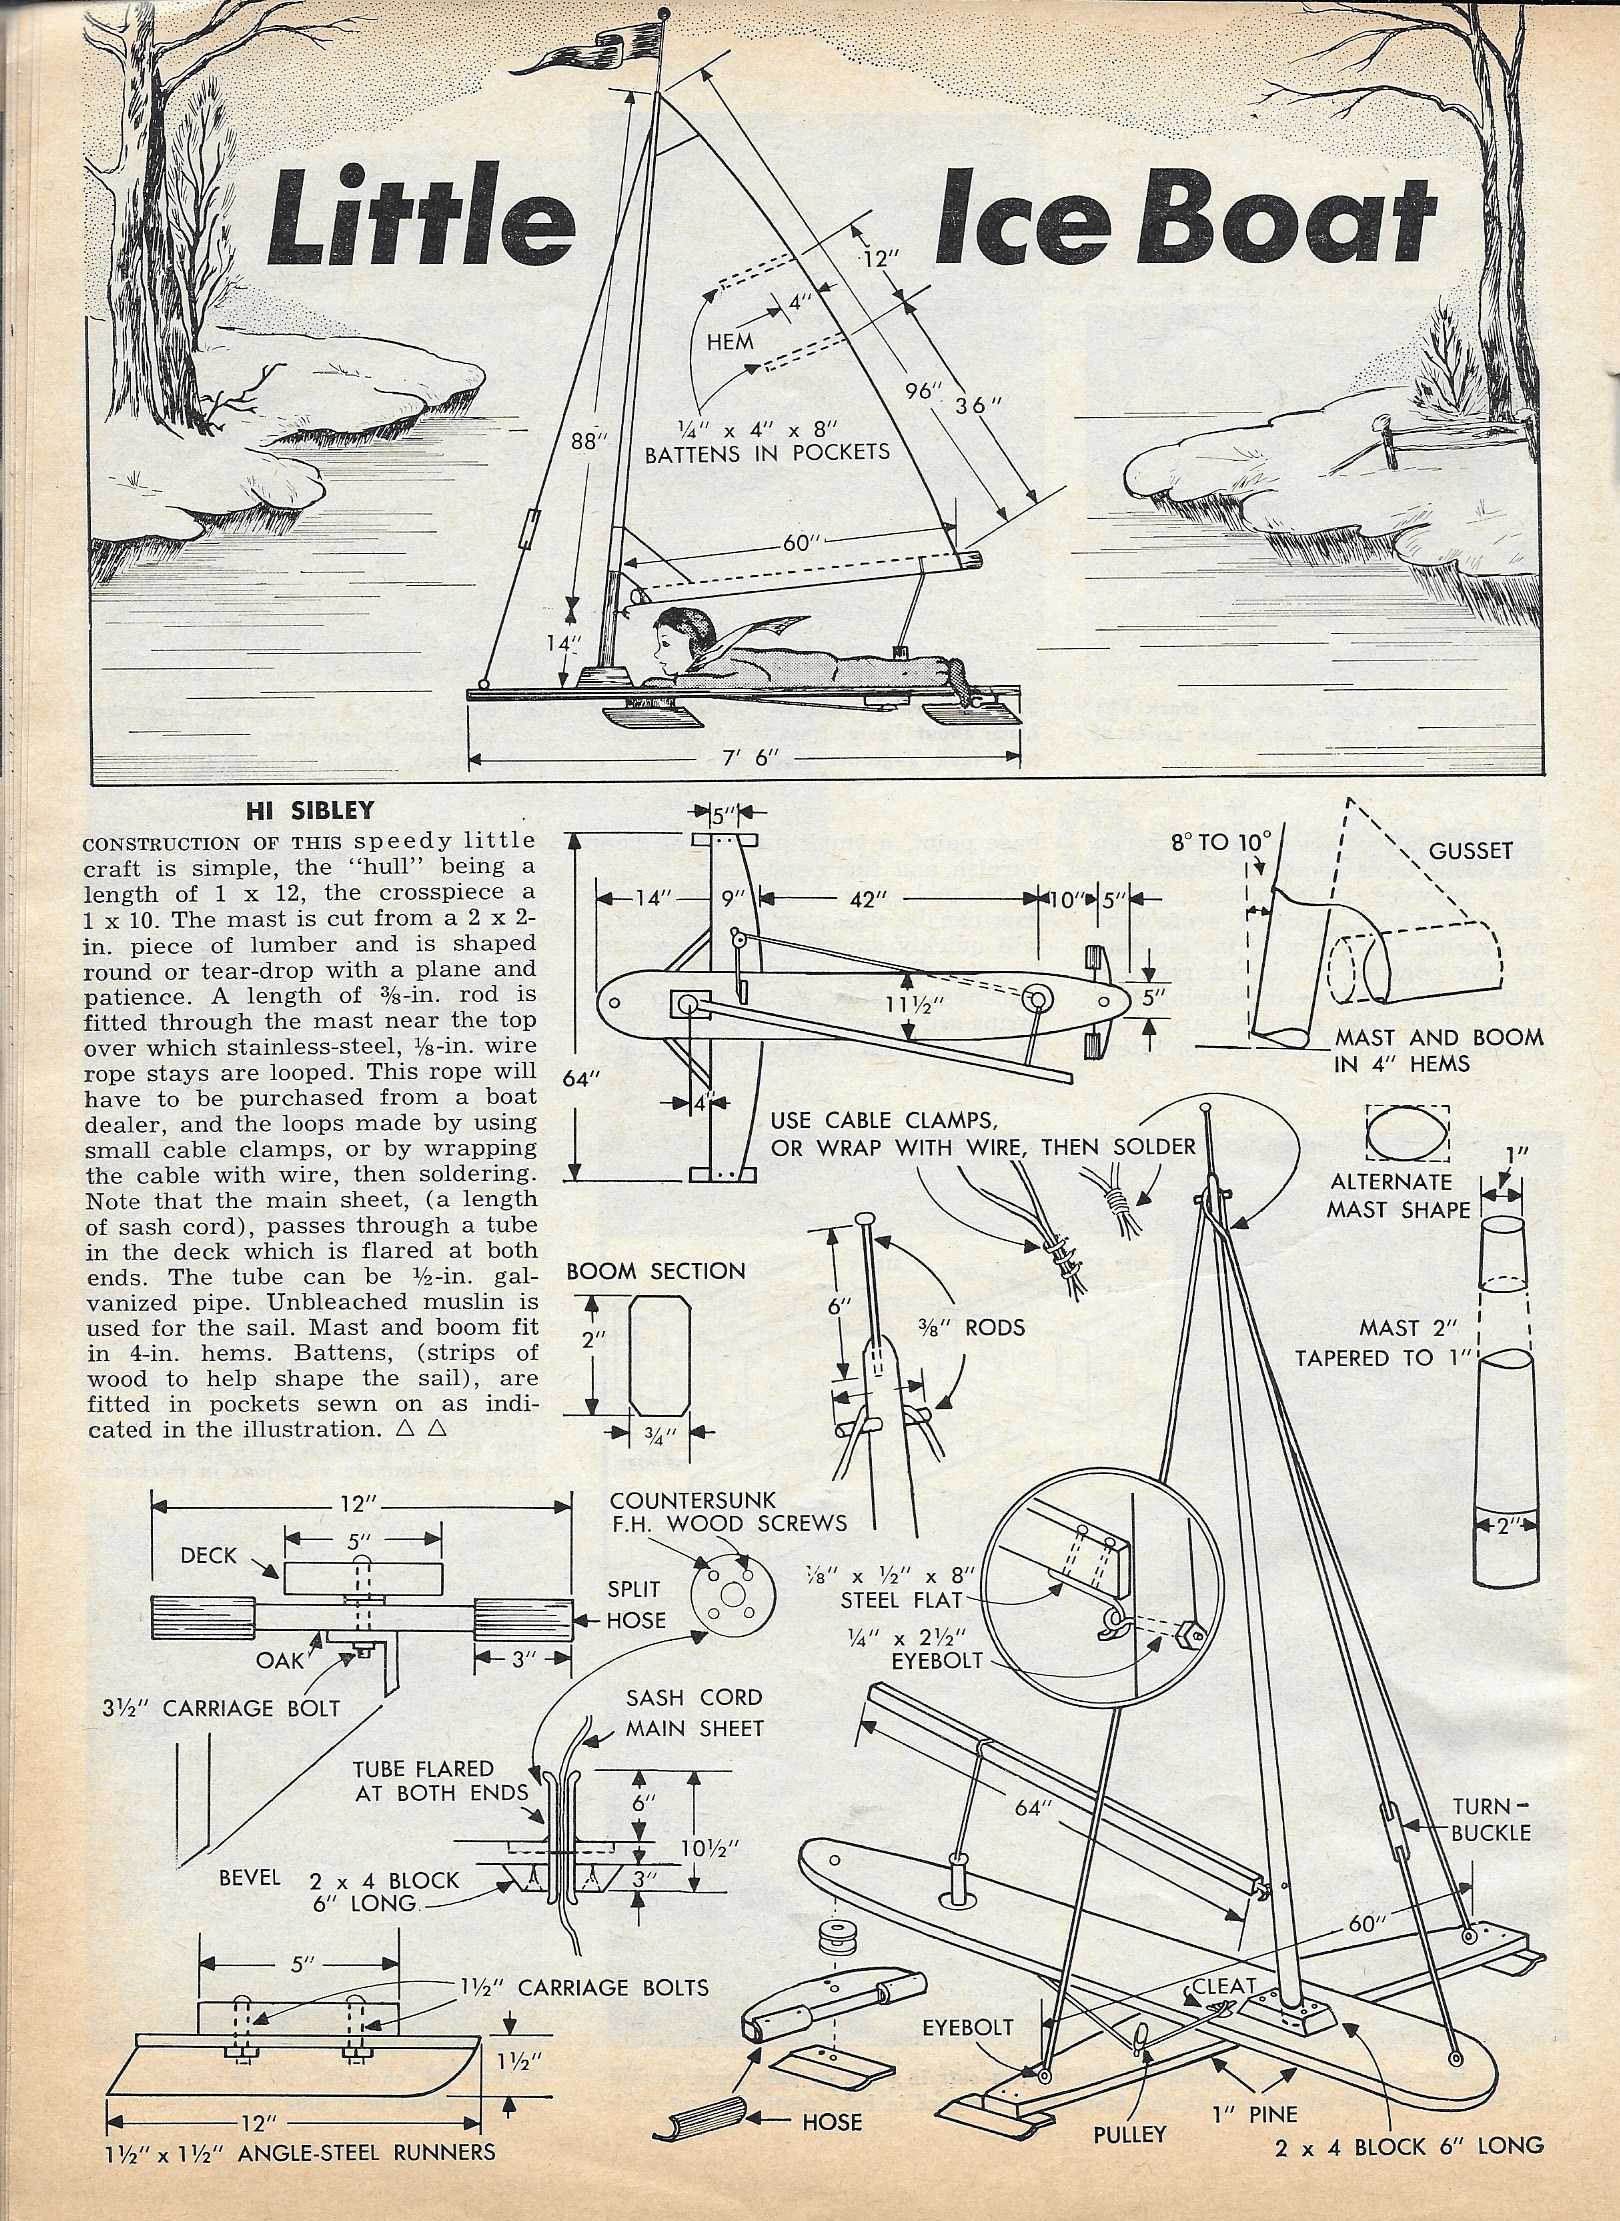
Workbench Magazine 1962 Jan-Feb Little Ice Boat
This is a scanned document of the now defunct Workbench Magazine of this era. Permission was granted by the new Workbench Publication for The Patriot Woodworker community to copy and use the old Workbench Magazine at our pleasure, and for free distribution and re-use.
Got kids! Even if you don't this Locomotive Toybox chest will bring out the kid in any woodworker. I thought this would be a fun one to publish here today, basic construction, and perhaps this will end up in a child's life by Christmas! Have fun!
Got kids! Even if you don't this Locomotive Toybox chest will bring out the kid in any woodworker. I thought this would be a fun one to publish here today, basic construction, and perhaps this will end up in a child's life by Christmas! Have fun!
- 0 replies
Featured by John Morris

Cast Iron Stanley Level
This old cast Stanley level was found at a yard sale recently and I'm hoping to find out more about it. The marking on the left might indicate fabrication or patent date, but the mark on the left has me baffled. Hoping for some help here. Stanley was of no help, although I did find this catalogue on line from 1914.


- 8 replies
Featured by John Morris

Workbench Magazine July-August 1968 Early American Spoon Tray
This is a scanned document of the now defunct Workbench Magazine of this era. Permission was granted by the new Workbench Publication for The Patriot Woodworker community to copy and use the old Workbench Magazine at our pleasure, and for free distribution and re-use.
- 0 replies
Featured by John Morris

Guitar Stand
Well, I “was” fully back in the shop and started to work on a guitar stand. I haven’t played in years but i got a guitar and im going to do my best to get back into it.


- 45 replies