- 12 replies
Featured Content
Top content from across the community, hand-picked by us.
Don't want to count my eggs before they are hatched.........
but I'm liking the way this is looking. Fourth coat of gloss wipe on poly, still wet. Probably will get two more coats. Flame box elder about 8.5" tall and hollowed to about 1/4"
box elder vase.mp4
- 7 replies
Getting ready to Sound TAPS
I am in my summer BAA Uniform with Cornet in hand, going to Sound TAPS for Military Funeral Honors.
- 3 replies
Working with the Grandson.
My wife and I watched our Grandson, Teddy, for a week, while his parents moved into their first house on Long Island. While here, he did the usual things for a 5 year old, play dates, swimming in the local creek/pool, helped with yard work, and helped me start a dovetailed, sliding lidded box, that is to be used to store loose parts for my Delta shaper. We didn't quite get around to painting it but I'll show him the results when finished. All-in-all, he had a great time!!!!
- 17 replies
Workbench Magazine September-October 1967 Contemporary Bedroom Set
This is a scanned document of the now defunct Workbench Magazine of this era. Permission was granted by the new Workbench Publication for The Patriot Woodworker community to copy and use the old Workbench Magazine at our pleasure, and for free distribution and re-use.
Quote
Contemporary in design, yet conservative enough in styling to be in fashion for many years, this bedroom set offers many extra conveniences as well as ample storage. Source: Workbench Magazine Sept-Oct 1967
- 0 replies
4th of July, 1776
My thoughts,
Our beautiful country, as we celebrate the anniversary of our Independence, I am bursting with pride at how far our young country has come in such a short period of time.
I am thankful for living here, I thank God every day for allowing me and my family to be a part of the American experience. I love our American people, with all our faults, and with all our unique traits and culture that has formed since the day William Bradford set foot on Plymouth Rock.
We are the American Experience, there is none like it the world over, there are no people like us, and we are a very unique culture made up of a melting pot of Natives, Immigrants, and Natural Born.
Thank you America, thank you men and women who provide for our protection so that we may sleep soundly at night, thank you Military. And thank you to the folks on Capitol Hill who legislate, argue, and represent. And thank you to all Americans for personally making my families life rich with daily experiences as our people and our society grow, change, shift, re-position, and never settle for status quo.
Thank you to our Founding Fathers who authored the Declaration of Independence, and thank you Americans who created the Constitution of the United States
And most of all, thank you God for shining your light down on our country and having mercy on our land and for your fatherly love, and endless supply of patience as we Americans, just try to figure it all out.
Be proud!
For we are, AMERICANS!
- 92 replies
Piano -> Bookshelf
Spent a good part of the day today working on this project. 50ish year old piano made in Cincinnati. A long road of discovery.
My aim was to be able to get out the "harp" -- the cast iron frame with the strings. This will, I hope, significantly reduce the weight down from 500-600 pounds and needs to come out anyway for the conversion.
So got apart:
90% of the harp
the lid
the music stand
the keyboard
the keyboard cover
the strings
the dampeners
Details:
A piano has 88 keys, but most of the keys have three strings, most of what was left had 2, and a few lower octave had one string. The strings need to be at least loosened to get them off the soundboard pegs. Of course, the tuning pegs are not only close together, but have a square top, making removing by a drill and socket not possible. At least they were not male Torx that I'd have no way to remove (saw that on some of my research).
The harp is held in by a bunch of #14 or bigger screws. most of them are under the strings. So the strings needed to have the tension removed, then cut. Of course, the very last screw, the one hardest to get at, would not budge. Went to AutoZone and got a can of penetrating lube that did no good. Tried to drill out without success. Screw removers didn't work, either. So back another day with a Fein Multitool and hope to be able to get it by cutting out the board below.. One more screw holding the harp down on the opposite end that may be a bolt holding on the leg coming up through.
Pulled out 88 dampeners that sat above the strings in the harp. Necessary before the harp can be removed.
Unscrewed the rail on the soundboard from below, but it appears to be glued down, too. May have to just remove this whole thing and put some plywood in there for the bookcase. (The plan is to use the top and other misc parts for shelving, where possible)
Pulled off the top, music stand, keyboard cover, and a whole bunch more hard to get to screws to remove the keyboard. The keys are pretty nasty looking so they will probably not be in the final product.
Will have to do some touch up and refresh, or maybe strip, the finish on the very nice walnut veneer once further along.
Pictures when I'm not so knackered and get the parts unloaded from the van.
- 74 replies
- 1 reply
- 1 reply
Box for Daughter
My daughter asked me to make her a small box...Presto changeo, ala kazam....
Had a lot of fun with this one. Not bad for a first box. I wish it had turned out a little more centered, so that the variations in wood types were more even.
.40
- 12 replies
Briana Hine (Adopt a Warrior Family for Christmas 2020 Prayers Needed)
Dear folks, I have been in contact with Mrs. Hine, the mother and wife of our 2020 Adopt a Wounded Warrior Family for Christmas project.
I was informed a couple months ago that she had been diagnosed with breast cancer, at that time diagnosis and staging was kind of up in the air, and over the last few weeks we have finally gotten more precise information from the family and I feel it's time to offer up some prayers for Mrs. Hine.
Mrs Hine is scheduled for a double mastectomy on June 14, and she and her family will need all the help they can get. For now, I'd like to offer up this prayer to our friend Briana Hine.
"Please pray that the Lord Jesus Almighty heal my friend. Help God take away the cancers that are consuming her body. Help her to survive this, become stronger, and help spread the Lords love. Be with her family through this trying time. Help them to flourish in strength and understanding."
AMEN
Also, I have decided that a good portion of our current community fundraiser proceeds will be redirected to Briana's family to help provide meals during her recovery, we will order food for them to be delivered through their special portal created at:
Meal Train for Briana (Bree) Hine
WWW.MEALTRAIN.COM
Hi Everyone! This meal train is for Bree and her family. Many of you already know that our sweet Bree has been diagnosed with...
If you would like, feel free also to take up a day for the meal train and have food delivered to their home, even if you are a state away, you can participate in this, and order food locally to be delivered. If you do decide to take a time slot to have food delivered to the family, please let us know here which slot you took.
Thank you all for your prayers in advance, and your support.
We love you Bree! You'll get through this lady!
- 8 replies
Latest project
This is what I am working on right now. I have a little more work on this and it will have a lid.
- 13 replies
Workbench Magazine September-October 1967 Cherry Planter
This turned planter offers some unusual challenges to the lathe buff. The upper portion being two, separately turned blanks. Source: Workbench Magazine Sept-Oct 1967
- 0 replies
Featured by John Morris
Flush draw cabinet ?
I've started on the build for my daughters sewing room cabinet. She wants flush drawers. What is the recommended spacing around the drawers from the face frame? I'm thinking 1/8" but a bit of professional advice is in order.
- 43 replies
Featured by John Morris
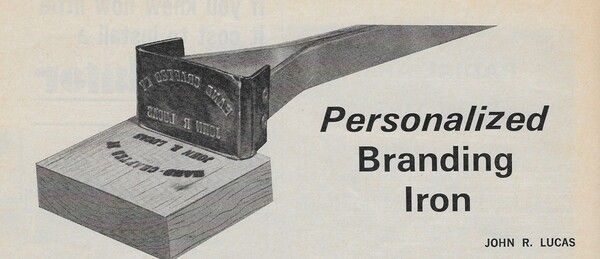
Workbench Magazine July-August 1967 Personalized Branding Iron
- 0 replies
Featured by John Morris
Kitchen Redo
I planned on remodeling the kitchen a year ago January but was informed that our Goddaughter's wedding was in April and Patti was baking the cookies for the cookie table. 2020 being what it was scraped the wedding plans. Decided to redo the first floor bathroom instead.
- 80 replies
Featured by John Morris
Workbench Magazine Mar-Apr 1966 No Gear Wooden Clock
This is a scanned document of the now defunct Workbench Magazine of this era. Permission was granted by the new Workbench Publication for The Patriot Woodworker community to copy and use the old Workbench Magazine at our pleasure, and for free distribution and re-use.
- 0 replies
Featured by John Morris
The story continues
Well it had to be to good to be true. Finished the coffee bar and the she wants a shelf with hooks for coffee cups. The real kicker is these are not the cups she uses every day but cups from the regular set of dishes.
- 21 replies
Featured by John Morris
Quilt-clapper
This thread is classic me LOL (laughing with/at me is encouraged). So the other night after work, I’m sitting in my La-Z-Boy, trying to make it appear I’m still awake. I hear “Honey, can you make me one of these?” I ask, “What is it?” She replies “It’s a quilting clapper.” Silly me, I think that’s what turns on a quilting machine when you clap your hands. So I look at a picture of a block of wood she is showing me, and I’m like yeah, I can make you a block of wood LOL. Apparently you use these to flatten out seams, with an iron (and said block of wood). So I go online and some guy makes them, and shares the plan. hardwood, 2-3 inches wide and thick, 12 inches long. His are 3 inches wide at one end, and 2 inches wide at the other end. No gluing, no finishing. Guess I talked myself into not taking it too seriously, due to its ease of completion. So today I wander over to the closest Woodcraft, and pick up Mrs Ash, 3 x 3 x 36. I get her home and introduce her to Mr chopsaw. Now she has two sisters. I get out me compass and draw a 3 inch half circle on one end, and a 2 inch one on the other end. Find a straight edge, and connect the half circles. Figger I only need to do this once, I’ll use the first one to trace on the other two. Oh yeah, I figgered that since I’m making one, I may as well make three, the Missus, my sister, and another of the Missuss’s friends, who quilts. Well this is the first time I’ve worked with Ash, and the first time I’ve really worked with anything 3 inches thick. Also first time I’ve used the bandsaw on anything thicker than 3/4. I found out that my bandsaw is not square to the table. Since I had talked myself into this being an easy project (Which it certainly should have been, had I taken it seriously enough to make sure everything was square) I traced out the other two blanks, cut them on Mr Bandsaw. Woke up Mr SS Beltsander and spent some time trying to undo the appearances my unsquare bandsaw had produced. First time using the Shopsmith belt sander, I usually can get the job done with the strip sander. Mrs Ash and her sisters then had an appointment with Mr Router Bosch, who gave them a groove down the middle of each side, so the ladies can easily hold them. Tomorrow they have appointments with brother Mr ROS Bosch for a whole lot of sanding. I really wanted these to be 3 identical, perfectly radiused, straight edged, but assumed everything was gonna go smoother than it did. Next time I will take my EASY project more seriously, use a square, and NOT RUSH. This thread is only for entertainment purposes and is not looking to solicit any you’ll do better next time, replies.
- 14 replies
Poplar Painted Cabinet
A few weeks ago mama decided she wanted a cabinet to store her arts and crafts supplies that are taking up floor space in our upstairs hallway. She went shopping online and found a cabinet she liked for 230 bucks, and it was the typical particle board white surface type of stuff. So I told her I'd be happy to build it and the materials would be less as well.
So she and I went to our lumber store and picked up some 4/4 poplar, poplar because she wants the exterior painted white, and I want the interior natural finished. We will be using General Finishes Milk Paint for the exterior. Also, I am going to build saw tooth shelf supports as well.
This is our hardwood lumber dealer "Reel Lumber", about 30 miles from home, it's full of all kinds of stuff, from pine to oak to exotics and everything in between. Our Poplar was running about 2.70 a board foot. I spent about 150 bucks, and with the Milk Paint, we are going to come under budget from her online cabinet she wanted, and we are going to have a piece of furniture to pass down to our kids, and their kids.
Got the boards home and had to size and join them. Note: if you look behind my Makita CMS, you'll see a cross with a flame in a heart plaque, when I was going through some serious health issues a year ago, my friend Jess @Smallpatch, sent me this very special and inspiring gift, it lifted my spirits enormously, and when I felt I needed a little nudge from the Lord while working in the shop during that rough time, all I had to do was look at my plaque, and I felt it. To this day I cherish it, and I feel the Spirit in it.
Just a board on the bench, laying out dado's.
Glued up.
I built the face frame with a Kreg pocket screw jig, and then glued the frame to the case, and bored holes in the face frame for 1/4" dowels, 1 1/2" long and glued and driven in to the case, then a flush cut hand saw and cut the dowels flush and block planed them smooth. Since the case is going to be painted, I thought adding the extra strength of the dowels would be good since you won't see them below the paint. I also mixed up some two part epoxy and floated it over each dowel, let dry then sanded smooth, just so there weren't any issues with the end grain of the dowels sucking up the paint.
Joining boards for the raised panels.
Getting the rails and stiles ready for the raised panel doors, I was playing with my Stanley 45 yesterday, and after a few tweaks here and there, she purred and plowed, making some wonderful clean 1/4" wide by 3/8" deep grooves to accept the raised panel.
The grooves turned out very nice.
After running the grooves in, I used a block plane to take a whisper shaving off the top to clean up the surface.
Within an hour I had two rails and one stile done, and I was starting on the second stile when mama called me in for dinner last night.
Here is where the case is as of today. The backed boards are beveled and nailed off on the back of the cabinet.
Today I am gluing up the door panels. I'll keep the images coming, and thanks for looking!
My very special cup, that a friend gave me, and also a cup for mama too!
- 81 replies
Tailstock Drill (Lever Action)
I was never happy drilling on the lathe. All that cranking of the tailstock wheel and never enough travel. I always thought a lever action, like a drill press, would be nice especially when it comes to clearing the chips from the bit and hole.
- 21 replies
Featured by John Morris
Workbench Magazine January-February 1966 Table Tennis Rack
This is a scanned document of the now defunct Workbench Magazine of this era. Permission was granted by the new Workbench Publication for The Patriot Woodworker community to copy and use the old Workbench Magazine at our pleasure, and for free distribution and re-use.
- 0 replies
Featured by John Morris
Past projects
A few pics of some of the things I do. Not a lot of fancy but it keeps me occupied and just enough variety to make things interesting.
- 10 replies
Featured by John Morris
- 0 replies
Featured by John Morris
Past projects
A few pics of some of the things I do.
Not a lot of fancy but it keeps me occupied and just enough variety to make things interesting.
- 10 replies