Search the Community
Showing results for tags 'clean up'.
Found 9 results
-
During the recent re-arranging of the FULL plane til....one or two planes stayed outside .....needing a bit of work... This just need cleaned up, and the settings up to date...still a little deep...Millers Falls No.9, pre-war Type 2 Next? Well... May have been sitting around a bit too long? Ya think? cleaned up nicely enough (cheap brush with a few drops of 3in1 oil) Need to adjust the frog a bit..otherwise.. The iron is cambered, as this IS a jack plane...Sargent No.3416...old enough that a patent date is on the lateral lever...from 1901 Next...that Stanley No. 8c, type 19 does have a few "issues" to fix.. That bolt has a burr to be ground off..and.. There is a burr at that point...just enough that I have to remove the bad bolt BEFORE I can remove the lever cap...grinder for the bolt, needle files for the lever cap Next? NOT a "good" look...all pitted, needed to grind back behind that black line.. Almost there. Then over to the H-F Disc/beltsander...mainly the disc part...had a full glass of water handy, too..took a while of grind, dunk, grind, dunk..to get a new bevel and a flat back.. Then a couple oil stones..this is the coarse Crystolon...then on to the 600 medium India stone....the the wet or dry papers..1500 grit followed by the 2000 grit.. From the 600 grit to the.. 2000 grit...at each step, flatten the back more.. Then finally, a good stropping.. Old leather belt, with some green stick (didn't feel like going to the Unicorn, this time..) Got things back together..a test drive or two to get things set up.. Was a busy day, today...plane in the middle? Millers Falls No. 9, type 4.... One before WW2, the other, about 1947ish... A Jack, a Jointer, and 2 smoothers...might be a good starter set?

- 4 replies
-
- 11
-

-
- sharpening
- clean up
- (and 1 more)
-
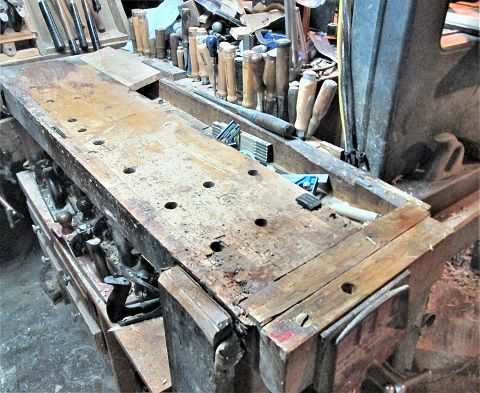
Getting to the point, that BEFORE I can do anything else on them projects.... Something needs to be done about this mess.... Things keep trying to walk off the edge....about half of this mess will go back into the tool chest.. Also, was getting tired of chasing the handbroom around. new keepers to keep the saws from rattling... Here we go..first was to box up a few planes... Stanley 45. have to tear it down, to pack up...close the lid... Placed in the big tool chest..next.. Stanley No. 71-1/2 Just sit down in the box.. Close and latch the lid...placed on top of the Stanley 45's box in the tool cabinet...next... 3 for 1 sale..... tear down the Wards 78, set the Auburn #181 into it's holder.. Close the lid, place over on a shelf...next? Old OEM box for the Stanley 45...is now the home of the Dremel kit...slid this back out of the way... At least that door clears, when I go after a hand plane....didn't stay there for long, though Before it was back in use...bench looks a little better? C clamps have their own storage rack.. MIGHT have enough of these...never know.... And..NOW..I can get back to work....
- 24 replies
-
- 10
-
-

-

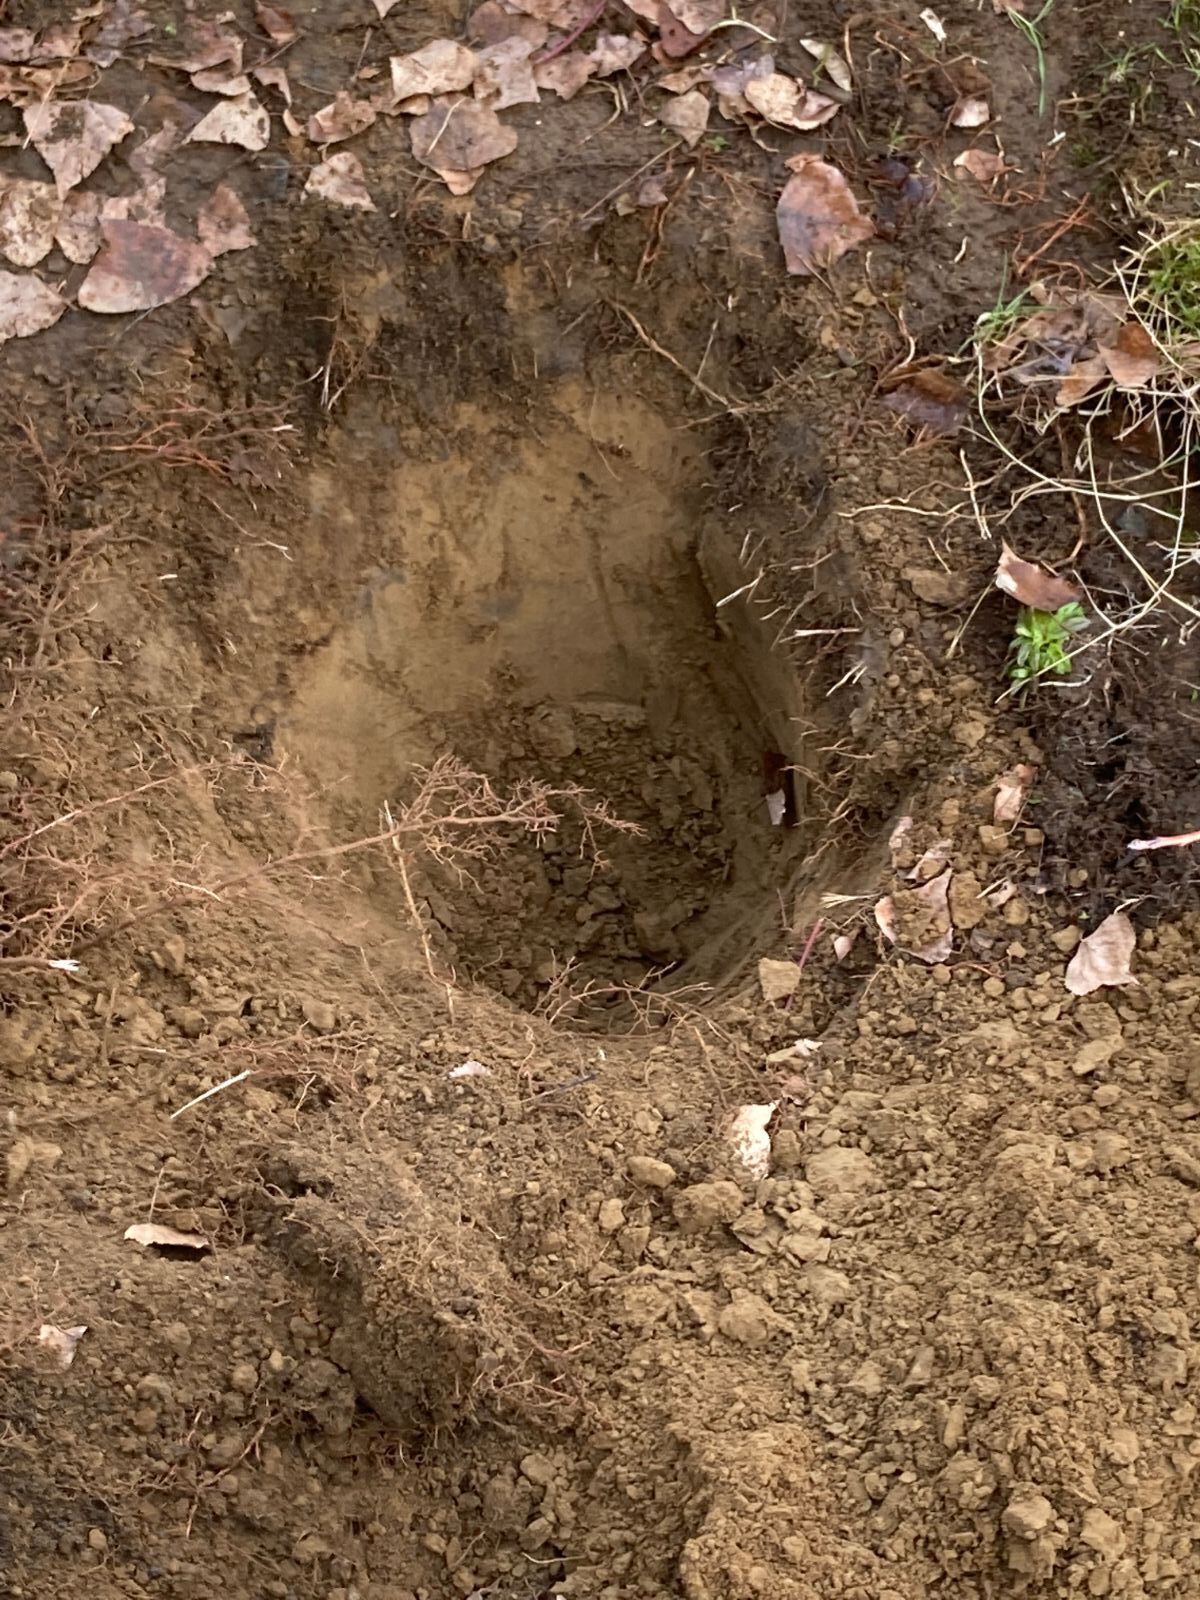
A bit of garden improvement and clean up with a bit of CHAIN SAW fun thrown in.
AndrewB posted a topic in Home Improvement
So this morning getting ready for later this month I plan on putting a plant that I got from my parents they said they didn't want it anymore so they gave it to me. Either way dug out the hole in the ground for it TALK A BOUT A PAIN IN THE u know what. At the same time taking care of a beater work bench that I had built for me lathe when I had first started out doing the hole wood turning thing and I broke out the chain saw and had some fun went to town on it and welp now its gone. Slowly but surely. Just haven't figured out as of yet if I'm going to get extra soil for the plant or just use what was in the pot and surround it with what I dug out of the ground this morning. All of that got me over a total of 2000 steps so bonus. Note I do NOT have what you would call a green thumb.
-
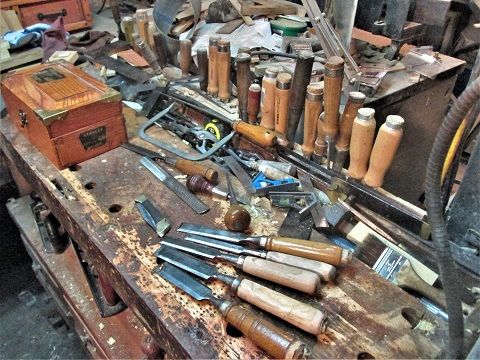
Ok, latest Project is about ...done. Time to clean up the bench, put away the toys,,,and maybe rehab a few items.. I can finally set this back on the bench....bench is a bit ...full... Over flow from the Tool Well? "Name that Tool"? How do you hang this thing up.... Every shop could use a 4-in-hand rasp/file....but it needs a place to sit, until called for.. Chisel shaped objects, at least the 3 in front...the other was rehabbed long ago...clean, sharpen, and re-do them handles.. May "refine" the other two....Scratch Awls were also cleaned, sharpened up, and a coat of finish brushed on... The rasp was cleaned of rust and crud, pocket knife was too..and sharpened... Anyone want to stop by and help out? Stay tuned..( may build a second row to the back of the bench storage rack....may need 2..?)
-
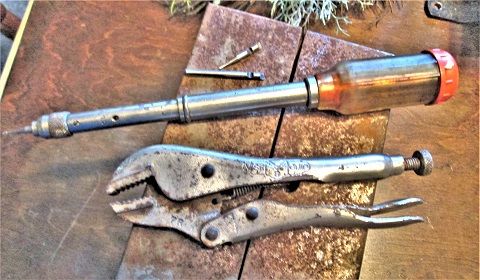
Well, Stopped at ONE garage sale.....Spent a bit over $15...Picked a pair of straight jaw Visegrips, and a "modern" Yankee drill... That had 3 drill points. That was the $0.50 of the $15.50.....and I almost drove off without these two..why? A COMPLETE Stanley Mitre Box with it's OEM saw...had to take the saw out, to make things easier to cart around... So....in order to do a rehab on this new "toy", one item needs addressed... need to put away all of this mess....including those freshly cleaned up bits.. other end of the bench was worse..( board was to test how sharp the saw is....VERY sharp...) Took maybe 10 minutes to go from this mess...to... I think I can live with this... That Disston saw... And, when I cleaned the spine up, there was another Disston & Sons stamp. Took the Brass out, and shined them up. Saw is 26" long, not counting the handle..and WAS 4" under the spine ( now about 3-1/2"..) which makes the Mitre Box it goes to a #246, or a #346 model. IF you look at the bottom of the guide rods, instead of a square block, there is a split cylinder. Both stock rests and both stock holders are there...was missing depth stop back here ( had one in me spares box) Afraid to look under the top deck, and see what sort of shape the main deck is in...No name plate showing Model number.. But there are 4 patent dates, all from 1904...There was one item to replace.. An old break..and I had a replacement in the spares box...Decided to soak the moving parts in PBblaster, since none were moving....got rid of the plywood deck... Well, well, lookee what I found. Those stock rests ( for doing crown molding) These are OEM, OLD ones..they have a small button to keep them from being pulled out too far ( and lost) But, if you take the rest and that thumbscrew and holder around front... That same thumbscrew threads into the metal disc in the deck...and you have a length stop for repeat cuts...Shook up the can of PB..and gave things a soaking... Swing arm did not want to...swing...let this soak for about an hour, gave it another try...was able to move it nicely enough...details? One, in addition to the numbers on top of the quadrant, that show the number of cuts for a given box ( 4 = 4 sides = 4 cuts= 45 degrees) there is a scale along the front edge.. These are degrees. There are detent holes under all of this, to lock the saw in place for the cuts... Still evicting spiders...That HUGE slotted "bolt"? is not a bolt..notice that little hole in the slot? There is a tapered pin in there, when you install the guide rods into the arm, you tight a bolt at the end of this pin. It spreads the slot, and holds the guide rod assembly in place. You can also see the detents the swing arm locks into..other end of the swing arm turns on a "King bolt"... Which I may need to remove, to clean and repaint everything that needs painted.. Intent is to make this Mitre Box & Saw look like the day Mr. L Millice bought it...Saw has been cleaned up....box has been taken down to the bench....need a bowl to toss cleaned up parts in, and a new 6" brass wire wheel for my grinder....and a 3/8" thick plank of Poplar, 6" x 24" Project wood. old wheel sheds worse than a sheep dog in August... Stay tuned...
-
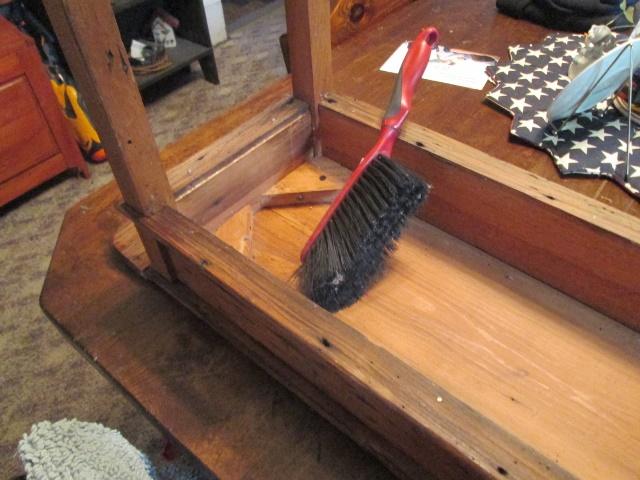
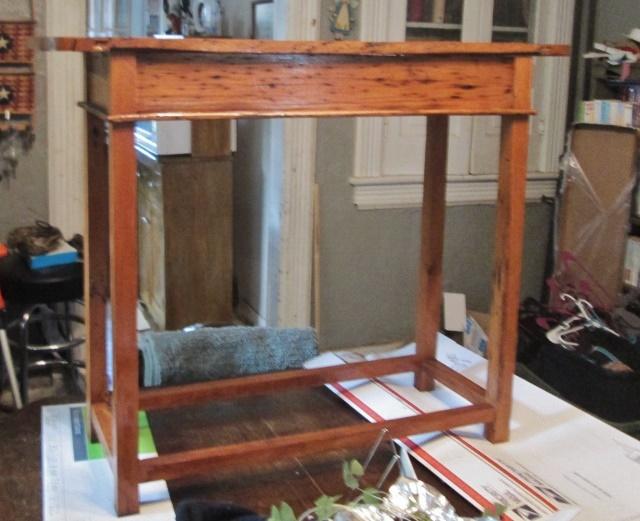
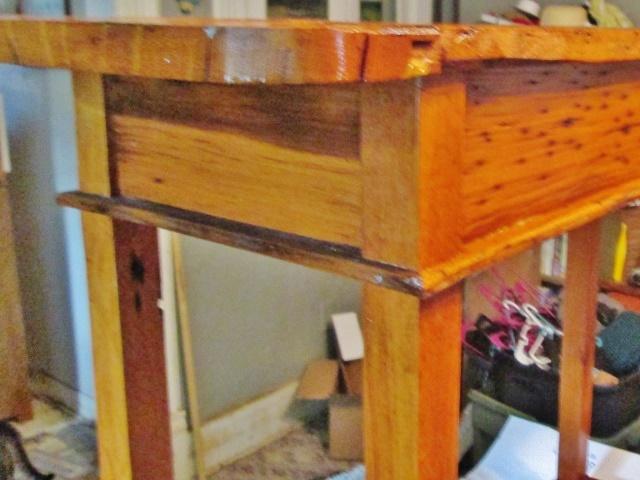
Built the table back in the Pole Barn Shop days...about 2012, or so....Starting point was a 13" wide plank of Sycamore, and a few white Oak rafter parts, complete with nails.. To get a decently straight plank for the top, had to rip it down a bit, to remove wane, and the tapered edge....Saved some of the ripped parts for breadboard ends. Table traveled around, a while. Finish at the time was just a flood coat of Golden Oak stain...never got a coat of varnish... While moving things around the other day...table came in from the foyer...needing a good clean up... Been sitting a while? Broom to evict the squatters.. Then a wipe down to try to get rid of the dirt & dust. Apron edges were from old oak rafters...outside edges were rounded over..with a block plane.. Trim was notched to fit around the leg. They were mitered at the outside corner. I was going to thin the breadboard end pieces..never got around to it. Was a bit afraid they might fall apart.... Those flat trim pieces? They acted like a sponge..soaked up 6 coats of varnish, today...black holes were from old cut nails. Trim was just glued and nailed in place.. Legs and stretchers were ripped from those old rafters...Mortise and tenons at the corners. So..everything now has a coat of clear gloss varnish.. Maybe a better look? Just some old barn wood....
-
So a friend of mine finally found his inherited Stanley 55 in his cellar, complete with 4 boxes of cutters. I volunteered to clean it up for him as it is grubby and caked with dirt and some surface rust on the rods, screws, etc.... Yeah, yeah..I want to play with it after I'm done...okay...I admit it... (1) I'm having a bit of trouble taking apart the adjusting screw (27 and 28 on diagram)...has a pin at the bottom that goes into the cutter and a knurl knob that makes the adjustment. I'm thinking I don't want to take the pin out...mainly cuz I'll probably lose it...but it doesn't look like it will come apart without doing that. Any of you 55 owners find a Houdini method of taking that apart...? (2) My other minor headache is the tiny cutter (85 on diagram) on the bottom of the left fence/body. A small screw keeps it aligned and the slot in the screw head is worn beyond any screwdriver being able to grab it. I'd like to take it out and put an edge on it...it is very dull and I'm sure it won't do it's job of cutting a good edge. Ok...ya caught me again...yes, I'm hoping he'll think what a wonderful job I did and give it to me...
-
Ok, wall was poured the last time. Time to remove all the forms, and maybe do a back fill? First off......the turnbuckle braces. Pull the nails out of the whalers, remove the stakes, no need to trip over either. Stack the turnbuckles out of the way, Stakes into a pile. Next off, those whalers themselves. Pull the nails until just the 2xs are left. Whaler wires have their own plastic bucket to be tossed into. Make sure ALL nails have been removed from the wood. You don't want to step down on one..DAMHIKT Wood removed, time to remove the hardware. Pins get knocked out, and placed in their own bucket. Then the "dogs" get knocked off the forms. If I'm on the outside crew, I would be working my way from a corner, first. IF I luck out, and have to do the inside....I work from a plywood filler strip, towards a corner. Wall ties come through the form into square holes, and a pin is inserted into the tie. A simple whack with the hammer to pop the pins back out. There should be a couple nails holding the bottom of the form in place on the 2x4 "plate".......IF the mud crew hasn't slopped a bunch of the stuff down there, should be an easy job. At the corner, there is a part that looks like an angle iron. Get it loose, and take it off. Knock the wall tie loops out of the way and work the first form looseand off the wall. Scrape the form clean of mud smears. Hand the form to the gopher, and let him stack them up, using a pair of 2x4s as a skid. ( BTDT) and then onto the next form. IF the weather is kind of cold.....there is nothing like that green fog that arises up off the wall as you strip the forms....smells like money. Work your way around the walls, until all forms are off, cleaned and stacked...should be about lunchtime by then.....if your not standing around, burning daylight. Forms on the inside? Can be stacked up like the outside ones, and a LULL can reach out and pick them up. No LULL? Hand the cleaned form over the wall, and let the gophers stack them. Drills/screwguns to remove the Tapcons holding the plates down. Tapcons into my nail bag, 2x4s to be stacked out of the way. Now, while you were stripping forms on the outside of the wall....where the wall ties come through the wall. A hammer will be used to break the wall tie off. They have notches on them, and that is where the break will happen. Might create a crater, no big deal.....Later you can come back with a mix of "mix" and a rubber float, and fill in any and all holes/voids. On the inside of the wall, we left the ties alone. A 1-1/2" thick foam "board" is cut to size, and stuck onto the exposed ties...no glue needed. Insulation is now installed. Backhoe can drop a bucket of backfill gravel into the trench on the inside. . The templates for the anchor bolts have to come off. Remove the tape around the threads, and remove the nut, then the plywood. When you install the nut this time, only go halfway onto the threads of the bolt. Then fill the bolt with motor oil. Keeps thing from rusty up. Any wood inside the blockouts? These need to be removed also. Sparky's Mouse hole needs to be cleared out. Same with the plumber's holes. next, with everything out of the inside of the walls, and the trench around the inside filled and pounded. A rockchucker shows up to shoot the gravel to cover the floor of this crawl space. Insulation boards are in, so drape plastic sheeting all over the ground, and up the insulation boards, and THEN have the gravel shot inside. Laser level to check grade, and a rake man or two to help spread the stones out flat and level. Around the outside of the walls, foundation sealer is applied as per the print. Might be brush on stuff, might be a sheet of stuff. And have the backhoe drop gravel in to the trench. Need to add it in layers, groundpounded, and add some more, until the outside has been backfilled to grade. And that is all the concrete crew has to do with the job. Load up the hardware on the company flatbed, put the tools away. And head out to the next job, as this one is done Just a basic rectangle foundation for a ranch style home. No basement. IF they wanted an attached garage...we'd have done a thickened slab for that. Then they could add a run or two of blocks before the wood goes up. We'd come back and pour an "apron" if needed. Hope you enjoyed this little tale....
- 2 replies
-
- 2
-
-
- stripping forms
- clean up
- (and 1 more)
-
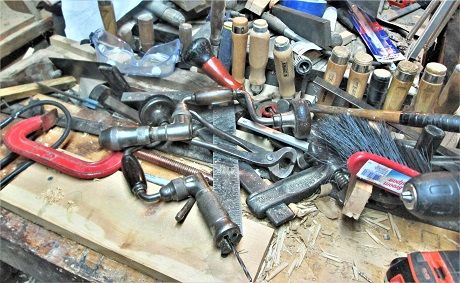
Kind of overflowing right now.. Underneath? Makita Sawzall I picked last year for $10. Black case below that? Is a tool box FULL of wrenches and sockets. Craig is supposed to be using that one. Taped up Makita needs need batteries...that WILL hold a charge longer than 10 minutes. The other is almost as bad. Rest of the toys? Mat need to do an inventory first..... Need to find a spot for the latest rust hunt item... $20..after I talked it down by $5. Emerson made, No. 113.226423. I now need to buy a sanding belt for it, and a disc or three....might find some use for this.....maybe.