Search the Community
Showing results for tags 'chest of drawers'.
Found 8 results
-
It was in May 2024 when I completed the chest of drawers #1. I have not posted since then, but I have the second one in-work. It is not the same style but is similar. Just a few pics. The dovetails were made using my table saw. I have the tails (qty 100) done and have not started the pins. I choose to apply the finish before assembly. I only have the drawer fronts milled in rough dimn. I spray outside or in the garage and then carry every piece in to my clean rooms (kitchen, living rm, or use the ping pong table in the basement). Thanks for looking. Danl

- 14 replies
-
- 11
-

-

-

-
Looking around for ideas, found this one sitting in the dinning room window sill... Along with a writing desk...figured IF I change a couple details...like make the drawers 4" deep...and the sides into Frame & Raised Panel...hmmmm.. There is a Mystery board in the latest stash.. Is the 1 x 8...Ash..or...White Oak? Them be Ray Flecks... Have a few defects to work around... At least in the 1 x 6 shorts...and one end will need trimmed up. Yep, THAT one.. Next, decide which to use.. As either raised panels, or, the 4" deep drawer fronts...either way, both will be 4" wide...have to decide how LONG to cut them... Will need 4 stiles, just have to figure out how TALL this case will be...and then how long to make the rails... Starting tomorrow, when I haul a couple 1 x 6s to the shop...and the "Timer" set at 90 minutes...we'll see how much cussing will be needed.. Stay tuned...
-
My Mission style chest of drawers is complete along with the bed and nightstand. I used QSWO for the primary wood and poplar wood for the secondary wood. All the dovetails were cut using a TS jig. The glue-up for the case was stressful; forty-four M&T joints (14 twin & 16 single) along with two dovetails, all in one glue-up. The drawers are supported on undermount slides. For the motif, the inlay is Mother-of-pearl and black veneer. Finish is dye, shellac, gel stain, and wb lacquer. The 4th piece to the set (chest of drawers #2) is in-work and it will be of a different design. Thanks for looking. Danl Posting log for the Mission style Bedroom set journey 1. Help me with my lumber hauling Feb. 15, 2022 2. White oak is here Feb. 28, 2023 3. Moxon vise May 15, 2022 4. TS - tenoning jig May 29, 2023 5. Double tenons June 5, 2022 6. Mission Bedroom set – making progress July 23, 2022 7. Mission Bedroom set – making progress – take 2 Sept. 18, 2022 8. Inlay lines & dots Sept. 30, 2022 9. Mission Bedroom set – Nightstand door Oct. 9, 2022 10. Table saw made dovetail joinery for a drawer Nov. 13, 2022 11. Mission Bedroom set – Nightstand is complete Dec. 23, 2022 12. Mission style bed – prototype March 7, 2023 13. Mission style bed – production -1 May 23, 2023 14. Mission style bed – production – 2 June 3, 2023 15. Mission style bed – production – 3 June 15, 2023 16. Mission style bed – production – 4 June 21, 2023 17. Mission style bed – production – 5 July 22, 2023 18. Mission style bed – production – final Aug. 13, 2023 19. Mission style chest-of-drawers – 1 Sept. 16, 2023 20. Mission style Chest-of-drawers -2 Oct. 8, 2023 21. Mission style Chest-of-drawers -3 Nov. 24, 2023
- 6 replies
-
- 11
-
-
-
-
- chest of drawers
- white oak
- (and 1 more)
-
Ok..first two planks have arrived in the shop... Need to be cut down a bit...to 41" strong... As they are both too long...will be a rough sort of cut, for now.. Speed square to mark out @ 41"...the cut-off? Kind of "Fugly"? other board was only 8" too long..but the board was tapered...so, I cut the wider end...Next Finished length will be around 40" or so...this allows me to trim the ends square. These were run through as a rip cut..rip one edge, with the "better (Straighter) edge" against the fence...then flip the boards over, move the fence a blade's width closer to the blade..run run the freshly sawn edge against the fence...result is what you see here. Next, find the center point..5-1/2" divide by 2..= 2.75"..set this from the fence to the center of the saw blade.. These will be the 4 corner posts of the case. a 32nd shy of the 2.75..but they all are the same.. Letting them get used to the shop...as I need to figure out the sizes of 6 pairs of rails...and 10 raised panels... The corner posts? This is from another SMALLER chest of drawers, also built for the Bedroom..I have to mill the rails, and the raised panels, yet....more planks to the shop Right now, the Dryer is making the shop a bit too warm to work in. Looks like I have had a BUSY day, so far? Stay tuned..
- 94 replies
-
- 10
-
-
- project start
- ash
- (and 1 more)
-
More progress has been made on the chest of drawers. Last time I made a post I left you with this pic. Now I need to make the inner front and rear center stiles and the front upper rail. The front upper rail is a part of a dovetail joint. I started making the rail dovetail by sawing a cheek and two shoulder cuts. Then I cut the dovetail profile using my table saw fitted with a 10-degree bevel saw blade and a shop made jig. After two cuts and some chisel clean-up I have a nice dovetail. Then I laid the front upper rail across the top of the two front legs and scribed their location using a scribing knife. I used a small saw to help with the chisel work. I found chiseling into white oak difficult, so I regrouped and used my router to make the socket for the dovetail. I’m happy with the initial fit. After a little tweaking with a chisel, it will fit nicely. Dry fitting with all the stiles and rails in place. Sorry that I did not take pics for the inner front and rear center stiles. The inner stiles will carry the weight from the #3,4,5,& 6 drawer slides. The front stile has twin tenons on each end and twin mortises routed for 3 rails. The rear stile has two half-lap joints and three single mortises. The rear inner stile will be glued and screwed to the #3 & #6 rear rails during the final glue-up assembly. Locating the mortises was a meticulous effort. I use a template and a compression router bit to route the profile to all the lower rails. Time to dry fit all the pieces and get ready to trial install the under-mount draw slides. The drawer slide will attach to the front leg and the rear rails using a bracket, after the rear legs are notched for each bracket, to allow for the proper clearances. I will need to rout the twelve notches into the two rear legs and the inner rear rail. Another shop-aid or template is made to help route the twelve notches. I used my mortising jig to hold the legs and the template. I used a ½” OD guide busing in my router along with a 1/8” dia bit. The drawer slide is temporarily located looking for positive clearances. I made shop aids to help hold the slide in the rear in the correct plane. I made another shop-aid to locate the front of the drawer slide 1-1/8” from the front of the front legs. The Chest of drawer top boards are milled to final thickness (7/8") and glued together. The top still needs to be cut to size. Next, making the L-hand door. More mortise and tenon joinery need to be made for the door construction. Doesn’t it look pretty? I have a plan and a mock-up for the door pull installation. AGAIN, thanks for looking. Danl
- 8 replies
-
- 10
-
-
-
-
- chest of drawers
- qswo
- (and 1 more)
-
The past weeks a little more progress has was made making the Mission style chest-of-drawers. Thanks for looking. Danl Mission style chest-of-drawers-1 Used a template to aid in making the corbels. It is the same template that was used for the bed. The top boards have been rough milled to 1" thick. Final thickness will be ~7/8". I have a good chop saw but not a good method to make repeat cuts to cut the rails to final length. So, I put together two shop made tools and had great results. Time to cut the twin tenons using another shop-made jig. I used a combination of two shims to get the desired spacing between the tenons and tenon thicknesses. They are the same shims used with the mortising jig. Test fit into a set-up board. Nice fit. Pro-tip: when testing the fit for twin tenons, have the mortises longer than the tenons because you want to verify the fit between the tenons, not the fit of the length of the tenons. Twin tenon before clean-up. Twin tenon after clean-up and making the tenon ends round using a bench chisel and a light sanding. Many of the casework mortises and tenons are complete. I know I still have more to make. Time for dry-fit. Thanks again. Danl
- 6 replies
-
- 8
-
-
- chest of drawers
- white oak
- (and 1 more)
-
I started the build of the mission style chest-of-drawers with QSWO for the primary and poplar for the secondary wood. The drawers will rest on under-mount soft closed drawer slides. My wife wanted 3 drawers behind the door. The door will have the same motif as the nightstand and the bed. I am not certain if the motif will be applied on the lower drawers. I hope to finish the corbels and route the mortises, into the four legs, for the twin tenons next week. The drawer heights are (4) 6", (1) 7", and (1) 8". Danl I use my shop-made-mortising jig to route the mortises into the legs for the needed mortises for the sides. I use my shop-made tenoning jig to saw the tenon cheeks. Fits together the 1st dry fit as planned. The side panels were made from ½” book matched, solid wood. Ripped sawn from 5/4 bd. The panels have a recess to allow for a 1/16" gap. Thanks for looking. Danl
- 6 replies
-
- 10
-
-
-
- mission
- chest of drawers
- (and 1 more)
-
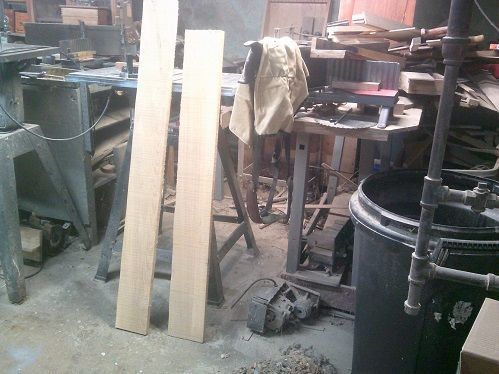
So..although I still have 4bft of Maple left.... 5' against the wall, 2' on top..the rest of this stack is Ash 1 x 6s, there are 8 planks, at 1 x 6 x 4' There is a 1 x 6 x 5' and two at 1x 6 x 6'.... Plan right now, is to set up to replace an OLD Chest of Drawers....that I made from scraps about 20-30 years ago...back in the Pole Barn Shop days... drawer fronts are 3/4" plywood, wrapped with pine.. Thinking something like this will look better? have to work around a couple bad spots...might use that maple for the top...or..the drawer fronts? we'll see...
- 46 replies
-
- 7
-
-
- chest of drawers
- replaced
- (and 1 more)