Skip to content
View in the app

A better way to browse. Learn more.

The Patriot Woodworker

A full-screen app on your home screen with push notifications, badges and more.

To install this app on iOS and iPadOS
  1. Tap the Share icon in Safari
  2. Scroll the menu and tap Add to Home Screen.
  3. Tap Add in the top-right corner.
To install this app on Android
  1. Tap the 3-dot menu (⋮) in the top-right corner of the browser.
  2. Tap Add to Home screen or Install app.
  3. Confirm by tapping Install.
Supporting Our Service Members
We proudly stand with all United States service members in Operation Epic Fury and those deployed around the world. Your sacrifice, courage, and dedication are deeply respected and never forgotten.

Part 5- Mounting The Drum And Motor

(0 reviews)

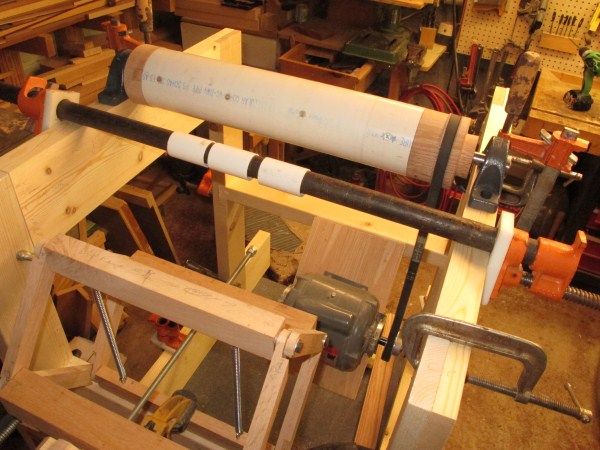
Time to mount the drum and motor to the frame. The choice of 2 x 6 sides was made to hopefully eliminate any flexing when work pieces were in contact with the sanding surface. However, that lead to difficulty in figuring out how to be able to mount the drum bearings to the sides. Long carriage bolts can be expensive!

The sides are counter bored about 3” and then drilled to match the bolt diameter. An area around the mounting surface was mortised for an aluminum plate. The pillow block bearings will set on the plate, not the wooden surface. Again, my hope is to improve stability.

(counter bore and carriage bolts)

1750604088_Counterboredsides.jpg.e657d4f3e433511f0005ede9c2efc4cd.jpg


30227499_CarriageBoltsinplace.jpg.da24a2e625f6d48fd8a5df7b806eb931.jpg


I was afraid that the soft pine might crush enough to allow the bolts to spin during tightening. Once everything was dry fitted, the bolt heads were Gorilla Glued to help prevent them from spinning.

(gorilla Glue)

1324426540_GorillaGlue.jpg.64a679a850ef33e2a69b48acd2df8254.jpg


Finally, the aluminum plates are placed in position- ready for the drum to be bolted down.

(alumin plates)

1854625165_AluminumPlates.jpg.2d3901ad226e8f4cde245a2c692c9d1f.jpg


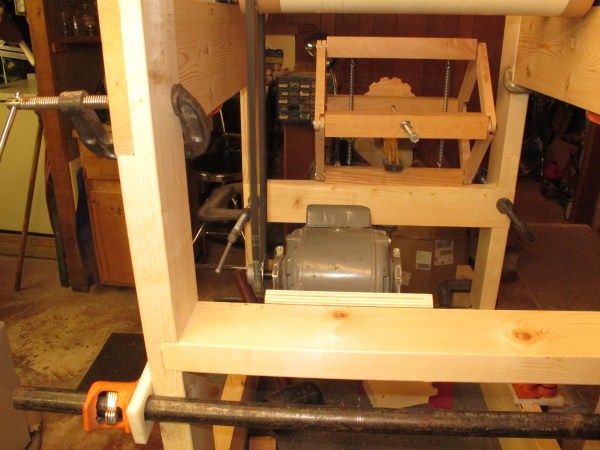
The motor is mounted to a piece of 3/4 “ plywood. The plywood is fastened to the frame using small “barn style” hinges at one end of the plywood. The weight of the motor creates the tension on the belt/pulley system. I routed slots for the motor mounting bolts in order to be able to adjust the motor side to side to align the belt/pulley.

(motor mount 1,2,3)

1895661522_Motor1.jpg.cd21058b9d7147682a12a824a1553b2d.jpg


Motor2.jpg.95d1ff2107f28ad6d93470057c1f71f7.jpg


815859169_Motor3.jpg.1b336062cf74f67c2bc4902efaa2496d.jpg


0 Comments

Recommended Comments

There are no comments to display.

Join the conversation

You are posting as a guest. If you have an account, sign in now to post with your account.
Note: Your post will require moderator approval before it will be visible.

Guest
Add a comment...

Account

Navigation

Search

Search

Configure browser push notifications

Chrome (Android)
  1. Tap the lock icon next to the address bar.
  2. Tap Permissions → Notifications.
  3. Adjust your preference.
Chrome (Desktop)
  1. Click the padlock icon in the address bar.
  2. Select Site settings.
  3. Find Notifications and adjust your preference.