Search the Community
Showing results for tags 'pins'.
Found 4 results
-
Got the Christmas ornaments done for this year. Made mice. Running out of Ideas. I think this is the 15th year I have made ornaments to give away. I used a 1.5 X 1.5 X 2.75 blank and they ended up about 2.25" long. A tear drop shape made the best looking bodies IMO. They're finished with Shellac. The eyes and nose are sewing pins. Cut the head off a pin to use as a drill bit. Cut the black heads off leaving appx. .5" of pin to insert into the holes and no glue was required. Here is where I bought them. https://www.amazon.com/pengxiaomei-Straight-Quilting-Dressmaker-Decoration/dp/B087NCXR67?th=1 The tails are pipe cleaners cut to 3" pieces and glued into drilled holes. Purchased them here. https://www.amazon.com/your-orders/pop?ref=ppx_yo2ov_dt_b_pop&orderId=114-0234615-4143423&lineItemId=qiqlqqhlonnsqny&shipmentId=XqMb3k65F&packageId=1&asin=B0054G62V6 For the ears I used .5" X .5" blanks and turned an ear shape. Cut them down the middle on the band saw and glued them in drilled holes. Couple of them broke off while sawing. Dang-It. Can always make more I guess.

-
I got a carport and it has been in storage for a few years and when I go to put it together no bolts. I can't find any locally. I don't know what to call them. Its about 1/4" dia & 2 1/2" long. I have been to Lowes and Fastenal and others. If I knew what to name it. Preston
-
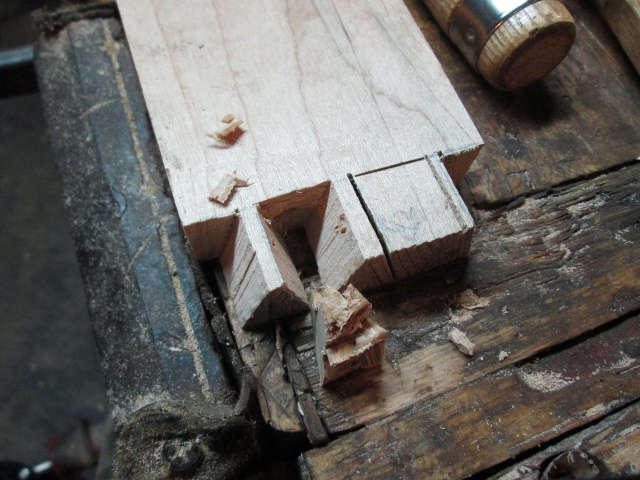
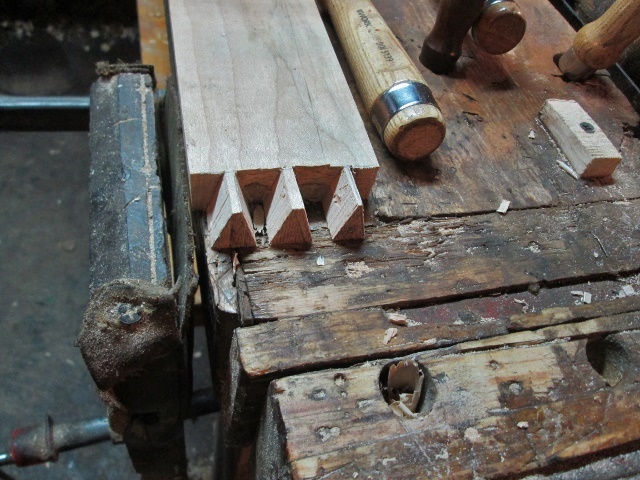
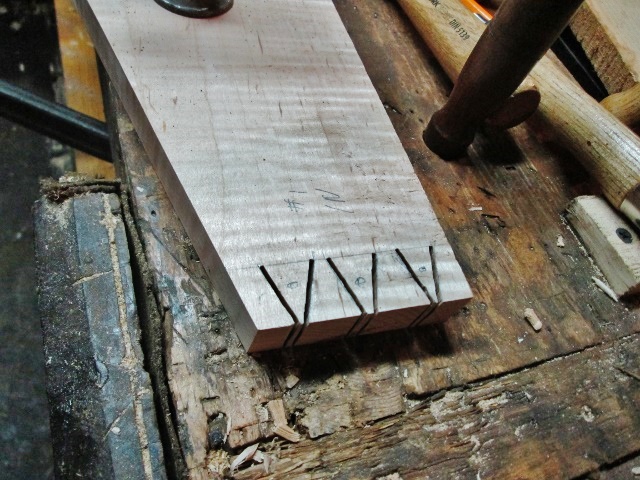
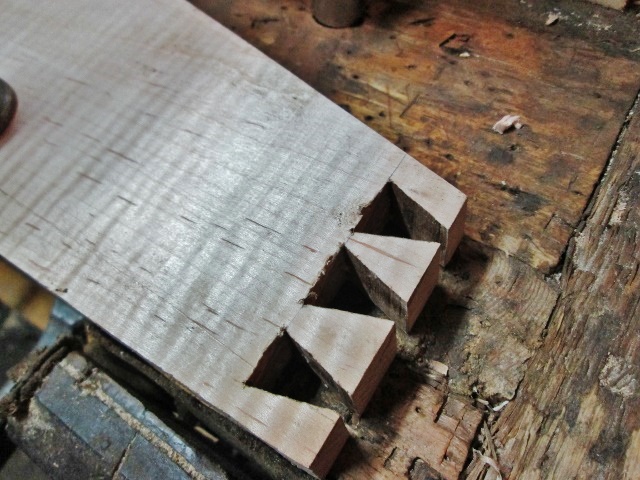
Rather than bury this in the Desk thread....corner work for the desk means dovetails.. I jointed the edges. Nice to have a square end to work from.. Laid out the pins first ( Easy to mark out the tails later) then a bit of saw work... This is now my "Go-to" saw for joinery...my other good saw stayed down at Charles Neil's place... Have to remember which is removed, and which isn't. Cut the edge ones off, which left this.. This is how I chop out the waste...I leave a tab out on the end, because... It supports the waste until it pops out. Got all this done.. NOW I can use this to lay out the tails.. Not sure about anyone else, but I am terrible at angled cuts....cheated and used the bandsaw. I stayed on the waste side of the lines, trying to leave the lines.. Then back to chopping.. Same as before. Then flip over and chop some more, until the waste pops out.. Maybe a little clean up? Dry fit to see ... Close enough for the girls I run with? One corner done, three to go... And that is how I do dovetails....
-
Ok, got the last of the rebates cut. Made a few nicely curlies with that homemade plane. Started to put things together Pinned and wedged a few joints, usinf the draw-bore way. Pins would tend to wander off line a bit, and blow out the other side. Oh well, will be a PAINTED door. Some Titebond III and some sawdust, then sand smooth Worked my way from one long rail, across to the other long rail. Pipe clamps to pull things tightly into place, then a glue covered pin to hold it there. FINALLY got this thing together, and stood up in the shop This be the bottom half. Door is at the far end of the shop, with the camera at the other end. And a look at the top half Next up? Some filler, some Kilz Primer (2 coats) hang the door, and maybe add a top coat. Oh, and install a latch.... Already discussing a new door to go with it, re-using the old window from the old door.....Another story, one door at a time...
- 2 replies
-
- 3
-

-
- screen door
- pins
- (and 1 more)