Search the Community
Showing results for tags 'humidor'.
Found 12 results
-
.thumb.jpg.573d1497d0675219908c85aabefd797a.jpg)
(Arts and Crafts)-Workbench Magazine September-October 1968 Simple Humidor With Pipe Rack
John Morris posted a topic in Plans and Software
View File Workbench Magazine September-October 1968 Simple Humidor With Pipe Rack This is a scanned document of the now defunct Workbench Magazine of this era. Permission was granted by the new Workbench Publication for The Patriot Woodworker community to copy and use the old Workbench Magazine at our pleasure, and for free distribution and re-use. Submitter John Morris Submitted 12/03/2025 Category Arts and Crafts- 2 replies
-
- 2
-

-

-
- workbench magazine
- magazine
- (and 6 more)
-
Workbench Magazine September-October 1968 Simple Humidor With Pipe Rack
John Morris posted a file in Arts and Crafts

Version 1.0.0
1 download
This is a scanned document of the now defunct Workbench Magazine of this era. Permission was granted by the new Workbench Publication for The Patriot Woodworker community to copy and use the old Workbench Magazine at our pleasure, and for free distribution and re-use. -
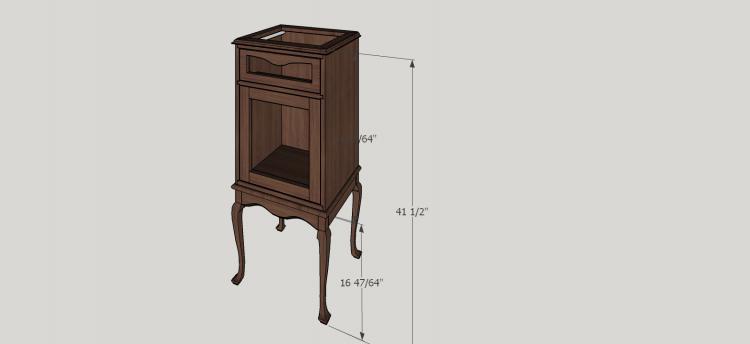
This was a fun thing to do.... I drew this up in Sketchup and isolated each piece and transported a *.jpg rendering of the piece..... and then took a similar picture of the actual.... The sketchup drawings are the ones with the blue background.... 2nd in the sequence.

-
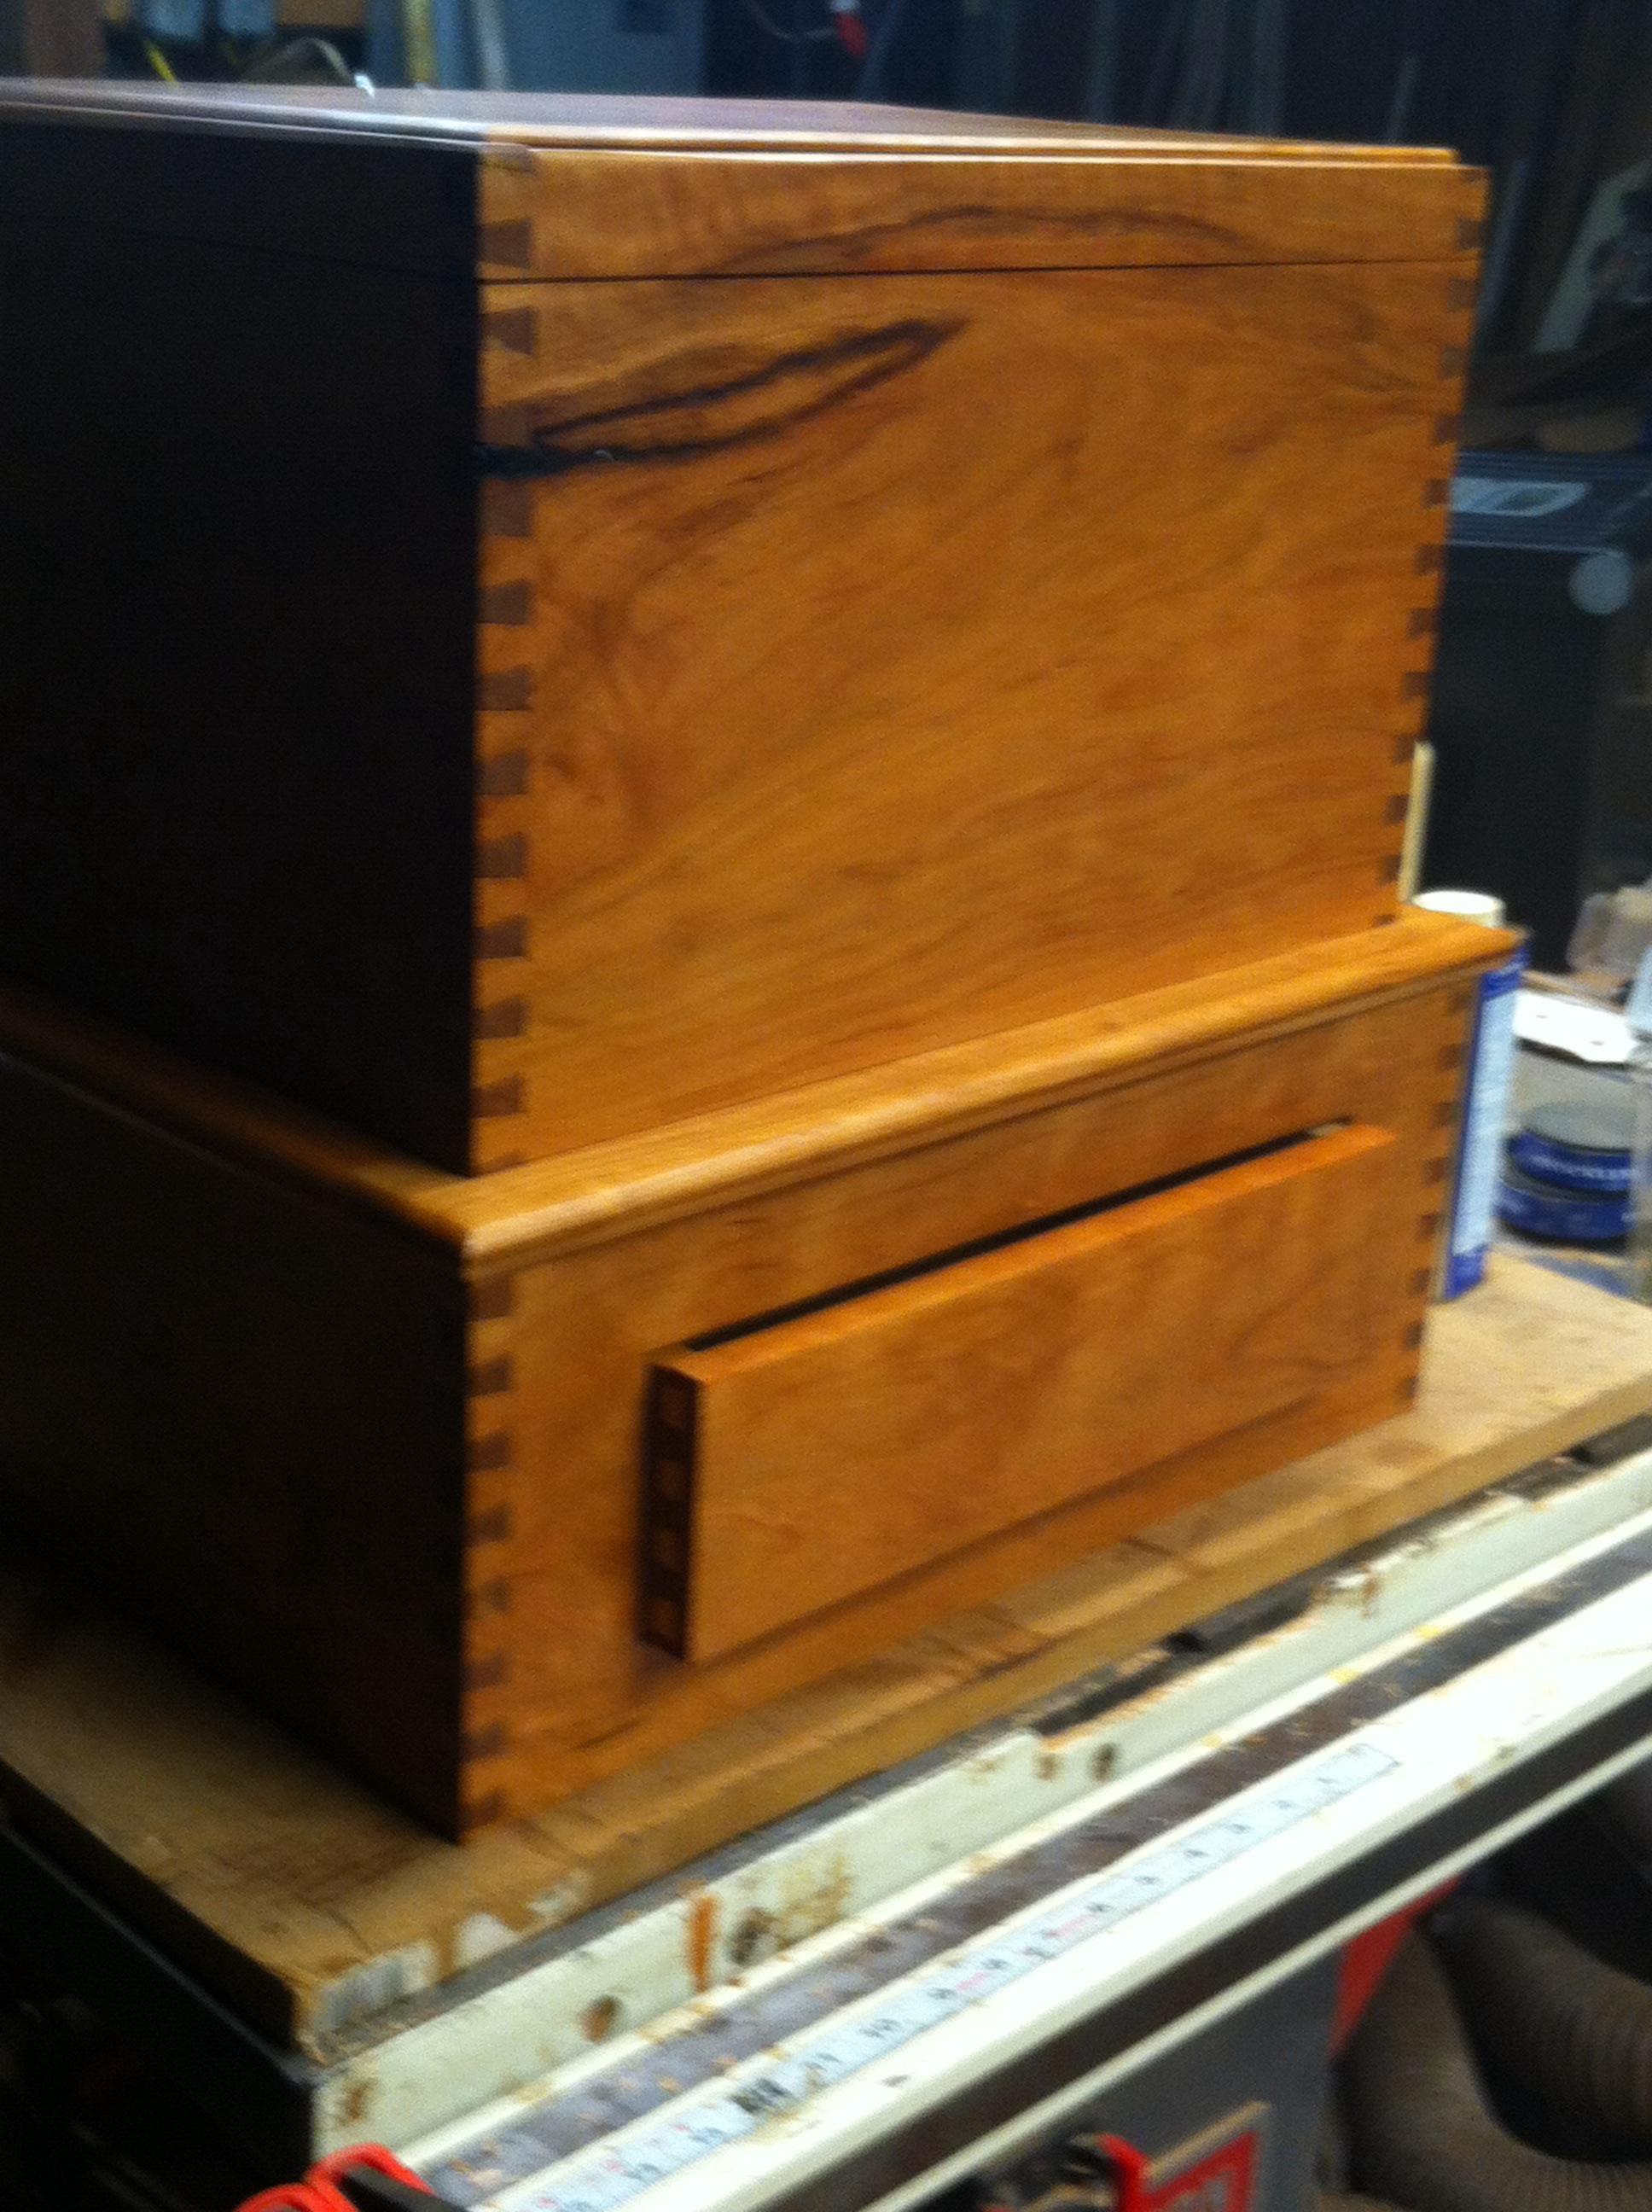
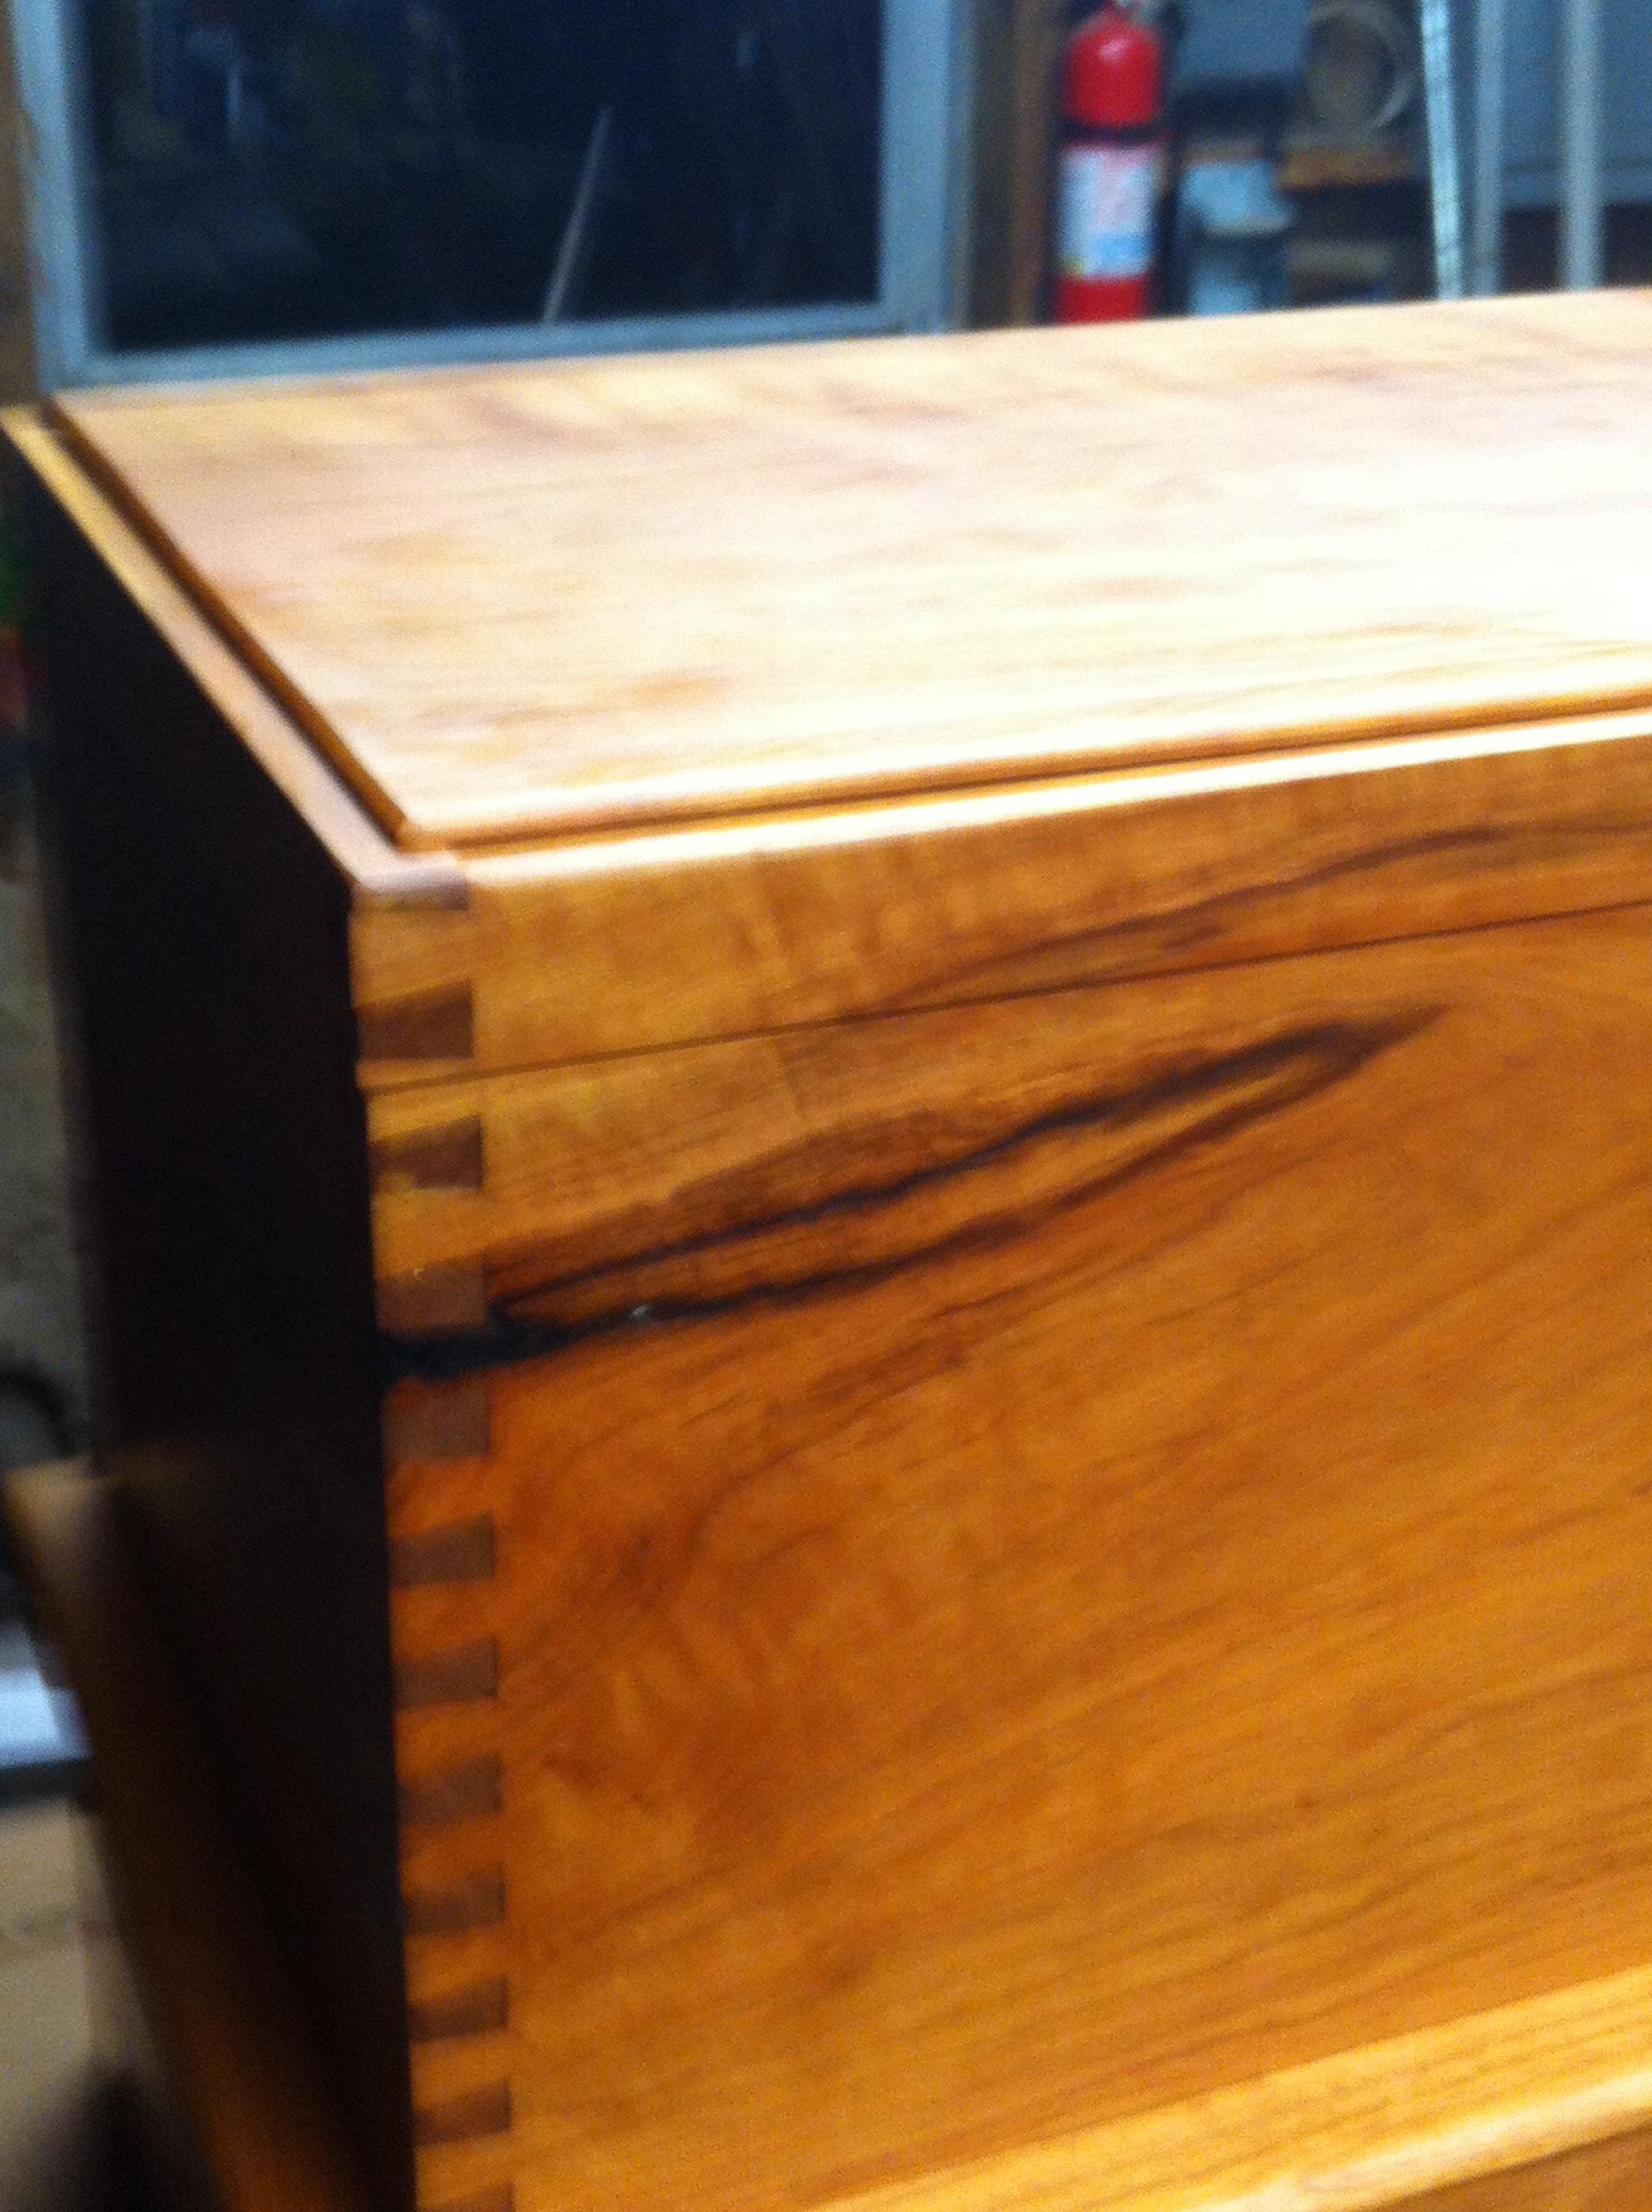
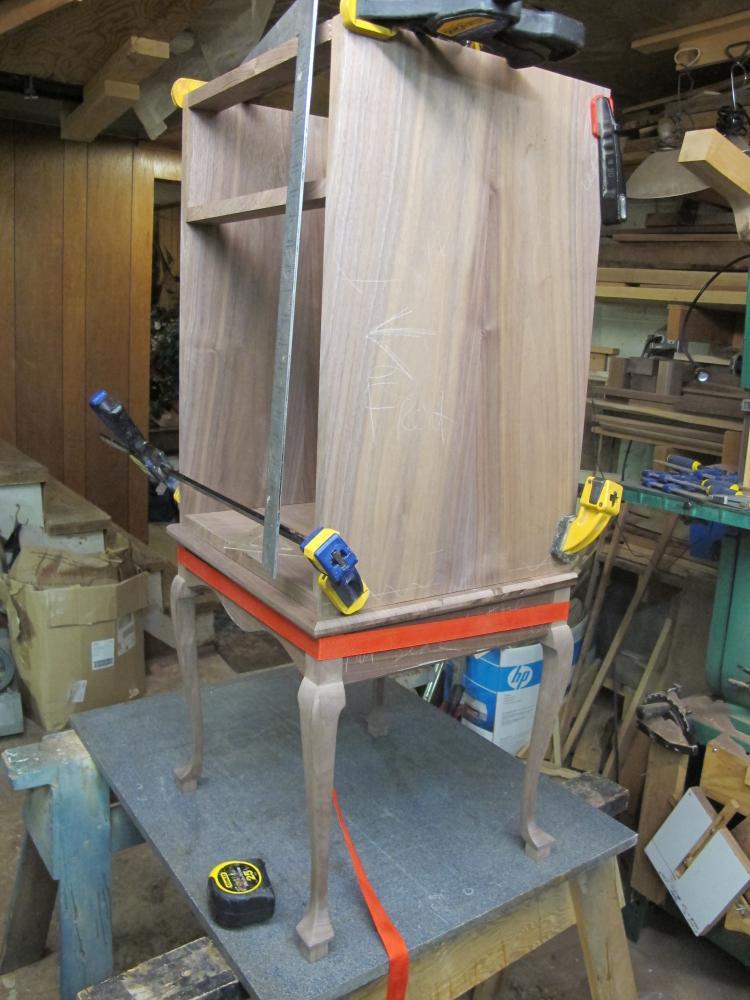
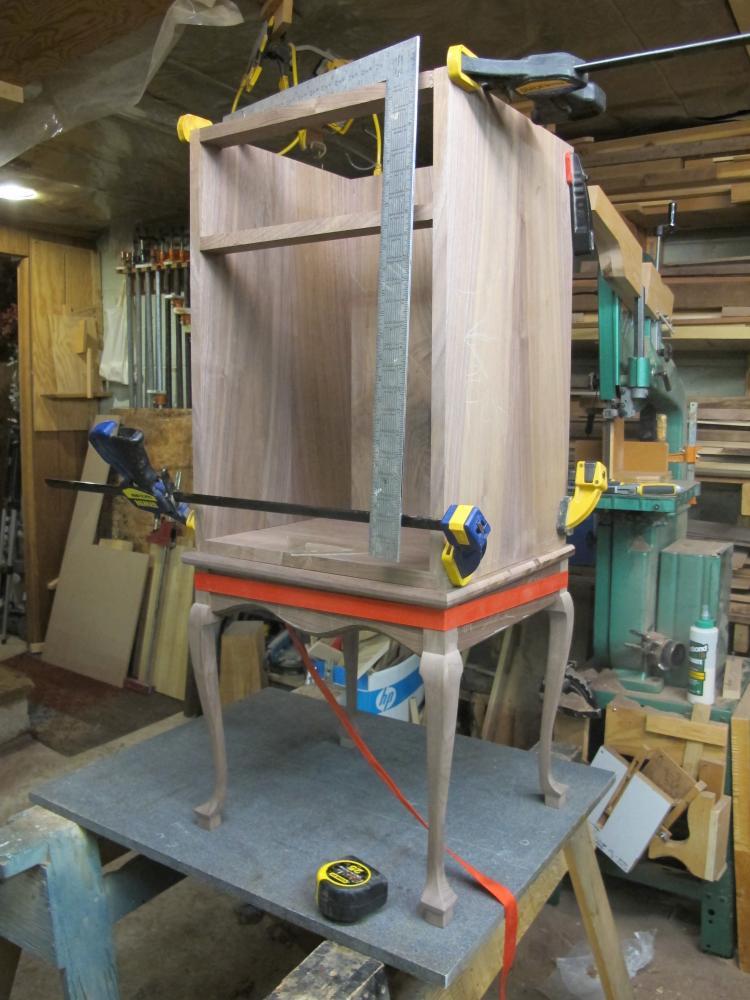
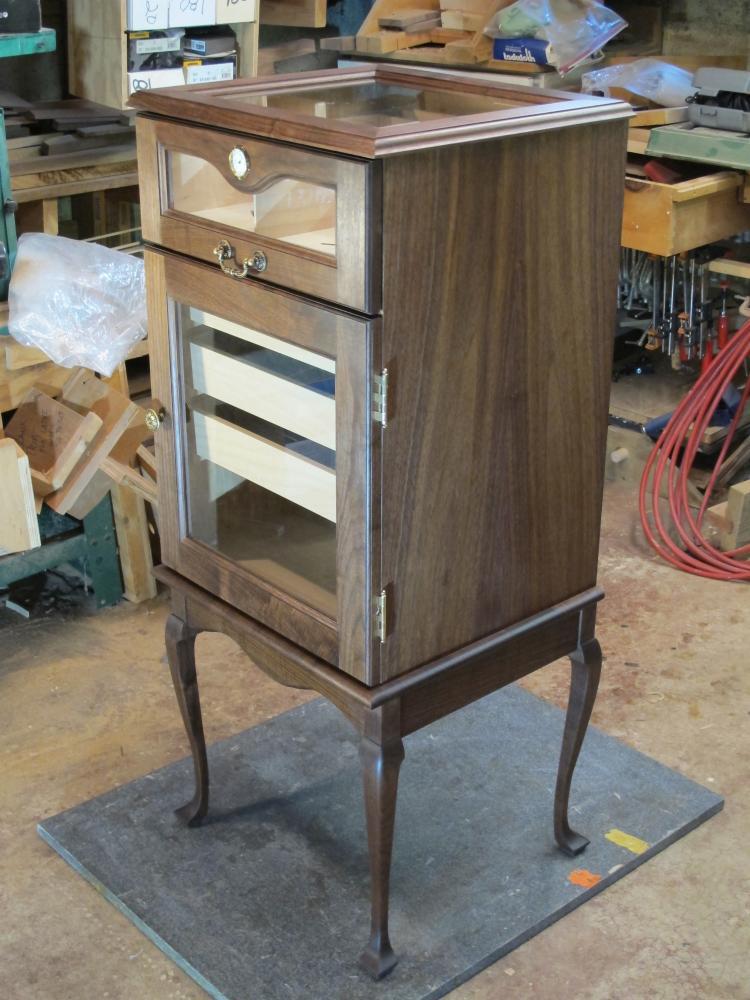
Wrapped this up today, was hoping to finish on Veterans Day, but.... found myself rushing to finish and that's never good.... Humidor (top portion) is removable, but fits nicely on the stand....
- 6 replies
-
- 6
-
-
- shadow box
- humidor
- (and 1 more)
-
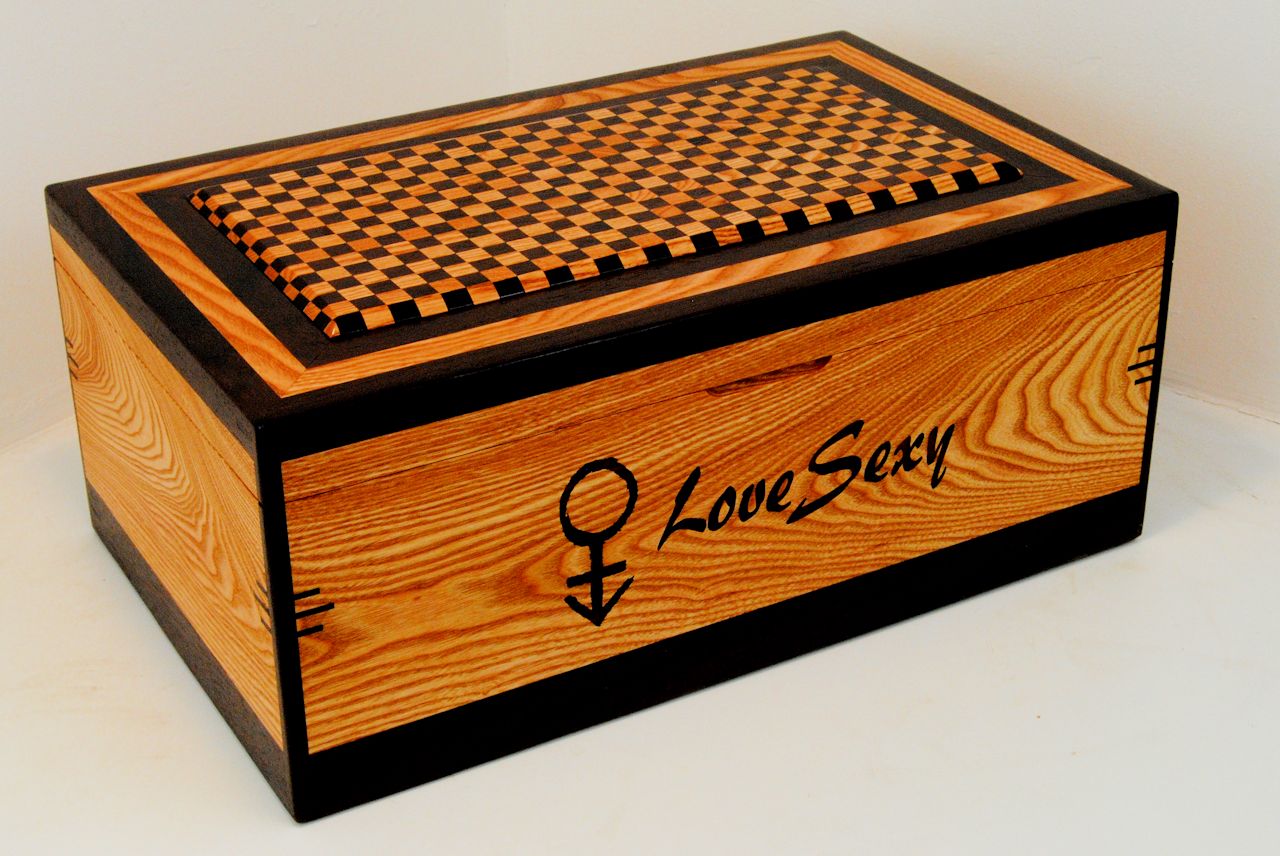
This one is on it's way to Brazil.... apparently, the fellow is a fan of Prince.... ironically, I finished it up today, which happens to be the 1 year anniversary of his passing..... Kentucky Coffee & Peruvian Walnut... Thanks for looking....
- 10 replies
-
- 10
-
-
- humidor
- coffee bean
- (and 1 more)
-
Finished her up today.... I documented a good bit of the inlay detail at this thread if you are interested and haven't seen it... Thank you for all the support and comments.....this was a fun one to build. Bonus box.... (was building this one at the same time).... Curly Big Leaf Maple, Amboyna Burl, Mahogany & Morado...
-
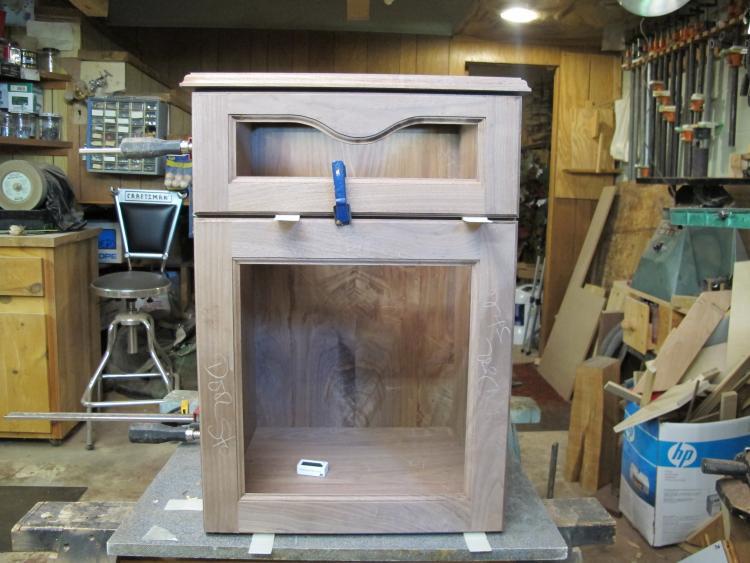
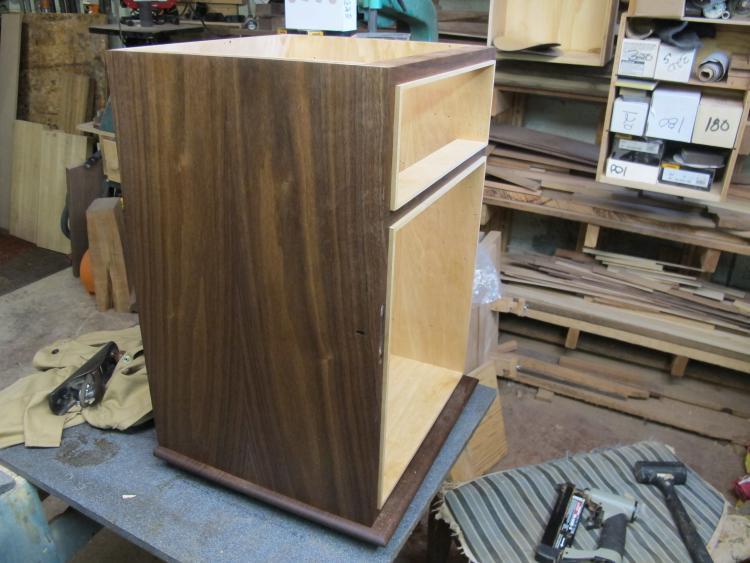
So here is my humidor so far. This is just the outer cabinet so far. I decided to go ahead and prefinish it before assembly to give the BLO time to cure before sealing the exterior and interior with shellac. Once the shellac cures I'll assemble it and install the Spanish Cedar lining.
-
Our Wood Turners Forum Host Lew Kauffman has made it on Facebook royalty! Woodcraft shared his Humidor project on their Facebook page! Surf on over to Woodcrafts Facebook page and LIKE Lew's project, and leave a comment if you like,show your support for Lew and Woodcraft! Great job Lew!
-
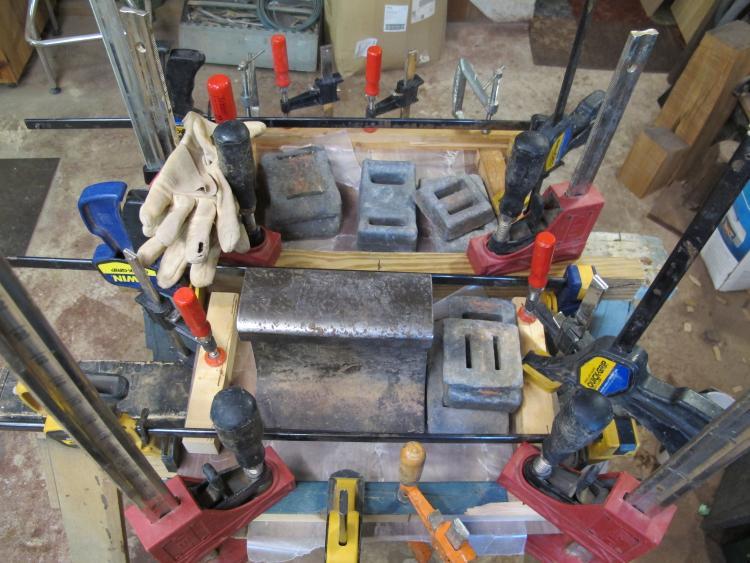
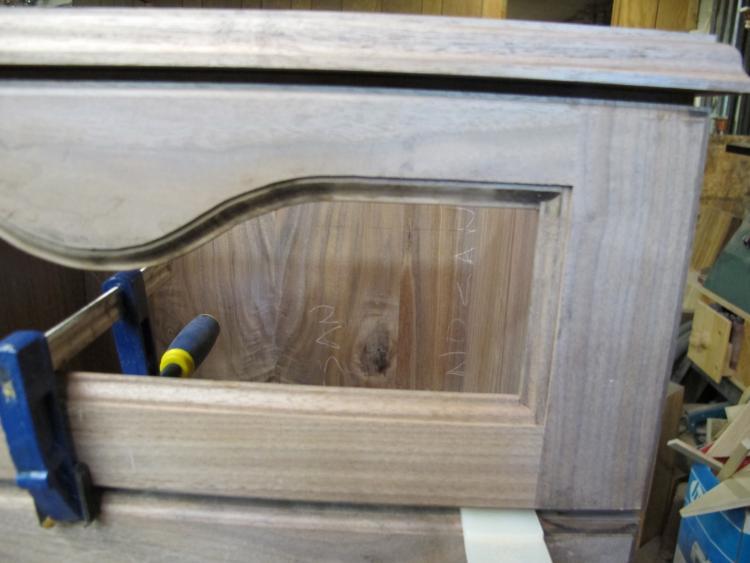
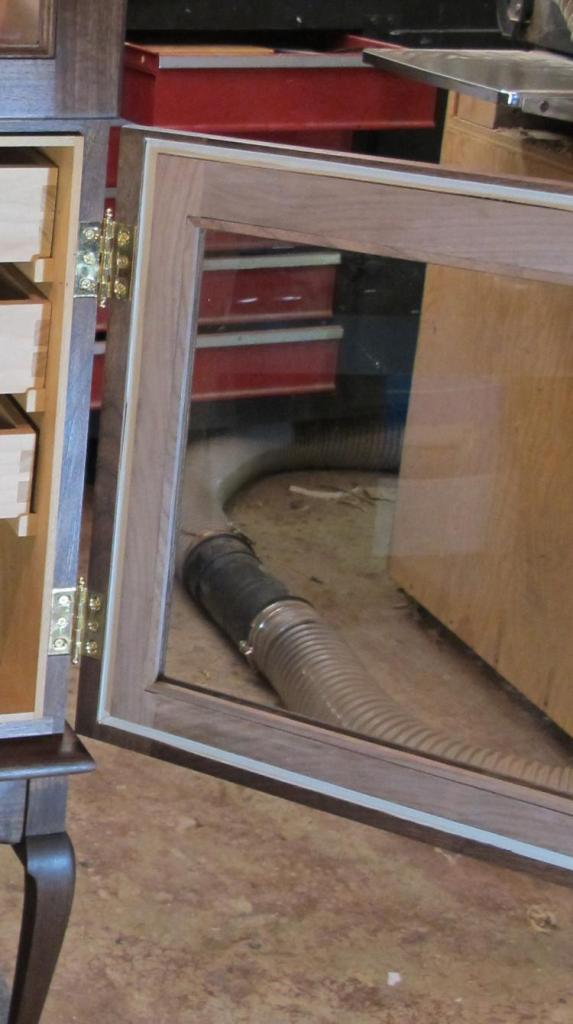
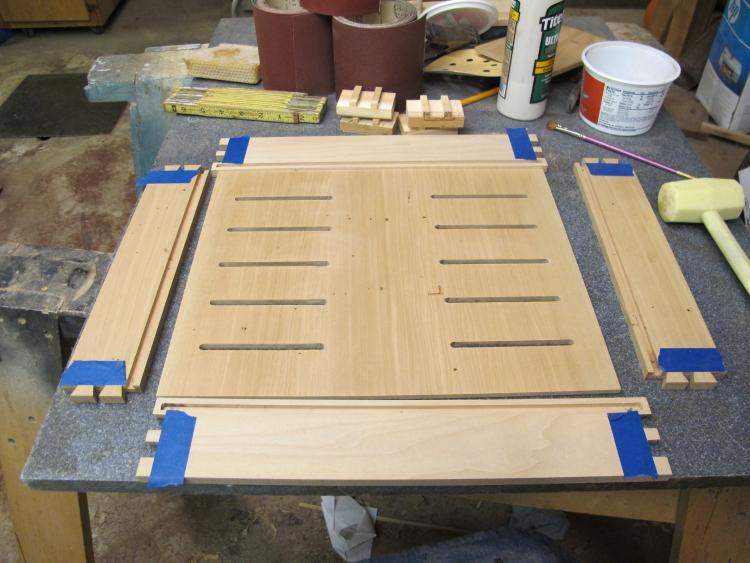
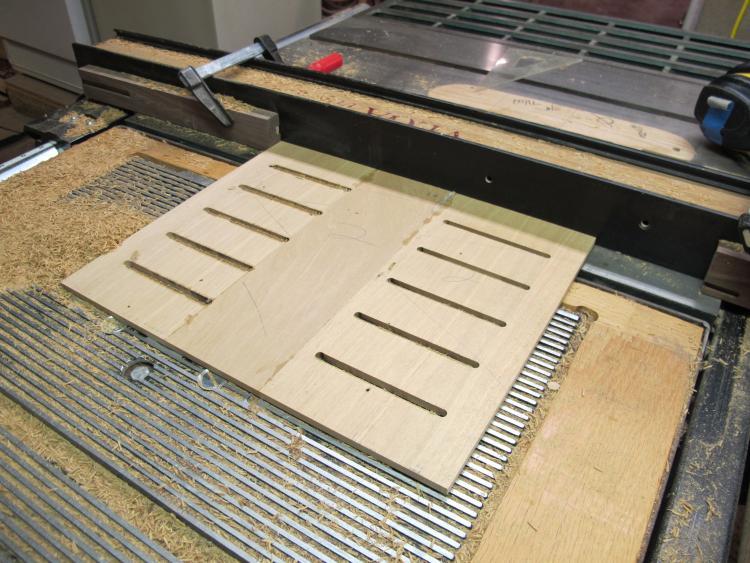
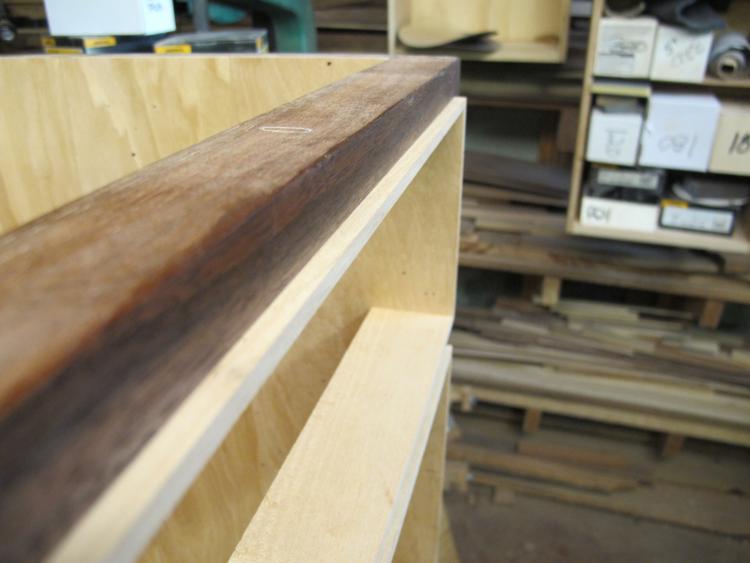
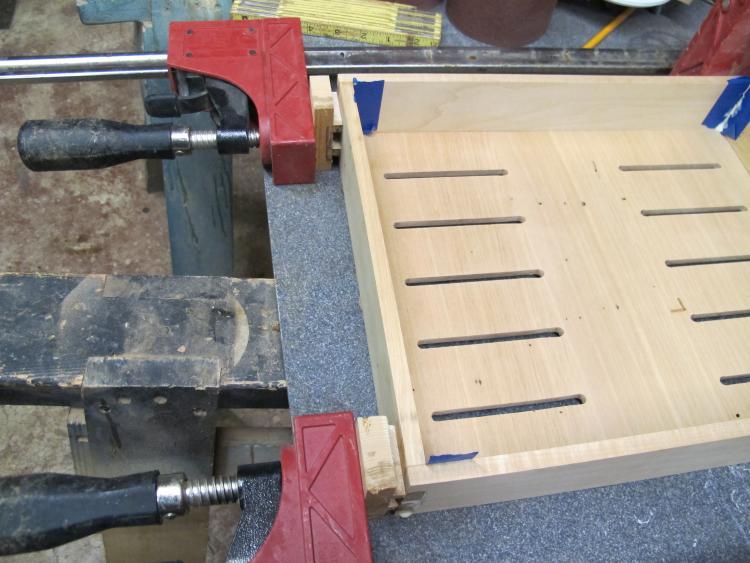
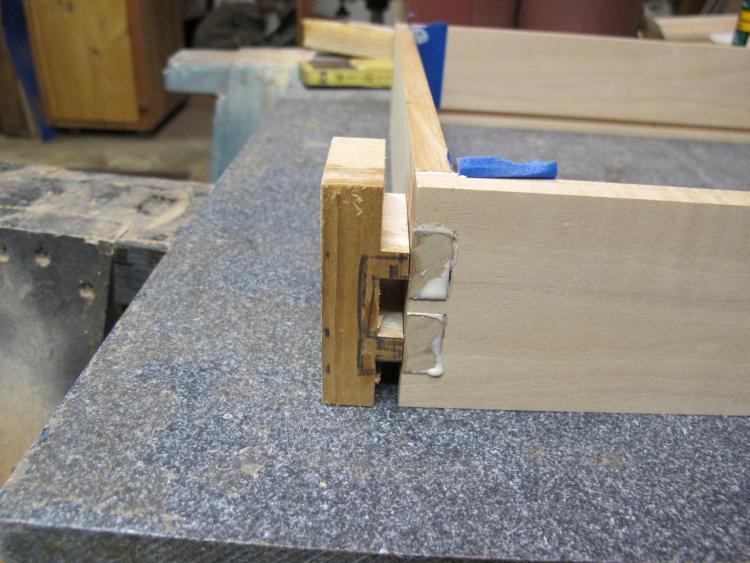
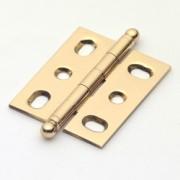
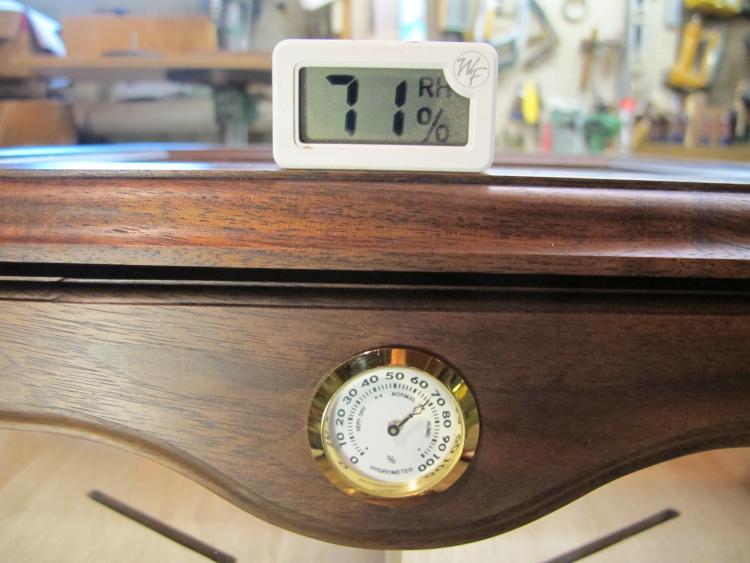
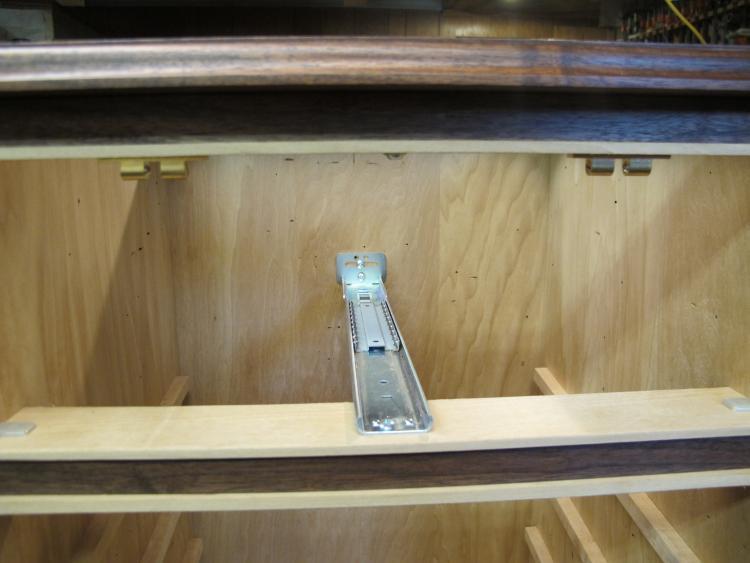
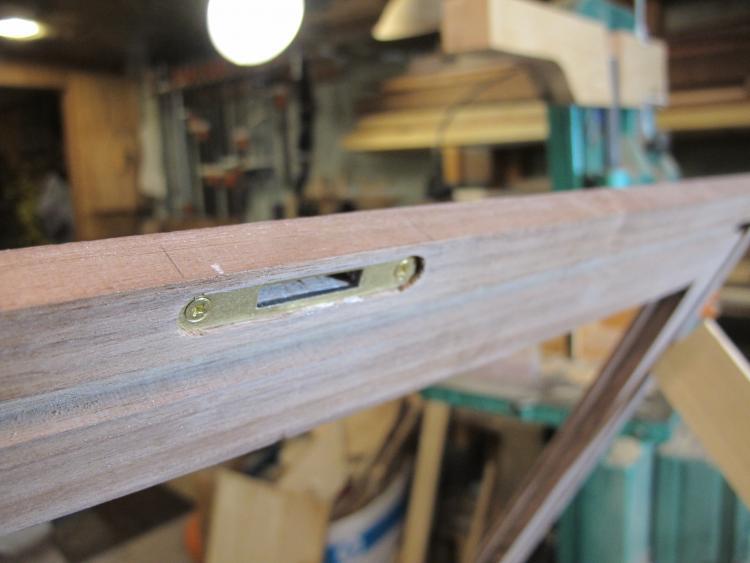
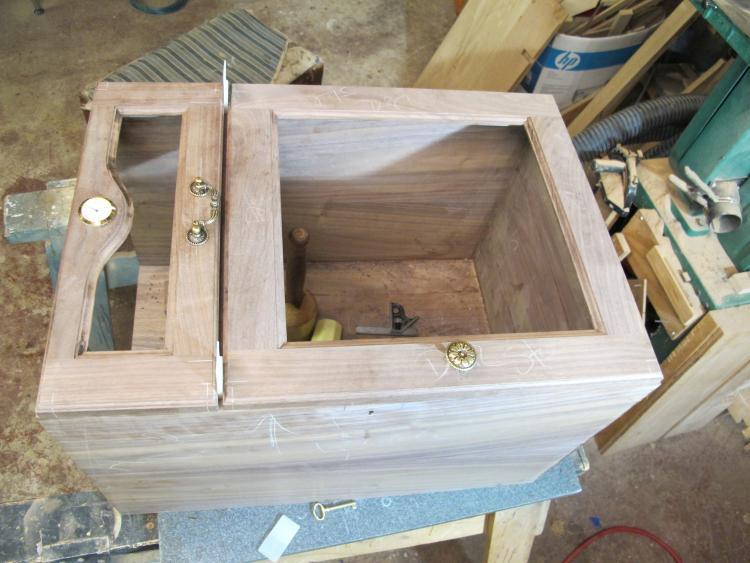
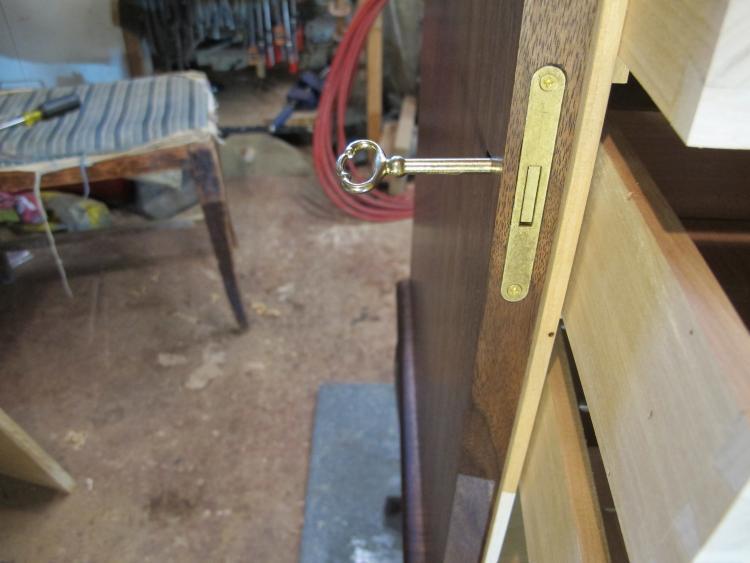
Part 3- That’s going to hold a bunch of cigars! It was time to start on the actual humidor. At first glance, it seemed like just building a standard cabinet with a door and a drawer. Humidors, however, should maintain a constant internal humidity level. The design needed to have a seal around the door and drawer. In addition, all of the cabinet joinery needed to be sealed. The customer’s specifications were to use solid Walnut for the entire humidor. This presented a problem with the cabinet back having a cross grain glue-up situation. And, finally, there are the glass inserts to deal with. All in all, not the typical cabinet I had originally envisioned in my mind’s eye. Giving credit, where credit is due, an acquaintance from another forum directed me to an Internet article addressing most of my concerns with this build- http://archive.cigarweekly.com/magazine/cigarticles/02-12-2009/building-a-cabinet-humidor-from-scratch . The author’s content provided the answers to the cross grain glue up as well as sealing the door, drawer and glass. The humidor is made from ¾†Walnut. The sides, bottom and back set in rabbets. I used TiteBond III throughout. For the back, I used ½†MDF and veneered it with 1/8†Walnut pieces. Vacuum clamping would have been ideal for applying the veneer; unfortunately I don’t have that set up. Clamps and weights did the trick. The cabinet begins to take shape. The drawer/door divider is connected to the sides using a sliding dovetail connection. The door, drawer front and top are made with a rail and stile, raised panel bit set. To permit installation/removal of the glass inserts I removed the back portion of the raised panel slots on the door and drawer. Holding strips will be added after the glass is in place. For the top, I removed the “fancy†front portion of the raised panel slot. My thoughts were that this would provide better support for the ¼†glass top. After the glass is installed the “fancy†strip will be installed. all glass pieces will set in a bed of clear silicon. The door and drawer is assembled “cope and stick†the top is mitered at 45° and the joint reinforced with biscuits. Sealing the door/drawer information came from the above mentioned article. The seal is made by having the Spanish cedar lining extend about 3/16†proud of the cabinet openings. The liner will fit into a foam lined dado on the back side of the door and drawer. I made the dado 3/8†wide and about 5/16†deep. The foam liner for the dados is ¼†thick door weather stripping with a sticky back. I fastened the top with using 3 screws. One in the front, through a slotted hole, in the drawer's top support rail. Then one screw on each side using a pocket hole type fastening. The top is sealed with a clear silicon bead. The drawer front required additional modifications. Because the drawer front has a glass face, I couldn’t really make a 4 sided drawer box and then attach the drawer front. I decided on a 3 sided drawer box and attach it to the front with sliding dovetails. This method also needed a slot to support the drawer bottom. After the drawer box was installed, I filled the sliding dovetail slots with a matching plug- Thanks Steven Newman!! http://thepatriotwoodworker.com/user/3502-steven-newman/ The door box and three storage shelves are all made from Spanish cedar. The sides are 3/8†thick and bottoms ¼†thick. The bottoms of all of these had slots for circulation/ventilation. On the drawer bottom, I made the slots run diagonally. I quickly discovered this was a real pain to setup and run. A hand held trim router and guide needed to be setup for each cut. When I made the shelves, I used the router table, fence and stops. This worked much better. Even though the slots were not angled, I don’t feel the overall look was compromised. Box and drawer sides are all hand cut dovetails The hardware is pretty straight forward. Brass hinges morticed into the side/door. Single under drawer slide mount. Morticed door lock and key. Ball catches to hold the drawer closed/sealed. The drawer/door exterior hardware design selected by the customer. Humidity gauge is installed in a hole with access from the back. In the next part- finishing up.
-
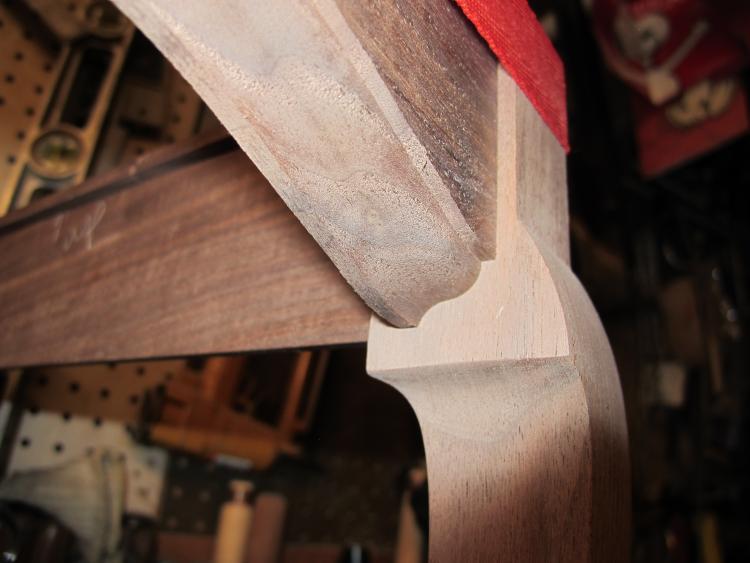
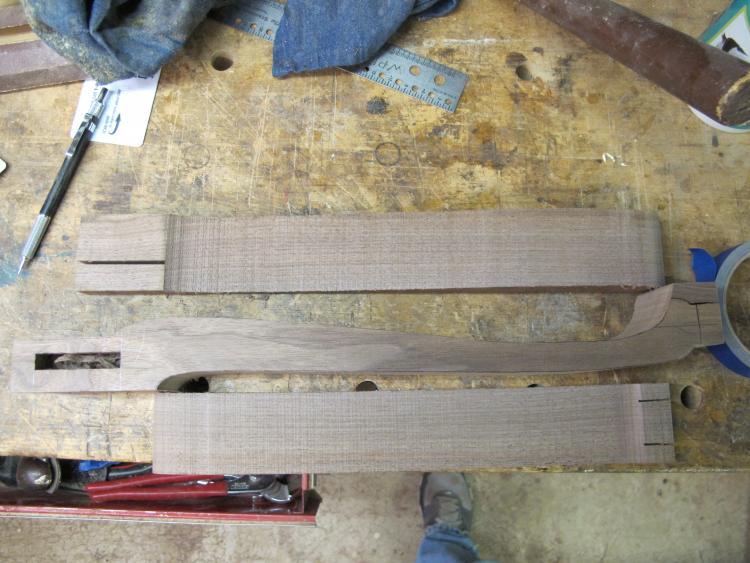
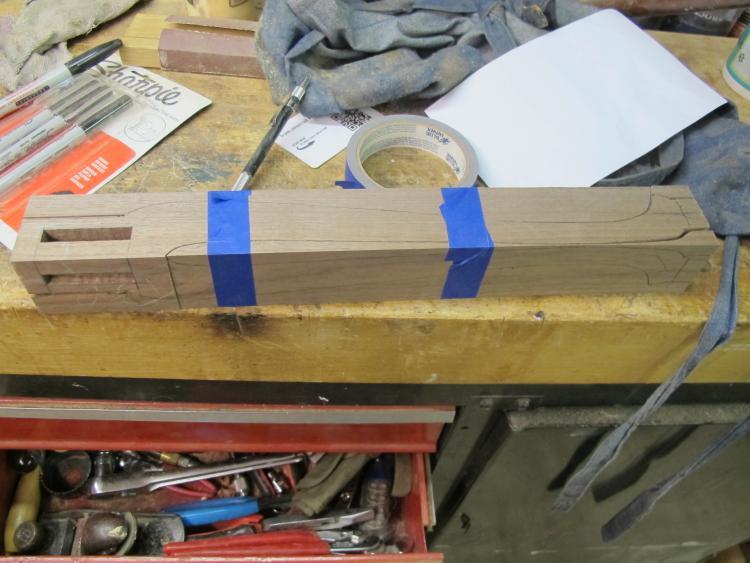
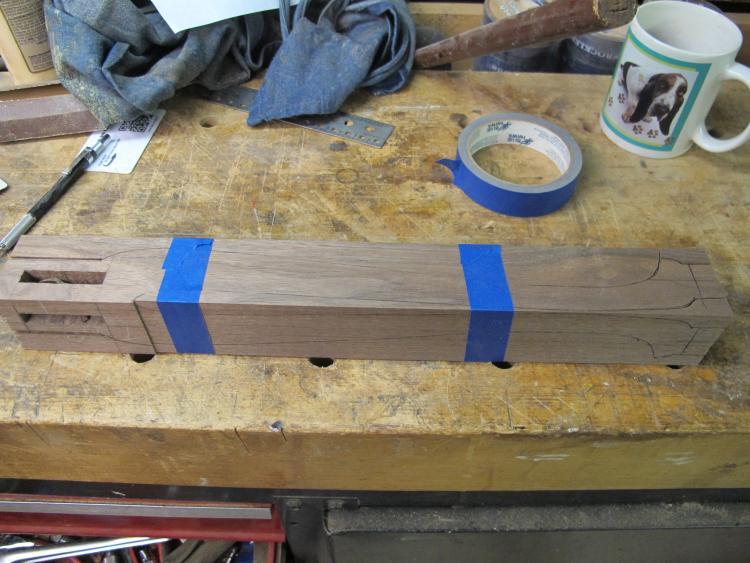
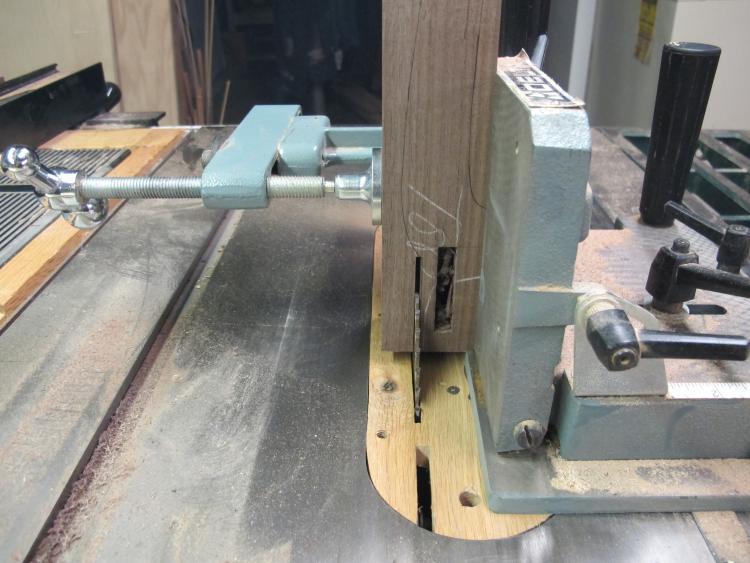
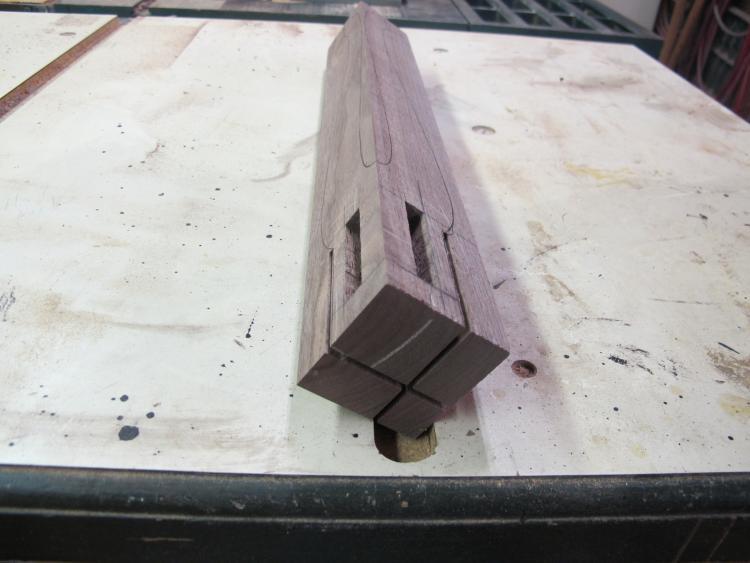
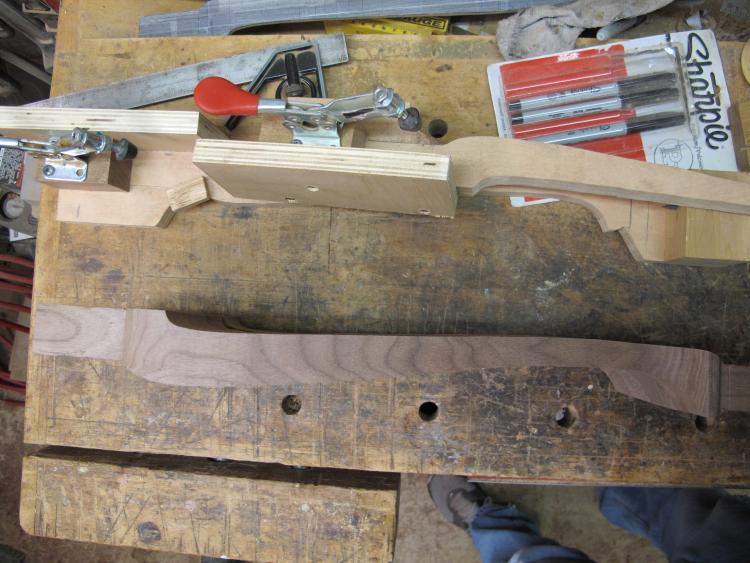
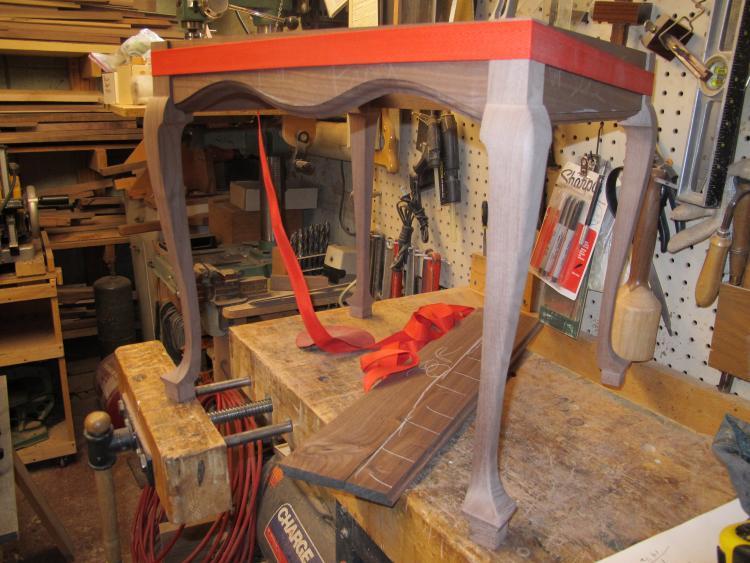
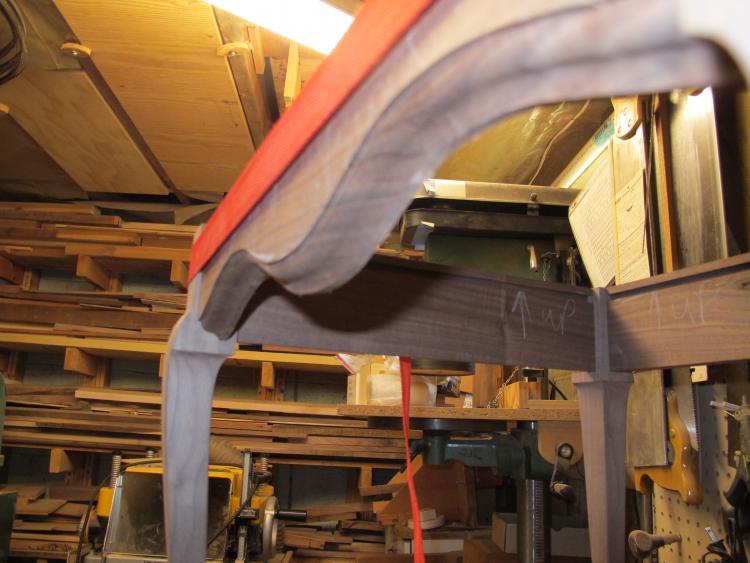
A New Experience- Building a Fancy Humidor Part 2- You say you never made a cabriole leg!! I could tell I was in for more than I realized, once the final design was approved. Now, I’m no stranger to cabinet construction but the humidity control and fancy legs were both new to me. This is going to be a real learning experience. I decided to begin with the Queen Anne legs while I searched for a local sawyer who could slice the thick slabs into usable thickness. As a side note here- I also had to learn how to draw Queen Anne legs in Sketchup. I’d still be struggling with that if it wasn’t for the help of an acquaintance who is a Sketchup Guru. I searched the Internet for videos on making the legs. The easiest to follow was by Chad Stanton- https://www.youtube.com/watch?v=5kkpNTTz5HM . With the full sized template created, I laid out 5 blanks- yes I figured I mess up at least one leg. I figured it would be easier to do all of the “square†work before cutting the curves. Firing up the hollow chisel morticer, I create the mortices for the apron tenons. Next up were the square cuts for the leg top. Every video I watched showed these cuts being made with the bandsaw. I knew there is no way on God’s green earth that I’m steady enough to make those cuts and have them perfect. I need to sleep on this. I have all of these neat tools; certainly one of them should be able to do this. AHA!!!!!!!! The old Delta Tenon jig! Now, with those cuts made, it’s on to the bandsaw. Cut two parallel sides, tape the waste pieces back in place. I tried leaving a tiny sliver uncut at the very end of the saw pass. It held the waste piece a little better until the tape was in place. Rotate the leg 90° and cut the other two parallel sides. Remove the waste pieces/tape and there you are! I left the “pads†on the bottom of the legs extra-long to make sure I could level the table legs without cutting into the fancy “footâ€. O Boy! Sanding time. I admit it- I hate to sand. Well, there are no flat surfaces and lots of bandsaw marks. If only there was a way to hold the legs…WAIT!!!!.... a JIG!!!!! I made a jig- actually two jigs- to hold the legs horizontal so I could use the oscillating spindle sander. I needed two jigs because of the mirror image of the leg sides. One of the jigs is for two of the parallel sides and the other jig for the opposite two parallel sides. The legs still required a lot of hand sanding but the spindle sander removed the saw marks. The rest of the base was pretty straight forward. Tendons cut on each end of the apron pieces. A fancy ogee routed on the bottom edges. A slot cut for the top clips. A dry fit and a little work on the tenons. I needed to cut a 45° angle on the ends of the tenons so they would fit full depth when both apron pieces were inserted in a leg. Found a sawyer and he cut 3 slabs into 4/4 slices. Charged me $10- I gave him $20. In the next part, I’ll start building the cabinet.
-
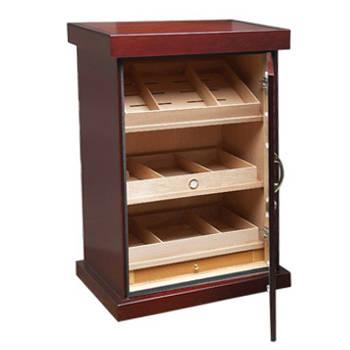
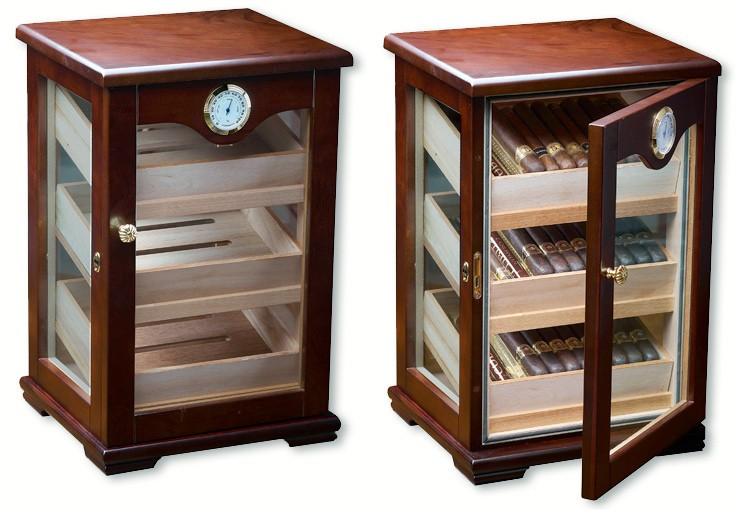
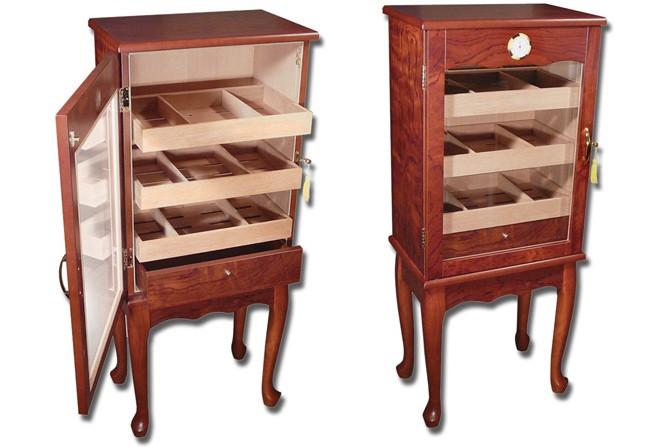
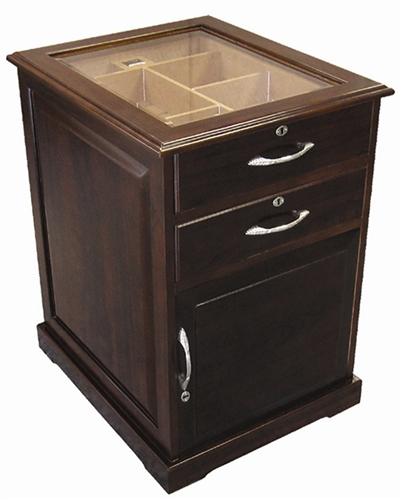
A New Experience- Building a Fancy Humidor Part 1- Always listen to that little voice in your head A while back, I received a phone call from a turner friend asking if I wanted some American Black Walnut- at a good price. Excited and wary at the same time, I agreed to make the trip to see the guy. Turned out the owner of the walnut is a gun maker. His guns are flintlock rifles and his woodworking processes mimic those of the early American gun makers. He had an overabundance of wood (if thats even possible) and was willing to part with some of it. After admiring his guns and the processes he uses, the haggling began. I should mention the Walnut was air dried, dead flat, straight grained, a little over 2 thick, to 15 wide and at least 8 long. I had previous purchased some walnut from the saw mill, so I knew what the going rate was going to be. Well, I have $100. I'll take whatever you think is fair, said I. At this point, my turner friend spoke up and started describing some of the items I have made- which piqued the Walnut owner interest. You ever make a humidor? he asked. I think- only a fancy little box and then I hear myself saying- No, but I'm sure I can.Tell you what he said, you make me a humidor and you can have all 10 pieces of the Walnut and I'll even throw in some smaller pieces of Curley Ash and English Walnut. Funny how the little voice in your head gets drowned out when faced with that big pile of wood. We exchanged emails, agreed he would send me a picture of what he wanted and I would build it. We loaded the old 86 Dodge Ram and headed home- avoiding the Interstates and any large hills- finally unloading the stash in my friends garage. A day or so later, the first images arrived. We discussed the size and modifications. More images arrived. More discussion. Another image. There are features from each image that needed to be incorporated into his specifications. Using Sketchup, I created what would become the end product- more or less. Not the simple box I had envisioned during my wood pile high. In part two, we'll start the woodworking.
-
Those of you who follow "Wednesday's Wisdom" will remember I was also working on a walnut humidor. Well it is finally finished and awaiting pickup. This project contained a whole lot of "firsts" for me, including the cabriole legs. I need to say a big THANKS to Patriot member Steven Newman for his instructions on attaching the drawer box to the drawer front. You are right Steve, the plug virtually disappeared! The customer designed the humidor details, however, some of the construction points were gleaned from this article- http://archive.cigarweekly.com/magazine/cigarticles/02-12-2009/building-a-cabinet-humidor-from-scratch . Specifically, the method of sealing the openings to maintain the internal humidity. The humidor is made entirely of walnut (from the customer) and lined with Spanish cedar. To avoid a cross grain gluing situation, the back of the humidor is made from MDF with a heavy veneer. The drawer is held closed with ball catches (those things a a pain to install) and the door has a mortised lock. There are three lift out storage shelves/boxes. . All of the glass is seated in a silicon bed and secured with removable wooded strips- in case of glass breakage. I sanded everything thru 500 grit (Abralon pad at 500) and then applied Dark Walnut Watco Danish Oil. When it dried I used dark Briwax as a top coat. Hope the customer is satisfied when he actually gets to touch it. Thanks for looking. Any comments, criticisms and/or suggestions are always welcome