Search the Community
Showing results for tags 'charging station'.
Found 2 results
-
Unlike many in my industry I do not like tying up a drawer in my box with charging stations. Considering how many different chargers a drawer is just not good use of precious drawer space. The top of my box however, it is fair game. Developed this to handle all my charging needs plus room to grow as more are needed. Made from plywood edge banded with pine. Fo the face I used roofing tin gluing it down with contact cement. A nice addition to the shop. Gets cut off by main power switch each night so no batteries charging when I am not there. Can't forget it, my overhead light is in the mix so I would see the light on before I close up shop each night.

-
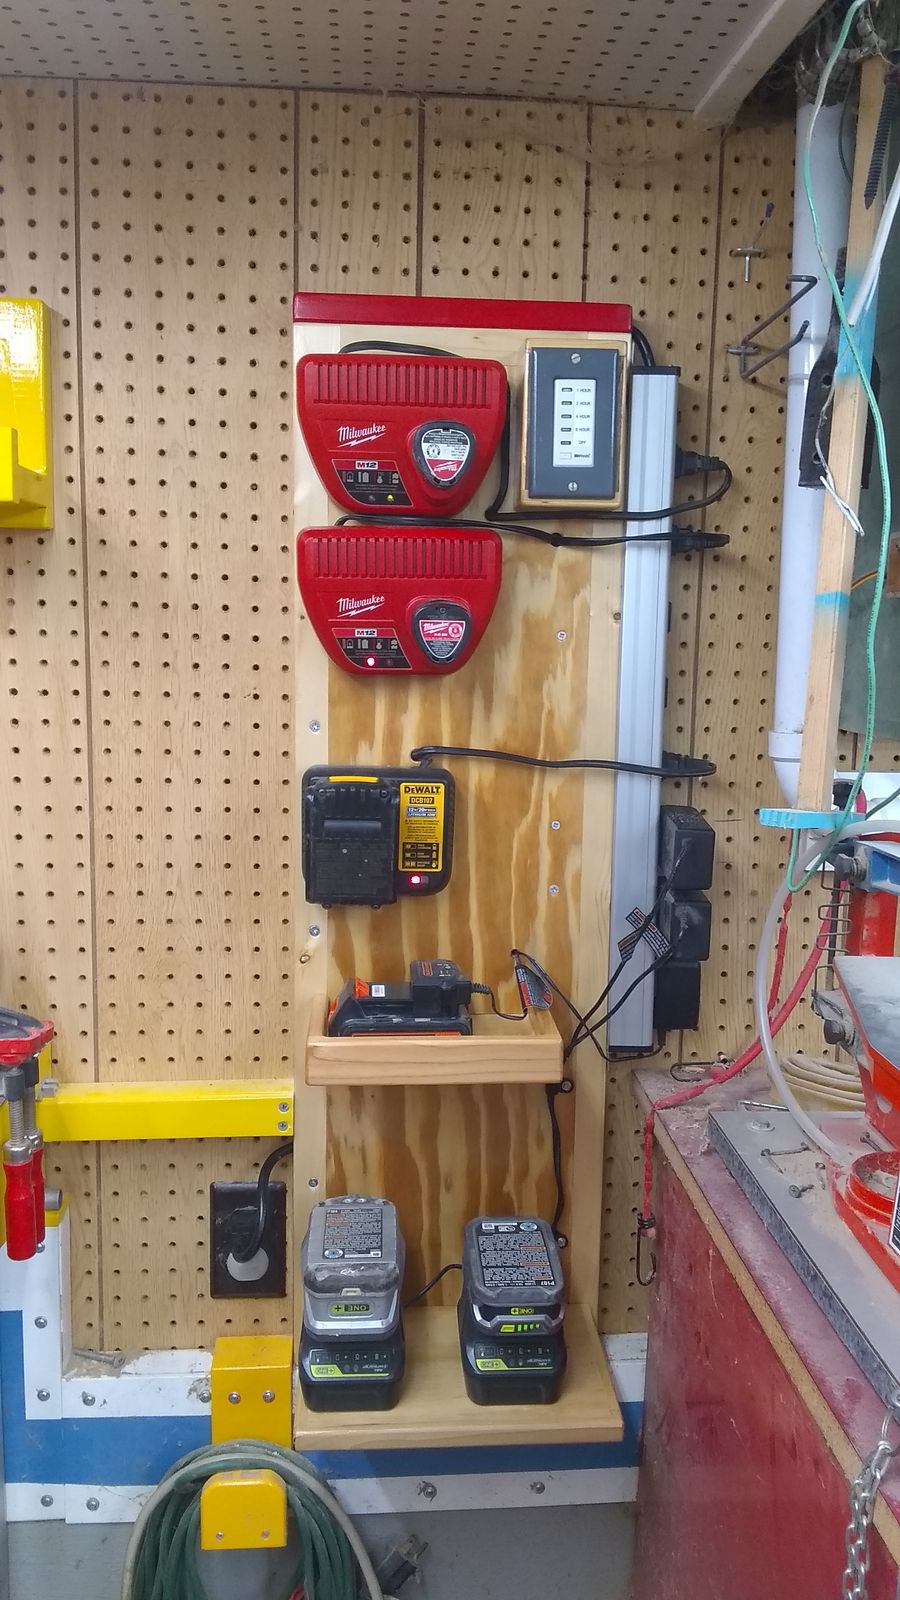
Having finished the corner clamp set up I am moving down the wall to refit things to accommodate the braces and such used previous to clamp storgae build. First in line was a new expanded charging station. This time I built in expansion for future chargers. Last version was meant for two, and a add on as minor expansion. That plan worked okay for awhile. Following @steven newman 's lead I started with fitting the pieces together then a glue up. I made a frame of 1 1/32 square pine boards and then cut a recess out for the 1/2 inch plywood. This gives me a gap behind the unit to stuff the excess charging cords. Also gave me rom to run the electrical from the bottom to the top timer, then onto the power strip. Always those chargers than make life complicated. This Black and Decker drill a friend gave me has a puny charger you cannot mount to the wall. So I made a shelf for it. Then when I test fitted the Ryobi chargers they stuck out more if I mounted to the unit then if I mounted to a shelf and let then stand upright. No problem, as Steve says, we have ways. View from top of unit to see the back wiring, even added a proper box for it all. Soldered the stranded wire together so it is not coming apart. @Artie will like that touch. Once that was done I went and labeled what goes where and dated the box so we know those things if needed. And now finally with all the finish work done I am ready to install the unit and see everything fits. The holes above or around each charger allow me to feed the excess wire into the cavity behind. No mess, and no modifications to the charger wires needed. This way if I need to take a charger with me just unplug, pull wires out and go. Ya never know this might be genius or maybe I never use this option. Red painted top is a warning to NOT put screws here! This is where the electrical cord is hidden that goes to power strip. The timer is set when I need something charged. It goes off, and entire station is cold. No weirdness with fires and overheating and such. In theory. 2nd part of this is that the chargers cannot top off a battery using up it's lifetime of expected charges. Have used this type of set up several times over the years, seems to work. This by far is largest one with 6 chargers total. And finally I made a box to store the charged batteries so that small issue is handled. It doubles as a holder for my frame jig. Killed to birds with one stone with that idea. Corner project now completed. Moving on to other stuff.
- 30 replies
-
- 9
-

-
- cordless charging
- charging station
- (and 1 more)


.jpg.dcf2da61946351e6e0dc31613cca3ac6.jpg)