Search the Community
Showing results for tags 'slabs'.
Found 2 results
-
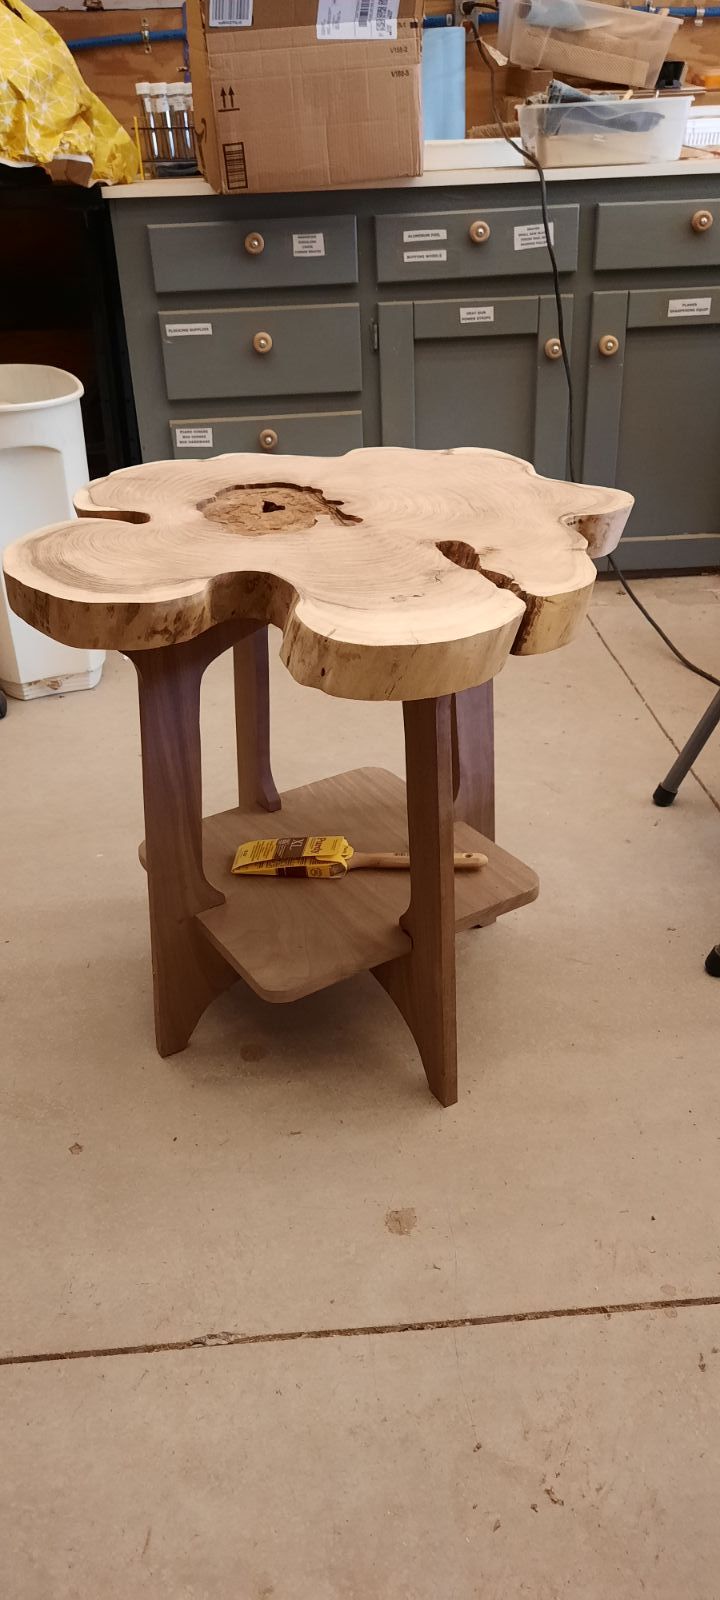
From this... To this. Using these plus a lot of elbow grease. It measures 26"X26" .got about 10 hours in it. (not Inc. naps) Next step is a seal coat of polyurethane. Then more sanding. Followed by a resin pour of black in that routed area. Had to rout out some punky stuff. Just one of the joys of working with raw mesquite slabs. Then finally, a brushed on coat of clear resin. Since these three slabs (rounds) were cut sequentially from the same log, I can look forward to more of the same. But, I've identified some grinding accessories to speed up the process. These will be the tops for the Limbert tables. Here's a pic of it as a WIP.

-
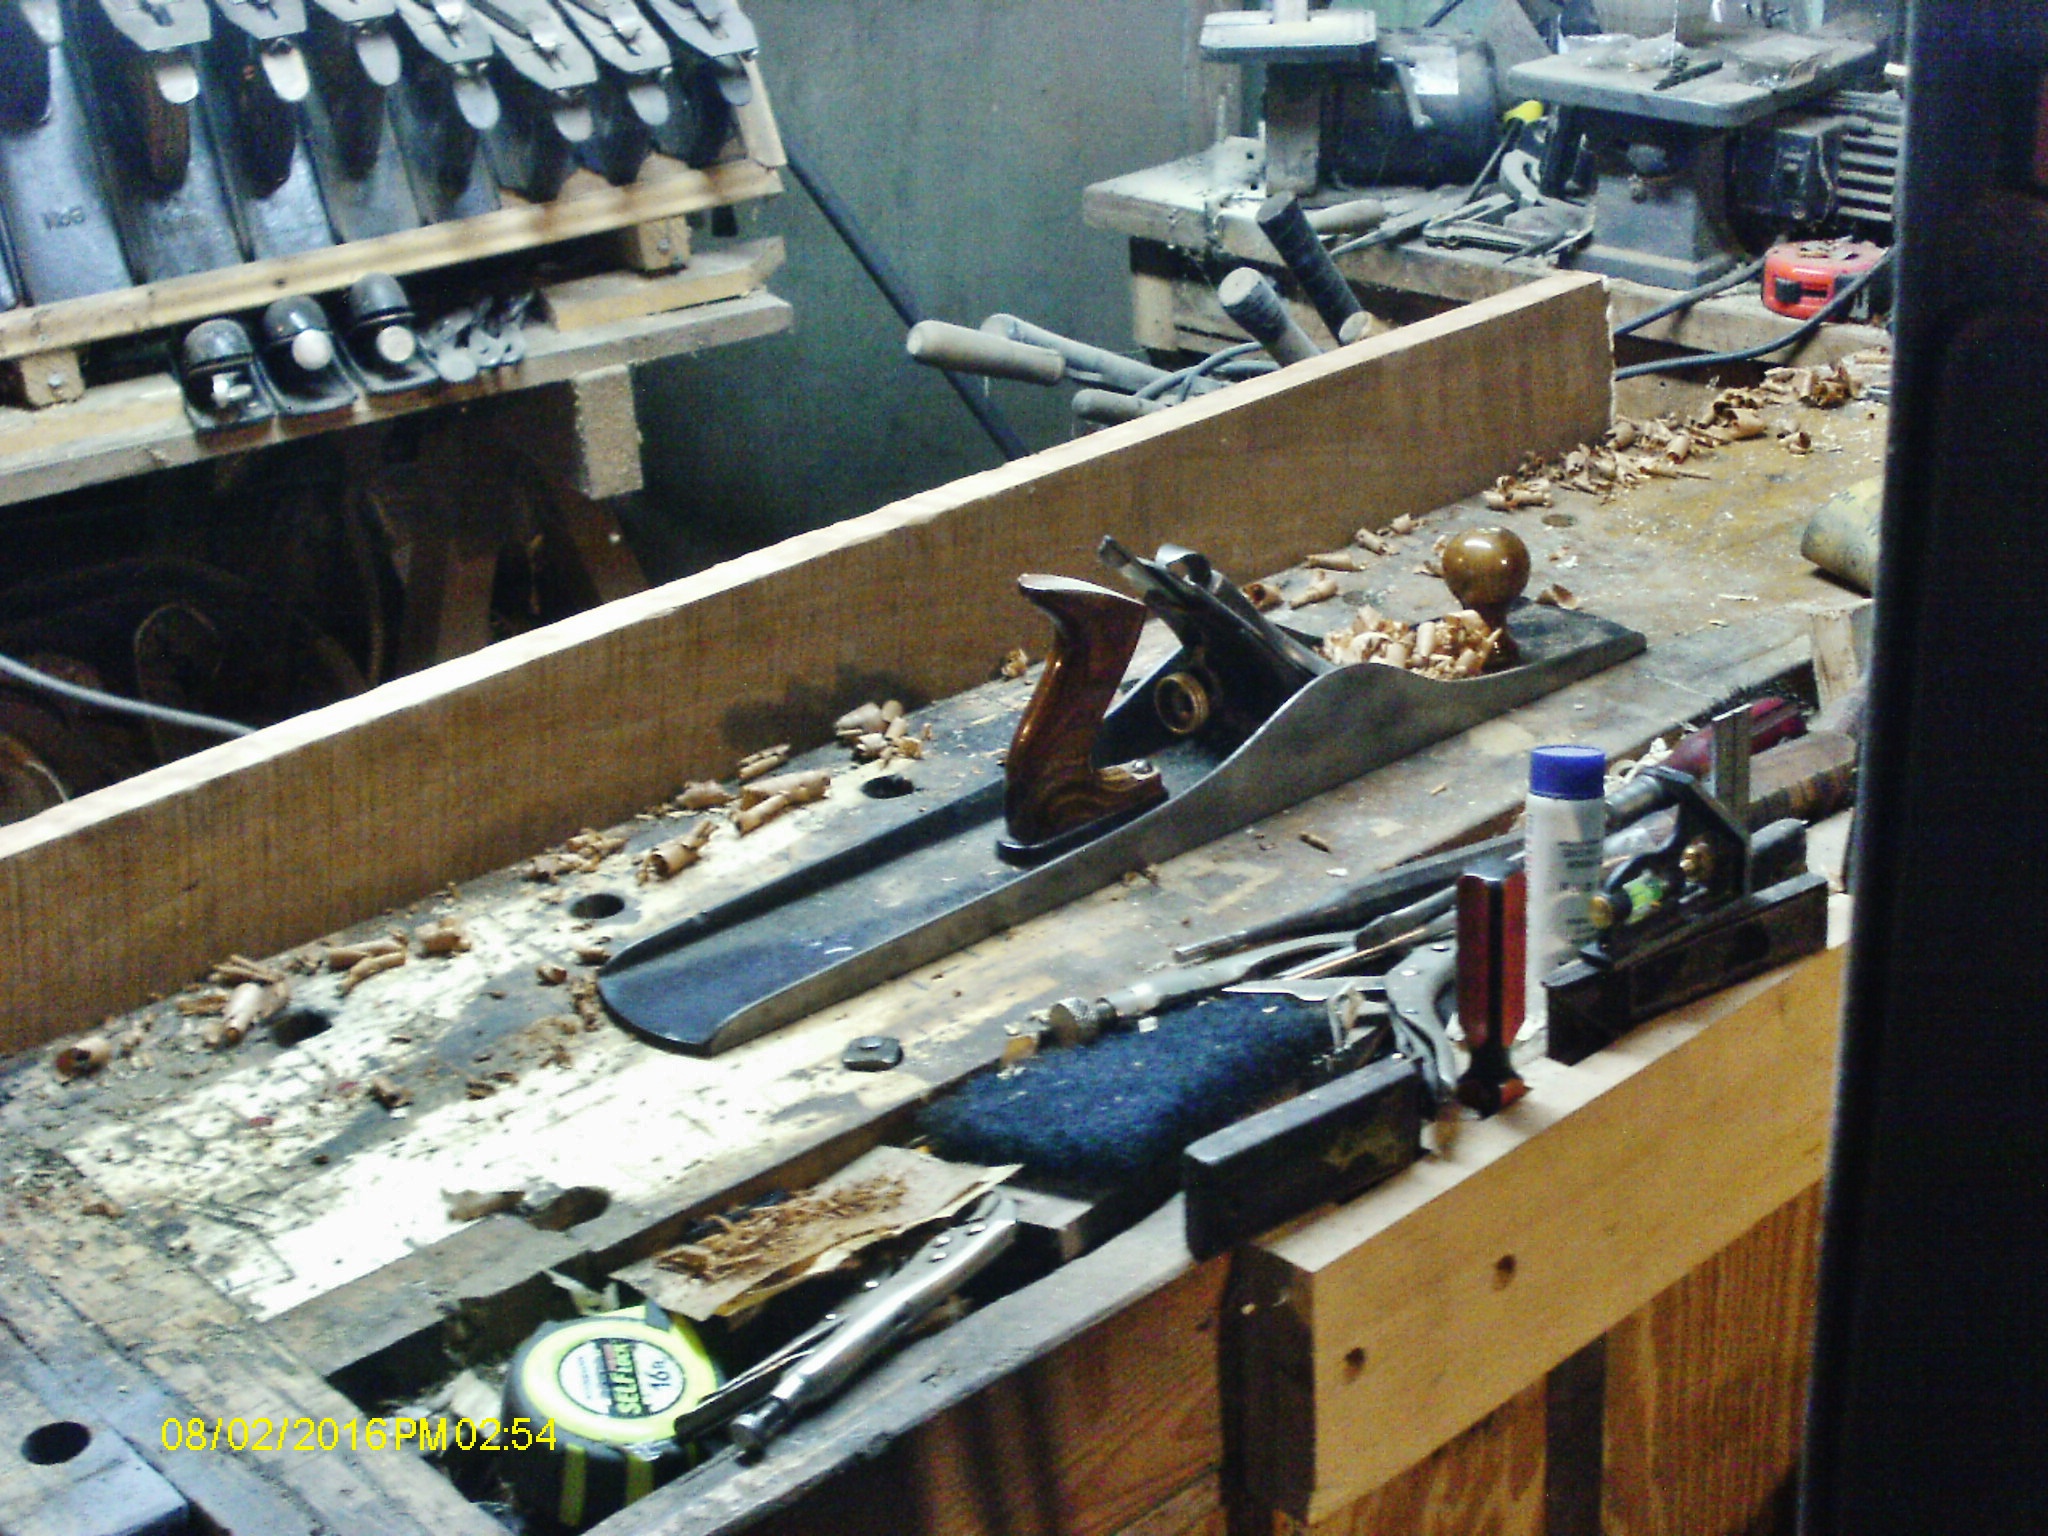
Decided to at least get them milled down a bit. One edge has been jointed The plane is a Stanley No. 7c, type 9. For some reason, it looks a bit tiny....edge of the board is 1-1/8" wide, by.... 50-1/2" long. Wider end is about..16"....The $1 slab of walnut does have a bit of cupping going on, though.. So, I might as well rip right down the center. Then surface all four edges. There is a slight bow along the length, might make a cut across the middle, as well. I did try out a Junior Jack on that edge.... Might have set it a wee bit deep? It looks very small, sitting on the edge... Plane is a Millers Falls No. 11. When I get back down to the shop, I'll start cutting this thing into a few pieces I can use.....One of two planks I picked for a $1 each....