Pulling the trigger

By Steve Krumanaker
· 4,494 views
Thought hard about this segment and came up with all sorts of reasons and justifications for even wanting a laser engraver. The honest truth is, I've just always liked gadgets. Never mind I intend to use it for embellishing some of my turnings if and when I figure out how to use it.
There are some youtube videos with turners using small machines to make “signature disks” they let into the bottoms of their bowls or vessels. The machines cost about $90.00 and do a surprisingly good job. The down side is they will only do an area about 3” square and are limited in height. I thought if I ever got one I would like more capacity and flexibility so I spent a little more and bought a machine that will etch an area about 11”X14” There are several vendors that sell these machines, banggood.com, gearbest.com, aliexpress.com, to name a few. I suspect they are all made in the same factory. At any rate I bought this machine from banggood.com. One thing I will say, if, and when a person may decide to purchase one of these, be patient and watch for price fluctuations. The price will change almost daily and move as much as a hundred dollars one way or the other. So, what do you get for, in my case, about $200.00? Basically, a box of parts. I have to
 to admit, the parts were packaged very nicely. Everything was organized and easy to get to. All of the necessary hardware and tool are included in a little plastic compartmentalized plastic case. One thing to note about these kits, they don't come with printed instructions. I imagine that's to save expense as they are shipped all over the world. There is a video of a machine being assembled on the banggood website and there are "assembly" pictures as well.
 When you get right down to it, there really isn't a lot to one of these machines. The little box at the top right contains the power supply and the laser. Next to it is a pile of plexiglass parts that are machined to hold the motors and for the aluminum extrusions to fasten to. Four corner brackets to assemble the frame, a "gift" pack of small wood test pieces. 5 pieces of aluminum extrusion and the controller board next to that. And, of course, the little box of hardware and tools. The three stepper motors and various cables are not in this picture. That's about it.
So, I watched the video several times and looked at the assembly illustrations. For some reason Banggood.com has made the video and pictures so a person can't save them to a computer. Seems crazy to me, but whatever. My shop is about 90 feet from our house and surprisingly, I can access our home network in the shop, if, and only if, my computer is next to the wall closest to the house. My workbench is near the opposite end of the shop and trust me, it's no small feat to change that. So, I would go to one end of my shop, watch a little of the video and run back to my bench to assemble the part I could remember. Being in my 60's that wasn't a lot. Back and forth and back and forth.
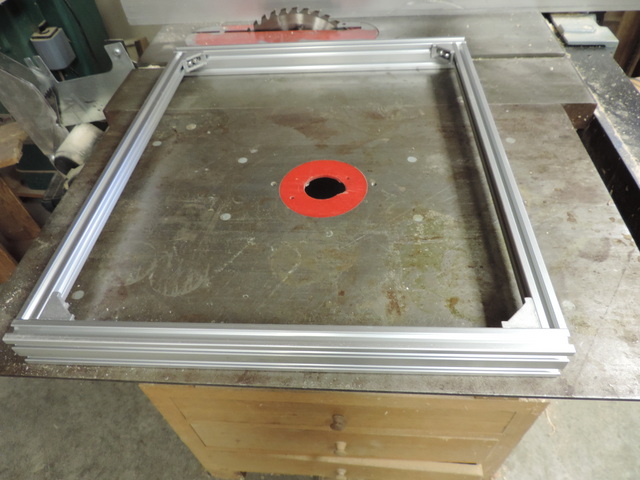 The assembly starts with putting together the frame which is aluminum channel fastened together with corner brackets. I did that on my router table surface so everything would be nice and flat. The extrusions that make up the frame are two 1" X 1" and two 1" X 2" channels. I don't know if they are real 8020 or a knockoff but those aluminum channels have changed how we do so many things.
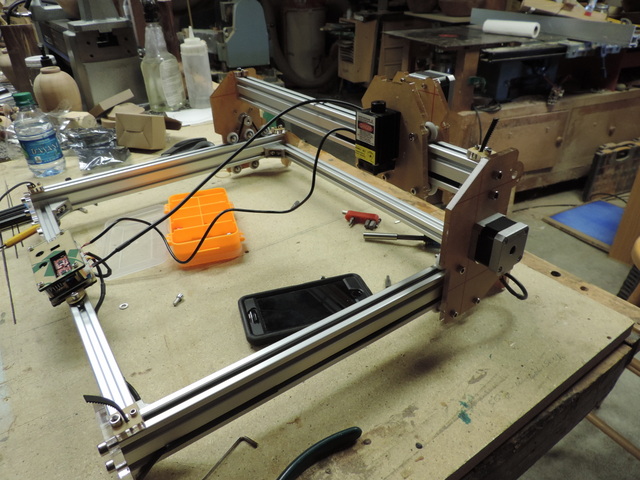
 The next step is to assemble the motors and bearings to the machined plexiglass components. Fortunately, this is all pretty straightforward stuff as the online "instructions", if they can be called that are not the best. I knew that before hand though so I can't complain. The bearings ride in the groove in the aluminum channel and it's actually quite smooth.

I should probably note that this is not meant to be a "how-to" as far assembly goes. There are a few third party videos on youtube which are better than a series of pictures showing how it all goes together. Once a person gets into the project a little it all starts to make sense. After the motors and the bearings are attached the gantry supports are put on the channel and the feet are attached. I would guess by this point I'm about two or three hours into it. A good part of that time is watching video to make sure it's put together correctly.
As wood workers, w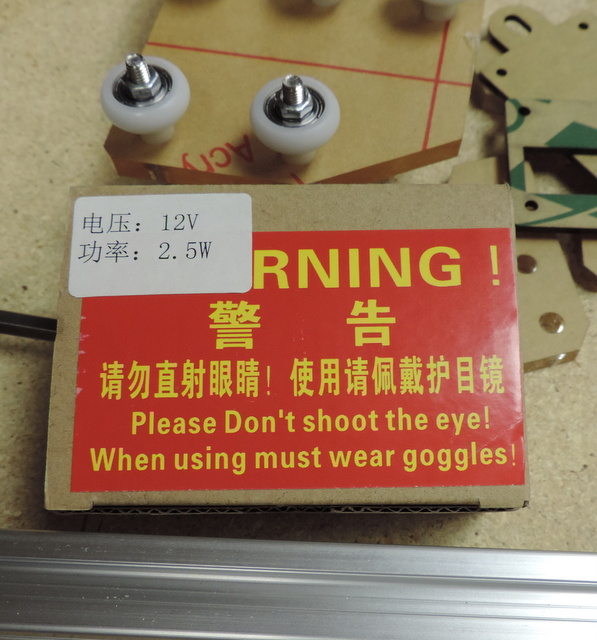 e joke about our toys when we get a new tool for the shop. Most of us know that these "toys" can hurt a person. Something like this may seem a little less risky. The opposite is true. A person doesn't even have to be near one of these to suffer eye damage as just the reflected light from one of them can be harmful. The most important safety rule with one of these is;
"Don't look into the laser with your remaining eye."
After the feet are attached the laser is installed and the gantry assembly is mounted. After that, the wiring begins and its all plug in connectors so that's not a big deal.
 After several hours of studying video, restudying video, hard work, and paying close attention to detail I'm done except for putting on some wire wraps to tidy everything up. Once I get the software loaded I'll be ready to do some laser engraving...........
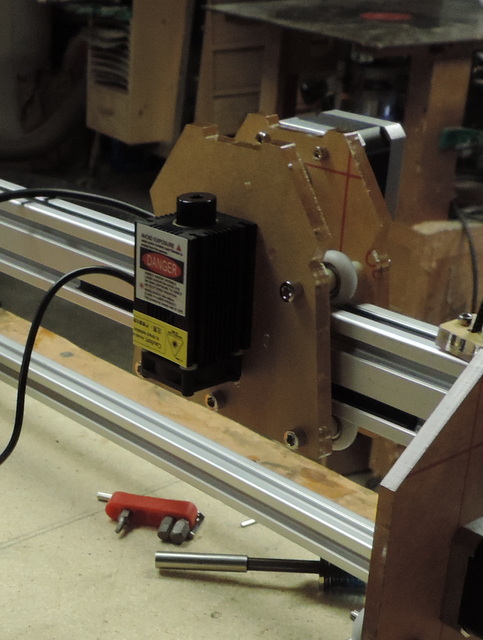 on the ceiling, doh, mounted the laser upside down. Thankfully it's a simple of flipping the gantry channel over as it will mount either way. Now, on to loading the software and doing some world class etching!
-
 2
2
Recommended Comments
Join the conversation
You are posting as a guest. If you have an account, sign in now to post with your account.
Note: Your post will require moderator approval before it will be visible.