Search the Community
Showing results for tags 'grease'.
-
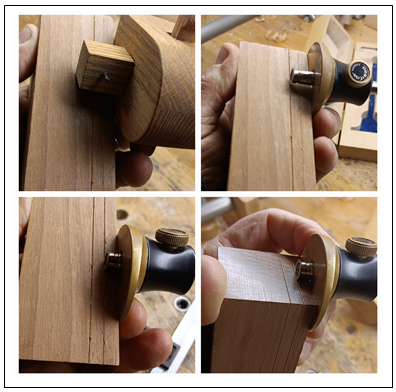
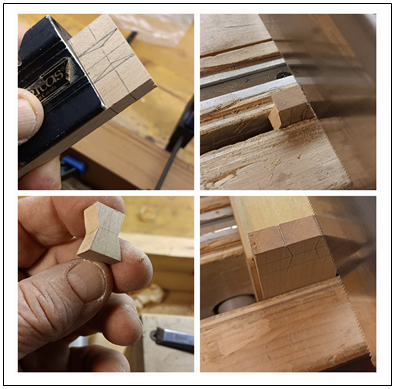
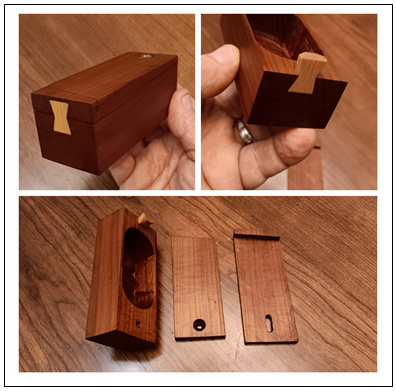
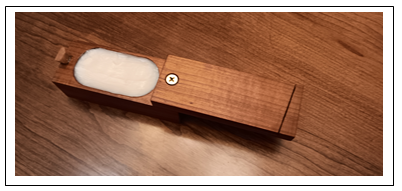
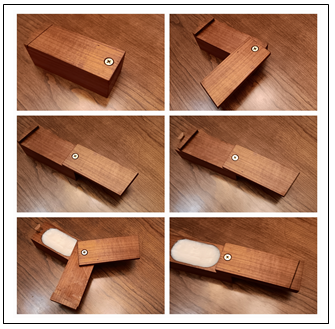
INTRODUCTION It seems like everyone has made a grease box except me. I never heard of one until seeing Roy Underhill's Grease Box Video of "The Woodwright's Shop". After making this, I'm hoping I'll now belong to a GBOC ( grease box owners club). LOL! I didn't have any Walnut but did have lots of Spalted Maple, Eastern Hard Rock Maple, and Torrefied Maple. So I decided to make mine out of the latter two. PREPARING STOCK and SCRIBING I found a chunk of Torrefied Maple, which I used for the box. I roughed out the size to 4-1/8" L x 1-5/8" W x 1-5/8"H. In Fig 1, you'll see the steps of marking up the parts with a couple of my gauges. I lightly scribed two lines 5/16" in and apart with one of my homemade gauges. When finished they'll be 1/4" thick. Then, I used my LV micro adjust wheel marking gauge to go over the scribed lines. I didn't want any ragged lines from the pin type cutter left by my home made gauge. Fig 1 SEPARATING PARTS In Fig 2, I began by separating the parts into a Cover lid, Locking lid, and the main body. I used my LV Dovetail Saw 20 TPI, and a Japanese Ryobi pull saw. Fig 2 MAKING the BUTTERFLY DOVETAIL I'm not sure what to call this. It's butterfly shaped like a spline yet operates when closing the lid like a dovetail. Ergo, I call it a "Butterfly Dovetail". I made it using the Eastern Hard Rock Maple and with my LV extra fine dozuki saw. The part, Fig 3, was a bit small for me to handle and finicky, but I managed okay. It's not perfect but will do. This part, as everyone probably knows, acts as a locking feature for the Cover Lid, which slides into it. Then the Locking Lid swings around and locks the Cover Lid and everything into place. To see how this operates look at the Grease Box Video from Roy Underhill's of the "The Woodwright's Shop". Fig 3 SANDING and REFINING Sanding the parts was slow. Torrefied Maple is hard as a rock. It's also difficult to chisel end grain because it's a bit brittle. Having said this, when done and being successful, it yields beautiful smooth results. I used 80, 150, and 220 grit. FINISHING Finally per Fig 4, I finished all the parts with two coats of a 50/50 cut of pure Tung Oil. I let this dry for a couple of nights. Then I applied wood butter and polished. Fig 4 Here’s my Grease Box full of my home made “Wood Butter” Fig 5 Here’s the Grease Box opening process from left to right, top to bottom. Fig 6 Conclusion All in all it was a nice little project. There were a few hiccups but it was fun. It seems a little small but I wanted to try one to see how it went and maybe it will lead to making another larger one. Thanks for Looking! Cheers! MrRick
- 6 replies
-
- grease
- grease box
-
(and 2 more)
Tagged with:
-
Suggestion for bench vise grease
Cal posted a topic in Machinery, Tools, Research, Reviews and Safety
I just finished up cleaning & repaint to an old bench vise from an auction. At first I thought I would give the main screw (and the swivel base lock bolt) a light coat of axle grease. Then I thought that might not be the best thing in a dusty shop. What do y'all suggest for this application?- 16 replies
-
- bench vise
- lube
-
(and 1 more)
Tagged with:


