Optical Illusion Cutting Board For Mr. Ostrasky

By lew
· 7,272 views
I started senior high school in 1961. Somehow, fate steered me into the vocational program of building construction. My teacher was Mr. Lester Ostrasky. Most of us have had that one teacher that we never forget. The one that had the greatest influence on our lives- Mr. Ostrasky is that teacher. Starting in my sophomore year, I gave him a Christmas present and have done so every year since. After the Navy and a few years at the Letterkenny Army Depot, I started my teaching career at the new Vocational Center. Mr. Ostrasky was teaching there also. Now we were teaching partners but he still offered guidance to the "new kid". Though we are both retired, we still exchange gifts.
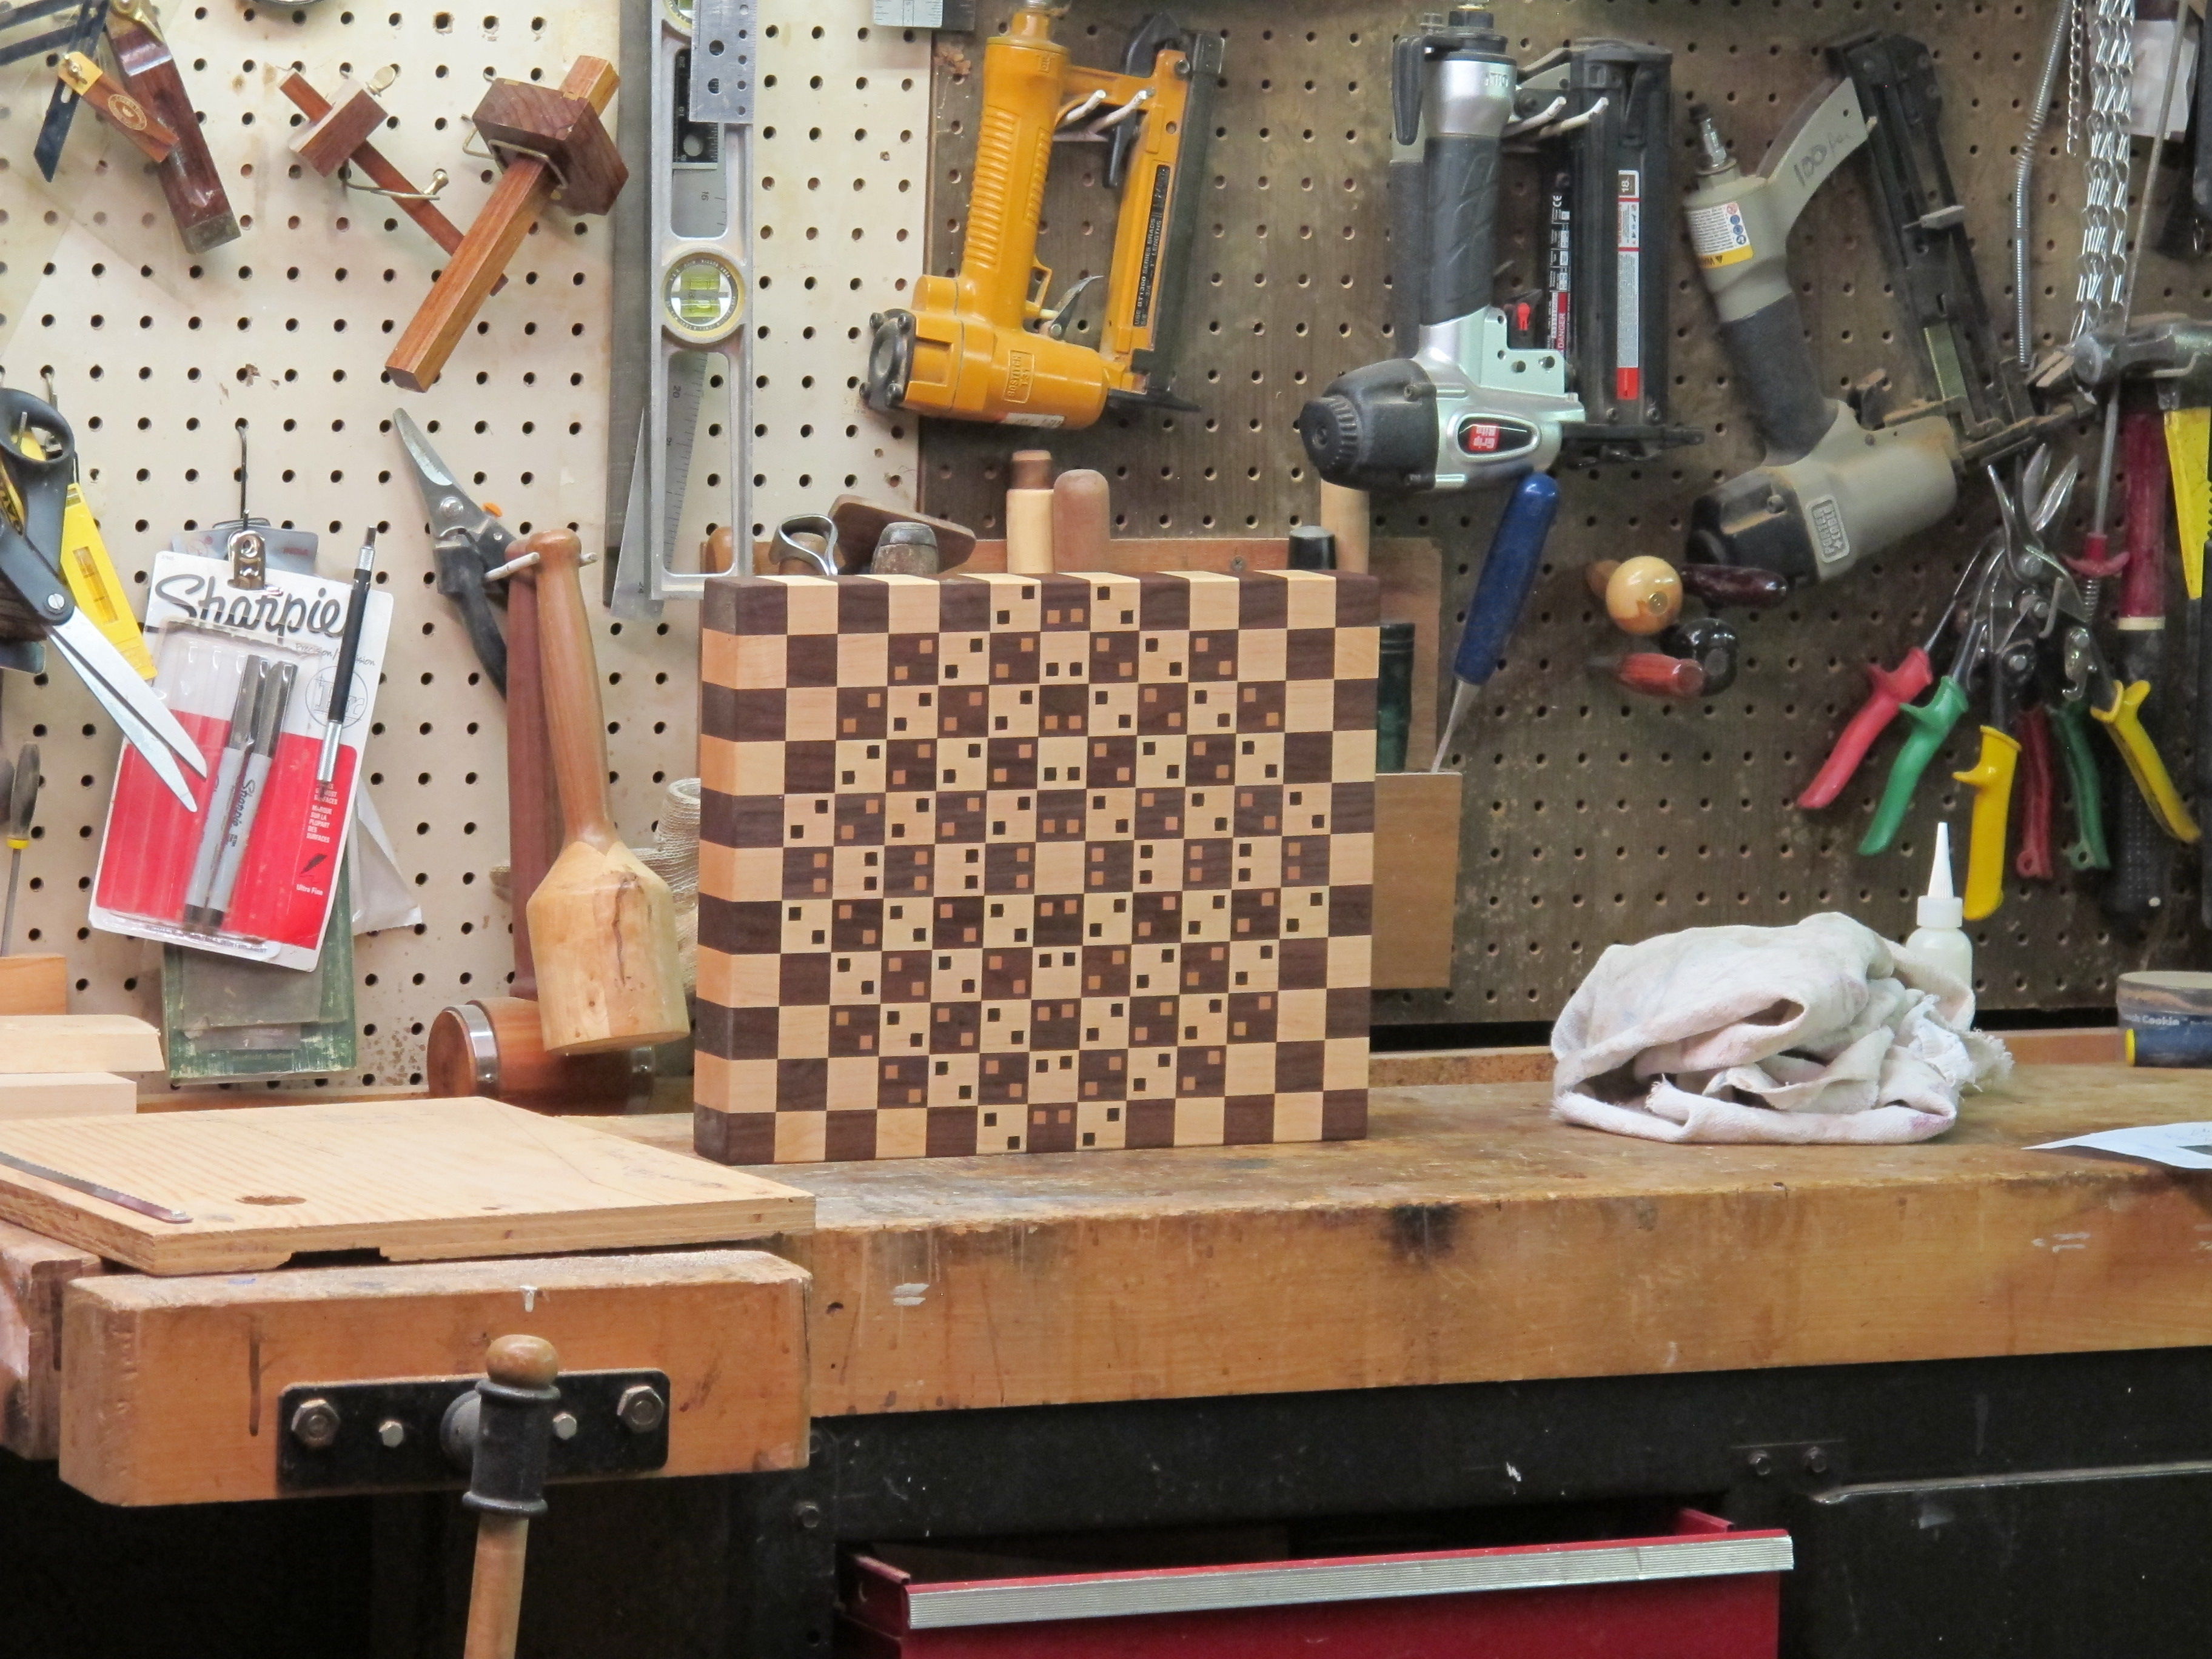
This year, I've made him an optical illusion cutting board. Although the illusion isn't as pronounced as I had hoped, I think he will be pleased.
The board is made from walnut and maple and is an edge grain design. I started by milling and gluing up the alternating strips. Then planed the blank to the final thickness and cut it into strips.

Unlike most of the checker board type cutting boards, the alternating squares needed to radiate out from the center and the finished board has each corner the same color square. To accomplish this, I made an extra row strip that would later be removed.

The illusion is created by alternate colored inserts strategically placed within the squares. Some of these boards use round inserts (dowels) and others use square inserts.
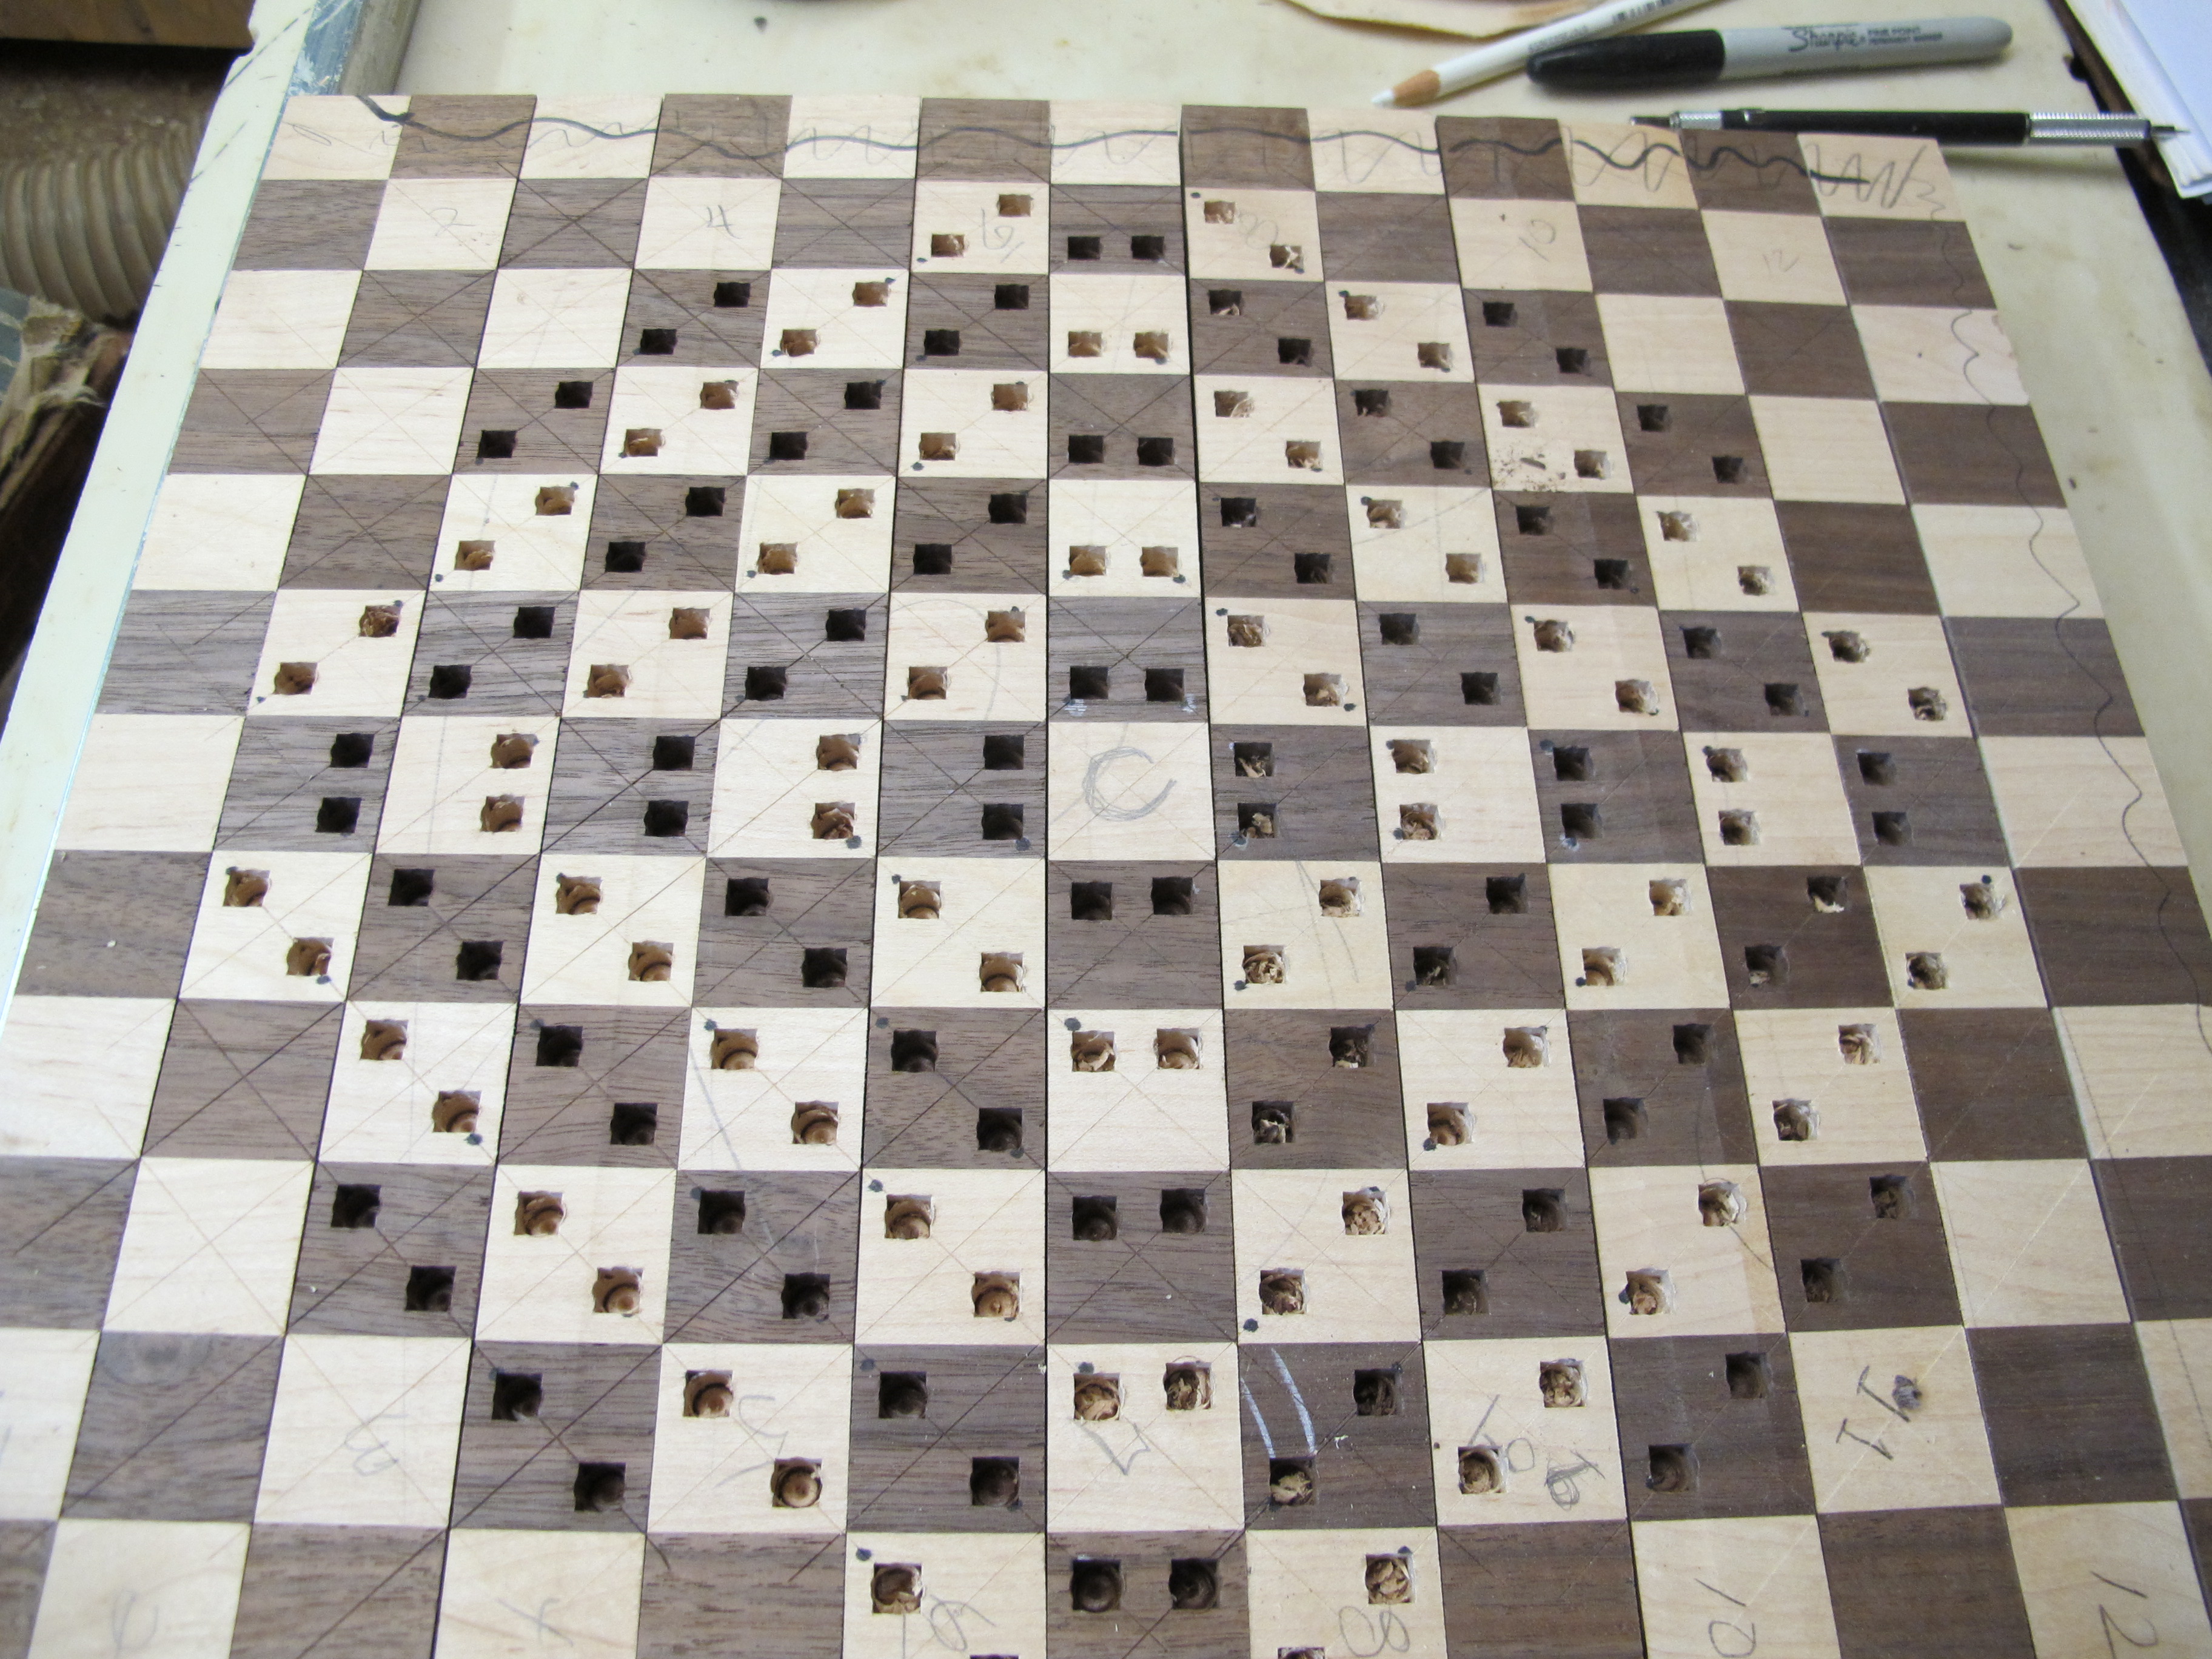
I decided on square ones. Square holes were relative easy as I have a hollow mortiser. The problem was that the "throat" depth was not nearly deep enough to reach the center squares. To overcome this problem, I delayed gluing the strips together until after the square holes were made.
Accurate spacing of the inserts is essential for the illusion so I dry assembled the board and clamped it securely.


Once the pieces were secured, I scored lines to help locate the square holes. Then added black dots to further identify the hole locations.

Because the holes were equal distance from each edge of the strips I set the mortiser fence to provide consistent placement. The center of the holes were on the scribed lines.

Now it was just a matter of punching the holes into each strip and then reassembling the board with glue.
Once the board was assembled, a couple of passes through the drum sander to smooth the surfaces.

I also needed to clean up the holes so the pegs would seat correctly. A sharp chisel took care of that.
The pegs were made from long 1/4" x 1/4" sticks. A simple bandsaw jig made for quick cutting.

Pegs were glued into the holes.

The extra peg lengths were cut off and the board sanded with a random orbital sander.

A liberal coating of Bumble Bee Butter to protect the surface.

In hindsight, I should have created the square pegs differently. The pegs are positioned with the end grain showing. The end grain of the maple plugs darkened more than I had expected. They look more like cherry. If the plugs had been created with the edge grain up, I think the contrasts would have been greater and the illusion more pronounced. But just to prove the checkers are all perfectly square, here's the back

. Next up will be Terry and Dian's chip and cheese platter.
-
 3
3
Recommended Comments
Join the conversation
You are posting as a guest. If you have an account, sign in now to post with your account.
Note: Your post will require moderator approval before it will be visible.