Jump to content

Search the Community

Showing results for tags 'risers'.

  • Search By Tags

    Type tags separated by commas.
  • Search By Author

Content Type


Forums

  • The Woodworking Discussion Forum
    • Introduce Yourself
    • General Woodworking
    • Wood Turners
    • Finishing
    • Wood Carving
    • Hand Tools
    • Scroll Sawing
    • CNC
    • Shopsmith
    • Show Us Your Woodworking Shops
    • Machinery, Tools, Research, Reviews and Safety
    • Plans and Software
    • The Veterans Corner and Causes Forum
  • The Old Machinery Discussion Forum
    • Old Woodworking Machinery
    • Old Metalworking Machinery
    • Old Machinery Operating and Restoration Tips
    • Old Machinery Badges and Decals
    • Old Machinery Swap and Sale, Classifieds
    • Old Machinery Hitching Post
    • Old Woodworking Machinery Archive
  • The Home Improvement Forum
    • Home Improvement
    • Patio and Outdoors
  • The Scrap Bin
    • Free for All
    • The Patriot's Pulse
    • Announcements
    • Bugs and Issues

Categories

  • Honoring the Fallen
  • Warrior's Christmas

Categories

  • The American Woods
    • The Softwoods (Conifers)
    • The Hardwoods (Broadleafs)

Categories

  • Book and Literature
  • CNC Files
    • CAD Files
    • CAM Files
    • CNC Reference and Tutorials
  • General Woodworking
    • Shop Charts
    • Shop Jigs
    • Shop Furniture
    • Arts and Crafts
    • Furnishings
    • Musical Instruments
    • Wooden Toys
    • Yard and Outdoors
  • Home Improvement
  • Old Machinery Manuals
  • Old Machinery Badge & Decal Images
    • Beaver Power Tools-Callander Foundry
    • Delta Specialty Co.
    • Delta Mfg. Co.
    • Delta Milwaukee
    • Delta Rockwell
    • Walker Turner
    • Sears Companion
    • Sears Craftsman
    • Sears Dunlap
  • Sketchup Sharing Center
    • Furnishings
    • Shop Jigs
    • Arts and Crafts
    • Sketchup Tutorials
  • Scroll Saw Patterns

Blogs

  • Building A Walnut Shotgun Case
  • Military Challenge Coin Display Build
  • SJUSD Veterans Recieve Plaques from Patriot Tigers
  • The Pastor’s Table or I Think My Sister Is Trying To Buy My Way Into Heaven
  • Small Patch Musings and Such
  • Photography
  • Steve Krumanaker
  • Christmas 2016
  • Cherry Entertainment Center
  • Another Church Table
  • Inside Out Turning
  • Segmented Turning
  • Canon Ball Bed
  • Situation Normal, All Fired Up
  • DUST COLLECTORS 101
  • Workbench PIP
  • Republishing the French Rolling Pin blog
  • Thickness Sander
  • Shopsmith lathe setup
  • Drying Turned Wood
  • New Projects, shop stuff, new tools,
  • Bill Kappel
  • Bowl Drying Adventures
  • Chess set

Product Groups

There are no results to display.

Categories

  • Members
  • Sponsors
  • Administrators
  • Forum Hosts

Find results in...

Find results that contain...


Date Created

  • Start

    End


Last Updated

  • Start

    End


Filter by number of...

Found 2 results

  1. kmealy

    Painting biscuits

    Got a tip from Woodsmith yesterday, but it's an embedded video, so I can't share it here. They take scrap plywood, about 2" wide and cut some plate joiner (biscuit) slots. Glue in a biscuit (will stick out about half) and use like a painter pyramid to raise your work off the table for finishing or staining. He made some with 1 biscuit each that you can put wherever and some with a row of three for things like doors and shelves. If you can't envision this, I'll post some pix after I have made some.
  2. Kenny Tarmack

    How it's made part 5

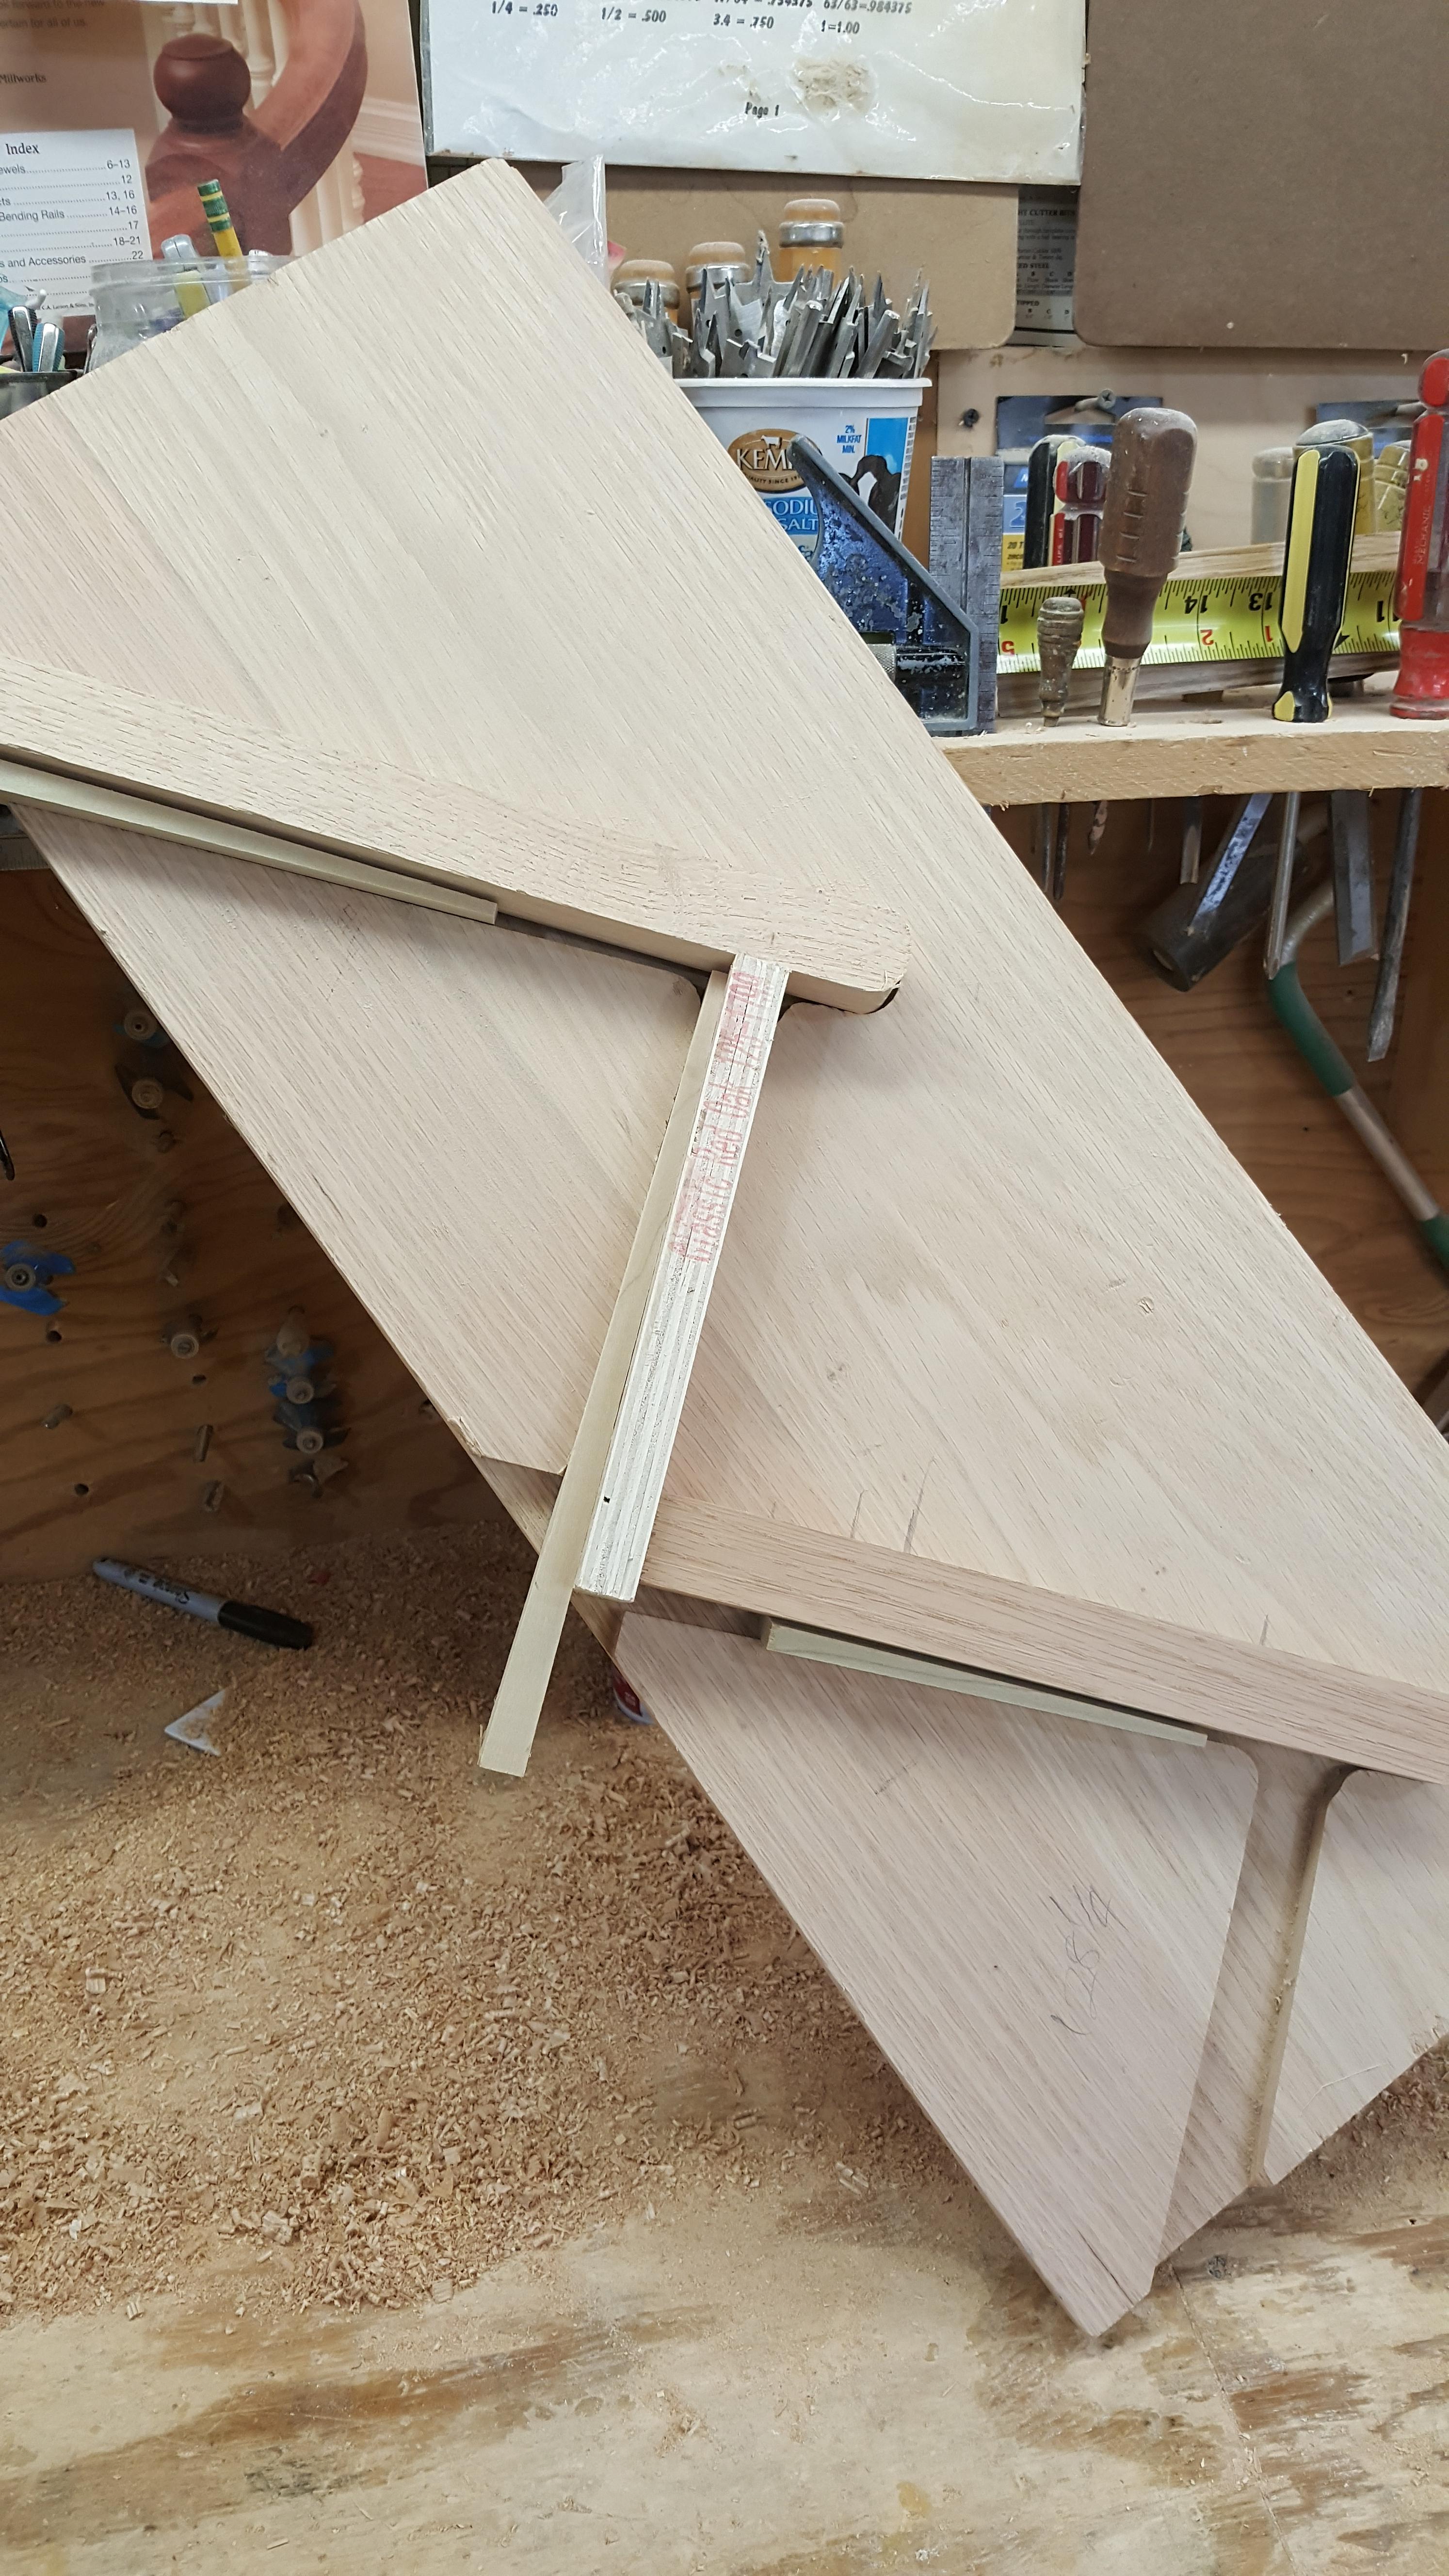
    To answer a few questions that have been asked to me in the past, yes I design and build stairs for a living. The jig for Bending curved stringers was not made specifically for my stairs, it is adjustable for any size radius up to 10' and has been used for 100's of stairs. Here is a picture of the jig used for routing out the stringers and a close up of how the treads and risers get wedged into them, the router bit is called a stair bit, basically a dove tail bit.The jig is adjustable by loosening to two bolts shown with the pencils sticking up, it needs to be adjusted for each stair, do to the different run and rise. A picture of the under side of my stairs, a small bead of glue is applied to the bottom of the riser, the riser is then stapled the the back side of the tread then wedged. The treads get put in and wedged first, then the risers. Glue blocks are then applied to top of the riser, and the under side of the tread. Think about this, in order for the tread to bend, 8" of riser under the tread must bend, and 8"of riser over the tread must bend, not going to happen, that's the reason a center stringer is not needed. I'm currently setting the newel and putting in the curved rail, more episodes to follow.also a pic of the jig used for cutting the wedges, the board is flipped end for end after each cut.
×
×
  • Create New...