Search the Community
Showing results for tags 'cnc joinery'.
Found 9 results
-
This one nearly got thrown out as it looks like a boring simple miter joint. Pull it apart and it reveals why it stays together with no glue added. Tenon cut from what is normally cut off to make a miter joint. Mating mortise cut in the face of the opposing side. On my blog: Not just a miter joint 4D

- 1 reply
-
- 3
-

-

-
- cnc joinery
- miter joint
- (and 1 more)
-
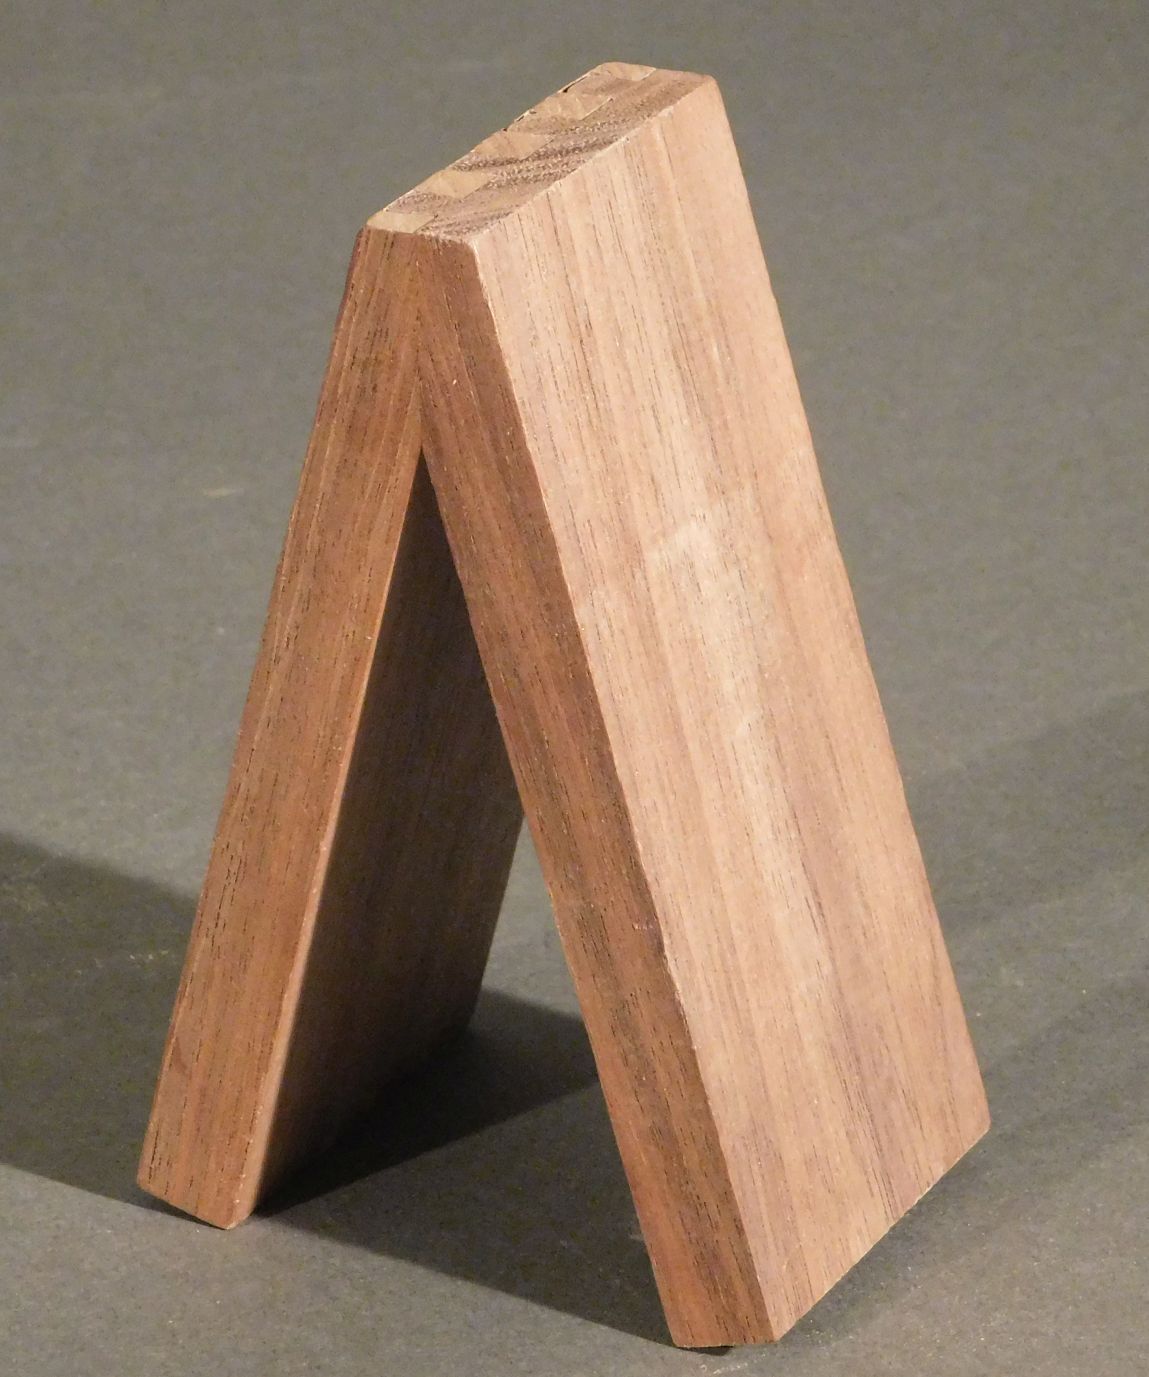
Not a common demand, but a variation of this joint was used for the top corner of an A-frame side frame on a CNC controller cart made by my students when I taught. Not as simple as I originally thought it would be to cut. A few more details written up with more photos now on my blog: Steep Dovetail Joint 4D
- 2 replies
-
- 5
-
-
- cnc joinery
- dovetail joint
- (and 1 more)
-
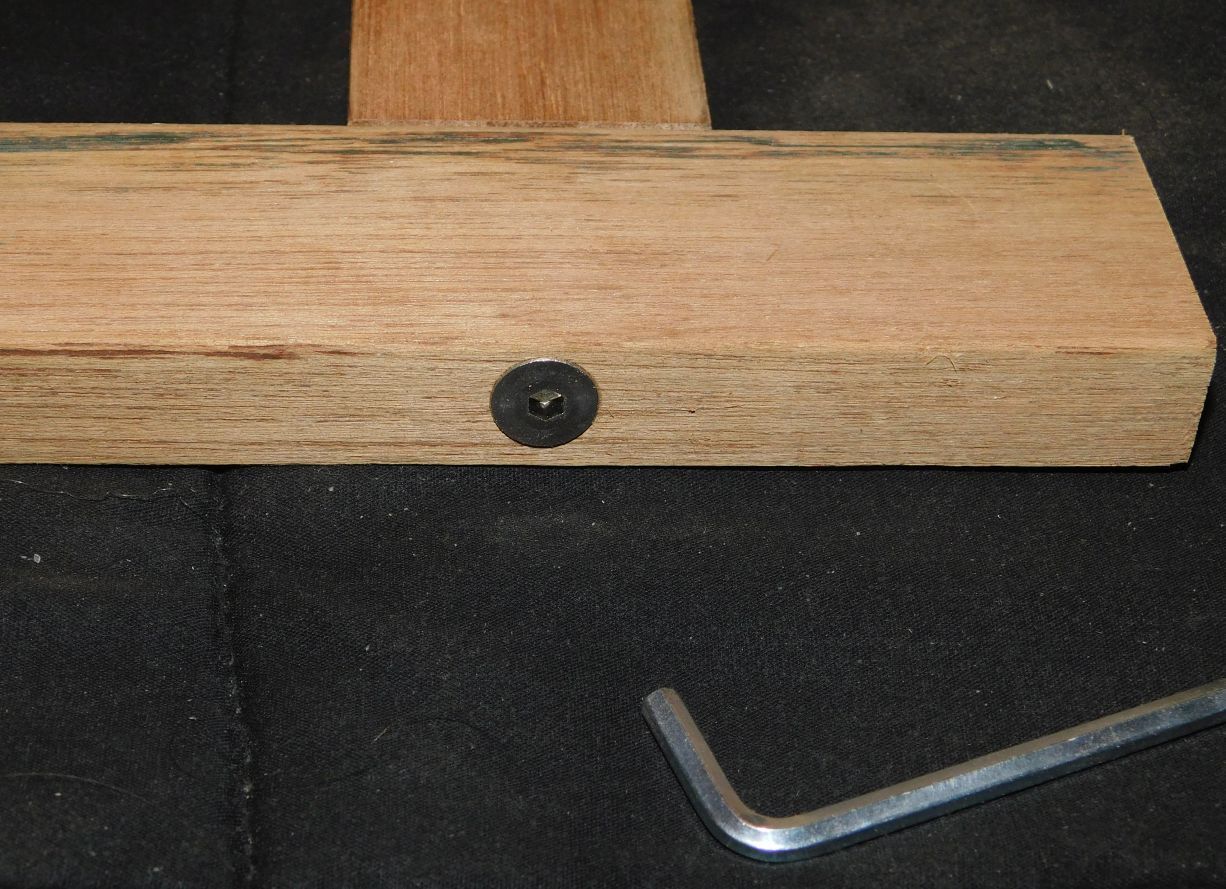
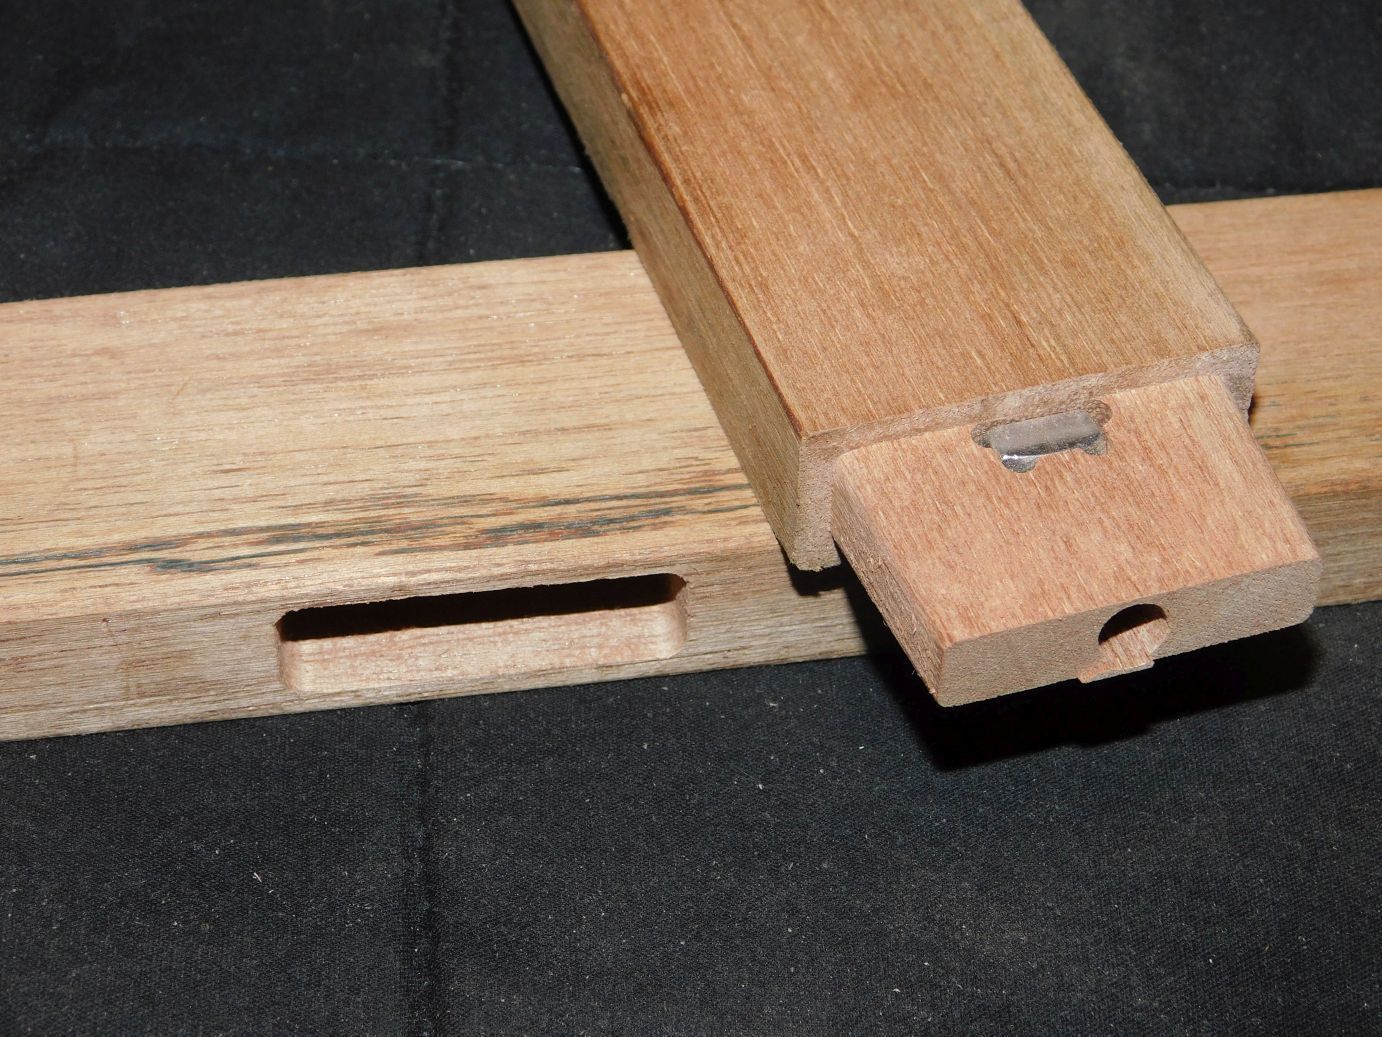
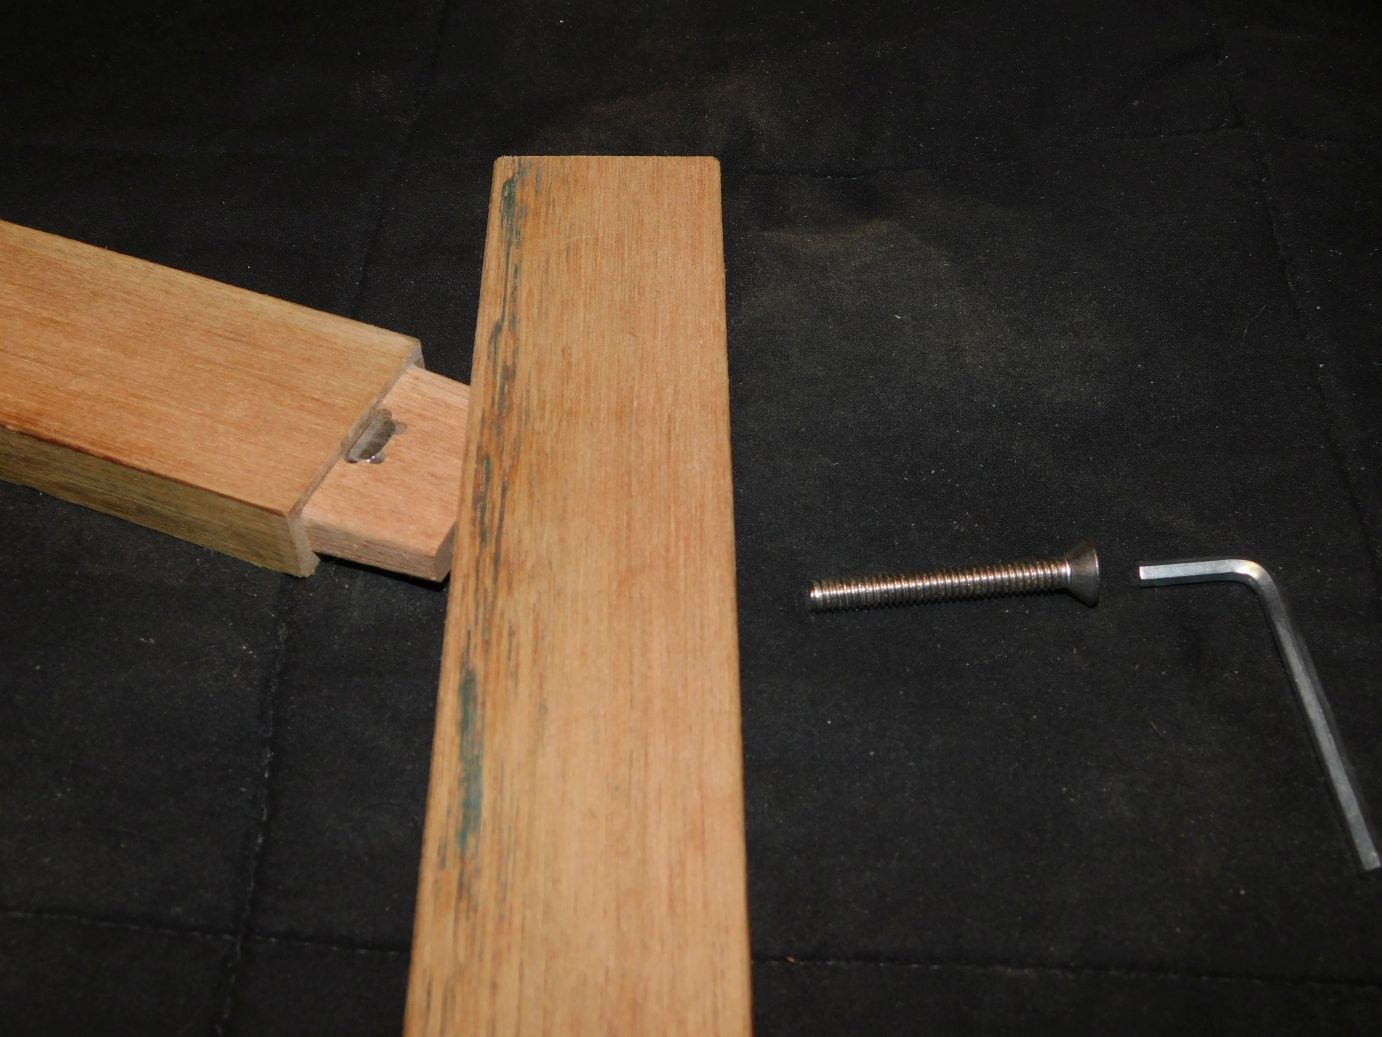
A prototype done. Intended to knock down and go back together reliably. Mortise is 1/16" deep than the tenon is long. Embedded square 1/4-20 nut to pull snuggly with the flat head bolt. Can't see the nut when the joint is tight together. The bolt head could be a cap screw and more discretely counter bored. Not simple to draw up or quick to cut, but as I'm retired now time isn't that important and challenges are enjoyable to figure out.
- 26 replies
-
- 5
-
-
- cnc joinery
- wedged m&t
- (and 1 more)
-
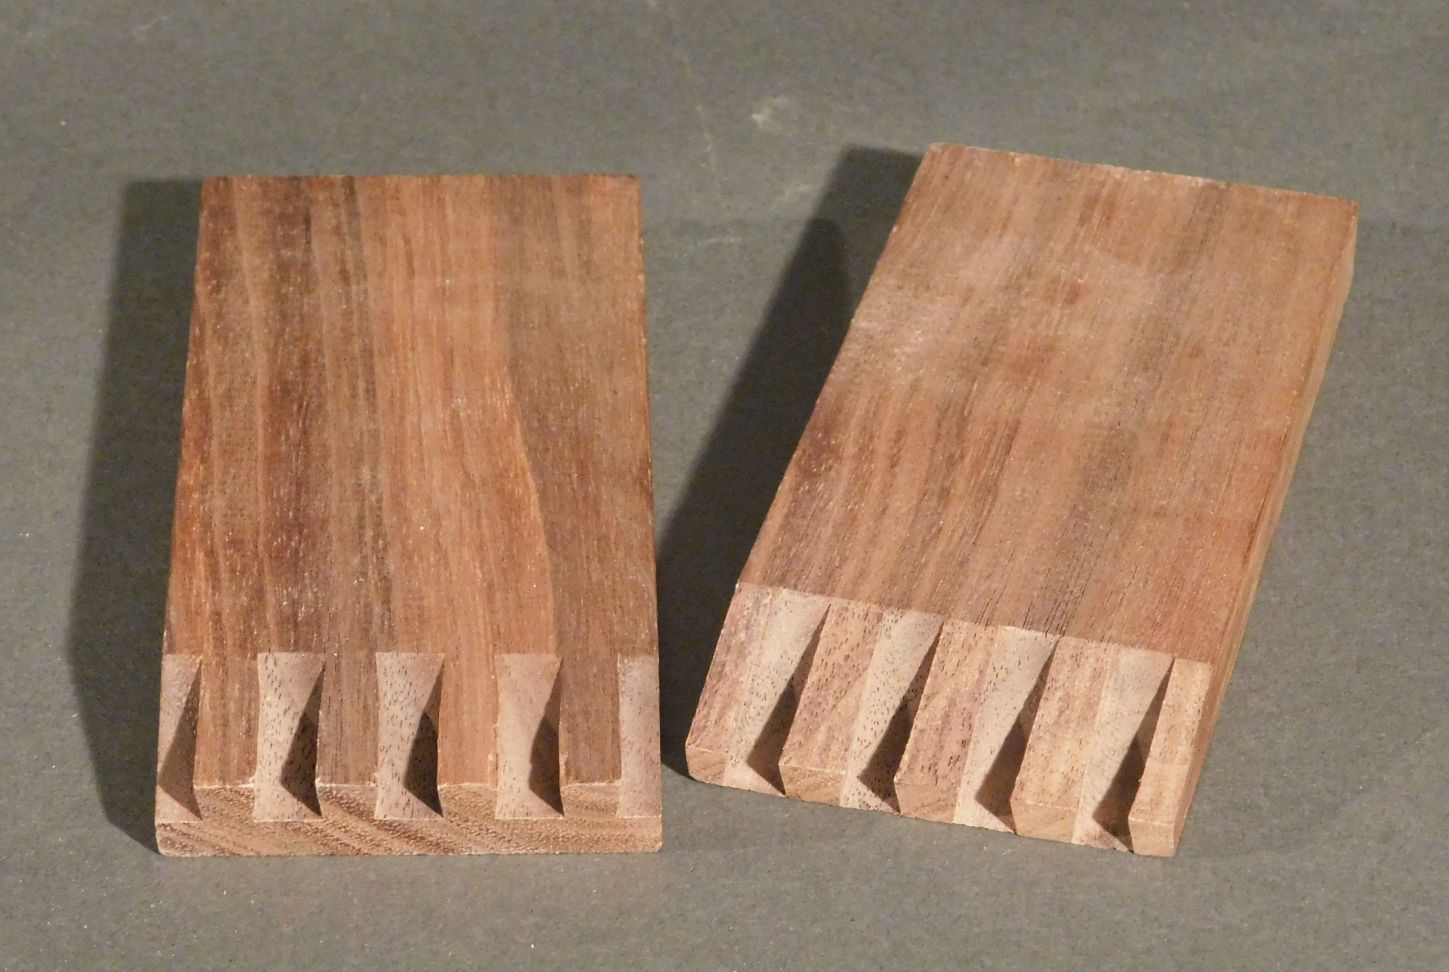
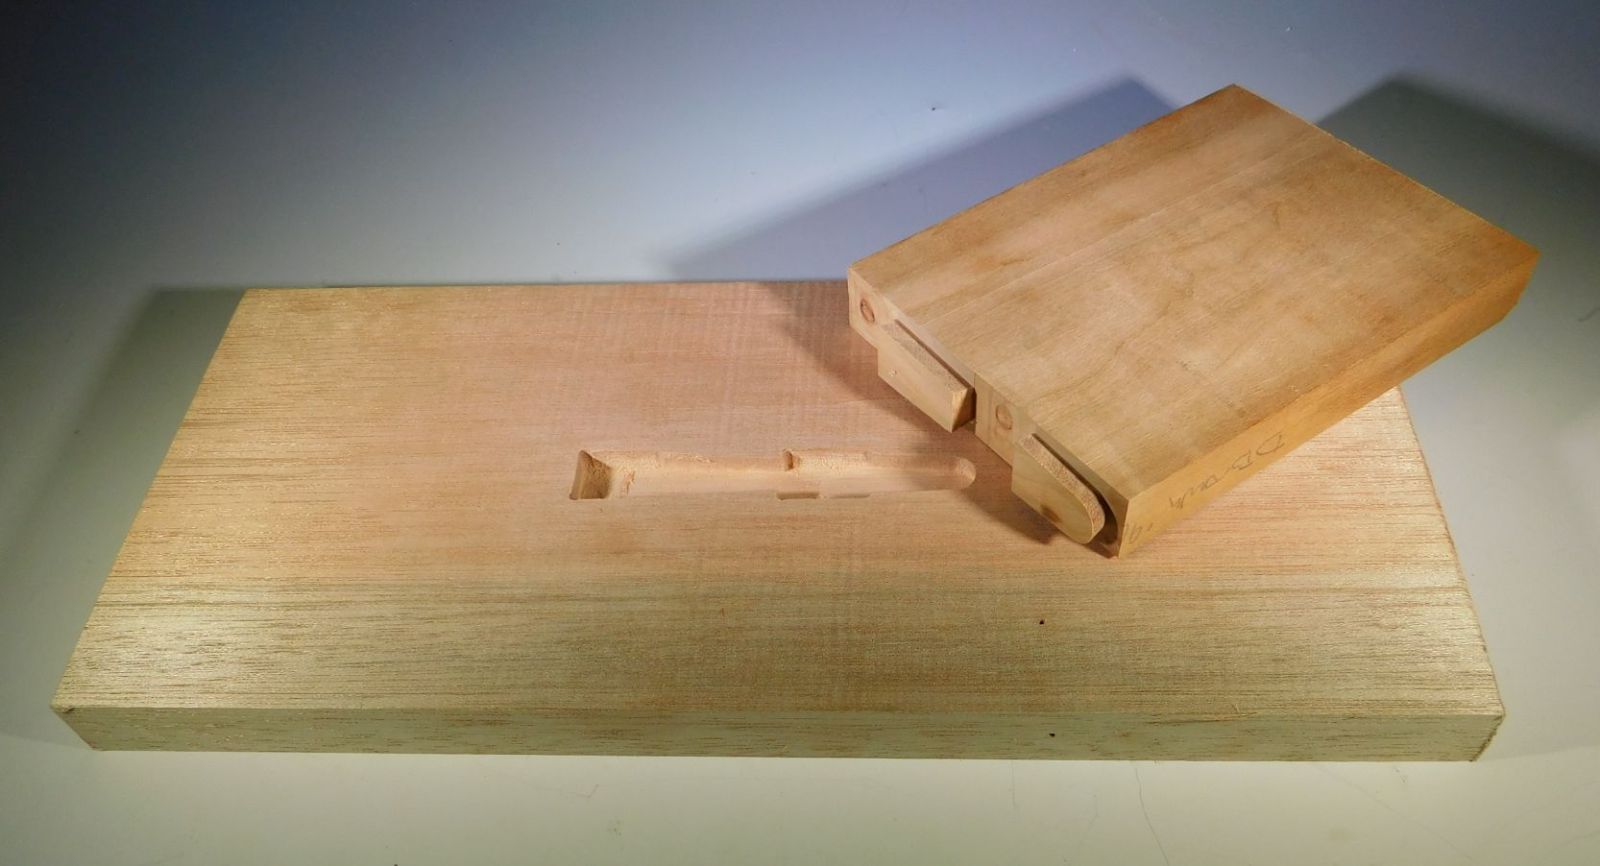
I first came up with this joint for a student project several years back. A one-off solution that solved her connection challenge. Inspire to make a sample to evaluate for an end table project I'm contemplating. First try on my CNC for the projecting dovetails failed miserably. Cut that end off, revised the file and double checked my setup on my CNC before trying again. This time the joint fit tight, and with a push snugged up securely. Scrap of cherry into a Mahogany scrap. 4D
- 3 replies
-
- 6
-
-
-
- cnc joinery
- dovetail joinery
- (and 1 more)
-
Yet to be actually cut, and I may abandon this idea, but here are photos of a board a leg extender joint for a parsons table. The table I have is 18" tall, but I'd prefer it to be 24" tall to make a more useful side table. I'd have to be able to remove the legs to cut this on the bottom of them. Debating on whether to use the same wood or a contrasting wood to emphasis these "feet" and the joint. Walnut perhaps which I have some of. I've come up with a similar joint for extending dowels and it got used to good effect on a couple of student projects. That one is likely already posted here. 4D
- 13 replies
-
- 4
-
-
- board stretcher joint
- cnc joinery
- (and 1 more)
-
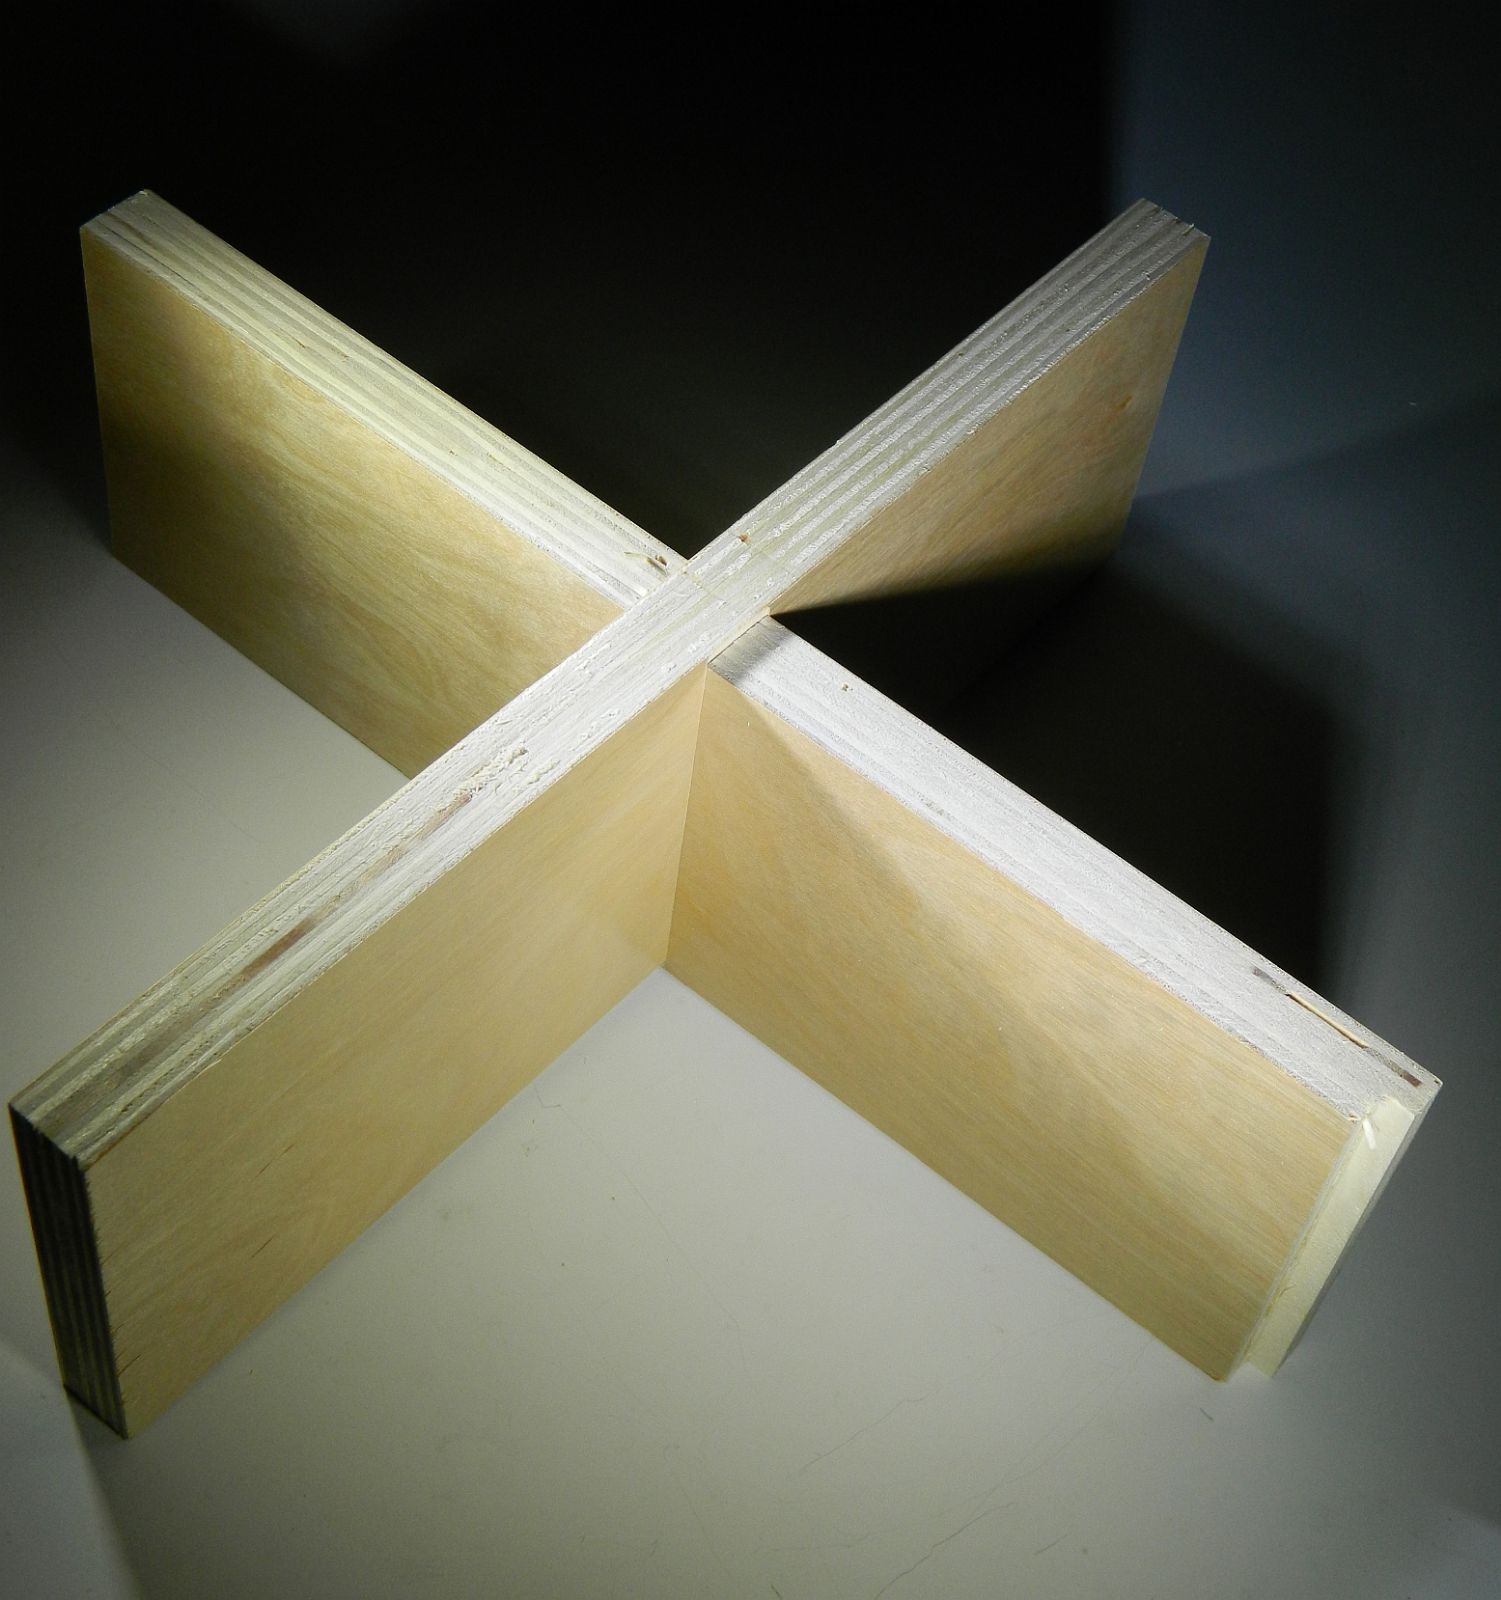
As a few box build projects have shown up on this forum, I'm sharing one box sample I made to show my students. All 4 corners have a different joint and all are cut using a CNC: A simple Box Some joints could be cut laying flat. Some had to to have at least one board clamped vertically. For the miter joint both sides used the same toolpaths and were clamped at 45 degrees. 4D
-
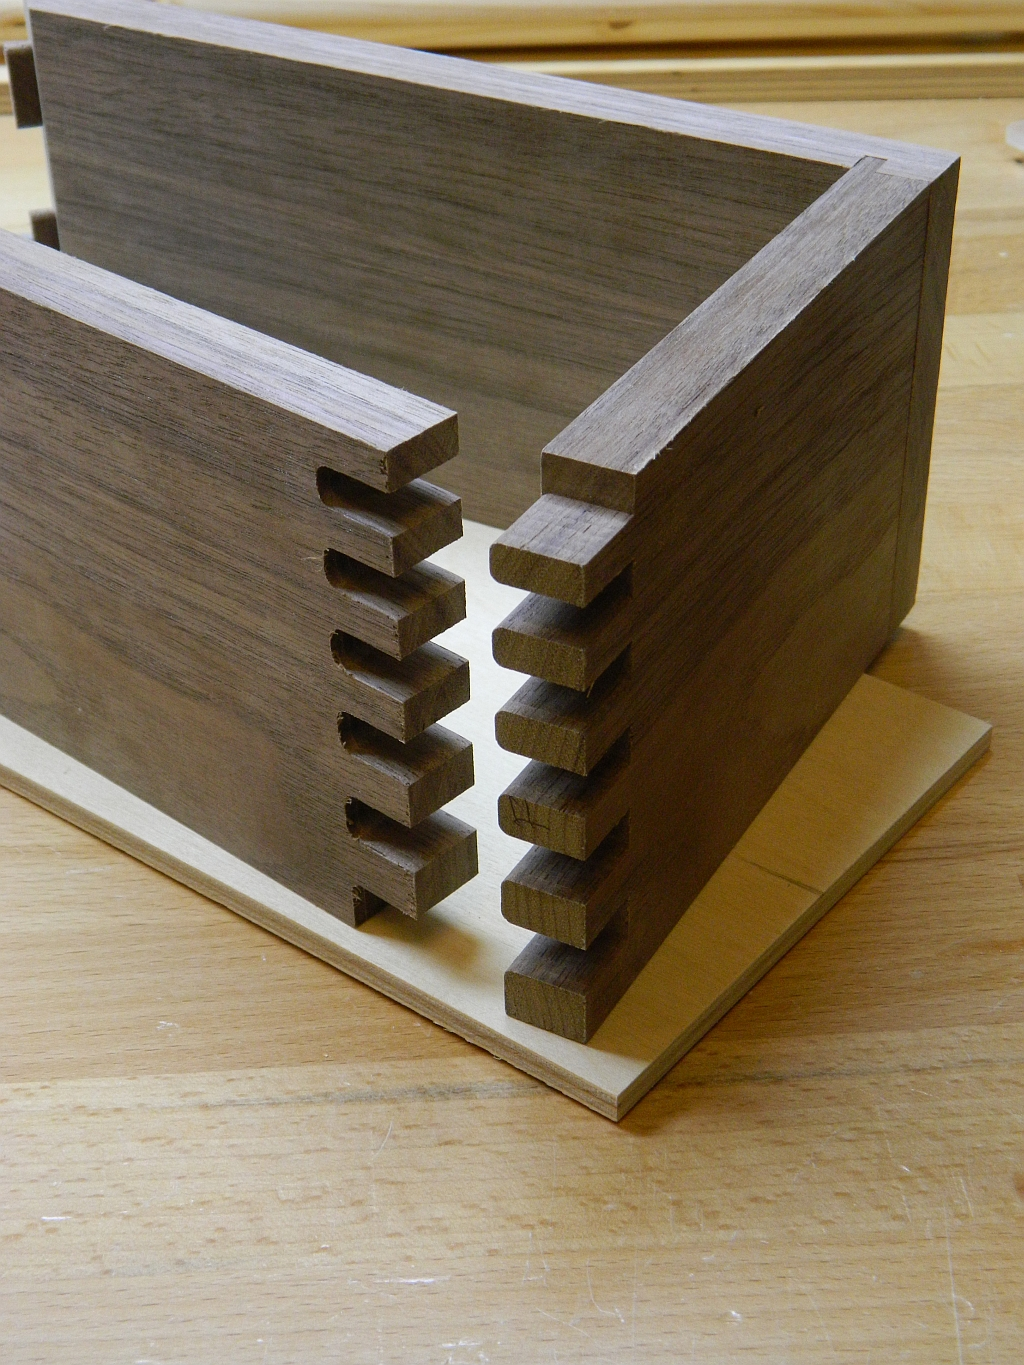
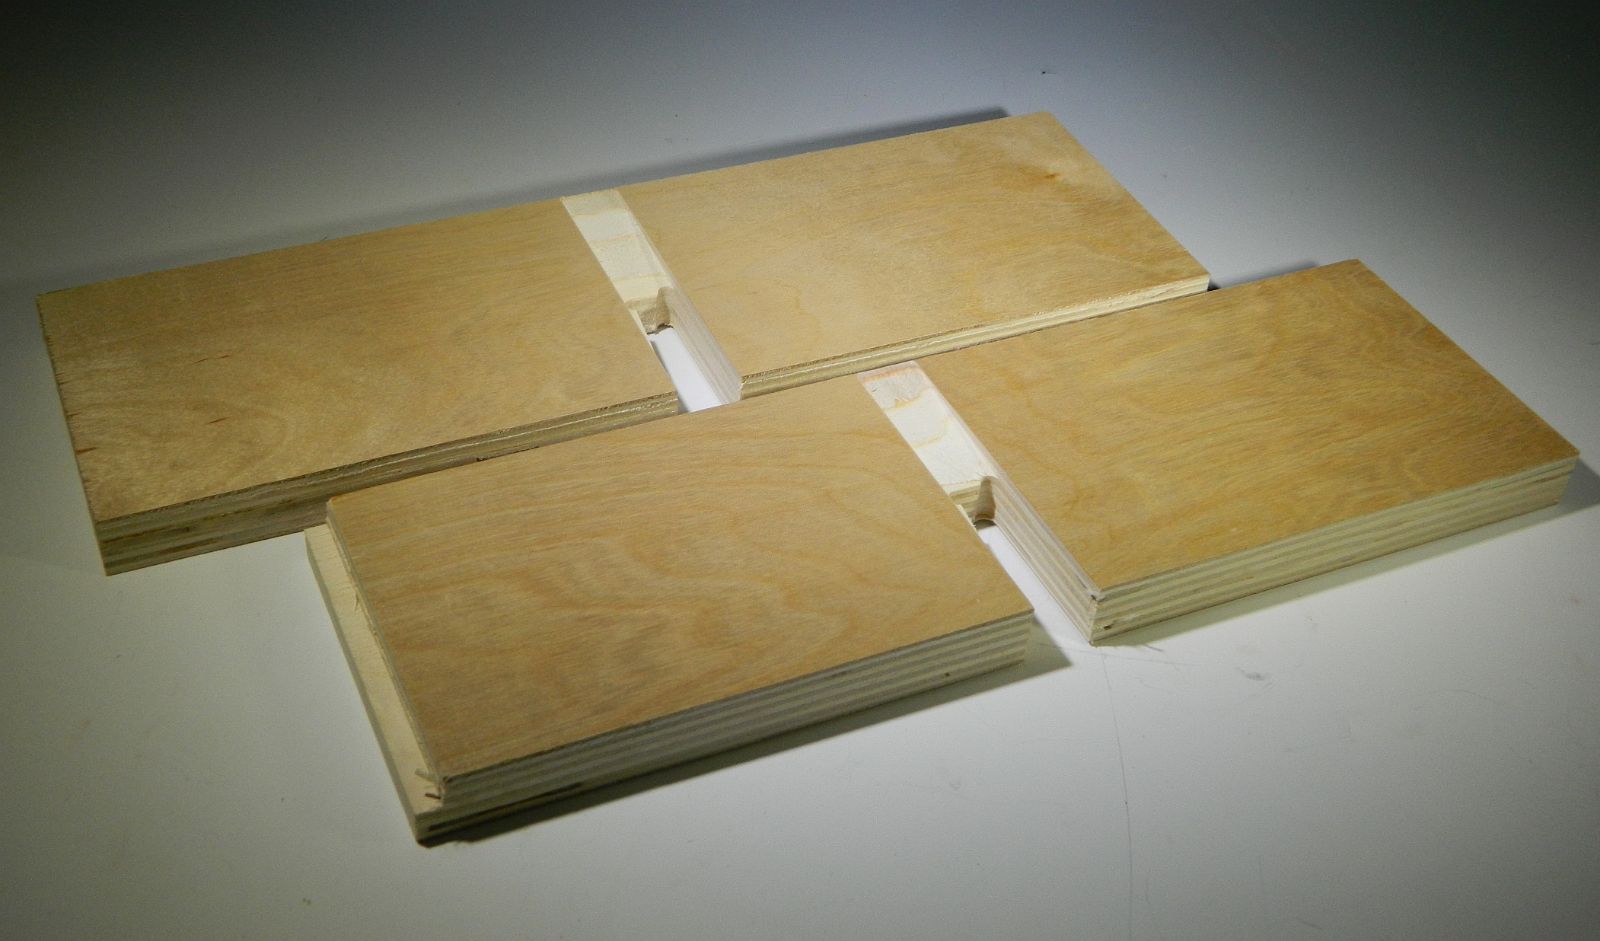
Often my student's cabinet projects needed half lapped panels to compartmentalize interior volumes. Even in drawers that needed dividers a half lap joint was the obvious way to intersect the parts. For some educational research credit I set about seeing if many classic woodworking joints could be made "better" using the CNC. This joint is one outcome of my explorations. My ramped halving joint slides together easily but closes up tight and snug. The tapered side of the slot on each side mates to the ramped face on the opposite side of the mating piece. The joint is kept aligned down the entire intersection. Both sides are done with the same toolpaths with the boards laying flat on the CNC bed. My blog post about it includes a link to Vectric's Forum where I posted a sample file you can download to inspect if you use VCarve or Aspire. https://4dfurniture.blogspot.com/2022/10/tapered-halving-joint.html 4D
- 5 replies
-
- 5
-
-

-
- panel joinery
- halving joint
- (and 2 more)
-
While teaching I would make samples of joinery I thought up to be a reference set to show my students. Many complex joint solutions never found a customer, although they were usually inspired by a challenging past project done by students. This is a tale of one sample and one student who appreciated seeing the sample. Summer shop classes often requested my help for CNC work that was beyond the capability or the instructor. One such day I was in the shop to help one student when I was asked by another (Abby D.) if I could show her how make a form for S shaped laminations. I asked to see her design drawings to get a better idea of what she needed. Her intent was to stack three S-shaped laminated curved to make a 3-legged end table. As my personal design process strives for simplicity I could see how a sample joint I made could greatly simplify her project. Simple curves rather than stacked S shapes joined in the center the formwork was simpler and the result almost identical to her design drawings. A single bolt through the center holds all 6 curve sections together. The cables at the top lock the geometry. I cut the joint end by clamping each curve over the end of the CNC. The sample I showed her and the final project:
- 9 replies
-
- 1
-
-
- cnc joinery
- 3-way intersection
- (and 2 more)
-
I've just delivered this book stand to my college library rare book room. It now sits in the front large window of that room where it can be seen from the general library space. I was asked by the chief librarian to design something original and representative of the creative design environment our college is. These photos are of it in the finish room of our fabrication lab where I teach different sections of woodworking and furniture design to students in Interior Architecture and Industrial Design. CNC created aspects of this piece include the VCarved quotes cut into the two stretchers, the soft curve on the front of the dark front ledge, and all joinery including sliding tapered dovetails to slide the side support of the back shelf into, bowtie tenon rows between stretchers and feet stretchers and posts, and also between feet and posts. You can see a 4-tenon stacks of thru tenons bowtie shaped piercing the top. The thumbnail curve on the top edge of the feet was also done using the moulding toolpath in Aspire.
- 57 replies
-
- 7
-
-
- furniture design
- white oak
- (and 4 more)