Search the Community
Showing results for tags 'table'.
-
Wife volunteered me to make her a craft table to replace the folding plastic one she was using. Looked around for some ideas and didn't find any plans I really liked so i borrowed from a few different ideas on Pinterest and winged it. This design as you go is time consuming and can get really really frustrating. All I bought was a sheet of oak ply and the hardware. Everything else came from current stock, cut offs, and scrap on hand. Started with a "basic" type frame for each side and just kept adding sides and shelves. Will just trim with 1 1/4 strips cut from scrap.

-
Hi all, I've got a mystery cast iron extension table 10"×7" wide with a simple miter channel that's the same width as the one on my Shopsmith band saw. There are two half inch rods spaced 7.25" apart that insert into the main table. I wish I could post a pic, but it's my 1st post. It's somewhat similar to the model 500 saw table extension except that the pivot mechanism is somewhat like the saw table mechanism with a lock lever. There are no maker's marks or tags, just the part number 502995 on the the table underside. It green or bluish-grey in color, I think. Thanks to anyone who can help me identify this accessory piece.
-
When I bought my little laser engraver, I didn't really think things thru about how/where I was going to use it. Setting up to engrave different turnings is a challenge. Partly because the laser's working area is pretty small and partly because of the limited focus distance. I mounted the laser on a sub-base so I could clamp it to keep it stationary, but focus adjustments were challenging. Eventually I mounted the laser on my bench drill press. Using the drill press table height adjustment, the box I made for the laser storage and scraps of wood I could get the settings pretty close. Making the critical last focus adjustments meant trying to reach around the setup and tweaking the drill press table crank- a real pain because of the location. I thought if I could make an adjustable, axillary table with a more easily accessibly adjustment control; then I could set the drill press table to a height close to what I need. Then use the axillary table for the precise location. In hind sight, I would have saved a lot of wasted materials had I drawn this in Sketchup first. The "scissor lift" mechanism is the second version (first version seen in the pieces above/left in first picture). Fortunately, all the materials came from scraps and hardware already in the shop. Without the table and lead screw- 4 angles From the top- Works pretty good. Haven't set up the laser yet to actually do engraving. The lead screw is 1/4 x 20 all thread.
- 22 replies
-
- 10
-

-

-
- laser engraving
- scissor lift
- (and 2 more)
-
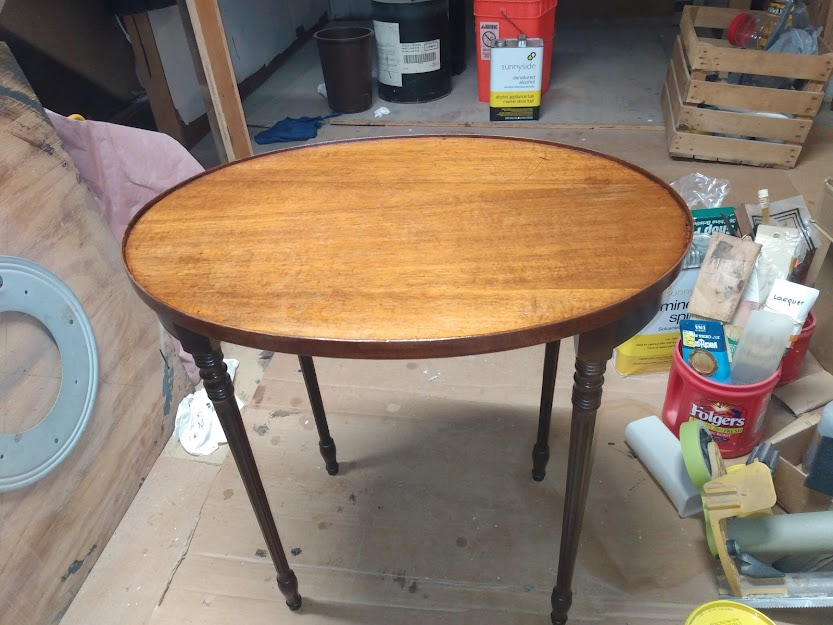
Got one of a set of nesting tables from a friend that had a leg broken off. Process of repair: Take off one end of legs with the damage Work apart the joint on the other end since the dowel pins were at right angles Find broken off pieces and glue and clamped them back on Removed broken off dowel pin. Cleaned out holes Filled remaining missing piece with stick epoxy, let cure a few minutes then chisel and sand down to flush Glued in new dowel pin and reglued the rest Lighty sand top Apply a bit of touch up marker where needed Apply a couple coats of shellac, then a coat of lacquer Before Putty with overfill Putty after sanding Glue up Back together
-
Managed to get some forward progress on the wife’s entry table this weekend.
-

Version 1.0.0
26 downloads
This is a scanned document of the now defunct Workbench Magazine of this era. Permission was granted by the new Workbench Publication for The Patriot Woodworker community to copy and use the old Workbench Magazine at our pleasure, and for free distribution and re-use.-
- 1
-
-
- magazine
- workbench magazine
- (and 2 more)
-
.thumb.jpg.573d1497d0675219908c85aabefd797a.jpg) View File Workbench Magazine July-August 1968 Vitrine Tables This is a scanned document of the now defunct Workbench Magazine of this era. Permission was granted by the new Workbench Publication for The Patriot Woodworker community to copy and use the old Workbench Magazine at our pleasure, and for free distribution and re-use. Submitter John Morris Submitted 05/14/2023 Category Furnishings
View File Workbench Magazine July-August 1968 Vitrine Tables This is a scanned document of the now defunct Workbench Magazine of this era. Permission was granted by the new Workbench Publication for The Patriot Woodworker community to copy and use the old Workbench Magazine at our pleasure, and for free distribution and re-use. Submitter John Morris Submitted 05/14/2023 Category Furnishings -

Version 1.0.0
16 downloads
This is a scanned document of the now defunct Workbench Magazine of this era. Permission was granted by the new Workbench Publication for The Patriot Woodworker community to copy and use the old Workbench Magazine at our pleasure, and for free distribution and re-use. A wonderful twist for a picnic table, from the modern era, true to form, have fun! -
View File Workbench Magazine July-August 1968 Picnic Table This is a scanned document of the now defunct Workbench Magazine of this era. Permission was granted by the new Workbench Publication for The Patriot Woodworker community to copy and use the old Workbench Magazine at our pleasure, and for free distribution and re-use. A wonderful twist for a picnic table, from the modern era, true to form, have fun! Submitter John Morris Submitted 04/08/2023 Category Yard and Outdoors
-
View File Workbench Magazine July-August 1968 Octagonal Lamp Table This is a scanned document of the now defunct Workbench Magazine of this era. Permission was granted by the new Workbench Publication for The Patriot Woodworker community to copy and use the old Workbench Magazine at our pleasure, and for free distribution and re-use. Submitter John Morris Submitted 04/08/2023 Category Furnishings
-

Version 1.0.0
18 downloads
This is a scanned document of the now defunct Workbench Magazine of this era. Permission was granted by the new Workbench Publication for The Patriot Woodworker community to copy and use the old Workbench Magazine at our pleasure, and for free distribution and re-use. -
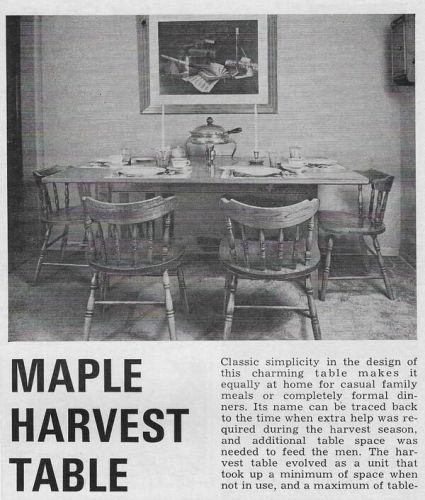
View File Workbench Magazine May-June 1968 Maple Harvest Table This is a scanned document of the now defunct Workbench Magazine of this era. Permission was granted by the new Workbench Publication for The Patriot Woodworker community to copy and use the old Workbench Magazine at our pleasure, and for free distribution and re-use. Submitter John Morris Submitted 04/08/2023 Category Furnishings
-
Version 1.0.0
29 downloads
This is a scanned document of the now defunct Workbench Magazine of this era. Permission was granted by the new Workbench Publication for The Patriot Woodworker community to copy and use the old Workbench Magazine at our pleasure, and for free distribution and re-use.-
- 2
-
-
- harvest table
- table
- (and 2 more)
-
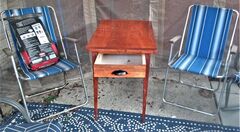
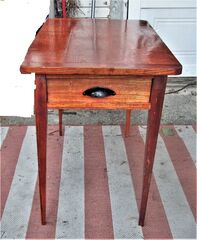
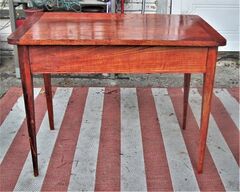
So maybe two years ago I promised my wife a side table. Finally got started. Had a big piece of mahogany for the sides and face frame. Using ply for the bottom of drawer box. using rabbit joints for the bottom and sides. Then Rabbited the face frame for tight fit. Used pocket screws to join frame. Before assembly I needed filler strips for the drawer slides so used some 1/2 inch scrape for those. Time for a test fit. So now time for glue and clamps
- 27 replies
-
- 10
-
-

-
- ambrosia maple
- leopardwood
- (and 2 more)
-
So wife asked me last week to make her a coffee table. On the way to my grandson soccer game we stopped by Woodcraft and found a 52x13 Sirari slab that she liked. It is Sirari. Never worked with this type before. This project will let me learn how to epoxy fill worm holes and work with live edge. Should be fun….
- 15 replies
-
- 5
-
-
-
- coffee table
- table
- (and 2 more)
-
This is a scanned document of the now defunct Workbench Magazine of this era. Permission was granted by the new Workbench Publication for The Patriot Woodworker community to copy and use the old Workbench Magazine at our pleasure, and for free distribution and re-use.
-
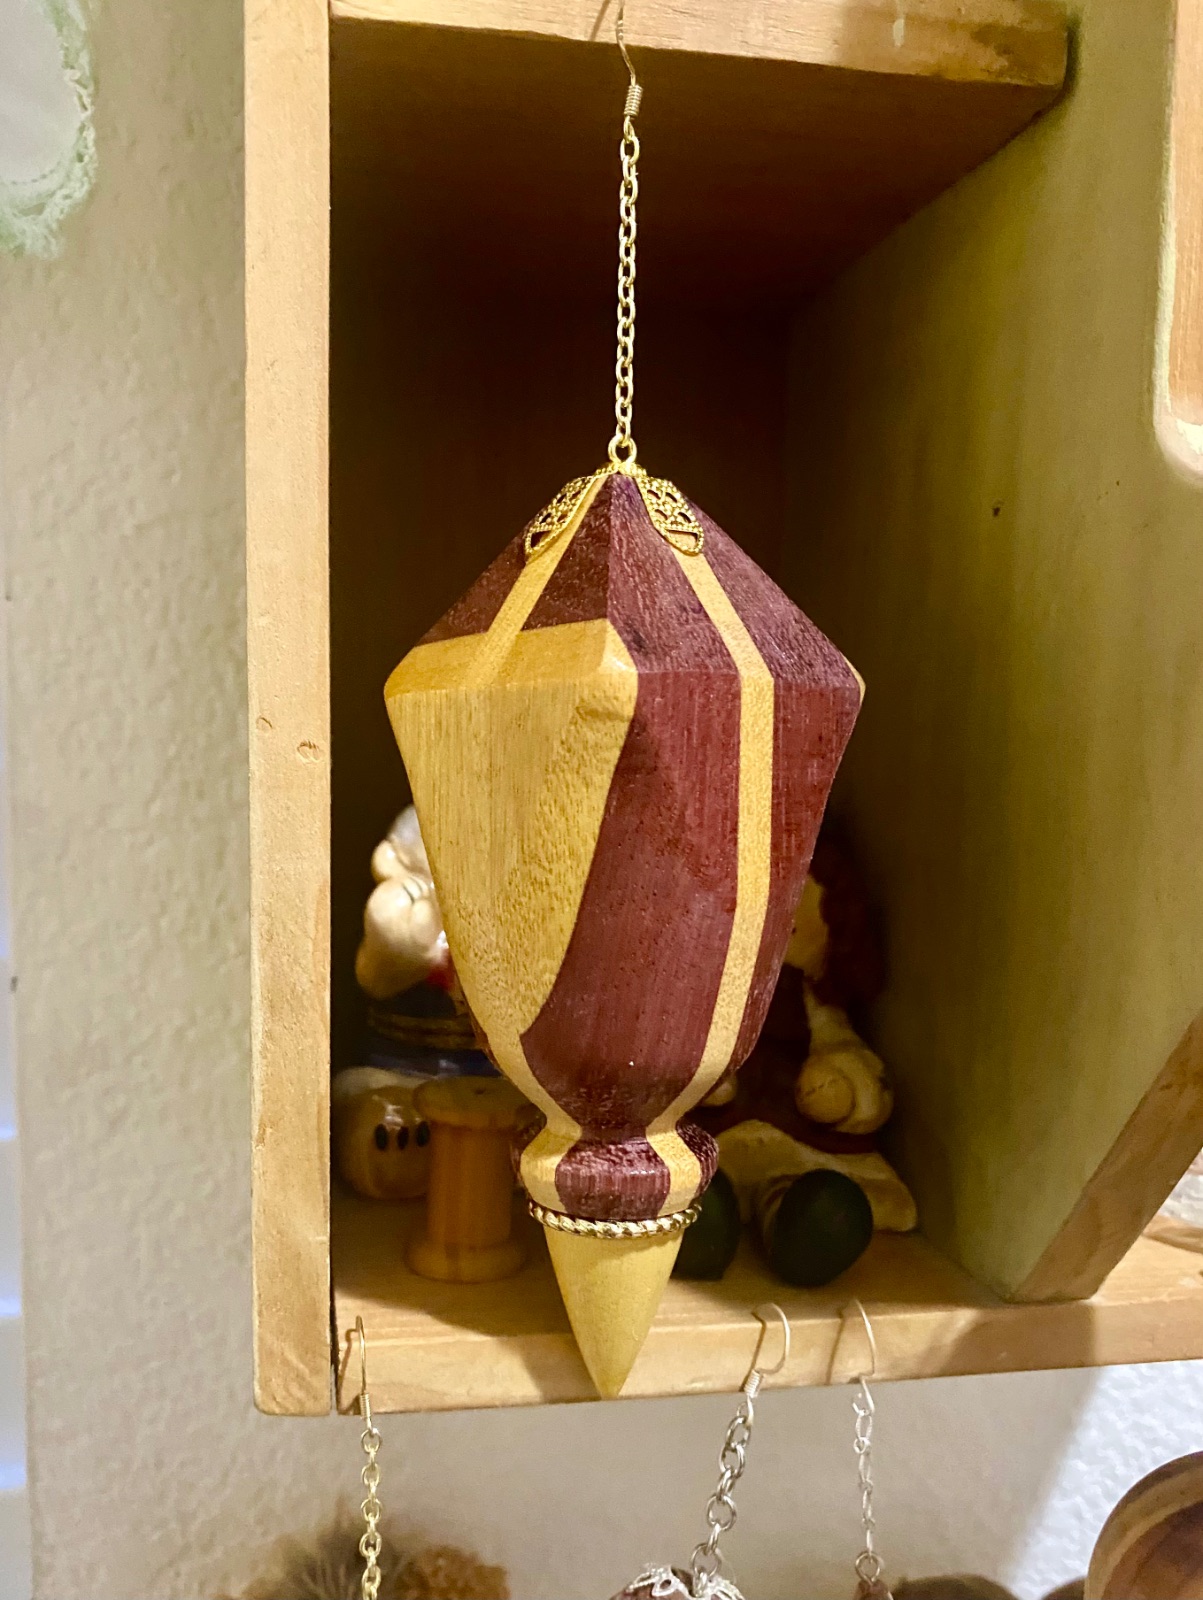
I made a glue up of purple Hart & YellowHart about inch & half square. I cut the end into a pyramid on my table saw then turned it on my lathe. I cut it very slowly with a fine blade. Then moved it to lathe for final turning
-
That simple, little table has been delivered to a friend of mine's house,today.....time to clear the beck for action.. Haul 4 planks to the shop... And sort out for the best grain for a table top.. Thinking about the center 2 planks...the one on the left? Will get used as apron stock/drawer front....Need to cut things down to a more manageable size. Can't use the tablesaw, and can't use the mitreboxes just yet.. Have to do the saw work here....need enough blanks to make a 24" x 24" table top panel....mark out a line.. And get the saw down and ready to go.. Should do the trick? A "Cordless" saw.....I just happen to be the "motor" Waiting til Supper settles, then start some Cardio? Table will have a drawer, this time around...will need wider aprons on 3 sides... Stay tuned...
- 76 replies
-
- 11
-
-
Hauled the last of the Ash planks to the shop...took 2 trips...to get the 4 boards downstairs, and laid out on the tablesaw's top...2 planks were selected to provide the blanks for the top of a table..the other 2.... Will be for legs, and aprons...These 4 boards average 7/8" x 5-1/2" x 6'5" long Can't use the tablesaw to cut the blanks for the top panel...we have "other" ways.. Disston D-100, 26" long, 7ppi...Cardio Workout, anyone? Length of the 4 blanks is 33"....the 4 blanks would make a panel 22-1/2"....until I can mill them down a bit....wavy edges, tapered....one end would be 5-1/2" wide, the other would be 6" wide.. Something like this. have the four blanks clamped together, to let them get used to each other.... These were saw at the bench....was a bit rough to do....working on a 5' long bench...cutting up 6'5" boards Wound up clamping the plank across the width of the bench, down by the vise... I did have about 18 photos...somehow, in the processing..the computer deleted them all..even the Camera's card That "file" does NOT exist, now? Had to go back to the shop, and take these 4 new pictures.. There is a Plant stand, made of a bunch of sticks....that sits in the front window.....cats on Squirrel/Bird Patrol keep knocking it over, spilling planters everywhere...this table is replace that stand.... Well it IS a start..stay tuned
-
I finally finished the buffet table. It’s about 50 inches long and 13 inches deep. I made it from walnut and butter nut. Finished with 4 coats of Armor Seal. I started this project around mid September and just finished it. This was a very hard build for me. I didn’t have any plans other than what I had in my mind and just went with it. Now, it’s on to re-arranging the shop a little bit.
- 34 replies
-
- 18
-
-
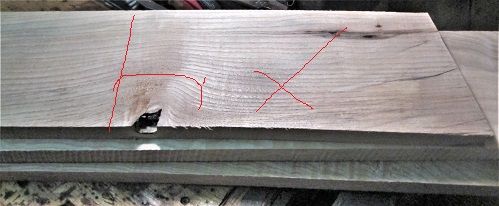
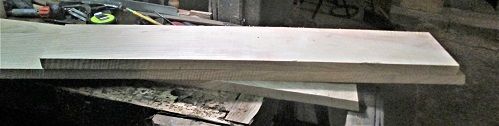
New Gazebo is sitting out back, already have a few chairs and planters....comes time to sit my Guinness down...no place....need to correct that oversight... Have some 1 x 6 x 4' Ash lumber...and some 1 x 6 x 75" Ash lumber....three boards each....should be enough. Weight restrictions until Saturday...nothing over 10 pounds....means three boards head to the shop...one at a time... With the worst of these 3 on top....Looking for around 30" of decent lumber....looking along the edge.. Hmmm. we have ways..need to trim the ends a bit.. Yep, that's gotta go....other end? Yep, knot has got to go...splits go, too...set up a saw bench...can't run the circular saw, right now... Get the Disston D-112 down from the hook... Doesn't take all that long...those 2 scraps were headed for the build pile...Square to see how well the saw operator did... Don't think a shooting board will be needed, today. Used this cut plank to lay out #2.. Again, looking for the best section....this time, it was closer to one end... Nice when using a saw, you can look along the saw plate.. And see "Reflections of.."( saw is almost 100 years old, BTW) Got #3 cut to about 30"...and laid the 3 out on the bench.. This is going to take a bit of work.....tablesaw to remove the worst of the curves....not all, just the worst..try again.. I can start pushing Jointer Planes this Saturday morning...goal is, to get the top glued up and sitting off to the side....while I build 4 legs. There MIGHT be a drawer involved...need a place to store coasters, right? Have not decided on a bread board end thing.....maybe, maybe not... Stay tuned...( for those keeping track..1.5 hours of shop time, today)
- 27 replies
-
- 10
-
-
From the album: A Table for the Gazebo
-
From the album: A Table for the Gazebo
-

From the album: A Table for the Gazebo
-
From the album: A Table for the Gazebo