Search the Community
Showing results for tags 'resaw'.
-

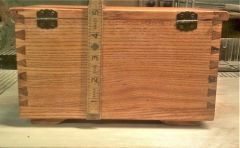
Project Post, Organizer and ruler.JPG
steven newman posted a gallery image in Small Crafts, Boxes, Picture Frames, and Lighting

From the album: Benchtop Organizer,2 drawers
-
- 1
-

-
- organizer chest
- resaw
- (and 1 more)
-
Project Post, Front corner.JPG
steven newman posted a gallery image in Small Crafts, Boxes, Picture Frames, and Lighting

From the album: Benchtop Organizer,2 drawers
-
- 1
-
-
- organizer chest
- resaw
- (and 1 more)
-
Project Post, Back corner.JPG
steven newman posted a gallery image in Small Crafts, Boxes, Picture Frames, and Lighting

From the album: Benchtop Organizer,2 drawers
-
- 1
-
-
- organizer chest
- resaw
- (and 1 more)
-
Project Post, Height 5.5 in..JPG
steven newman posted a gallery image in Small Crafts, Boxes, Picture Frames, and Lighting
From the album: Benchtop Organizer,2 drawers
-
- 1
-
-
- organizer chest
- resaw
- (and 1 more)
-
Project Post, too big.JPG
steven newman posted a gallery image in Small Crafts, Boxes, Picture Frames, and Lighting

From the album: Benchtop Organizer,2 drawers
-
- 1
-
-
- organizer chest
- resaw
- (and 1 more)
-
Project Post, Lid has a chain.JPG
steven newman posted a gallery image in Small Crafts, Boxes, Picture Frames, and Lighting

From the album: Benchtop Organizer,2 drawers
-
- 1
-
-
- organizer chest
- resaw
- (and 1 more)
-
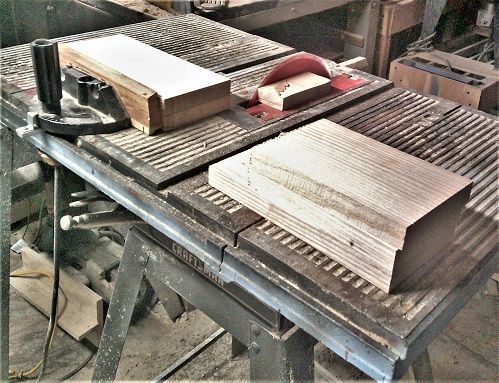
Had a bunch of Ash scraps...too thick too be used as is....decided to thin them down a bit....and try out the brand new tablesaw blade.. Old blade was starting to burn stuff...New blade had to be installed from UNDER the top of the saw...BTW.. Wanted to square the ends of some of the boards, and see what the cuts looked like.. Yes it is very sharp.. Cut is a tad on the rough side...then set up to do some resaw work... Zero Clearance Overlay...cut will leave 1/2" of "good" wood... Almost deep enough...so, to remove that last bit.. Disston D8 , 28", 5-1/2 ppi RIP saw.... Doesn't have quite as wide of a kerf, as the tablesaw does.. Once I got the middle of each board.. I was left with.. 5 pieces, 4" wide, by 1/2" thick..and five at 1/4" thick....same set up for the rest of the "scraps" These only needed 2 passes through the tablesaw...and.. These 3 only needed a single pass each.. Tablesaw was busy, today.. And the hand saw was too... Half of it's sawdust stayed up on the bench, the other half? Made a nice little pile on the floor below.... Will let the pieces sit a spell, while I decide on what to make with them....maybe another boring little box? Stay tuned..

-
Sorted the last of the Ash scraps...resaw most of it down.. Sorted out for 4 slabs at the same thickness....ripped those to the same width...as for squaring the ends... Mitre gauge set to 80 degrees? 2 long sides, and a pair of ends....10 degree bevel complicates things a bit, though.. Guess I can't use this square...have another to use.. Also to lay out through dovetails... Gave an old saw another try... Jackson Backsaw... then chop out the waste... Trace around these Pins, to lay out the tails...saw and chop...dry fit.. Then repeat for the next corner....until... All 4 are done. Stay tuned, more to come...
- 11 replies
-
- 3
-
-
- spoon tray
- spoon
- (and 3 more)
-
When last seen, these were what was left of the stash of Ash.. Not enough wide stuff, too many narrow things...sort through this and see what I can make.. Trim these, and maybe build a pair of doors? Try and have these 2 as the ends? Thin panel is too thin...the other? maybe rip down the center line, and make the 2 sides from them? Hmmmm...ok...Had Laundry Detail, today.... So...while I was down there....work on a few items...like the rough edges of the door parts.. Millers Falls No. 11, Type 2...works nicely as a jointer on small stuff...THEN trim for length, with the jointed edges against the mitre gauge.. Spread some glue along the mated edges, add some clamps and cauls... Door #1 is glued up...repeat for door #2. Then set both aside, for a day... While I work on a few other items ( waiting on the rinse cycle?) Saw was busy, today.... Wide panel has been ripped, the 2 end pieces were then ripped to match....was having trouble with one end piece...could not get it flat....and was getting too thin to work out..scrapped that one...need to resaw a new one......set up the tablesaw to cut a kerf...so that one side would match the existing sides/end Something like this..only, the saw blade can't reach all the way to the middle...we have ways... Saw about 1/2 way down, turn over, and saw from the other end.. Hardest part was keeping the saw from hitting the top of the vise... Needed to match this for thickness..came close...then cut away the worst parts, and match up to that other end piece... Wasn't quite flat,, We have ways.. Edges were a tad rough, too...saw marks.. Not a problem..planes were busy, today.. Ya think? Until the doors or done, this is about as far as I can go...need to size the box to the doors...first. then decide and a choice of corner joints...and whether to add a bread board edge to the doors. 90 minute in the shop, today...still have to bring the clothes upstairs from the dryer.. Stay tuned..
-
Have noticed over the past week or so....vise on the end of my bench was getting a bit of the wobbles.....seems a couple screws into the end of the bench have stripped out, yet again....rather than tear the bench apart....decided on something else...Still had a chunk of 1 x 6 Ash.....cut and ripped it to close to size....but it was a tad too thick...we have ways Set this up...blade all the way up, still did not meet up in the center of the board...D8 Rip saw finished the job.. That just might work. Not sure about the thin piece, yet...Had to remove the sliding part of the vise..to drill and counter sink a few holes... There are no holes in the middle, as the steel jaw of the vise is there...Before I installed the moving part of the vise...a drop of 3in1 oil on the rods and the threads...works with just one finger, now.. Tried out a different vise.. Wentworth No. 1.....and it's 2 x stand....checking that this stays put...got a spotlight at the ready, too... Because there are some tiny teeth involved here... Saw is a Jackson 12", 14ppi (yes, I counted) Backsaw...and in the time it took to write this blurb up.... Saw file is back there in the tool tray...saw has been test driven....no binding observed...ready to go back to work... One vise is fixed..the other in use....while trying to get things sharpened and put away... Stay tuned...
-
That time again...time to clean the place up.. Sort through a few stacks..found some decent ones? Might come in handy...others? By the time all the bad stuff the cut away...this is what is left from one plank from upstairs...way too much bark and knots,,and holes.. There is a 1 x 6 x 2' that is just one big knot....other items.. Will meet up with the one on the right... All the further the tablesaw blade could reach...run the rip saw down the kerf to get some use out of these...throw the worst scraps out.. Then it become a puzzle as to how to put these all together into a project...might need some of these? We'll see... Stay tuned...
-
Lumber Run the other day...one of the boards was a1 x 6 x 6'5" plank of Maple....the other Maple was even longer...decided to see about a Project for October.. Sides are curved.. Fancy stuff.. However...sides needed to be 9/16" thick, not the 3/4" that the Maple was...lid panels are at 5/8" thick...need to do some resaw, it looks like. Hauled that plank to the shop, once the bench had been cleaned off.. IF I can hit me head on the way down the steps...imagine what this was like...had a few spots to work around, too.. Usual knotty stuff.. Even a "split end" Went to the cutting list...and started to lay out what needed to be cross cut.. Board was a wee bit too long to be cutting on the tablesaw, so.. we have ways..Disston D-100, just need a cut line to follow.. And work my way along until.. Left-overs? Will provide a 9/16" x 4" x 6" piece for the end of the box, to go with these.. Includes a "spare" side...but, these are all too thick...need to set up a kerf cutter, again.. Best face against the fence, run all 4 edges through...fence set at just over 9/16" for some cuts. and 5/8" for two others..blade does not reach high enough.. But, this will...just follow that kerf.. Until... "POP"...Repeat for the rest of the sides.. Will work on the other 3 parts later...will need to plane these smooth.. Before any joinery can start in.. Stay tuned..
- 22 replies
-
- 8
-
-
- curved sides
- maple
- (and 1 more)
-
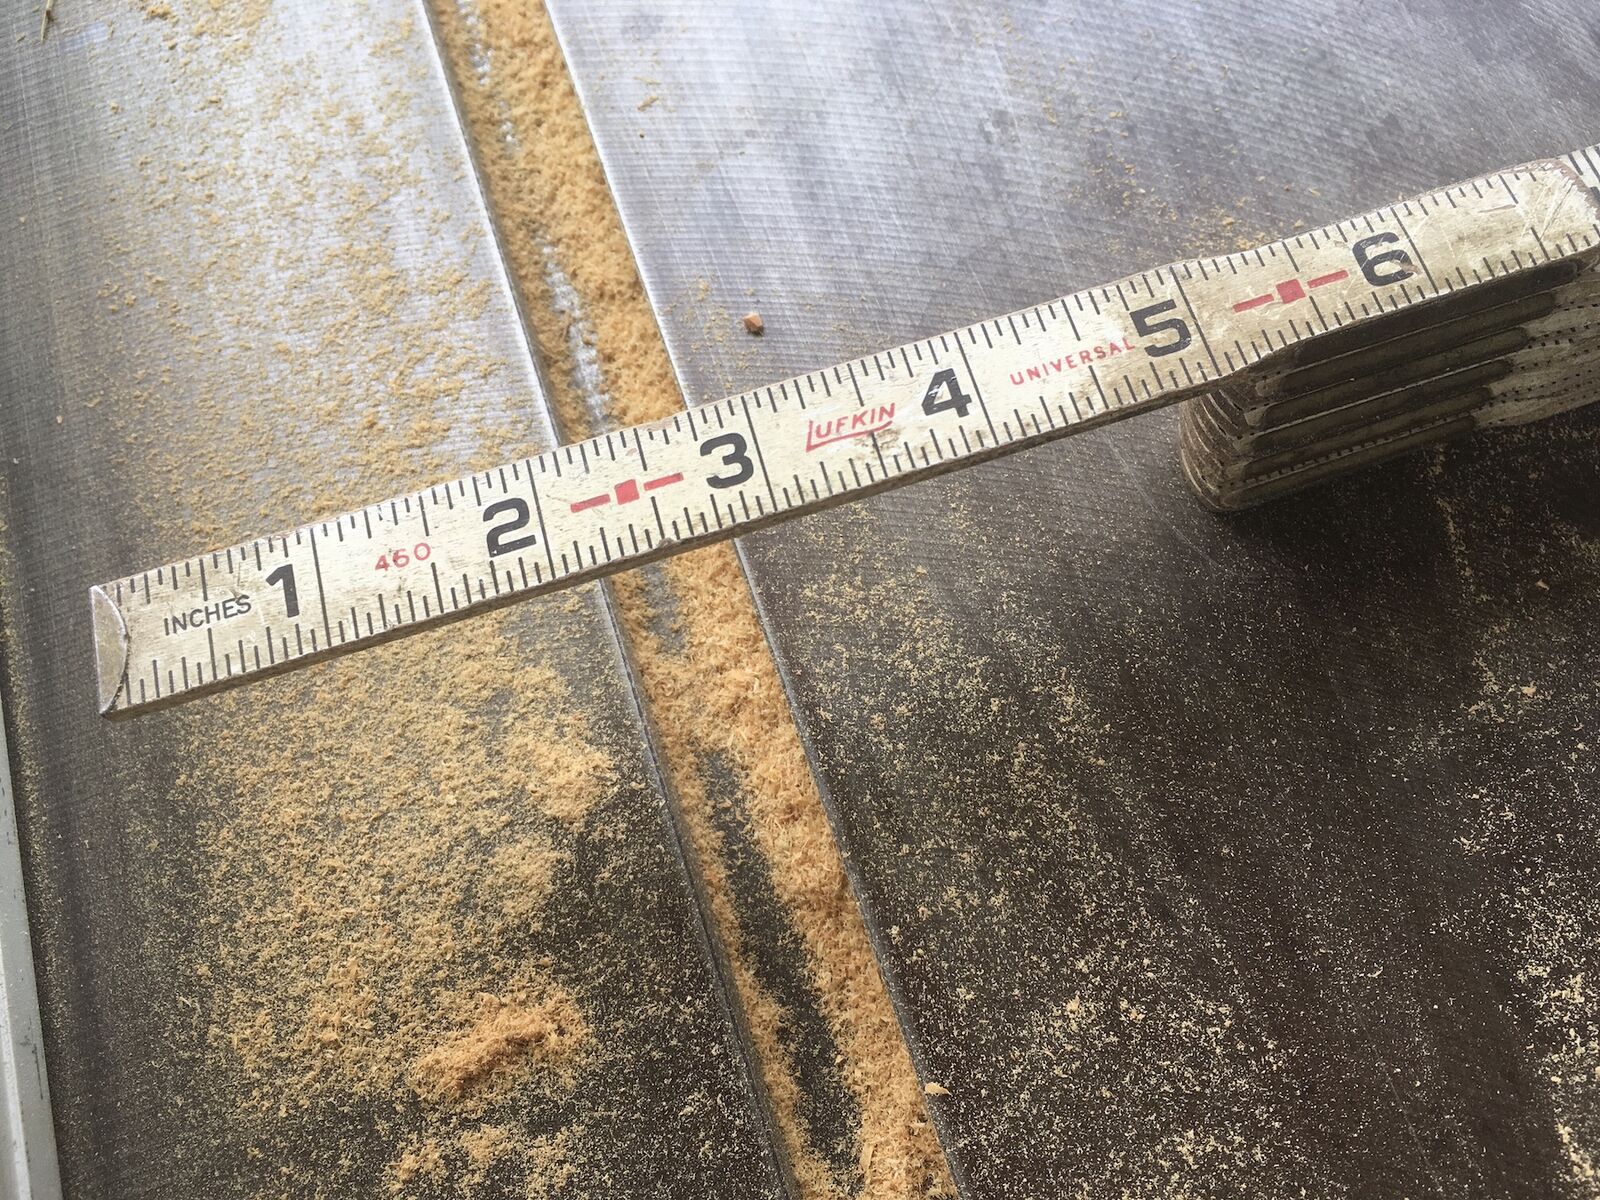
After 235 miles round trip, gas, tolls, time, and one fried shrimp lunch along the coastal highway, I own an older Delta contractors saw. K88-xx serial number is 1988? The 120V motor had power and noise issues but it fully disassembled, it wasn't bearings nor bushings. It was the drive belt. Plus ribbons of HDPE wedged within the motor. Someone was cutting cutting boards As much as the motor guy motor-mouthed the motor, fully-assembled, noise was not banshee-unbearable. No one complained about my front porch resaw clinic. I ripped until I could not find my flip rule. Took a break, drank water, realized I'd been running the Delta four hours. Ripped another 30 minutes. Near'filled a bucket with sawdust. Did not have compressed air like Steve Newman, but with the mini-vac reversed, a blew everything out, eased the 110 pound saw back into the living room, and my new friend doubles as an off-entrance table. Quietly awaiting more fun. At max height, it is a slow push resawing heartwood. Started with full thickness machine-oil impregnated heartpine. With care got nice slats with no blade marks. Thinner stock, easier push. This wood, I'm unsure what I'll do with it; be more careful in what I buy I've more but it'll be venting cutting oils for my lifetime. Maybe decking for sturdy basement platform step. Noticed early that the thin blade cuts easier than the thick blade. With care, I got slats of heartpine as thin as the thin blade. Shut off the saw and adjusted the fence to 16th" before every resaw cut. Maximizing the good piece - a 3x4x22 remainder from a 4x8x22 joist, still not enough for a 60" headboard. Maybe a panel nonetheless? A shutter panel to set in a window frame when more darkness is wanted. Wall hanger by all other times. Left nothing to chance - even cleaned the flip rule. An old drawer front of fine-grained, white, buttery wood? Buttery wood, butter-smooth cut. Very rewarding - opening up a single 1x3 - 55" piece of c.1910 flooring dumpster-rescued a few miles west, outside a refurbishment. Ya cut it open, the wood is as fresh as the day those carpenters laid the floor, scraped it smooth, before floor finishers did their thing. Before my next session, this Lufkin will get more respectful cleaning.
- 19 replies
-
- 12
-
-
- 120v
- delta 34-670
- (and 2 more)
-
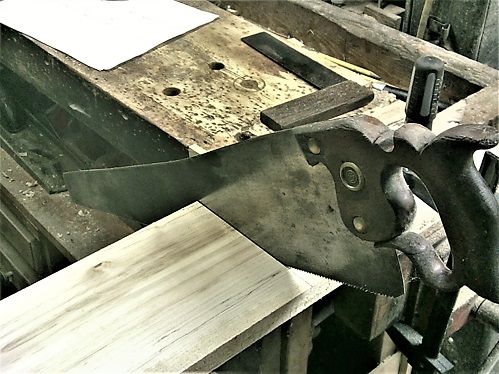
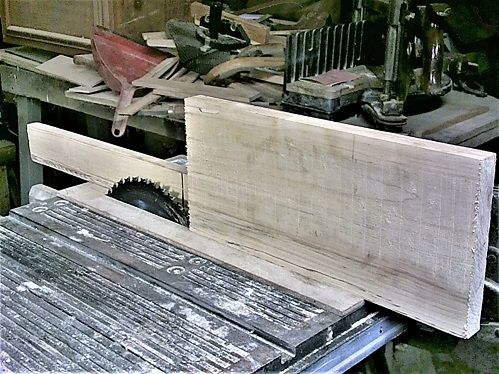
Lets see..we have a plank of Maple.. Not only do we have a set of plans, we also have a "Prototype".. Had to haul the plank to the shop...do a bit of lay out.. I WAS going to use a full sized saw to make the cross cuts, but.. Choose this little "Panel saw" instead. 20" long, 10 ppi Disston D8 ( old style, the "8" is inside of the "D" in the etch) Between the plan and the prototype...was able to lay out a few blanks... As I need a bottom panel, a panel for the lid, a panel for the ends, and the front and back...which left this.. For some of the drawer parts. All of these were 7/8" thick...way too much...decided to resaw things down a bit, according to the Plan: Lid is 11/16" thick, bottom panel is 1/2" thick...the four sides were supposed to be 1/2" as well....will be 3/8" instead. Had one edge that needed jointed.. As it had a slight bevel going on. Need these blanks to stand up on edge, for the next step.. Because of the way the shop does resaws...I need to mill a kerf for the rip saw to follow. Saw is raised as high as it can go...fence is set for each thickness to be milled. In this case, it is set for 11/16" width..boards are shoved through on edge... Then rotated until all 4 edges are done... This is the 1/2" thick bottom panel...then it is time for the handsaw... 1st try...kept wanting to flip out of the vise...managed to finish this cut, from both ends.. Decided on a "better way" to hold the panel... Since the end vise will open just enough...results? I have to be careful, though...usual routine is to cut from each end, and meet somewhere in the center...hard to see where, so when I do reach the other cut.. The saw will drop down onto the benchtop. However, my left pinky is also right at the edge of the handle ( 2 handed grip) and yes, it did get hit..once. Just a matter of "follow that kerf".. Results? Just have to smooth things out, tomorrow. Have that Drawer parts blank to resaw, yet. Also tomorrow. Had quite enough of a Cardio Workout for one day....even with the fan on high, was still soaked through...swept the shop, and headed for a cold Tonic & Gin. Stay tuned..
-
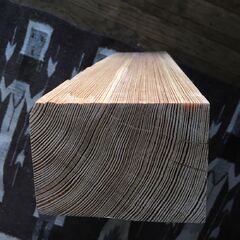
From the album: Resawing Large Beam Into Usable Timber
This was the last piece milled. 4" x 5" x 20" was the final.© The Patriot Woodworker
-

resawing beam into usable timber 19.JPG
Woodman posted a gallery image in Lumber, Milling and Forestry

From the album: Resawing Large Beam Into Usable Timber
© The Patriot Woodworker
-
resawing beam into usable timber 18.JPG
Woodman posted a gallery image in Lumber, Milling and Forestry

From the album: Resawing Large Beam Into Usable Timber
© The Patriot Woodworker
-
resawing beam into usable timber 17.JPG
Woodman posted a gallery image in Lumber, Milling and Forestry

From the album: Resawing Large Beam Into Usable Timber
© The Patriot Woodworker
-
resawing beam into usable timber 16.JPG
Woodman posted a gallery image in Lumber, Milling and Forestry

From the album: Resawing Large Beam Into Usable Timber
© The Patriot Woodworker
-

From the album: Resawing Large Beam Into Usable Timber
Nice haul overall. This grain looks light but the wood is heavy; it is darkening up with exposure to air.© The Patriot Woodworker
-
resawing beam into usable timber 14.JPG
Woodman posted a gallery image in Lumber, Milling and Forestry

From the album: Resawing Large Beam Into Usable Timber
© The Patriot Woodworker
-
resawing beam into usable timber 13.JPG
Woodman posted a gallery image in Lumber, Milling and Forestry

From the album: Resawing Large Beam Into Usable Timber
© The Patriot Woodworker
-
resawing beam into usable timber 12.JPG
Woodman posted a gallery image in Lumber, Milling and Forestry

From the album: Resawing Large Beam Into Usable Timber
© The Patriot Woodworker
-

From the album: Resawing Large Beam Into Usable Timber
Nice! A few images left. I milled each of these three on three separate days. Didn't want to rush it. Get the most out of each piece.© The Patriot Woodworker
-

From the album: Resawing Large Beam Into Usable Timber
Now onto the larger remainder. Mistakes made. That is the way to learn.© The Patriot Woodworker