Search the Community
Showing results for tags 'how to'.
Found 9 results
-
https://woodschool.org/videolibrary/
- 5 replies
-
- 8
-

-
- videos
- woodworking
- (and 2 more)
-
So I've been doing some experimenting this morning with grip lines in pen barrels. I put them in before I sanded the barrels how ever learning things the hard way I wound up sanding them mostly all the way back down and had to put them back into the wood. I'm wondering if there is a much easier way of doing this and I'm also wondering if there is a simpler way of getting the lines equal. I like the look fortunately these were just test pieces so they wont even get put together into a pen. Any suggestions on this? Here is video of exactly what I did.
-
Thought it might be best to start off with what my current setup is or at least parts of it. My Dust collector is a Grizzly 1029 2 hp operating on 220v. It had a 5 micron bag top and bottom when purchased and was upgraded to a canister filter from Penn State. My collector is located in the attic of my shop in a insulated enclosure and a 12x24 filtered return to the shop. Power is controlled with a Long RAnger remote. Ducting I used is 4 inch thinwall PVC. We will get into ducting and turning corners later. I have limited amounts of Flex hose in 4 and 6 inch. My bblast gates are a combination of homemade and manufactured plastic gates of two types. Since the Dc is located in the center of the shop ducting goes out in a spider like orientation. Ducting to machines is split in several places by use of wyes and boxes (made from Shop Notes plans). I have a cyclone based on some plan I found somewhere and a control box on it based on Shop Notes plans expanded. I recently added a Dust Deputy cyclone and may do away with the wooden cyclone. DC Room under construction on the left. Chip collection box and ducts to DC in attic on right. Another view of lower ducts and chip box. Above is Dust deputy with connections turned on the lathe to adapt openings to 6 inch flex hose. Ducts attached to ceiling spread to machines from this point. Of note here it is best to keep Duct runs as short as possible and as straight as you can get them. Any turn should be gradual and not an immediate 90 degree. This can be done with purchased wide and ducts or put two 45 angles together with a short 4-6 inch piece of duct between them. More on this in the next entry about choosing and installing ducts and blast gates .
- 10 comments
-
- 6
-
-

-
- dust collector
- how to
- (and 1 more)
-
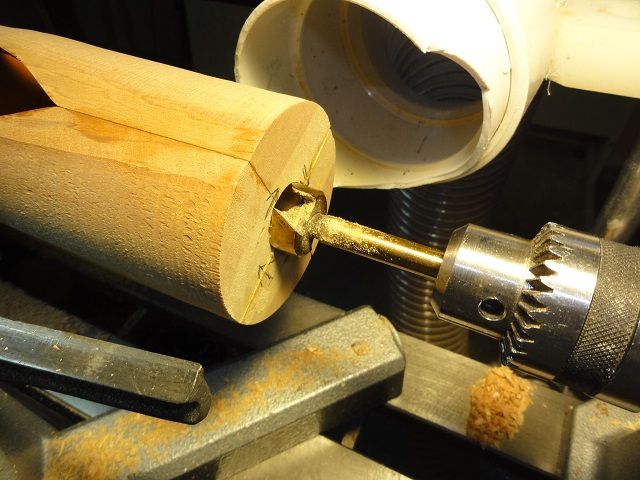
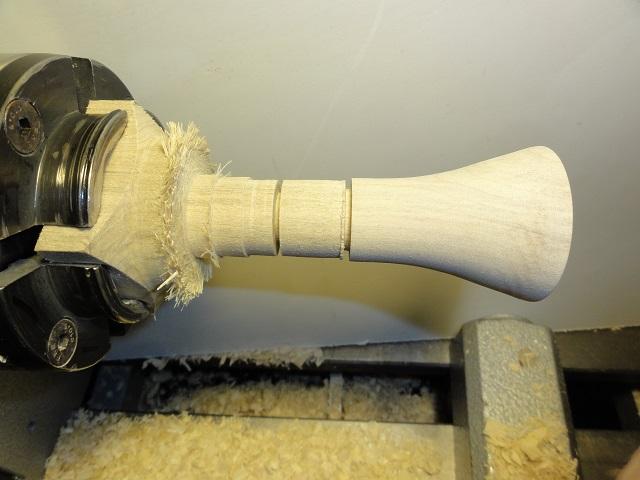
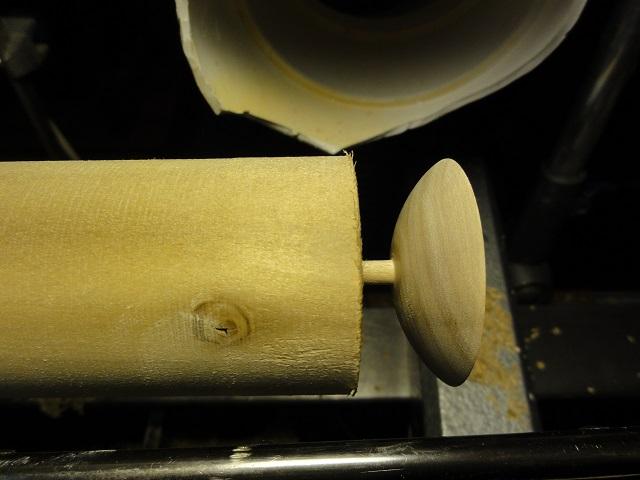
@Woodbutcherbynight This will answer most of your questions on this subject and maybe we coul all try this . It is not really that hard once you start just get snug fits and approach tenon size carefully. I have had the blank to turn this peppermill for almost a year and the test was done in walnut, the finial piece is a blank of colorply or some other brand of the same . It is red and blue but the Tru Oil made the blue look black. Both pieces came out fine and I just happen to have a good bit of walnut in the shop, but I would suggest a test piece before you commit to expensive wood . My ply blank was $28 and it is probably even higher if you have to order and pay freight as I got it at a symposium. Now Gunny asked how. Craft Supply has a video I got most of the specifics from the video and sheet instructions.INSTRUCTIONS AND VIDEO. I had to call a buddy as the video wants you to use a 1 1/16 bit but you can use a 1 inch for the thru hole. To start turn the blank down round and cut tenon on both ends. Mark for the top usually 2-3 inches. You will cut a tenon on the upper part of the base and a spigot 1/2 long on the top( do this after parting the bottom off because you need to size it for a snugg fit into the bottom). Mount the bottom in chuck and drill the bottom with forstner 1 5/8 for a depth of 1/2 inch. Then drill the thru hole of wither the 1 1/16 or 1 inch about half way thru. Reverse the blank in chuck and drill from the other end. Now mount the top in chuck and drill a thru hole 9/32 . Now turn the spigot 1/2 to 3/4 inch in length to fit the bottom snuggly. The spigot will need a hole to fit the slightly over 3/4 drive plate. I used a 3/4 forstner and then carved just a little bit to get the fit. Now comes the "fun" part. You will need to turn a drive center to fit the bottom of the base. So it will need a tenon to fit the center and then a wider tenon to fit the 1 5/8 recess. Oh this piece will need a tenon to fit chuck. Mount the base on the drive center and insert the spigot on the top into the top of the base. Then bring up the tailstock with cone center. Turn the body and top to your desired shape. Might help if you draw that out before starting to do this step. Noe put it together and check for fit . You may need to shorten the rod. NOTE if you do the 1 inch thru hole the bottom grinder will not fit so you will need to carve away a little to fit the bracket (that u shaped piece) so the mechanism will fit. Have fun . It would be fun to have everyone try to make one and then we could have a contest for best piece @John Morris

- 1 reply
-
- 3
-
-
-
- peppermill
- how to
- (and 3 more)
-
Getting started I like to use a piece of straight grained wood wide enough that it can be cut in two square pieces and long enough to cut it in half and for the length of the vase. It takes four same size pieces to glue up a blank. Pick up the pieces and mark the ends. This is how the pieces will be oriented for the final turn. For the first turn twist the pieces so the inside corners face to the outside corners and glue them together. It takes just a small amount of glue on the very ends. Remember these pieces will have to be pried apart after the first turning. The marks should look like this and be glued in this manner. I like to use Vise Grip welding clamps. The pieces need to be as accurate as possible and I get less sliding of the parts with them.I add some quick clamps when the parts are stable. A strong tape can be added for extra hold. I have never experienced any breaks. You will also want to get the vase to use as an insert. I chose this copper vase. The bottom is bigger than the top so I chucked it in the lathe and cut the base off leaving a smaller foot. Now it is time to mount it on the lathe between centers and mark where the vase insert bottom will be. I usually give the top some wiggle room and turn the wood back to fit. I decide where I want the window to be and mark that. It was about five inches from the bottom mark in this case. Measure the vase diameter and cut half that distance deep from the corner. This will create a platform for the vast to sit on and capture it from moving. You want to turn completely round the part in between the marks too. I left a 1/4" shoulder for the vase foot. Right now the windows are still closed. Anything turned of now will open the windows by "twice" the amount turned off. I want an oval shaped window so I marked the center of the oval and used the parting tool to cut the depth I wanted. Now finish turn the half oval and sand it. Now you can add some embellishments such as burn lines and apply the finish. The inside can be coated with finish when the vase is done but it is more difficult. When the finish is dry split the pieces apart. I like to use a thin knife for this operation. It is time to turn the pieces back to their original positions and glue them. Use all the available surface area as they will stay this way now. Here is half of it and you can see the platform for the vase foot. Once the glue is dry mount it on the lathe between centers. Turn the corners off and form a spigot on the bottom for the lathe jaws to grab onto. Remove it from the lathe, install your chuck and mount the piece in the chuck. Drill a suitable hole in the end for the vase and then use your turning tools to fit the vase. A little tip. Sanding sleeves from the oscillating sanders work well for holes your fingers don't fit. Bring your tail stock up with the live center and turn the vase to the shape you want. I added some burn lines and fit a copper foot to it. Put the finish on and you're done. When turning the inside of the vase you can go as deep as you want. Just remember the remaining wood vanes get smaller the deeper you go making it more fragile. Too far is when the blank brakes and that happens when you hit center.
- 13 replies
-
- 11
-
-
-
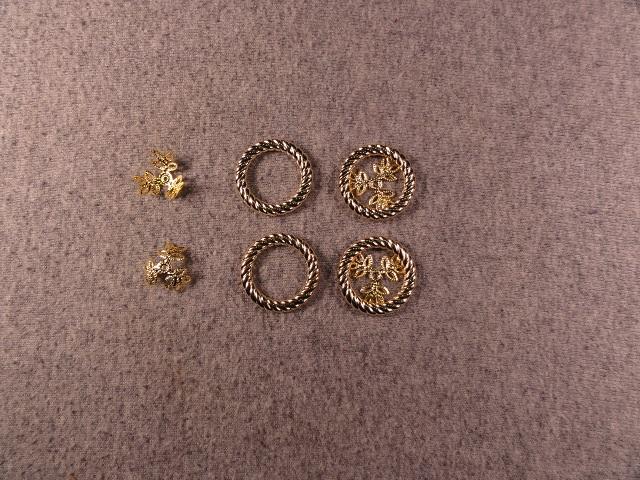
Got the angel ornaments done. There is 30 of them. Started with an inch and a half square blank, turned it round and measured two inches for the body and three quarters inch for the head. Drilled a 5/8" hole in the bottom 3/4" deep and hollowed it out some to take some weight off. Turned the body. Shaped the head and cut the ornament free. Turned it around and put it in the chuck to sand the top of the head. For the wings I put another same size blank in and rounded it off and cupped the end. Also measured off for the width needed. Shaped the front of the wings and left a 3/16" stud to glue into a hole in the body. Parted it off and set up the drill press to drill a hole on each side of the stud and took them to the scroll saw and cut a "V" for the wings. I used halos and caps purchased at the craft store glued together with Goop glue and held them on with a small brass eye and attached a hook to hang them with. Put the finish on all done.
-
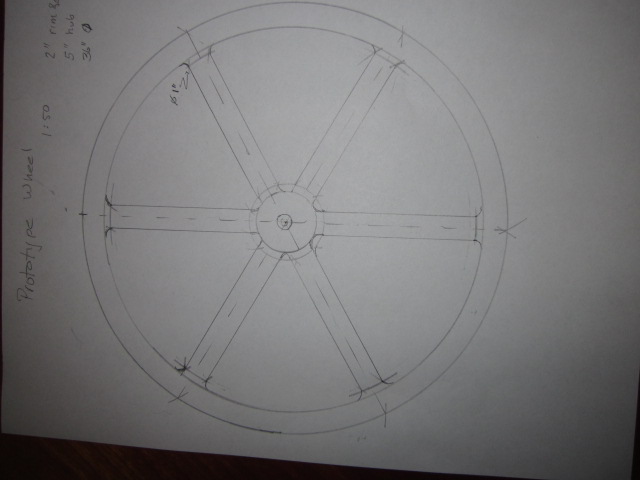
I am currently helping build props for a stage company. They like to build everything from 3 basic materials: 2x lumber, 1/4" lauan, and 3/4" OSB. Everything is generally screwed together so they can take it apart and reuse what they can. General rules: Safe for actors As long as it looks good from 50 feet, it's great. My current task is to make some spoked 36" wheels for an Egyptian chariot that will hold one of the actors. Last week, I laid up 3 layers of OSB and cut the outside circle. The plan is to cut out 6 triangular pieces to make the spokes and hub. My problem is what to use to saw out the spokes that will cut the 2.25" thickness without the blade wandering. Any suggestions? I will definite drill out a 1" or so hole in each apex to make a smooth curve and not concentrate stresses. Some options: Template with a router with bearing or guide and plunge down through levels. Don't know if I could get a long enough bit, though. Jigsaw or reciprocating (Sawzall) saw, maybe drilling holes every inch or two Plunge cut with circular saw as deep as it would go and jigsaw the rest and curves.(inside edge of rim) Drill lots of holes and smooth out the triangles between them
-
As I peruse my endless supply of the old Workbench Magazine, I come across some wonderfully fun articles, many that still pertain to our techniques in woodworking today. And when I do I like to share them here. So here goes, check out this very cool, old article from a Workbench Magazine 1965 Sept-Oct issue. How to use a wood lathe. Have fun! Do the speeds for turning still apply?
-
Wood Magazine has an 11 part video series on veneering posted on YouTube. Here's part #1 (the other parts are linked from there-


.thumb.jpg.573d1497d0675219908c85aabefd797a.jpg)
0001.jpg.d144827e2fba86545dc4b24704fa45a1.jpg)
0002.jpg.0aaaae0d194bb9e1842f754a5998b019.jpg)
