Search the Community
Showing results for tags 'finishing'.
-
Hope everyone has a safe and wonderful Thanksgiving. For Pennsylvania hunters, good luck on Monday- the first day of white tail buck season! Our Ward 57 Christmas project is underway. We are about 1/3 of the way to our goal. Please check out this and donate to get your raffle tickets for some awesome prizes! Our Patriot Turners- @Headhunter posted these fantastic bowls after we put up last "Wednesday's..." chapter. Tony creates his bowls using the Ring Master. See his post for more details on the species and more images of his bowls! Last week @Steve Krumanaker showed us the walking sticks he was creating. He used his shop made spirally jig to embellish the handles and they look incredible- Steve was kind enough to post a video of his spiral cutter, on his YouTube channel- @Masonsailor continue to crank out Christmas presents. Paul always fins the most interesting wood combinations to make each piece unique! The hardware for his turnings comes from Niles Bottle Stoppers. Head over to his post and see more of the turnings and what they are to become. What’s Coming Up- From the AAW. Click on the image for more information. For The Newbies- Expand Your Horizons- New Turning Items- Didn't find anything new and exciting. Hoping Santa will come up with some new stuff! Everything Else- Rick Turns list of YouTube woodturning videos from last week- This has nothing to do with turning but there is an interesting history lesson here. I was coerced into going with Mimi to Thanksgiving Eve church service. Fortunately lightening didn't strike the church or any of the attendees. Mimi's family have been long time members of the local Zion Reformed Church in Chambersburg. https://en.wikipedia.org/wiki/Zion_Reformed_Church_(Chambersburg,_Pennsylvania) On Thanksgiving eve and Christmas eve they light the original chandelier for the service. Real candles, this chandelier is not electrified. Keep in mind the church was originally built in 1811 to 1813. It was one of the few structures that wasn't destroyed during the Civil War when the Confederate Army burned the town. Pretty amazing. Safe turning

- 4 replies
-
- 5
-

-

-
- videos
- rick turns
- (and 17 more)
-
 Well, a day late. Yesterday got away from me and by the end of the day I was beat. Added stair rails to the deck steps. Mimi has been having difficulty navigating the steps while trying to keep control of the new puppy. First one wasn't as perfect as I would have liked- angles slightly off. Second one went a little better. Apparently my Sketchup drawing was not accurate for the stairs that were already in place. Our Patriot Turners- @Steve Krumanaker gave us an update on the platter he is making. The weave design is coming along nicely- See Steve's post for our turner's comments and more images of the platter- @Ron Altier posted one of his earlier turned ornaments- In his post, Ron explains a little on how this one was made- @RustyFNhas been really busy in his shop turning bowls, plates and refinishing. He posted two of the bowls he made This post has both along with comments from our turners- The plate, Rusty turned, got lots of comments on how perfectly it was centered- Rusty told us this one almost didn't happen! Rusty also decided to refinish a bowl he had turned Part of his finishing process included the use of wax. He explained what he did and what happen. He received lots of advice on finishing in this post- @Bob Hodge showed us some of his Christmas ornaments and shared his thoughts on spindle turning versus bowl turning. His ornaments combine several different materials and ideas- See his post for all of the details- What’s Coming Up- Lyle Jamieson has a couple of IRD's coming up- https://lylejamieson.com/product-category/live-interactive-remote-demonstrations/ Accelevents Small Turning Expo- The link for more information- https://www.accelevents.com/e/mpg-small-turning-expo For The Newbies- From the Woodworker's Journal, the monthly email for woodturners. Check out the t really neat spindle projects included in the publication. The link- https://www.woodworkersjournal.com/woodturning-monthly/?utm_medium=email Expand Your Horizons- Have you tried wet sanding using an abrasive paste? In this video, of an IRD, Mike Peace demonstrates the processes- Watch Richard Raffan turn a sweet little bowl. What we start with and what it turns out to be is can often be quite different- New Turning Items- From Craft Supplies USA, the new digital catalog- https://www.woodturnerscatalog.com/emailsales/oct-6-22.html Not so much new but a few sales currently running- From Carl Jacobson, some Niles bottle stoppers https://nilesbottlestoppers.com/product/whiskey-sample-kit/ If you are looking to upgrade your sharpening system, Woodturners Wonders is having a "Build Your Own" Kodiak sharpening system https://woodturnerswonders.com/collections/kodiak-sharpening-system Everything Else- Rick Turns list of YouTube woodturning videos from last week- Safe turning-
- 9 replies
-
- 5
-
-
- woodturners wonders
- niles stoppers
- (and 23 more)
-
Spent my shop time yesterday doing very small projects , sanding bottoms of bowls, cleaning up some gifted wood, putting tools away, weighing the sweet gum I just put in the kiln. Had a bowl with some tear out on bottom rings. Very difficult to sand so tried riffler files and that did pretty good to the point it looked like sanding scratches easily removed with 220. Would have never thought that as a solution. Still lots of small things to pickup but I did get those cutoffs hauled to firewood pile. It never ceases to amaze at the things I put off until it just looks like normal shop clutter when it is really unfinished projects. Now it is your turn to tell about all those projects you have unfinished. Oh and I did not tell all about the vase with a crack to be laced, the box from a club demo to finish and raffle off, the box lid with spiral cut but no bottom. MMMM maybe another shop cleanup day soon.
- 2 replies
-
- 5
-
-
- turnings
- shop organizing
- (and 1 more)
-
My Father died unexpectedly from a fall April 14th of this year. Been tough for the family as can be expected. My Mother requested I make his Urn. Took awhile to sort through all his things and find items to put on this Urn in his memory. The pins are from various employers and Aircraft, US Navy pins and Search and Rescue pins. The coin was given to me by a Deputy from Spaulding County Georgia that had worked with my Father on some searches. I though it fitting it go on his Urn. Dog leash was his favorite so I included that as well. The golden recessed strip at the top of the Urn is for his 52 years of marriage to my Mother. Had a extra gear to a Toyota so I added that as this was only vehicle he had bought in past 35 years. Used some walnut he had given me, some cherry as he liked that wood and a piece of pressure treated lumber he had asked me to cut into circle for him but never used. Bottom wrap is a handrail from old church pew. My Father was a very Godly man and as such this fits his nature and memory. Purple Heart accents as he loved to see that wood used in projects I had made over the years. Top of box is a piece of aircraft aluminum with stainless steel screws, his favorite. Very difficult project for me to complete. The build was straightforward, it was memories that surfaced during this 40 day build that made it tough to stay on it for more than hour at a time.
-
I need a technique that I am obviously lacking. I'm working on some 10-12 inch wide plates and bowls where the bottom of the inside should be flat, truly flat. Past eyeballing with a ruler across the plate or inside of the bowl, and using a small squared scraper, I put on some mineral spirits to see how the sanding works before putting on a real finish. Looks pretty good to me, but I still seem to get waves that show up when putting a finish on with any kind of shine. My best shot is to just sand the daylights out of the piece with a piece of sandpaper on a wood block to smooth out any waves that circle the center. Is there a faster, simpler, better way? Thanks, as always.
-
I love his take on it in this blog. I've been barking up the "organic finishes" tree for about 6 years now and love my results. His blog confirms what I knew but could not express in my own words. RIP ‘The Anarchist’s Finishing Manual’ – Lost Art Press BLOG.LOSTARTPRESS.COM Some of you will recall that I began work on “The Anarchist’s Finishing Manual” a few years ago, then...
-
Fairly active week here on our forum with lots of posts and discussions- Please remember that we only have about 2 weeks left to reach our fundraising. Plenty of Raffle tickets left. If you haven't made a donation, please consider it- One last bit of housekeeping. Please remember to add Tags to your posts. The tags make it easier for folks to find similar information throughout our site. Tags can be materials used, tools used, techniques used, finishes used, turner's names, object types, etc, etc. Our Patriot Turners- @AndrewB has been busy with his turnings. He is experimenting with various finishes as well as giving us a glimpse of his new toys to drool over! In one post Andrew took us along as he progressed through the making of this cup- He received lots of comments and there was a great back and forth as he worked on it. Andrew is working on a set of these hollowed forms- He gave us a nice pictorial journey with this on- Andrew also got a shipment of new toys. I hope he has had time to wipe off the slobbers from everyone drooling over them. You can see the rest of the haul at- What’s Coming Up- Cindy Drozda continues to do live demonstrations. Check out her schedule at- http://www.cindydrozda.com/html/Demo.html For The Newbies- I have an account on Reddit. While doing a little exploring, I found this in the Turning Forum- https://www.reddit.com/r/turning/wiki/index Quite an extensive list of information for beginners and experienced alike. A nice project that can help you transition from spindle turning to glue block/chuck turning. https://www.woodworkersjournal.com/project-turn-a-trivet-and-wine-caddy/ This project is from the latest Woodworker's Journal Woodturning Monthly. The entire newsletter is available at- https://www.woodworkersjournal.com/woodturning-monthly/?utm_medium=email A lot of discussions centered around chucks this week. Here's a video on making a specialized chuck- the Longworth Chuck- Expand Your Horizons- We all like to think our workshops are perfectly laid out and will never change. But just in case, here's Ernie Conover discussing moving one of the heaviest pieces of equipment in the shop- Got an email from Ruth Niles the other day. In it was a repost of an article about selling your work. It's amazing to see how many "Makers" actually earn a comfortable living from their talents. Sorry about the formatting. "Can you make a living with your craft? Here are some excerpts from HANDMADE Business magazine article written by Patrice Lewis. Plus I injected some tips from my own personal experience! Finding your unique niche will probably be the single most enormous hurdle to overcome. The reason this is difficult is most people focus on making items they themselves like. You must consider what competition there is for that particular product and how many others share that interest. Can you make your craft item fast enough to meet demand. If you can only make one a week, you won't be able to make a living. You have to make your item fast enough, without loss of quality, so you can sell them at a moderate price. WHOLESALE vs RETAIL How to market your product will come down to determining if your craft business will be wholesale or retail. Retail is you, you, you: you sell the item, you go to craft shows, you open the storefront, you develop a web page. You probably will need help because if you're doing all this, you won't have time to make any new items. The good part is you keep all the sales money and charge retail prices. By selling wholesale, you don't have to worry about the time and expense of being away from home to sell your craft item. The craft shows are a lot of fun but are also a ton of work and preparation and you have to make a lot of products that you end up bringing home time and again! When you wholesale, you know what to make and how many. Statistics show, while most crafters still prefer retail shows, more revenue is generated from wholesale markets. DON'T QUIT YOUR DAY JOB ...... YET. Rule #1: Until your craft business is profitable, you must live below your means. Don't make the mistake of blowing your early profit on luxuries like restaurant meals or unnecessary electronics. Rule #2: Ditch the debts. Pay off excessive credit card balances, pay down car loans, etc. Watch your spending so you are not tottering under the load of debt. HAVE REALISTIC EXPECTATIONS Can you look at your items unemotionally and rationally to determine which have the potential to be built into a successful business and which should stay as a hobby. Naturally we love what we make and the suggestion that not enough people would be interested in buying that particular item is sort of insulting. TARGET YOUR MARKET You won't do well selling hand-carved dolls at a motorcycle rally. Motorcycle people are not passionate about carved dolls! It's not a marketing match. Carving and painting or making bottle stoppers with hot-air balloons to sell at a Hot-Air Balloon Festival is perfect: or apples at an apple fest. SELF-MOTIVATION (this is my nemesis!) Doing a craft as a part-time hobby and applying yourself to a full-time home craft business is quite another thing. It's not hard to be in your shop producing, it's all the boring stuff that is the hard part. Those who know me, know I really hate the computer work on my website, making ads and doing bookkeeping. Also marketing research is necessary and not a lot of fun. This takes self discipline. No sleeping late and playing solitaire on the computer thinking "I have all day to get all the bowls done." " Last week we mentioned the use of tenos or mortices for a turning. "Rick Turns" posted a video illustrating what can go wrong if the wood isn't solid- New Turning Items- @Jim from Easy Wood Tools shared information about two of their new products. They have completely redesigned their parting tool. It permits deeper cuts than their previous parting tool. It still has the replaceable cutter, however, the new design replaces the cutter and its holder. The carbide tip is permanently affixed to the holder. No more lose tips to worry with. The second new product is a really handy set of flexible templates to help you create the exact sized mortise/tenon for any of the EWT chuck jaws. No need to hassle with calipers, compasses or dividers. Included is a magnetic holder to keep them right on the lathe ready for use. The set I ordered came today and they are so easy to use! Everything Else- Rick Turns posted his weekly list of YouTube turning videos- Started playing with the cherry logs. One of the logs I cut into blocks to try some hollow forms. Once it was rounded, I cut it in half. Less waste. Then created this form. It's partially hollowed. The wood is very wet and needs to dry before continuing. I've been experimenting with the soap solution drying method to reduce cracking. The piece will stay submerged for a couple of days, then moved to a bag of shavings. We'll see what happens. The other half of the block had a split. Turned it into a rough bowl. Got to use the EWT template for setting up the mortise. It's rough turned and submerged in the pot with the hollow form. Safe turning and stay well
-
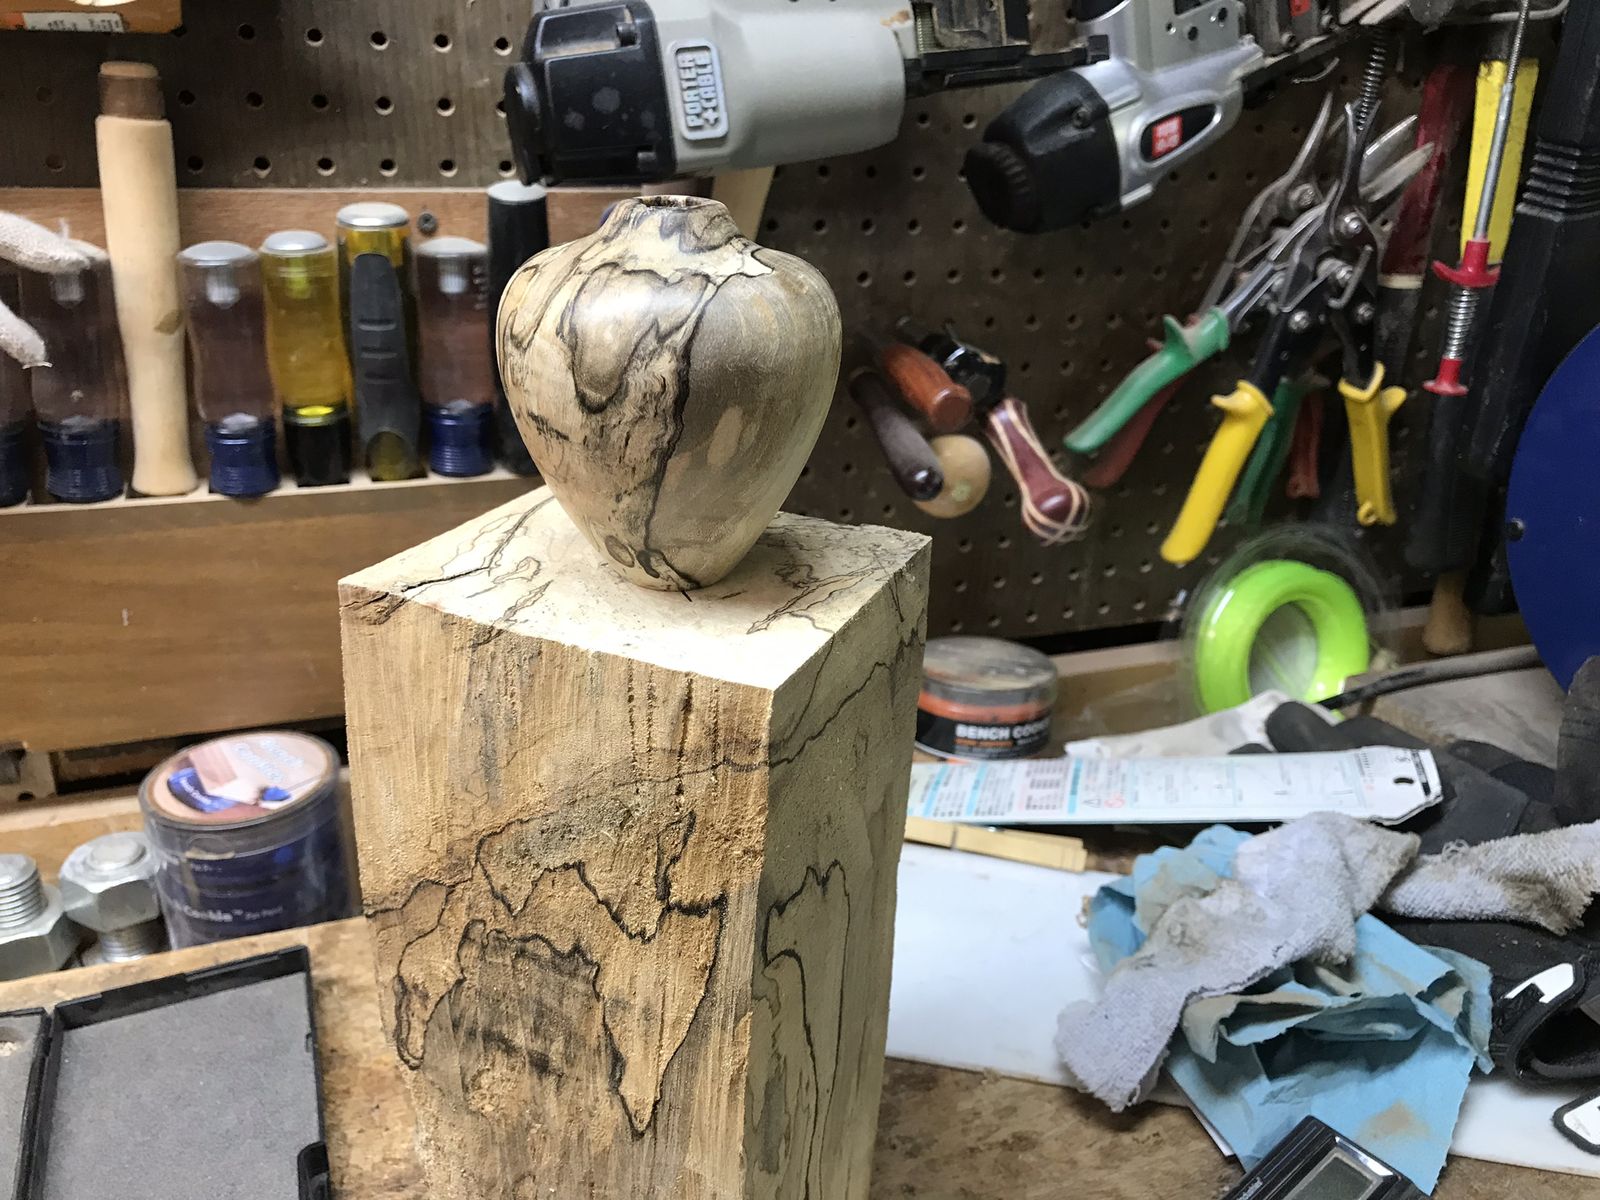
I hope this Wednesday finds all of you safe and healthy. Our Patriot Turners- @Lissa Hall posted a concern about the crack that occured in a cedar bowl she recently turned. Several of our members provided some advice about what might have happened. Please check out her post and maybe you can offer additional ideas- @Ron Altier turned another beautiful bell ornament! He explains more about it and the finish he uses in his post. We've had lots of updates on past posts. @Kevin Beitz is still fighting with a maple bowl. Several members offered additional suggestions- @Gerald added additional images of his Friendship Bowls. He explained more about the finishes he uses- @Pauley provided more information on the finish on his curley maple vase- @Masonsailor has finished up his turned tulip cabinet- One of @Gerald's older post was revived. Great article from Woodcraft on making a jam chuck- What’s Coming Up- Everything still appears to be on hold. It may be a while until meeting, workshops and symposiums are up and running. For The Newbies- Woodworker's Journal has added a nice video, from Ernie Conover, on finishes for woodturners. Mr. Conover does a great job explaining and demonstrating several, simple finishes- Expand Your Horizons- There is still a growing interest in combining acrylic resins and wood. This video is not so much a "how to" but more of a "look what I did." New Turning Items- The folks at Woodturners Wonders are offering a new stand alone tool rest for your grinder. You can read more about it here- https://woodturnerswonders.com/collections/grinding-wheel-accessories/products/stand-alone-tool-rest Everything Else- Rick Turns has his April video list available. With the lockdown, it's nice to have this list to pick from Been playing off and on with that splated maple bowl. I've always wanted to turn a Calabash bowl and that was my intention with this one. Unfortunately, the punky wood under the faceplate had different plans. To get a safe purchase on the piece, I needed to reverse the mount which left screw hole where the bowl bottom ended up. I'm not really happy with the shape, either. The holes were deep enough that when the inside was turned, they came thru. I tried to use sawdust and CA to fill them but they are pretty noticeable on the inside. So right now, I'm considering some sort of foot. I have some ebony piano keys. Might try to use them and design something. Surely can't leave it like this. Safe turning and stay well
-
- 1 reply
-
- 2
-
-
- general tips
- finishing
- (and 1 more)
-
I have had my Excaliber 21 for some time now and LOVE it. I love it so much that I have worn the "paint" right off the top near the blade opening. Now, the color of the bale matches the color of the blades. Makes it really tough to see the blade entry. I have tried paper, zero-clearance 1/4" plywood, coloring the blade with no results. OH, most learned members, how can I fix this problem. Short of taking it somewhere to have it ground down, polished and poder coated, does anyone have a real solution? Will be most anxiously awaiting your responses. fred
-
Hello, I am to the stage of finishing the kitchen cabinets I have been making for my sister ski condo. In the first time in my woodworking life, I have purposefully attempted to contain as many knots in the wood to make it rustic. The wood I have used to make them is rustic hickory. I need to fill most of the knots before I can finish with a clear coat. I have seen some YouTube videos of filling gaps with black tinted epoxy. This is what I know; you put tape on the back of the board to keep the epoxy in the gap and mix up black epoxy and pore it in the knots or gaps. Has anyone out there done this? I need some pointers where to get the epoxy and the black colorant. Best regards, Ron
-
When you create a peice of furniture you sometimes use a back of 1/4" ply. Do you glue or nail it in place? Do you prefinish it and the rest of the peice so that you can spray the interior ? Do you fasten it in place to act as a squaring device then after the glue drys in the frame remove it for finishing later on? I am finishing up my daughters curio cabinet and think it should go this way. 1. cut to fit but do not install. 2. Fiinish the face and sides of the peices and spray if desired. 3. Finish the plywood back. 4. Install the back with Nails to allow some wood movement.
- 10 replies
-
- 3
-
-
- furniture
- construction
- (and 1 more)
-
Quite a wide variety of things this week. Our Patriot Turners- @Ron Altier posted a question concerning his lathe's faceplate. He was having difficulty removing the faceplate after use. Our turners offered several suggestions and modifications. Head on over to Ron's post and see if you can add anything to what was discussed. @Gerald added a really great tip to the Woodturner's Forum tip section. He gave us a link to an article using the bandsaw for cutting bowl bland. Lots of good information- @John Morris Asked for information on the "Ring Master" tool for making bowls. Several of our members gave him their opinions. Please check in on this post and help John out with his inquiry- You know, our turners are the absolute best bunch of folks! @HandyDan posted his thanks to @John Morris for gifting him a buffing system. Dan is our pen making expert and this system really helped him improve the finish of his bullet pens. What’s Coming Up- More information and registration for this September event can be obtained at- https://gawoodturner.org/symposium/ For The Newbies- We want to thank @Gene Howe for passing along this reminder. Safety is really important, not just for beginners, either. Expand Your Horizons- I run hot and cold on what type of finish to put on a turning. Sometimes the function of the turning dictates the type of finish. Other times it is up to individual tastes. I really like the "feel" of the wood when you touch the turning while others prefer a more "finished" feel. If you like the high gloss finish, here's a video from M. Saban-Smith on the steps he uses to get a glass-like finish- New Turning Items- We found a couple of new items. From Woodturners Wonders, a small bit holder for use when sharpening. More on this holder is at- https://woodturnerswonders.com/collections/unique-tools/products/small-tool-bit-holder Second, it a new item from Ruth Niles. Ruth calls this one a "Tab Popper". This should be a hit with the ladies to protect their nails. Ruth has more information and images on her site- https://nilesbottlestoppers.com/product/niles-tab-popper/ Everything Else- The latest edition of Woodturning OnLine is available at- https://www.woodturningonline.com/index.php?edition=062019 . I know many of you do club demonstrations. There is a nice article about remote demonstrations in this issue. You can check it out at- https://www.morewoodturningmagazine.com/articles.php?articlesid=127&access=bb51e4e9a315 Rick Turns has the May edition of the YouTube woodturning videos. Please add a comment to Rick's posting. A lot of work goes into cataloging this data- I made a trip up to the Woodcraft store and now have been playing with my new Easy Wood Tools mini hollowing set ( @Jim from Easy Wood Tools ). I had a really dry, hard chunk of cherry. Used the straight hollower to make a bracelet. Shavings came off like it was green wood! Finished with mineral oil and beeswax. I had some maple, from a tree we had removed, setting behind the garden shed. When I cut into it, I discovered it had spalted. Couldn't let that go to waste although it is quite punky in places. Mounted a small chunk and went to work. I drilled a 1/2" hole down thru the center and then shaped the outside. I flooded the surface with CA to help stabilize the punky wood. Using the 0°, 45° and 90° tools to hollow out the center I made a wall thickness tool from an idea I stole from a Mike Peace video. He recommended spring steel wire but all I had was coat hanger wire. As you can see, I need more practice and a better thickness gauge. The bright light near the top is where I sanded thru the surface of the turning. It was extremely soft there. The lights near the bottom show thru REALLY thin walls! Side view from one angle, looks pretty symmetrical. Looking closely, you can see where I sanded thru at the neck. Turned 90° and now the asymmetrical neck can be seen on the right. The soft part sanded down quicker than the harder grain next to it. I just couldn't bring myself to pitching it. Made a jam chuck to finish the bottom- As fragile as the piece was, I needed to get it out of the chuck without banging on the sides. Air pressure to the rescue! When I make a wooden chuck (or glue block), I drill a small centering hole completely thru the wood. Turned out to be a good habit. And there you have it. Gonna play around, using the mini hollowing tools to create a small finial. Not sure about the finish, yet. Safe turning
-
Hello All, Let me start by saying I am not here to start a debate about politics, religion or motor oils I just don't know where to begin with final finishes. I have made a very simple floating shelf out of oak. I finally got it stained to the color/depth I like. I am not a big fan of oak or shiny finishes but "it matches the bathroom cabinets" my wife tells me. I am curious what my options are for finishing this product and stand up in a bathroom environment (steamy showers). I'd prefer satin if not flat finish. Does stain have to be top-coated? Would a linseed or tong oil be appropriate (I read the blog referenced on here about the difference)? Is flat poly a thing (I read the reference on here about not using sanding sealer with poly)? Can a wax be used as a top coat or should it in a bathroom? Does it matter that I used oil stain? Thank you, Fred
-
So as I've been building storage in the shop I have yet to put any kind of finish on well anything. I've built a few wall hung cabinets, a router table, a smaller drill cabinet, the outfeed table, a rolling cabinet that holds and stores the Kreg Foreman, the miter station, and rolling clamp cart. And then a few jogs like the crosscut sled and so on but haven't put nay finish on anything yet. Is this normal, personal choice, or otherwise not wise? I admit I'm not the best at putting a finish on anything that isn't for the formal part of the house but that's a two part thing. 1st I'm not all that thrilled about the finishing process and 2nd I'm not always sure it's really needed. On formal pieces I see the value in both finished look and protection plus it usually will bring out the characteristics of the wood itself such as grain and features. For the shop I'm not sure what I gain other than additional work. Can someone chime in on what is most appropriate? Am I just lazy or is it simply a personal choice? Are there real world advantages in putting finish on shop storage and jigs? As for the sliding jigs I do wax the runners and such as well as keep a good finish on my metal tables (table saw, band saw, jointer, planner, and so on)
-
-
From the faces I put one these folks they don't seem too happy but I'm still in the finishing stage so maybe they will cheer up before I get them shined showered and shaved! The baby was wrapped in swattling clothes and I couldn't find any of those while building this picture...
- 13 replies
-
- 14
-
-
- scroll saw
- carving
- (and 1 more)
-
Looking for some use for those old bandsaw blades and found you can cut and bend them into great work supports for finishing.
-
Like most having a fan is a must sometimes. Whether it be for the heat, to aid with drying, or just air circulation. But the thing is always in the way, taking up real estate on a bench you would be happier full of more junk,.... I mean stuff. At first I mounted it to the ceiling and put it on a plate that swiveled. Worked but still in the way and was a pain to take down. Then someone gave me some t channel track for a garage door. Now this had potential. Made a carriage to slide on the track and mounted the fan. It already swiveled up and down all I needed was side to side. The track allows me to move it back and forth along that side of the wall. Took some trial and error as I worked out various kinks. Was going to balance the thing so it could be moved one handed. Hung a c clamp on the end of a stick and figured out the weight. Finally asked myself why am I screwing with this. You have two hands, lets paint this and get on to something else. LOL Small project, not much time but nice to get the thing out of the way when needed, but always ready to go. Enjoy, be inspired.
- 8 replies
-
- 9
-
-
- finishing
- shop upgrade
- (and 1 more)
-
Having done a dry fit I took it all back apart and spent a few evenings painting, or staining and some urethane for a finish. Reassembled and reinstalled finished product. This gives me a much needed run to the bench from an existing outlet for the bandsaw. Even added a future outlet for a potential 10 inch bandsaw if I ever come across one reasonable priced. Free is always better but that has not materialized as of this evening. While I could have just left the PVC white and called it a day I had a friend that has a drainpipe in a cubby hole. His wife wanted to add a shelf and was curious could this be done and if so could it be made so it did not look like a sewer line. I suggested a shelf with supports and then paint the PVC a color that blended with the stained wood. As a demo of what this would look like I did mine in this way. They looked at the pics and agreed this was the way to go. This is not glued together, I painted the entire surface, this gives adequate seal. To test it I hooked up a fog machine and smoked the entire thing then went and checked for leaks. As expected the valves leak a small amount, I expected that. This stuff is from a Rigid kit I bought from the borg years ago. Not exactly high quality but it does work. For those curious about the picture frame see the last picture. It hides the water separator/ regulator and main shut off valve for the shop compressed air. My solution to not having it out where it can be damaged. I have several outlets in various places through out the shop with the only thing exposed being the hook up valve. Also have on in the eave of my carport for those times I need to air up a tire or work on a vehicle. Would have preferred to have 4 inch pipe for the entire set-up bit the lay of the shop just would not accommodate that. You work with what I have, not what you wish for my Grandfather would often tell me. Sage advice. While this is overkill, I enjoy the craft. Making something from scraps or almost nothing. Doesn't matter to me if it is for the shop or for something in the house the creative process is what I enjoy. Nothing is more satisfying than finishing a project, shop or otherwise and having a drink and admiring the work. Enjoy and be inspired.
-
Got this 12 inch Grizzly a few years ago. At the time I did not have Dust Collection piped to where I put it. So I improvised and used a short hose and a bucket. it worked, not well but was better than dust everywhere. Finally got around to upgrading this bench and gave myself a few goals. I mounted the sander to a plate that locks in at the back to the bench. Just in case I need to move it, it will happen people. Then I decided I needed dust collection done right. The saw points the wrong way for the outlet so I had to get creative to reverse directions. Another goal was to store the sandpaper disc on the unit. I put that behind the sander. Cut a circle from 1/4 inch ply and stacked 3 old 10 inch sawblades for weight. Ran a bolt through it all and a knob on top. To remove paper pull knob and there you go. Not liking the white PVC I painted it black. Not needed but it has a finished almost factory look to it so hey it's classy okay? Got it all done and hooked up a 6 ft hose from the nearest DC outlet I had. yeah it worked but I said to myself, you can and need to do better. So I began the next stage which pipes all the way to the wall with a extra outlet and a shelf. That part is not done yet, but soon enough. Enjoy and be inspired.
-
I just wanted to update folks on the status of Kieth Mealy as our Finishing Forum Host. At last contact it sounded like Keith was up to his eyeballs with life and business and he is just having a heck of a time getting back here with us. Believe me, I know how he feels, sometimes just to squeeze in a few minutes can be a daunting task, and it stays in the back of your head as something you know you need to do, but just can't, then ya start to feel bad about not being able to get it done, and then the task just becomes a pain in the rear to have lurking in the back of your brain, yep, we all been there! We have not had contact with Keith for a little while now so that means he is being driven hard elsewhere, and we should respect that and wish him the best in his business and his family. As you can see in the image of Keith and kids, he is performing a much more important task, sharing his knowledge with the younger generation, and he is teaching the kids how to extract honey! Hey he has other hobbies ya know! I want to personally thank Keith for the time he spent here, his weekly finishing topics and his interaction in forum topics and posts, were and still are highly valued here on TPW, and are now a permanent part of our information structure, and that my friends is priceless. You can't buy information like Keith shared with us, the information that Keith dispersed here in the Finishing Forum can only be gotten from a man in the business, and with years of experience behind him, and you cannot put a value on that my friends. Like our Scrolling Forum Host Fred Wilson, Keith is moving on to being a laid back low key member of The Patriot Woodworker, where the stresses of meeting deadlines with the weekly topic are no more, and the contentious meetings on The Patriot Woodworker corporate jet are no more, and also his six figure salary as well that he earned as host, is no more. But one thing for sure, a legacy of wonderful information and knowledge in the sometimes mysterious field of finishing, has been left behind by our friend Keith Mealy. We wish him the best in all he does, and we hope someday he'll drop on by and just say howdy, we do miss him. If anyone has a direct "Bat Line" to Kieth, please let him know he is thought of highly here, and we are forever grateful for the time he spent here. Cheers folks!
-
To get a nice sheen on a turning after sanding thru the higher grits, grab a handful of shavings, dial up the lathe RPM's and hold the shavings against the spinning piece.


.png.8d01fab120e5e24a8a4ebbaf0d83fb83.png)
.png.db6294b27cdddc310b2a670aed0d36fa.png)


.jpg.655f8dc95a0c2142d14a48590e5ddfd0.jpg)
.jpg.c691dda7f98d0eed5ed8195fbafc97f3.jpg)
.jpg.b1adb3931231f01e29a8264a434ed1b4.jpg)
.jpg.e786dbe609dd6ea6036b04262a45858c.jpg)

.thumb.jpg.573d1497d0675219908c85aabefd797a.jpg)


.jpg.bca27aa03a12d165bfb1761f5340c3e9.jpg)
.jpg.c9a96238d2114a93ea0f8026b258daef.jpg)
.jpg.dbd46f20091ec8ed4917826ec254a6c0.jpg)
.jpg.1008f52cb30f811508ae7755f2a29433.jpg)
.jpg.7a18a29acb8ebb076df7eb85b2bf4587.jpg)
.jpg.5ed6246090b983f01214a4aa90fba776.jpg)
.jpg.4d68f80b1383090ad29d7c288970e79b.jpg)


