Search the Community
Showing results for tags 'church'.
Found 8 results
-

Part 1- the concept
lew posted a blog entry in The Pastor’s Table or I Think My Sister Is Trying To Buy My Way Into Heaven
The Pastor’s Table or I Think My Sister Is Trying To Buy My Way Into Heaven - (borrowing a title concept from Rocky and Bullwinkle) Part 1: I think my sister believes my past transgression’s slate can be, at least in part, wiped clean by building furniture for the church she attends. The latest installment is a kitchen island/work table for the church’s kitchen. The pastor emailed me a picture of a table he thought would work but wanted something larger and with slightly different construction techniques. Using Sketchup and the free Sketchup viewer, we worked through the major details of the build and ended up with this concept- He chose to use poplar for the frame (which would be painted), soft maple for the two shelves (polyed) and hard maple for the top (oil/bee’s wax). The overall dimensions were 72” long x 30” wide x 36” tall. The top was to be made as a butcher block style using edge grain (rather than end grain) and 1.5” thick. He also wanted the top pieces to be random lengths scattered through the field. We originally thought about 1” “wide” field pieces but then went with approximately 1.5” wide pieces. That reduced the overall number of strips across the top. The legs were a full 4” square glue ups. All of the frame joints are mortice and tenons. The only hardware used was to secure the top to the frame (lag bolts/washers) and the shelves to the stretchers (wood screws/washers). As the build progressed, it became obvious this could be another china cupboard fiasco. The final assembly would have to take place outside of the basement shop. So… if you are up to it, follow along… -
Part 5:
lew posted a blog entry in The Pastor’s Table or I Think My Sister Is Trying To Buy My Way Into Heaven
Part 5: As “Norm” used to say- “We’re gaining on it now.” Time for the first dry fit to make sure all the mortice and tenons fit together. Had to futz with a few of the tenons but overall everything went together nicely. You can see why I’m limited to the size of my projects. This is the only assembly space available- add clamps around a piece and things really get tight. There were still a few more things left to do with the apron and shelf supports. I wanted to carry the chamfer detail along the bottom of each piece. Router table took care of that. The shelves need to be secured to the frame. I decided to use wooden “clips” and a dado in the stretchers The “clips” are cut from an “L” shaped piece of poplar I made a long blank for the clips and then just cut off about 1 ½” piece. I drilled an oversized screw hole through the thicker section (oversized to allow for expansion/contraction). The thinner part slips into the dado on the back of the stretchers and screws thread into the underside of the shelf. The astute observer will notice the mistake in the pictured blank. The wood grain is running parallel to the blank length. The little tabs (fitted into the dados) will snap off as soon as any pressure is applied. Not sure where my mind was when I cut this, anyway, I made new ones with the grain running perpendicular to the blank length (just forgot to take a picture). The final bit of frame construction was to create a way to mount the butcher block top. The frame (with 2 shelves) will weigh in at close to 100 pounds. If the completed table is moved, lifting it by the top, quite a bit of stress will be applied to the connection between the top and frame. It took me a while to come up with an idea that solved the problem. I added three cross supports that were dovetailed into the side aprons. The dovetailed supports were let into the apron using blind dovetail techniques. I used a trim router to hog out the majority of the materials. Then I chiseled out the remaining material. The dovetail shape, in addition to glue and screws at each dovetail location, will provide enough support to keep the top from breaking free of the frame. Finally, l drilled oversized holes thru the cross supports to receive 1/4" lag bolts to connect the frame to the top. Now to tear it all apart to work on the shelves! -
And Finally...
lew posted a blog entry in The Pastor’s Table or I Think My Sister Is Trying To Buy My Way Into Heaven
And Finally: The last bit of machining was to create the two lower shelves. The minister wanted to keep the “maple” look for the shelves but hard maple is a little expensive so we went with soft maple. Planed everything to ¾” and used biscuits to help with alignment during glue up. I made these shelves full width during the glue-ups A card scraper brought everything smooth. I sized the shelves using the same procedures as the top. Cut to length and width with the skill saw and a guide; then used the router, flush trim bit and a guide to finish off the saw marks. The guide is held in place with double sided tape and screws. The screw holes are located in the area that will be removed where the shelf wraps around the legs. I also ran the chamfer detail around the perimeter of both shelves. Marked and cut the corners Finished shelves One more dry fit to make certain everything fits Set the top in place to locate and thread the lag bolt holes. While I had the top in position, I did its’ final sanding and oiling. The top is sanded through 320 grit. I used two applications of mineral oil; allowing each to soak in about a day. Then, I used one application of hot “Bumble Bee Wax”- a blend of mineral oil and bee’s wax. Once that cooled, I buffed it out with an old towel. A final dis-assembly; the maple shelves sanded through 320 grit; the poplar pieces sanded through 180 grit. All of the hardware was pre-drilled and pre-threaded using bee’s wax to lubricate the holes. The minister set a time and date to pick up the table and transport it to the church. It has to make the journey from south central PA to Ithaca NY. The day before he arrived, Mimi and I carried everything- except the top- to the carport and I did the final assembly. Due to the dimensions, the shelves had to be set in place during the assembly/glue up. That really added to the weight! The minister arrived right on time and we loaded the base and top into his van. The church members are going to do the final assembly and finishing on site. It was a long process and I was relieved that he was satisfied with the work. Even though we communicated via email and pictures, it is difficult to know what something is really like. Several days later, I received this picture I think the church members did an outstanding job painting and finishing the table. It looks right at home there in the kitchen. If you made it this far, thanks for following along. Also, thanks to John Moody for the advice on the butcher block top. -
This is the second prototype for our church offering plates. No the will not be spaulted like this, only dry oak I have. Hope to do this in green wood but may have to resort to kiln dry oak like Mike Peace did. Hope to be able to have the final form 1/2 to 1 inch deeper . This piece is a little less than 2 deep. this piece has a small amount of curl do church will not get it

-
Other than working on a large theater set (I'll get photos of it before this weekend's performance), here's a couple of things I've been working on. First is the little free library, which I plan to start painting tomorrow, while waiting for some roofing screws. Second are some 4x8x7 storage shelves for the furniture bank.
- 11 replies
-
- 11
-

-
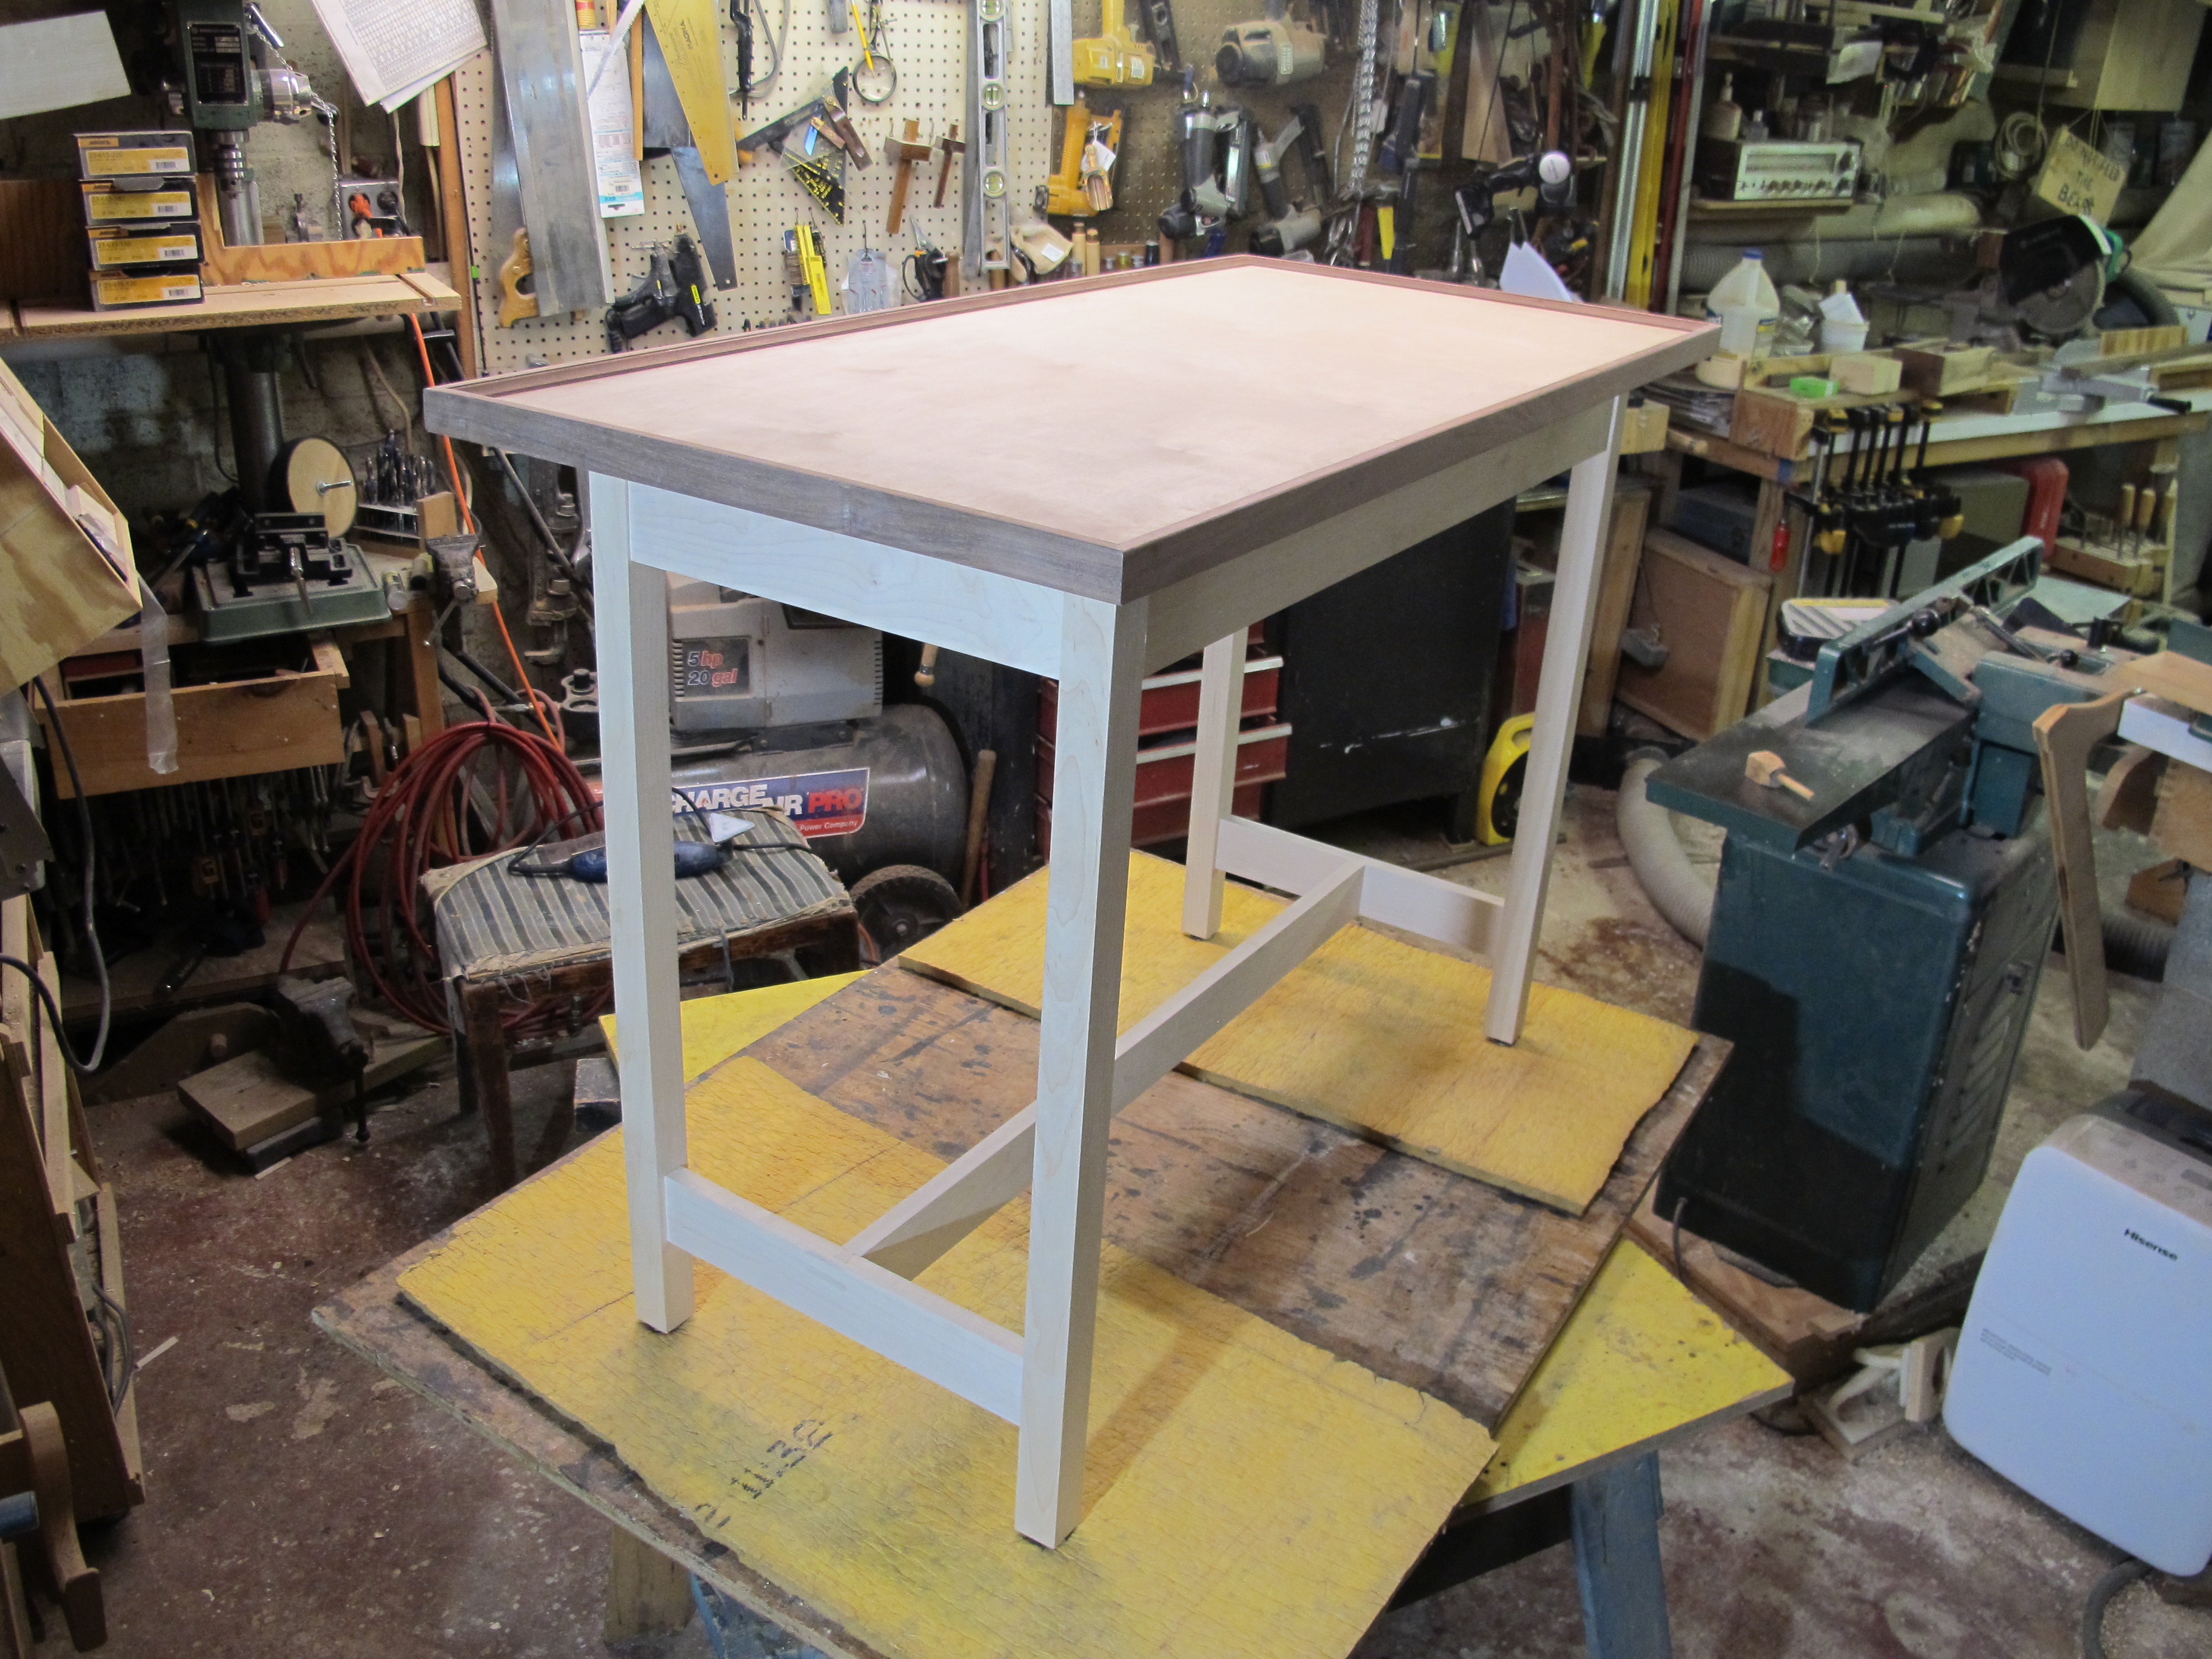
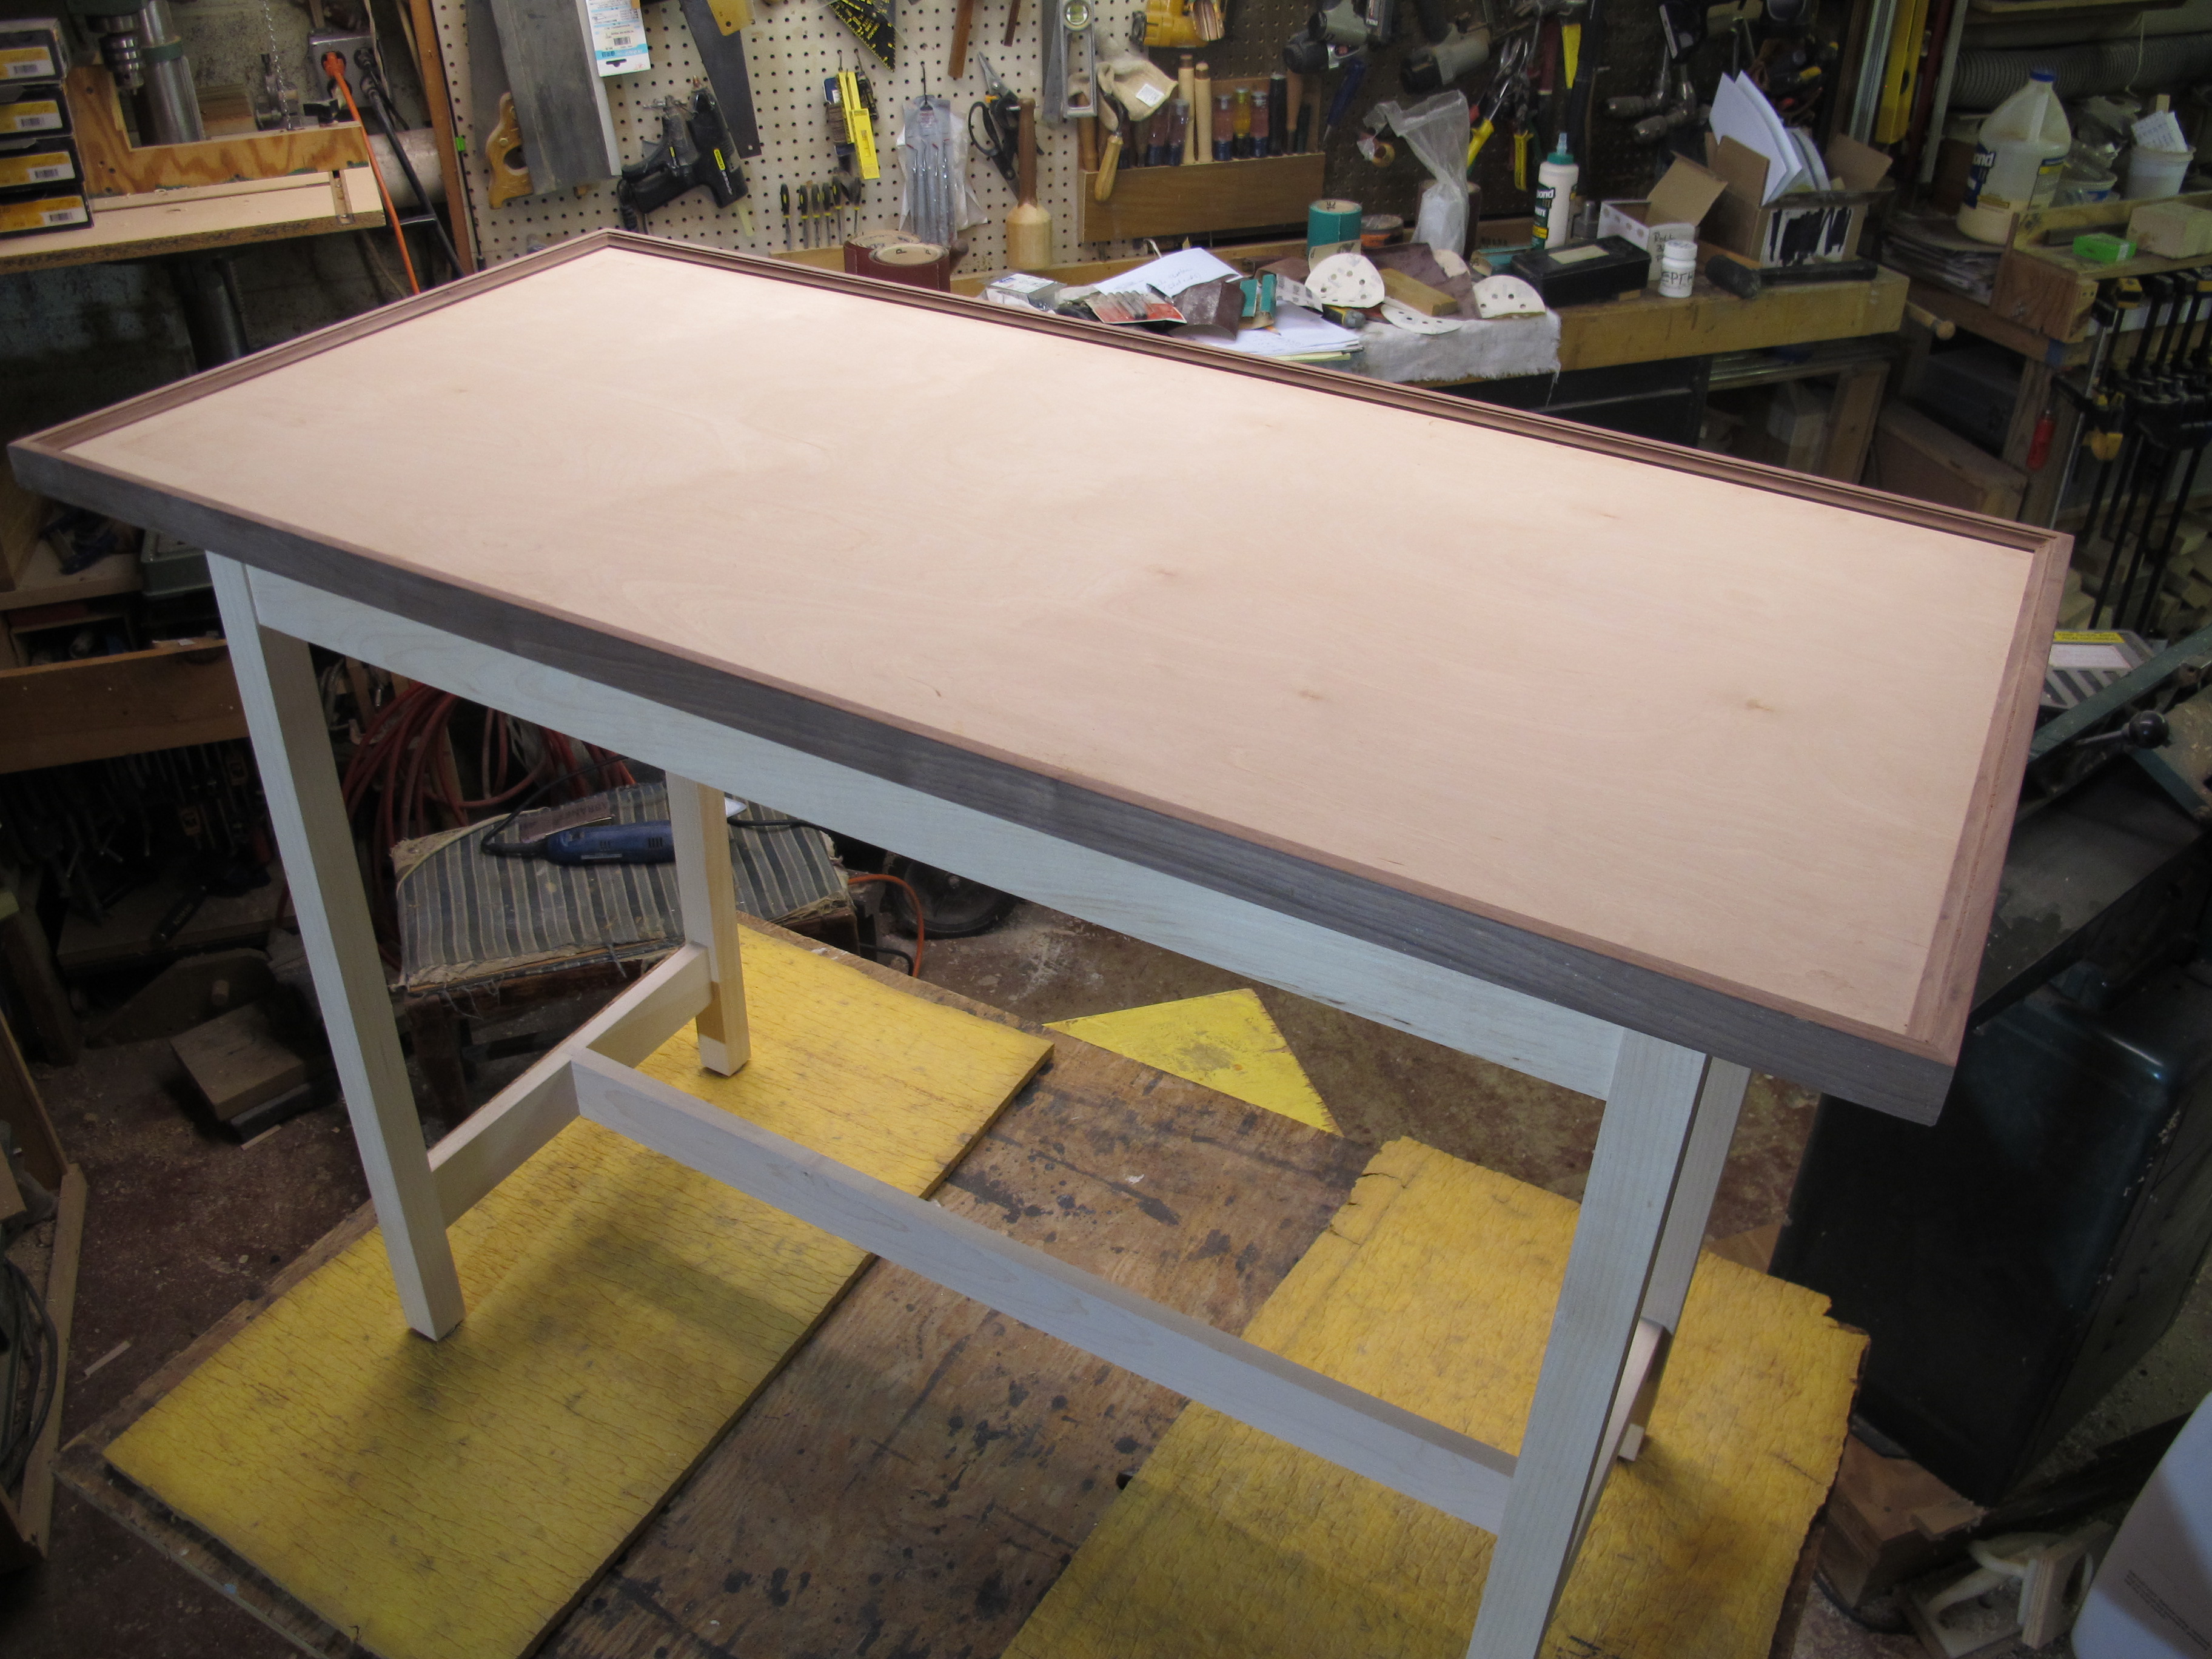
Finished up the "Communion Table" for my sister's minister. He picked the design/size/materials. The church members will apply the finish when it is delivered. Made of maple, birch ply and walnut. Mortise and tenon joinery all around except for the long lower stretcher which is connected using a sliding dovetail joint. 30" H x 20" w x 40" L.
-
Over the past few weeks I have been building a communion table from reclaimed pews. I am pleased to announce that it is now home in God's house, I sure hope the new owner likes it.
-

From the album: Communion Table
Completed oak communion table from reclaimed pews.