Search the Community
Showing results for tags 'cabinet'.
-
Mrs. Boss has commanded made a suggestion that we need a way to display what grown to be a large collection of finely crafted handmade bowls. Has anyone one come across a way to do this. Shelving unit comes to mind, but seems to lack any pizzazz. What are your thoughts? .40
-
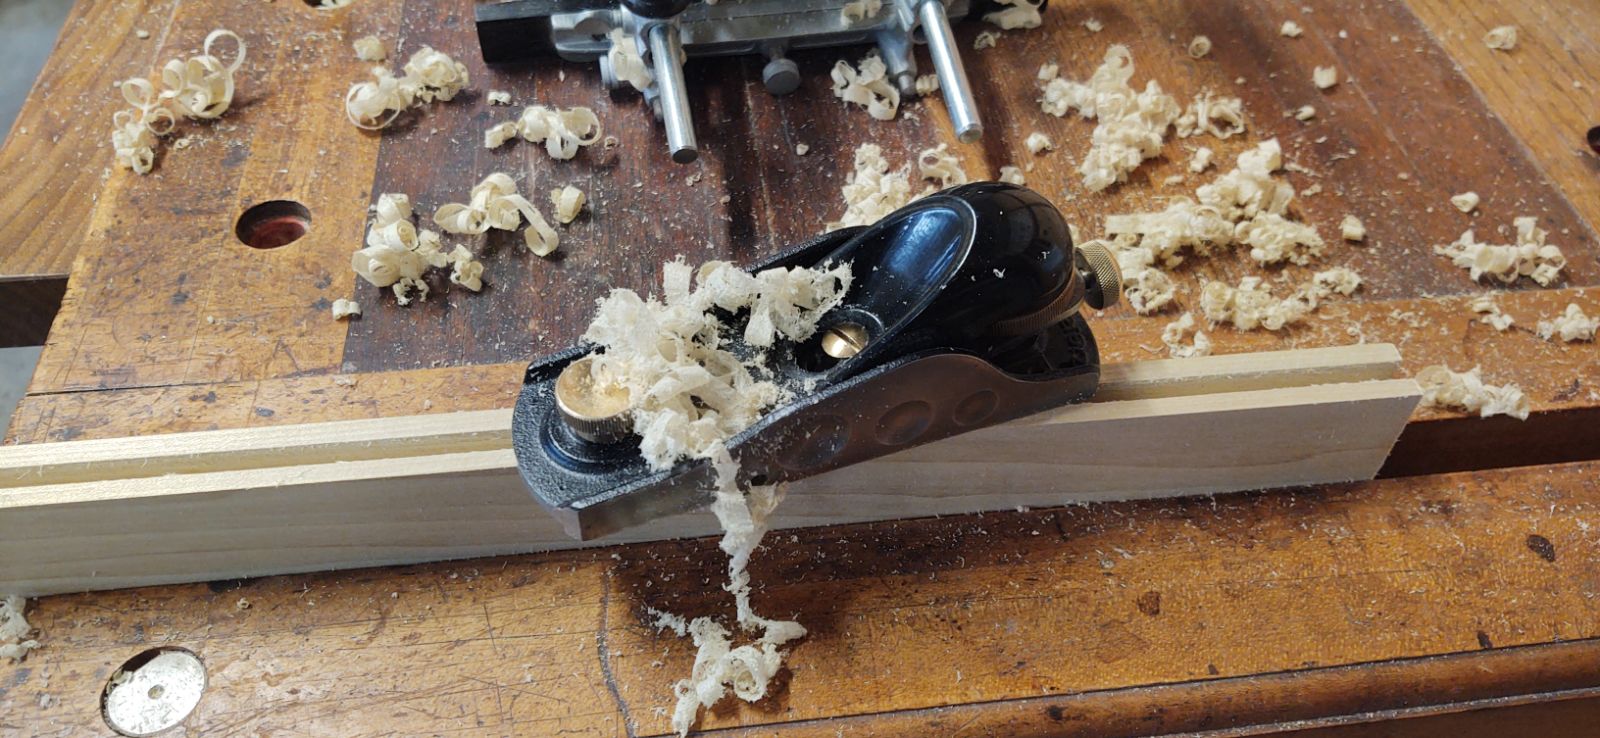
A few weeks ago mama decided she wanted a cabinet to store her arts and crafts supplies that are taking up floor space in our upstairs hallway. She went shopping online and found a cabinet she liked for 230 bucks, and it was the typical particle board white surface type of stuff. So I told her I'd be happy to build it and the materials would be less as well. So she and I went to our lumber store and picked up some 4/4 poplar, poplar because she wants the exterior painted white, and I want the interior natural finished. We will be using General Finishes Milk Paint for the exterior. Also, I am going to build saw tooth shelf supports as well. This is our hardwood lumber dealer "Reel Lumber", about 30 miles from home, it's full of all kinds of stuff, from pine to oak to exotics and everything in between. Our Poplar was running about 2.70 a board foot. I spent about 150 bucks, and with the Milk Paint, we are going to come under budget from her online cabinet she wanted, and we are going to have a piece of furniture to pass down to our kids, and their kids. Got the boards home and had to size and join them. Note: if you look behind my Makita CMS, you'll see a cross with a flame in a heart plaque, when I was going through some serious health issues a year ago, my friend Jess @Smallpatch, sent me this very special and inspiring gift, it lifted my spirits enormously, and when I felt I needed a little nudge from the Lord while working in the shop during that rough time, all I had to do was look at my plaque, and I felt it. To this day I cherish it, and I feel the Spirit in it. Just a board on the bench, laying out dado's. Glued up. I built the face frame with a Kreg pocket screw jig, and then glued the frame to the case, and bored holes in the face frame for 1/4" dowels, 1 1/2" long and glued and driven in to the case, then a flush cut hand saw and cut the dowels flush and block planed them smooth. Since the case is going to be painted, I thought adding the extra strength of the dowels would be good since you won't see them below the paint. I also mixed up some two part epoxy and floated it over each dowel, let dry then sanded smooth, just so there weren't any issues with the end grain of the dowels sucking up the paint. Joining boards for the raised panels. Getting the rails and stiles ready for the raised panel doors, I was playing with my Stanley 45 yesterday, and after a few tweaks here and there, she purred and plowed, making some wonderful clean 1/4" wide by 3/8" deep grooves to accept the raised panel. The grooves turned out very nice. After running the grooves in, I used a block plane to take a whisper shaving off the top to clean up the surface. Within an hour I had two rails and one stile done, and I was starting on the second stile when mama called me in for dinner last night. Here is where the case is as of today. The backed boards are beveled and nailed off on the back of the cabinet. Today I am gluing up the door panels. I'll keep the images coming, and thanks for looking! My very special cup, that a friend gave me, and also a cup for mama too!

- 81 replies
-
- 13
-

-
- general finishes
- poplar
- (and 6 more)
-
well here is the shop, daughter #2 showed me how, my my its so simple, lol, hope i don't forget how. pic one is from south side, you can see the re located chop saw, gonna build base cabinets in length of about 10 ft and a few uppers above. #2 is from in front of lathes, you can see the baker racks we use for parts and drying racks. also above the clean room (8x20) you can see the mezanine where i store a lot of exotic lumber. #3, is a shot from table saw to rear door, orange cabinet holds a mini mill, and to the left you can hardly see is a grill covering a metal lathe, ( i dable making old, old gun parts) #4 corner where the band saws, drill presses, you can see a groove jig , this one i got right, worked out. #5 shot from by the orange cabinet jointer, 15 inch planer and table sw in pictures #6 see old router table attached to a mech box, its gonna go away later this week, and general work space, #7 The new router able, hope to have up and running later this week now that i know how to post pics, i'll throw some up once in a while rj in az
- 84 replies
-
- 14
-

-
-
- router table
- planer
- (and 9 more)
-
Hi - My question is regarding cabinet scribing. When installing cabinets and finding the walls not to be straight, I take the cabinet back out to the shop and make modification to the sides to get it to fit the wall. At the age of 66, this is not something I want to be doing. I've haven't tried this but couldn't I just take a similar size piece of 1/4" hard board or plywood( height and depth) and scribe that first and then transfer that to the cabinet? Thus eliminating any trips back to the shop with the cabinet. I guess if the floor has a some peaks and valleys this could come into play but let's just say that's not the case in this scenario. Thank you
-
Got some progress made on the sharpening station built in. Counter top is on, drawer slides are on order, and I have plenty of room for a coffee maker and a box of doughnuts (not shown)
- 19 replies
-
- 6
-
-

-
- cabinet
- sharpening station
- (and 2 more)
-
.thumb.jpg.573d1497d0675219908c85aabefd797a.jpg) View File Workbench Magazine March-April 1968 Elegant Room Decor This is a scanned document of the now defunct Workbench Magazine of this era. Permission was granted by the new Workbench Publication for The Patriot Woodworker community to copy and use the old Workbench Magazine at our pleasure, and for free distribution and re-use. Submitter John Morris Submitted 12/29/2022 Category Furnishings
View File Workbench Magazine March-April 1968 Elegant Room Decor This is a scanned document of the now defunct Workbench Magazine of this era. Permission was granted by the new Workbench Publication for The Patriot Woodworker community to copy and use the old Workbench Magazine at our pleasure, and for free distribution and re-use. Submitter John Morris Submitted 12/29/2022 Category Furnishings -

Version 1.0.0
11 downloads
This is a scanned document of the now defunct Workbench Magazine of this era. Permission was granted by the new Workbench Publication for The Patriot Woodworker community to copy and use the old Workbench Magazine at our pleasure, and for free distribution and re-use.-
- 1
-
-
- decoration
- workbench
- (and 2 more)
-
 Hi everyone ! I started carpentry a year and a half ago, i'm kinda proud to present you my first solo project : a wooden bar made with some ash olive tree ! The size is 1800 x 1100 x 520 (in mm), it took me 80H to complete it. Tell me what do you think about it, if you like it or not and how can i be better I also made a video on how i made it if you are curious : https://youtu.be/LBACC3ERal0 Thank you for your help ! Paul cant find how to put some pictures :'((
 -
Planning and organizing my work space, I am going over in my head different ways to build, or not to build, storage for my hand tools. I have gone over in my head a whole bunch of ideas, and one thing I always love to think about is re-purposing old cabinets for my storage solutions. I currently have old kitchen overhead cabinets now, where my finishing supplies and hardware is stored, they were given to me by a buddy at work years ago, and they have served me well. I was looking through local ebay sales in my area for antique cabinets, that I could reconfigure to fit my hand tools, and I came across this old pine cabinet for $285 bucks on Ebay. The lumber would cost that much to build it, and then my time, of which I have very little, it would be nice to just have this cabinet, and retrofit some dividers into it for my hand planes, and shaves and braces etc. I think this would be a really fun project wouldn't it? I could most definitely make this work for my hand tools storage.
- 27 replies
-
- 13
-
-
H ace posted some of this but decided to get it as ll in one place. The Church asked me to build a cabinet to replace the one I made a few years ago gift storage of audio equipment in the gym. Original plan was ply and paint it but then fell into 8 oak planks 25” x 12’. Has had termites so most needed 2 inches off edges. not pretty but a little saw work and planing did good and still the price was right. A-bit of two kinds of plane work. Some jointing to get to the next stage Glue up And more glue up
- 30 replies
-
- 10
-
-
I like working with kids. It’s not easy, i have to resist the urge to reach in and say “this is how it’s done”. Safety first of course, but after that it should be fun. Neice & nephew came for a visit, and i got the older girl out in the shop. Middle school … 12-13? She had never picked up any tool … dad isn’t the handy type … and she told her mom she didn’t think she could do it. So i locked mom out of the garage and off we went. Built a very simple bookshelf.
- 24 replies
-
- 12
-
-
-

-
I recently inherited this this old console tv that my Grandpa turned in a cabinet years ago. Thought I’d share because it’s a good idea.
- 10 replies
-
- 11
-
-
- cabinet
- tv console
- (and 2 more)
-
We’re starting to finish a hall bench my wife wanted. We decided to use (of course) General finishes milk paint and the color is driftwood. It looks like a darker gray. The plans call for barn board for the backing and a piece inserted into the door (see photo). The driftwood color is awesome! However, barn board is very expensive, so I got some rough sawn pine. My question to the group is what color, if any, should I stain the pine backboards? 1. Leave it natural and let the color do whatever it wants…? 2. Stain it….if stain what color? I tried a little golden oak on a scrap piece and wifey didn’t like it. She said it looked a bit red-ish. She thinks it should be stained with an ebony stain, I think it will make the entire bench look to dark. here is a photo of the bench. I made the picture black and white so no one would be persuaded by the colors they used. First photo shows the color we put on the bench. im a bit stumped on this one….
- 14 replies
-
- 5
-
-
- general finishes
- driftwood
- (and 1 more)
-
Hi all, I'd like to build a drill press cabinet and have never done anything like this. I'm a wood turner so this is new. I use it to drill pen blanks, not know what else it can do (tho I'd like to find a good book or website that tells what it can do!) I have a floor length one and I'd like this to be on wheels. What do I need to consider, how tall should the drawers be, how tall do I make the cabinet, do I make it as part of the drill press table and fence, is there a standard size width like 15 inches width. What thickness are the walls, can I use 1/4 or 1/2 inch plywood with 3/4 on the bottom for the wheels, is there a plywood better for this than others. I've never used sketch-up to draw any plans. I have started to learn about this morning. As you see I don't know anything about this. I will try to attach pictures of the drill press. It is a 16 speed from harbor freight. The width of the table is 11 inches.
-
Been working on this for couple weeks. My Dad died right after I got started so it got put on back burner for a bit. But for me best therapy is being in shop so back to work. Previously I made a exhaust fan enclosure to fit this same window. Used a attic fan for the job. Worked great!!! So good it would pull the finish into what looked like waves across a flat piece. Also at 1600 CFM it would pull door open. If closed you had to be careful you didn't get your head knocked open. So I found this smaller fan with a supposed 650 CFM. Fart fans usually come in at 100 CFM and for me that is just not enough. This unit came complete with louvers and a speed control. Didn't cost extra for the speed control for same unit so hey why not see how it works? Tried it and it is NOT going to work for me. Buzzes at anything under medium. Opened the unit up and the internals are cheap. Doubt they would last long. Might use the controller on something else but not for this project. Exhaust Fan For this build I opted for two pieces. One piece replaces the old window on top and fills the channel so it is 3/4 thick. This brings it flush to the track on outside and flush to the inside track as well. Then centered up the fan and made a hole for fan. Next I built the cabinet and then dry fitted. Drew the outline of the hole on the back and took back to shop. Screwed the two pieces together on those lines and routed out the hole in the cabinet. The bottom has a 2 inch thick piece of insulation board built into the back. When cooler weather comes I can open the future door and insert a 2 inch piece of insulation board behind the door. Then unplug fan. Keeps cold air out and no accidental fan operation. Wiring is internal through the back insulation board with a hole to let the power cord come out the bottom and go to outlet. Fan can be turned on manually or use the timer program to turn on during the day. Nice feature. Had considered a thermostatic fan but though this would work better. Pictures of progress so far. Window insert Old sheet to be faux curtain same method as used on rest of cabinets in this room. Operational fit. Added storage.
- 10 replies
-
- 10
-
-
- finishing room fan
- exhaust fan cabinet
- (and 2 more)
-
This cabinet is not mine, I found it on the Shopsmith Facebook Group page, a gent by the name of James P. Wright built this for his, I just wanted to share it because I thought it was a really nice example of a storage cabinet for our SS supplies and tools. Perhaps it'll lend a little inspiration too when you go to build your under storage cabinet. Enjoy!
-
My daughter asked if I would build a small storage cabinet for some of her quilting fabrics. What would be the preferred wood choice for the drawers without breaking the budget. Planning on 1/4" birch ply for the bottoms. The cabinet itself will be red oak. Seems the price of wood has gone thru the ceiling over the winter months.
-
Have a stash of Ash 1 x 6 planks...sitting around, getting warmed up.....ice is about gone... 9 boards = $18......have a big empty spot... have to leave access to that light switch, but..... Corner is a bit messy... Hmmmm....maybe a shelf, then a door or two above the shelf? Maybe a shelf up on top? may use these for door panels.. Or just fancy cabinet sides? Had to do a bit of measuring...and also locate the wall studs...and NOT the pipe for the shower on the other side of the wall. Will let the Single Brain Cell Sketch Up take a look at this space...... stay tuned...(not too sure about that green colour....)
-
A few pics of some of the things I do. Not a lot of fancy but it keeps me occupied and just enough variety to make things interesting.
- 10 replies
-
- 10
-
-
Awhile back came across a sweet deal on a WEN 12 inch variable speed Drill Press. A nice upgrade to my 8 inch, but smaller than my full size 17 1/2 in JET. So I put it next to the small 8 inch for last couple months while I decided on how I liked, or did not like the height of it. I prefer the height of the JET as far as where the quill sits. With the WEN sitting on this bench the quill is staring me in the face. Kinda hard for a short guy to use. This is how it looks with taller cabinet. So I set about making a new shorter cabinet. Did a dry fit and all looked good. Finished the insides before assembly. Then moved on to the top. So now the face frame is all assembled and fitted nicely. Some hand plane work and then bit of sanding. Put is all together for a dry fit, came out nice. Decided now would be a good time to check for fitting where it belongs. Hit the mark right on for height. Next is to move old cabinet out of way and see how the new one fits. Spot on. Put the WEN on the table and now to see if my measurements are true for lining up the quill to the quill on the JET. Not exactly on, off by maybe 3/16's. I can work with that. Now here is the dilemma. This is how it looks with the WEN centered on the cabinet. Plenty of room, access to both DP's all around. \ But stick the little guy back in the mix and we are slam full. I raised the little guy up so the quills all matched height. View from other side. Do I NEED 3 drill presses?? Certainly is nice but need, nah the new guy is more than up to the task and it is Variable speed. I rarely part with equipment preferring to expand my capability rather than sell a piece of equipment off. For giggles I put the small DP on the graffiti cabinet next to it and that is not working for me. Hard to access the cabinet behind. No further space exist large enough to accommodate the small guy. Hate to part with equipment and the extra capability but at some point hey, maybe this ain't gonna work? Maybe @Cal needs a small 8 inch DP????? Any ideas or suggestions??
- 62 replies
-
- 8
-
-
-
- benchtop dp
- drill press
- (and 2 more)
-
Well I decided to do a Newman but not as full. My carving and burning station needed something so cabinet and drawers were the thing. The stock for the cabinet was so rough looking on edges decided to edge band with cherry. Then used #3 plane to reduce it. Well then I have to sand that off, nice and smooth. Ok nothing of the assembly but this is what I have so far. Now a little on doors. This panel was not wide enough so I added a strip of Mahogany using a tounge and groove to secure it in place. Again no assembly pics . Totally assembled and then placed. No way to secure the back with the bottom panel in place so used a bracket to secure it . Well my choice for drawer front had some bad spots on back edges right were joints and bottom go so had to fill that. That was the progress for the last 3 days. Doors and drawer assembly scheduled for today and pushing forward.
-
I forward these design concepts to my son this evening. The sketches are missing some detail, but there is enough detail to make a plan. I’m waiting on my son for a decision (little does he know, his wife has already made his decision). His wife likes the cabinet which has two pull-out shelves behind a door. All of the cabinets have a trash can drawer, a large upper drawer, and locking casters. Cabinet dimensions are 36” wide by 24” deep. The cabinet will have a white varnish for a finish. Danl
-
Friend of my just got promoted to Sergeant in a local city. His new vehicle is a 2020 Ford Explorer. As such they have no inserts available yet to put away or lock up his weapons and such in the back. Concerned someone would bust out the back window he inquired about a custom cabinet. While the city will not pay for it he did get permission to make his own, at his expense. Thus far he has $450 in materials, $225 being in the 36 inch long drawer slides. Getting started. Had to edge band the plywood, I don't like raw plywood drawer edges. Once all the edges were done I set about making the carcass of the cabinet. The bottom plate has been matched to the back of the SUV. That decided the footprint of the cabinet itself. Next up was drawer assembly. I made a jig that fits my TS. This allows for even a larger drawer to be assembled and kept square. Drawers getting dry fitted. The drawer slides are attached to the cabinet via 1/4 x 20 machine screws. Each slide has 4 that hold it in place to cabinet. My friend wants a thin blue line through the top and sides. All of the inside of the cabinet has been painted light blue. Weapons drawer has been carpeted and inserts to hold them made, but not finished yet. Progress thus far after two weeks.
- 20 replies
-
- 12
-
-
- cabinet
- custom suv cabinet
- (and 1 more)
-
Ok...this is NOT going to get it.. Made to hold 16 saws....right now it also holds that weight in dust...something better needs built. Something that will enclose this things, so that once I wipe them down nice and clean...they WILL stay that way. Have a couple 1 x 10 x 6' planks....will start cutting them down into box, of some sort. I doubt IF the plexiglass windows will work....plan is the hang the 3 panel saws running around in the shop on the inside of the doors. You can see a handle or two, peeking around the edge of this til... Stay tuned...this might get..messy..
-
but it's what I have to do without access to stores. I should point out: my wife and I have watched every episode of "The Walking Dead" (well, she watched....I may have slept a little) plus I've seen all the "mad Max" movies. The point is we know how to survive in an apocalypse! So with that in mind I managed to build my cabinets for my assembly table to sit on. I was able to cut up some stuff I had made that was no longer used, and scrounged some pieces out of my stash that completed. This isn't the way I would do it normally...but, hey; these ain't normal times. So the carcass is mostly made up from the 3/4" ply stand my old table sat on, along with some 1/2" ply from a shelf unit that I had to cut up. The drawers are made of 3/4" ply sides (out of my stash) and hardboard bottoms. The hardboard would have been the sacrificial top for the assembly table before you'all changed my mind about needing it. The knobs have been in the shop for a while and came off our old kitchen cabinets from the remodel we did a couple of years ago. If this crisis ever ends I'll buy some wood to make drawer fronts. I should point out: I used Glide Right slides for the drawers. Gunny had mentioned them here a month or so ago, and I had seen another endorsement elsewhere so decided to try them out. Normally I would have ordered KV 8400 series, my go-to slide. Not any more, these glide right slides (from Amazon) are really nice and about 1/2 the cost of the KVs. These are the largest drawers I've ever made, 35' wide and 24" deep. They are amazing stiff, so I'm not worried about loading them down. All this, and people laughed when I watched the "Walking Dead".....well: who's laughing now! (Don't answer that!)
- 27 replies
-
- 11
-

-


.jpg.2e8932a89bb0ebf39ebc694df8de951c.jpg)


.jpg.27927db3e48489f7618be931b1133661.jpg)


.jpg.750538de09963f0e0cb377bcdb1997b0.jpg)
.jpg.8a543920b78a778d9d74580d6f29777e.jpg)


.jpg.973b3429955bf9a1f46bf983f44d8296.jpg)


.jpg.ba55e368b3d500b42fcc55ec725714db.jpg)


