Search the Community
Showing results for tags 'refurbish'.
Found 5 results
-
I hope everyone can enjoy a peaceful Easter accordance with your customs. Our Patriot Turners- @Smallpatch was hitting the yard sale circuit when he spied an old lathe. Not one to pass up a bargain, he took it home a refurbished it. Check out his post for more images and the back story- New member @User74 posted a question about carbide tools. We had a very informative discussion about the quality of tools and cutters. Check out the post and see if you can add to it- @Steve Krumanaker created a beautiful Beads of Courage box. Steve used a special technique to create the staves for his turning project. Head on over to his post for more images and our members' comments Another great week for our What's ON/OFF your lathe discussions. From ON the lathe, @Gerald and @User74 gave us a look at their current turnings New information starts here- And, from OFF the lathe- @RustyFN and @User74 completed some really nice turnings- New posts for this week starts here- What’s Coming Up- Click on the images for links to more information and registration- Last week, we posted a link to the Mid-Atlantic Woodturning Symposium. One of the presenters is Alan Lancer. Here's a short video of what you can expect to see from him- For The Newbies- A tip, from Lyle Jamieson, for holding small turnings without a chuck- Easy Wood Tools shared a new video on how their products are made. Easy Wood Tools are made, in America, entirely in house- even their carbide cutters! @Jordan Martindale Expand Your Horizons- Tim Yoder shows us how he makes his French rolling pin. Tim is always fun to watch! Richard Raffan is bucking the trend of large turnings. In these two videos, he creates lovely small turnings. His commentary, while turning, gives an insight into his turning techniques- The Woodworker's Journal has published the Woodturning Monthly newsletter. Nice article on how to add butterfly patches to a turning. The newsletter can be found at- https://www.woodworkersjournal.com/woodturning-monthly/?utm_medium=email New Turning Items- Got a heads-up from @Grandpadave52 about a great price on a Longworth chuck sale. Everything Else- Safe turning

- 5 replies
-
- 4
-

-

-
- peachtree
- longworth chuck
- (and 29 more)
-
Okay I have this screwdriver, unless someone comes up with a different name for this tool, and it belonged to my Grandfather. The wooden handle inserts needed replacement, got stabbed the other day. I removed them and made two replacement pieces to fit the angled edges. Used some 100+ year old mahogany. So my question is what would be the best way to go about attaching the handles again. Then any suggestions on carving down the handles to fit this nicely? I posted pictures of the numbers I found inside the handles. Anybody got any ideas on how old this thing is?
- 16 replies
-
- 2
-
-
- refurbish
- irwin screwdriver
- (and 1 more)
-
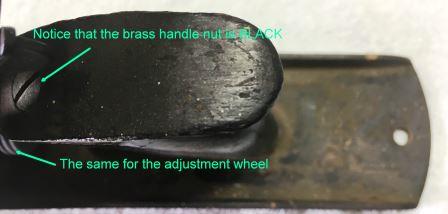
I thought that I would do a general tutorial on how to refurbish a hand plane. However, before I start, I would like to thank @HandyDan for providing me with this outstanding Stanley Bailey #5-1/2, Type 11 hand plane. Dan recognized that I didn’t possess a #5-1/2 and graciously offered it to me. So, I thought that as long as I was going to clean the plane up TO USE, that, I would take you folks through my process(es), step by step. Before I start, I understand that some of you are probably familiar with how to do this, but there are others who are not and may like to clean up grandpa’s plane or that garage sale find, but don’t know where to start. I want to see input and alternate methods from the members as I go through this process. I will show how I do this, but it is not the only way to get to the end result. Let’s make this informative for everyone and share ideas. Most of this will be graphic in nature with very little text. I will provide information and clarifications as needed. However, if I don’t cover something in an adequate manner, please ask. I have several core philosophies; the standard …a picture is worth a thousand words, the story is no good without pictures, and there are NO stupid questions. I will break this up into stages. First, I don’t know how much continuous time I will have to complete the project, and it allows for discussions and Q & A between stages. So, I’m going to start out with a general overview of the plane itself. Understand that, this plane is a type 11. This dates it to 1910-1918, so it is about 100 years old. Whoever had and used this plane took very good care of it. There is evidence that the plane iron was properly flattened on the back side, nothing was rusted solid, the wood was dinged but nothing was broken. However, the plane was in a “crusty” condition. (Side note: I apologize for the quality of the photos. They are taken with my iPhone SE as I go through the process. They are not the best quality...sorry.) Here is what the plane looks like before anything is done to it: The next few pictures are of the individual subsystems as the plane was disassembled. Why so many pictures, you ask? Well when it is all done you will be able to go back and compare the before and after results. How to Refurbish a Hand Plane, Stage II Now that it is disassembled it is time to eliminate as much rust as possible. There are many ways to do this but here is what I did. First step is a good wire brushing of all the parts to remove as much loose scale and dirt as possible. I used a wire wheel on a bench grinder to de-rust the hardware, and the components. Since the sole is a corrugated one, I used a softer, drill mounted wire wheel to get into the grooves. Now comes the messy part. All of the major components will go into an electrolysis conversion bath. There is lots of information on how to do this so I won’t go into details. However, here is my set-up and process. Here is the key component. You don’t need an awful lot of the Washing Soda added to the water to get good results. This shows how the cap iron, plane iron, frog, and lever cap are suspended. Here is the nastiness that is the result of the process. All of that red scummy foam is the rust lifted off of the metal components. The next thing was the body of the plane. Unfortunately, I did not get a photo of it in the bath. The #5’s don’t fit completely into the water, so there is about four inches that sticks above the water. I just do one side and then flip the body around and do the other half. After the parts come out of the bath, they are washed with clear water, and then dried. If I don’t have a chance to get to the parts right away I treat them with Boeshield T-9 to keep the surface rust from starting. When I finally get to the parts, they are wiped down with Mineral Spirits. They are then buffed on a pleated wheel with white rouge. I follow up with a loose linen wheel and the same white rouge. This usually gets the last of the crud off of the surface and puts a decent polish to the metal. Not everyone has a buffing wheel set-up, but, again, there are several ways to “skin the cat”. You can use something similar in a hand held drill or resort to elbow grease and handwork. The main issue here is to get rid of the deep down rust in any pits in the metal. Here are the parts de-rusted, buffed and ready to go. Once I am satisfied with the degree of polish, the part gets a good coat of Johnson’s Paste Wax. While I am buffing out the metal parts I, also, buff out the brass on the same buffing wheels. Remember those black handle nuts and the adjustment wheel. Well this is what they now look like. (Disclosure for the adjustment wheel a Dremel Tool is our friend. Wire wheels and little, tiny, itsy bitsy buffs and felt bobs) Once the brass is polished out you can either coat them with the Johnson’s Past Wax, or for a more permanent shine you can seal them with spray lacquer.
- 57 replies
-
- 5
-
-
- stanley 5-1/2
- hand plane
- (and 1 more)
-
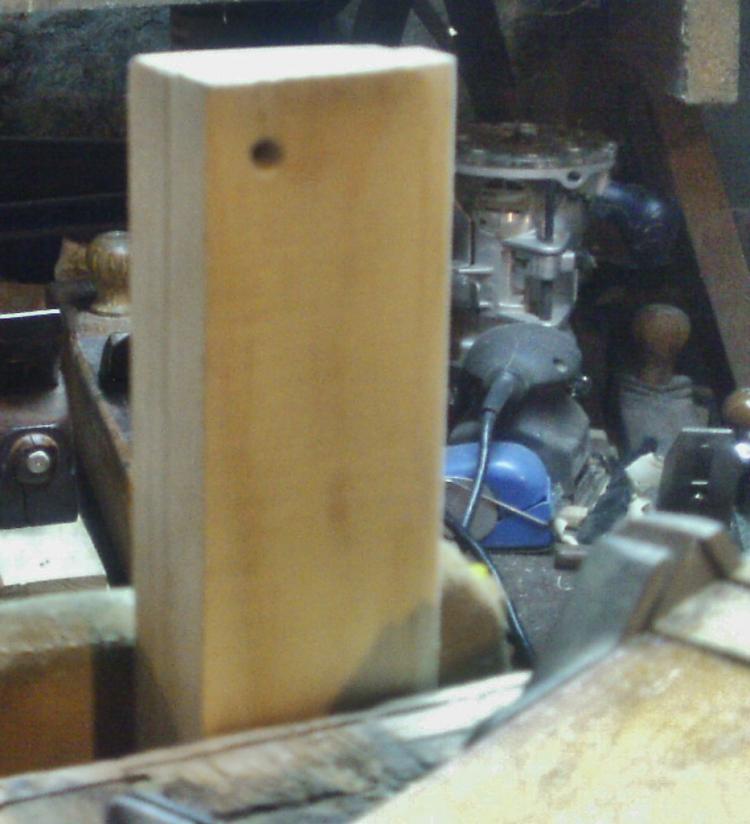
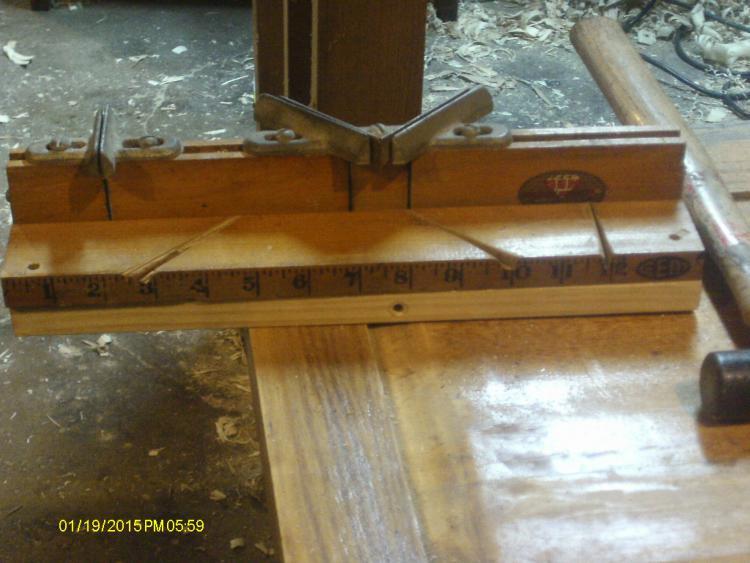
Had an old mitrebox, garage sale item. It is a folding type from GEM. You unfold it at the jobsite, screw it down or just a couple clamps. Was starting to look a bit worn out. May have been used a bit too long? Decided to replace the old sides with some new pine. Took one of the old ones off as a pattern Pine was some 1x3 stuff. Made a matched set. Drilled the holes for screws to be used as mounting hardware, drilled for the brass rod that keeps the sides from folding up on the user ( need to make a new one), and rounded over one edge. Router bit wasn't quite enough roundover, so, a block plane and a strip of sanding belt to get it better. Needed some pilot holes on the end grain for the pivot screws, set the pair into the vise, marked the locations And I think I have just the right drill for the holes, and cordless one single speed stanley 602, I think... Test fits showed one side was about spot one But the other was a hair too tight. Block plane to adjust. Folded it up to check things out Then added some of that SMELLY BLO to the new wood, and unfolded it to dry Adda backsaw and we are ready to go to work. need to transfer the art work to the new wood, though. Haven't figured that out just yet. Not a bad afternoon project?
-
That came out of Southern Cal. Seems about five block planes were hiding in there... with a very OLD Stanley 9-1/2 leading the way. Took a few days to refurbish all five of these, two days actually. Things as simple as removing all the rust and grime. Have a H-F drill press set up for this sort of thing along with a few other brass wire brushes. Paint brush with a wee bit of 3in1 Oil on it, to scrub away the grime. Sharpened all but ONE iron. It was just too short to do. Set up a test track of White Oak. The old 9-1/2 decided not to do a test drive. Pin to advance the short iron was too worn down, anyway, next, the "other" 9-1/2 Quite a bit newer, and it did make a shaving or two. Next, a Stanley 9-1/4 Stanley made this to look like the 9-1/2s but these did not have the adjustable mouth. I use a 1" x 30" beltsander to get an edge close to sharp, then an oil stone, then some 2500 grit to polish. Next was a Stanley #220 These used a screw to advance/retract the sharp edge. These are also about an inch longer than the 9s were. Finally in this line up. This is a Buck Brothers #110 wannabe. The sides were painted a gray colour. Went to remove the paint on the belt sander......found pot metal! Ok, ground the sole flat as well, and gave the sides and sole a good, mirror like polish. Sharpen the iron up, and test drive it a bit I guess SHARP is everything. Sides aren't too hateful, either And now the "after shot" of the Parade Not too bad? Well, stay tuned, as there are a few more planes in that LARGE box of goodies...
- 6 replies
-
- 3
-
-
- stanley
- block plane
- (and 1 more)