Search the Community
Showing results for tags 'poly'.
Found 13 results
-
As Steve Mickley used to say, "The worst thing to happen to a can." https://www.woodmagazine.com/woodworking-how-to/finishes-finishing/save-time-with-an-all-in-one-stain-and-finish?did=9924535-20230810&utm_campaign=wood-online_newsletter&utm_source=wood&utm_medium=email&utm_content=081023&lctg=b0b455ea13e71c23a3fc22b044c0be06fb838bd1
-
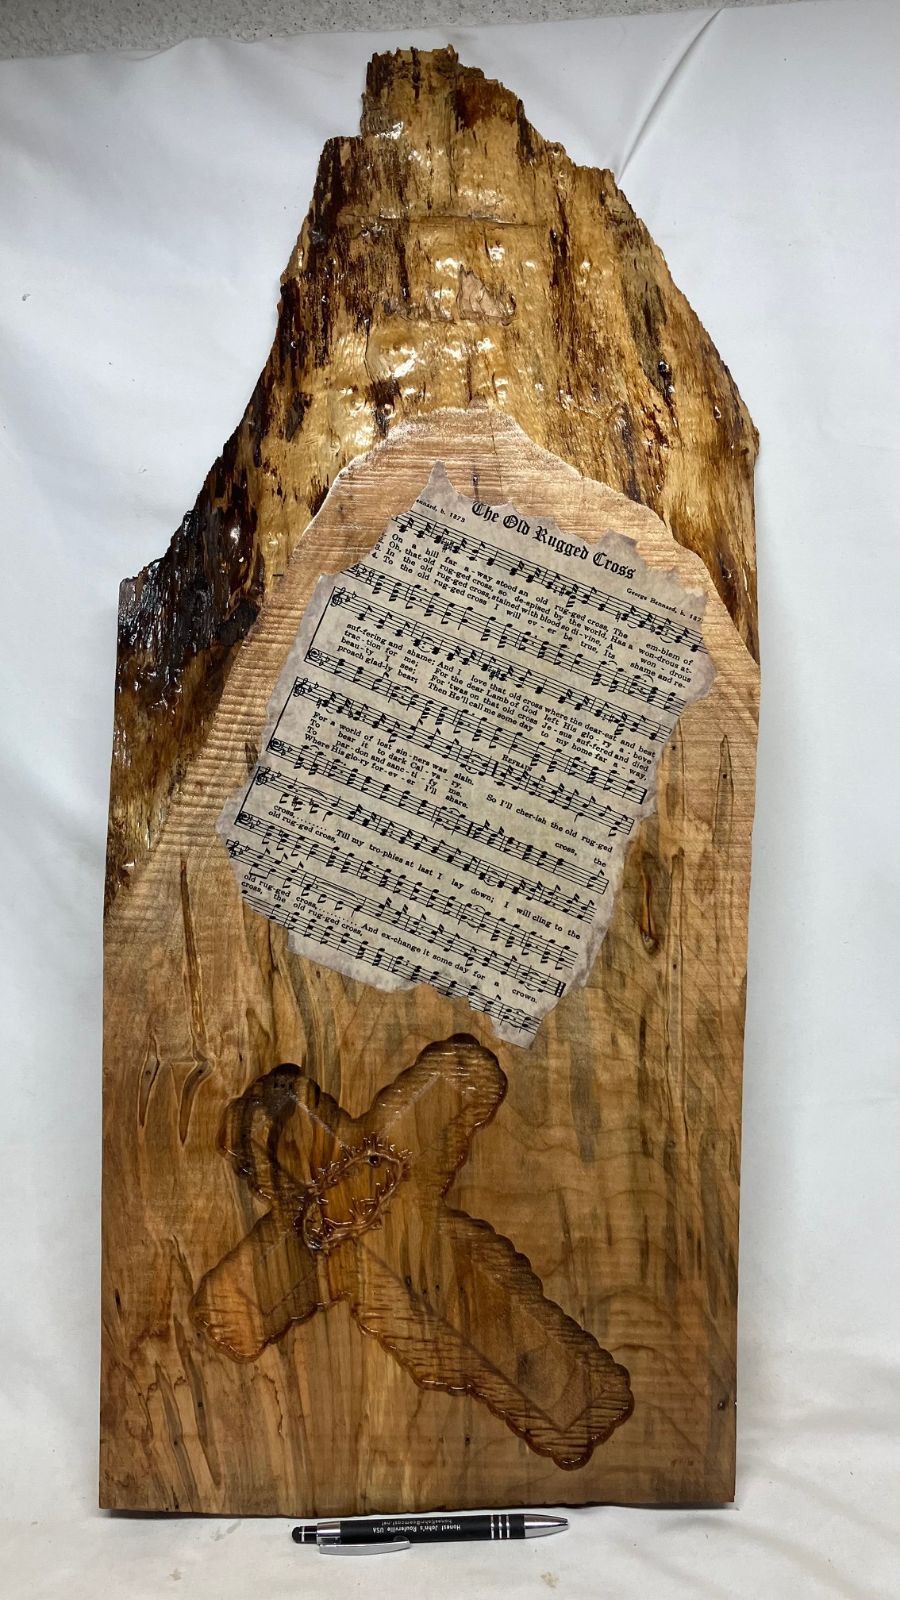
Had a cut off live edge slab laying around looking for something to do. Might have overdid it since it's about 30" high even after trimming. Natural wood with 3 coats of poly.

-
Please bear with me. The following has many assumptions & when i'm wrong please enlighten me. Currently I'm in the process of making pens---by orders of SWMBO. Pen turning is not my most thrilling task. I am using CA (thin) & CA polish to finish the pens. Multiple coats (minimum of 3 each). This leaves a glossy/glassy finish---which seems to be the intent of using CA (assumption #1)---CA is expensive (fact #1). Previously, when using & reviewing the use of polyurethane, it also leaves a glossy/glassy (some say plastic looking) finish. (Assumption & fact #2). You can see where this is going--right? If the intent is to leave a glossy finish--why not just use poly (the cheap way out)? I have NOT compared the perceived depth of finish between the two (CA & poly) but would assume (#3) that multiple coats of poly can be built on each other to obtain the desired depth of finish. After building the finish, either with CA or poly, is it recommended to apply a finishing wax to the pen? I'm assuming (#4) that the wax would dull the sheen somewhat and possibly wear off with use. All comments, bombs, daggers, etc. welcome. Thks smitty
- 4 replies
-
- 2
-

-
- pen turning
- gloss finish
- (and 3 more)
-
Here is a project I recently completed. 1/2" BB, #65 drill bit, all spiral blades olson #2, FD #2/0, minwax grey stain, 3 coats satin Poly, highlights with craft glitter paint. I used spiral blade to get the thickness of the kerf as close to the drill bit as I could.
- 3 replies
-
- 8
-
-
- baltic birch
- balticbirch
- (and 6 more)
-
Having just brushed on coat #3 of shellac onto the Spokeshave case...was wondering IF I could do a top coat of Clear Gloss Poly over that...?
-
Cutting, shaping, joinery, glue up and assy I can get that. If I mess up I just make another piece. But when all of that is done after maybe 50 hours of work and it is sitting there awaiting finish - I freeze. One mistake here and the entire project can turn into $250 in hard wood and 50 hours into tragedy. Am I mental? This is of course not at all out of the question. Is this typical or is it just me. Spray on - wipe on - brush on. Poly, oil, shellac, varnish, stain, polyshades. Uneven finish, runs, streaks. At times it feels like I am in a zombie movie and all of these issues are out to get me. So, I sit and look at the project in all of its unfinished glory and the more I look at it the more it seems it is looking at me and waiting.
-
On these hot days, my garage/shop stays cool until late afternoon. These kind of days make me want to stay in my shop with an extended project and stay cool while doing it. So I made this out of colored ply and acrylic. It wasn't without failure......several times. The ply is weak when thin and had defects in it that make things worse. The poly has VERY hard places in it and will break like ice when you hit a hard spot, especially in a thin dia piece. The gold at the joints is glitter, the kind kids use that comes in a squeeze bottle, 3 for a buck at the dollar store. The glitter takes overnight to dry and I spray it all with clear acrylic when dry. You won't see another like it
-

From the album: coffee table
Live edge American cherry coffee table. Top measures 50" long and 24" wide and stands 21" tall. Danish oil and 2 coats of wipe on poly to top surface for added protection. Legs are made from the cutoffs from canting some of the logs. I try to use as much of the tree as I can for conservation and to add some interest in my work. The legs are the corner blocks for the skirt and can not be removed and , I may add a lower shelf after I talk to the person it is being made for. -
 2 small lap top tables or end tables I made for a close friend that has brought me a lot or rough sawn cherry. They are solid cherry with 1/4 sawn cherry center panels. Tungoil oil finish the tops also have 2 coats of wipe on poly for added protection. The small kitchen table is made of live edge cherry. The top is only 48 inches long and is 25 1/2 inches at its widest point and 30 inches tall. Again tungoil followed by 2 coats of wipe on poly. Took a bit of looking through my stock to find the right looking pcs for the leg shape I wanted.
- 3 comments
-
- 1
-
-
- small tables
- kitchen table
- (and 5 more)
-
TGIF 2017-06-27 Last week, we looked at varnish, how it’s made and its properties. Today we’ll look at two of the three ways to apply this finish – spray and brushing. Spraying Don’t, just don’t. When I first got my spray gun, I tried spraying poly. I still have spots on the top of my tool box and I’m glad my cars were well out of the way. Why? Shellac, lacquer and water borne, dry very quickly. The over-spray dries and settles as dust. Varnish dries slowly, so the over-spray drifts, lands on flat surfaces wet, where it dries and cures. And it didn’t get cleaned out very well from the gun, which then required a good cleaning. Shellac and lacquer are easily cleaned from the gun with their respective solvent. Brushing Process Here is the technique that I use. The first coat provides the “sealer” There is no need to use a separate sanding sealer. There are several disadvantages to a sanding sealer – another product to buy and its reduced resistance to impacts and water vapor transfer. Sanding – Few of enjoy sanding, yet a poorly sanded surface will not give you a good finish. I usually stop at 120 or 150, or 220 if I’m refinishing a veneered surface. After sanding wipe off dust with a cloth dampened in mineral spirits. For opened-pored woods like oak, you might blow out the grain with compressed air. Preparation - Since varnish can attract dust into its finish, being clean is very important. Work in a clean room, preferably not the one where you’ve done sanding, clean the surfaces prior to applying the varnish, wear clean clothes, and apply the finish and leave for the day. Also pour some finish out in a separate container and use it from there. This keeps debris from getting into the varnish can. You can also use a paper filter to filter out any lumps. When you can, work on horizontal surfaces and with a long angle light behind the finishing surface. Use a natural bristle brush. Shake out any loose hairs prior to use. Then dip in mineral spirits to condition the brush. For the first few coats I use a good quality brush. For the last coat or two, I use a “badger-hair brush”. No badgers were actually used in its construction. If you are using a satin or semi-gloss varnish, stir the finish well before dispensing into your application container. Stir again after thinning and stir regularly during application as the flatteners will settle out. First coat – thin the varnish significantly so that it cures faster (a thinner coat). I thin 50:50 with mineral spirits. Apply with a brush. No need to be super critical here, just avoid heavy runs and puddles. Let dry overnight in a room-temperature room. Temperatures below 60 or above 80 will affect any coat curing Second coat - repeat same process as first coat. Third coat – Sand with P400 sandpaper. I like to use 3M’s 216U (sometimes labeled “Sandblaster.”) This will level the surface and remove any raised grain. You can also use ScotchBrite light gray to get an overall dullness to the surface. Wipe the surface with a lint-free cloth dampened in mineral spirits. For this coat, thin the varnish, somewhat less, usually 3:1 varnish to thinner. Many varnishes are very thick in the can to comply with VOC regulations. Adding thinner may take it out of compliance, but will make a much better flow out. Your objective here is to put on a thin coat. Thick coats cure longer and sometimes poorly. It's why varnish can look plastic or have deep brush marks. If you've ever seen a thick run or drip that is just gummy underneath, you see that thick coats don't cure well as they cure from the top down. Apply the finish in the direction of the grain. Flow off the end of the board and start the stroke about 1” in from the end. Once you’ve applied the finish, wipe the brush off on a rag and tip-off the finish by moving this brush across the surface with a light tough and nearly vertical to the surface. This will smooth the finish, cut down the thick parts and fill up the low spots. Let dry overnight. Fourth coat – Sand like for third coat. Lightly sand with same sandpaper and clean as before. This this coat, but now only about 10%. Apply in the same way as the third coat. If you are happy now, you can quit, but you have a couple more options. · Apply a fifth coat just like the fourth · Sand again and apply a thin coat of wiping varnish (next week’s topic) This will give you a nice even finish. · Finish the finish to smooth it out. One way is rub with 0000 steel wool and furniture wax, then buff out the wax with a clean soft cloth. Or you can take a crumpled up paper grocery bag to lightly abrade the surface. · Rub out with rubbing compounds (after 3 -4 weeks cure time). Varnish does not rub out as well as harder finishes like shellac or lacquer, so it’s better to just pick the right sheen from the can. Sheen information If you want a flatter finish than you have, you can let the varnish sit for a few days. Decant off the top part of the can and stir up the bottom part that will have the majority of the flatteners. Some people say to apply gloss finish up to the last coat, since it determines the final sheen. Not a problem if you have it, but I’d not buy a second product just for this purpose if I didn’t have other needs for it. Cleaning the brush I keep two or three jars of mineral spirits and label them III, II, and I. First wipe off the excess varnish from the brush onto a clean rag. Then dip and swish in jar III. Wipe off again, Dip in jar II, wipe off. Then dip in jar I. In time, jar III will get too gunky to use. Let it dry out and throw out the solid residue. Promote jar II to jar III, jar I to jar II, and start a new jar I with fresh mineral spirits. Store each jar with a well-fitting lid. Once you’ve reached this stage, I have another jar with lacquer thinner that will clean and remove some of the oiliness of mineral spirits. Wipe the brush dry and store in its jacket to dry. Over time the brush may get thick. You can buy a commercial brush cleaner that is a soup of solvents that will strip out most finishes. I also have use NMP stripper as it’s a bit gentler on the bristles and less noxious to the user. I wait until I have a few brushes in this state, then soak overnight in the solution with a plastic bag rubber banded over the top. Some more reading: http://www.popularwoodworking.com/techniques/finishing/finishing-for-first-timers
-
Well,at least the first coat, anyway. Got the supplies today. SMALL can of gloss Poly, a brush, and some foot pads... Foot Pads? Yeah, those white plastic Doo-dads you nail into the bottom of a table's legs. I also routered a fancy edge to the table's top. A cross between an cove and an Ogee profile. I also plugged the screw holes, and then trimmed the plugs flush... Three plugs are there....Turned the table onto it's top. Time to brush on a bit of Poly Gloss.. A little sloppy. The real trick was to tip the table back onto it's (new) feet, without getting anything on ME. Then come back and "tip-off" the top.. Will have to rub this one out. Also tipped off the shelf. Just might do. There is a hole in the one leg, where there was alot of sap wood? Turns out there is a knot on the other side of that leg, and the hole goes right through the knot...call it a bullet hole? Will let this dry for awhile, and then see about IF it will need the second coat. Been a fun project, so far. Plan is from my Single Brain Cell Sketch Up...never even wrote anything down..
-
Commissioned trophy case. 32"wide, 30 1/2" high 11" deep Adjustable oak shelving Sliding glass doors. Red oak carcass with red oak ply back. Finish is 1 coat of 50/50 BLO & poly and two coats of 80% poly and 20% BLO followed by Paste wax. This is one heavy box, and with the 1/4" thick glass doors it's really heavy. It's weight is the reason for the modified Freedomcleat on the back. The top half of the cleat is placed 1/2" from the back. The lower half has a piece of 1.24 MM BB attached to engage the cleat. It looks like a lighted cabinet. It's not. That's a reflection of a florescent behind me.