sreilly24590
-
Posts
192 -
Joined
-
Last visited
Content Type
Profiles
Forums
Gallery
Military
Glossary
Events
Downloads
Blogs
Store
Links Directory
Community Map
Everything posted by sreilly24590
-
Beautiful flag case and a stark reminder of the walnut I have set aside for my Father's flag. That walnut is from Monticello and was a very old tree when someone in authority decided that Thomas Jefferson stood at a particular spot and looked down at the University of Virginia in which he had a very active role in building. There was this walnut tree now blocking the view so they had it cut down. Fortunately my Father-in-Law, a self taught woodworker, was very good friends with the gentleman that got that contract and ended up with a fair amount of wood. I really need to nail down those plans and finally build this important flag case. He retired at 65 and was gone by 68. Of course being me, I shook things up when we moved from NJ to Va in 1961 and was telling my teachers that my Father was a Black Panther, The Black Panther Division. A very big regret was not securing his books fro the Army. One was a formal journal, like a year book, of his unit while the other was more laid back with random pictures of his unit both in the field and informal pictures. These were lost over the years.
-

Friday July 14th 2023-What's on Your Weekend Agenda?
sreilly24590 replied to Larry Buskirk's topic in General Woodworking
I've gotten into a woodworking slump and haven't been doing any woodworking for weeks now. Tied up with a new remote telescope project that is consuming time and patience. Rain has been too much this month with over 6.5" so far and temps in the high 90's. But I do have a woodworking class in a nearby town on using hand planes so that's a good thing. I have a number of old hand planes handed down from my deceased Father-in-Law and they need a proper education to use as intended. He was just shy of 101 when he passed back over 21 years ago and was a self taught woodworker who did some beautify work which is proudly displayed in our home in lamps, Grandmother clocks, Granddaughter clocks, mantle clocks....there's a trend here. He made well over 30 Granddaughter clocks for friends and relatives. Maybe this class will lend itself to respectively using his planes. Need a kick start as I have 2 in-progress blanket chests that nee to be completed. One is for my oldest Granddaughter. Just need the butt hinges and finish and attach the top..... -
Not sure if that's a King or Queen but I hope you have plenty of help carrying it to it's resting place.....that is one sweet bed!
-
thickness you can plane down to using wood planer
sreilly24590 replied to Lissa Hall's topic in General Woodworking
Not seeing the wood my 1st run at it would be to resaw it using a band saw. How wide are these boards? If only a couple of inches maybe a table saw if you don't have access to a band saw. -
Been there done that and yes, dovetails are by far, in my opinion, the hardest of joints. I'm in the very long process of making a cherry blanket chest for one of my granddaughters and even with the use of the Leigh Jig I had issues. One one attempt it was so bad that I ended up cutting the dovetails off and using miters with dovetail splines. The second attempt using Ash I had dovetail so tight they wouldn't mesh. At that point I took my pencil and traced the fit then used my chisels to very patiently carve back the oversized tails. It took a good while and lots of patience but I was able to keep square and get clean good fitting joints. My hat's off to you for your patience and endurance,
-
Truly inspiring and a testament to your wife.
-
The first few I went to were about 2 hrs drive from home and had plenty of vendors and participants. The advantage for me was the ability to see and feel the equipment as well as learn new to me technique. The only thing I was able to takeaway from this failed show was that Felder was there and happened to have a piece of equipment that I was very interested in and had been for a while. Prior to the show my interest dropped because I was unable to see and feel what I was going to be spending so much on. It was akin to buying a car when only reading and seeing pictures of it. That kind of money needed more to be supported by seeing the actual quality and hearing it in person, or at least for me it did. The show accomplished that and I was convinced that it was a solid piece of equipment and saw the value in the fact that it should last a very long time and do an excellent job for my needs. It was something that should hold value and be worthy of passing down when the time came. The down side was being mislead by almost $800 plus an additional $400-$500 to ship. To add mobility it required either a kit from them or a mobile base as well as at least one extension if not two. The cost just kept rising... As for the other shows I'd been to they well well worth it as they had demonstrations and well know vendors on-site such as Lee Valley with their full display of Veritas hand planes, Carter selling band saw blades but more importantly it was where I saw "Band Saw Clinic with Alex Snodgrass" which for me was an eye opener and worth the trip on its own. There were tools you could actually try as was true with Lee Valley and the hand planes they sold. While you couldn't by the planes there you certainly got excellent feel and instruction on how to use them as well by having personal demonstration on wood with an advisor. That old "try before you buy" is a great sales point, at least for me. Unfortunately since COVID this show has been canceled but apparently going again but now almost 3 hours away meaning at least a one night stay in a rather expensive area. Maybe next year.....
-
Thanks Paul, That seems to be what I've found out online. I was out all day today and got a call from the Delaware location. This may turn into a deep conversation with them......
-
No doubt the saw is nice but I can see limitations as to what I use my saw for and the jigs I use. The safety features are a nice touch. I think this design is more of a production type.
-
Thanks Fred, The quality of their equipment looks far better then most and the sliding table saw was on display. This was a 12" model but they make it from 10" up to 16" I think and they have a technology that lowers the blade assembly extremely fast without any damage to the blade using proximity sensor type devices. So maybe better than the SawStop system I have. That was impressive as well.
-
Well I thought I had found a good close show (Richmond, Va) to go to but seems this was their 1st year and there were only 3 vendors there when we arrived yesterday. One huge area and only 3 vendors. Luckily one of them was The Felder Group and they had some machinery on site. The one that grabbed my attention was the A331, a 12" jointer/planer and it had a spiral helical head cutter that was new to me. Two rows of cutters unlike others I had seen that had multiple rows, some straight across. This had 2 and were spiraled with cutters side by side across the head. I was skeptical at 1st then the fella edged a hardwood board in several passes then did the face. It runs at 72 db, very quiet but the most impressive part was the finish of the board. If I were going to start sanding the board I would have started at 180-200 grit. It was so smooth and looked ready for finish. I was told the cutters have 4 sides and the current setup has about 4,000 hours and still using the original 1st surface which seems incredible if accurate. It wouldn't bode well to exaggerate the wear factor..... I figured selling my older Powermatic, dated back to when they were transiting from USA to Asia, and I had installed a Helix helical head on it, I'd get maybe 1/3rd of the machine costs. Unfortunately the figure I was told at the show isn't realistic. I've tried multiple times to nail down the actual cost from the rep I spoke with and I get no response although he had answered the phone Saturday morinng and said he'd call back in 15 minutes. Not happy with the lack of communication, email or phone. So based on what I saw and what I was told it seems like a good piece of equipment but I'm not sure if/how the support really is. I was advised around $4K but that's closer to the price with the 3 knife option. Anyone here using this combo and care to advise on how well it works and support? At this point I'm really disappointed in the lack of communication and don't want to get the guy in trouble. maybe he's new.
-
Mission Bedroom set - Nightstand is complete
sreilly24590 replied to Danl's topic in General Woodworking
Excellent and a a lesson in patience I'm sure. -
Sweet!
-
Thanks for the replies. Seems more dependent on the project itself. I'm working on taking the sections apart one at a time. I have 3 main sections and working on the top first. I'm doing this for several reasons......keeping the area needed to apply finish and sanding down to two workbenches in case something comes up I need to do outside of this project. And marking the parts as to not mix them up (left, right, up, down, etc). Beginning to regret not having put the edging trim on the parts 1st but they are exact size and now hanging on a rack for finishing applications. I really need to get the sprayer out and get some practice.......
-
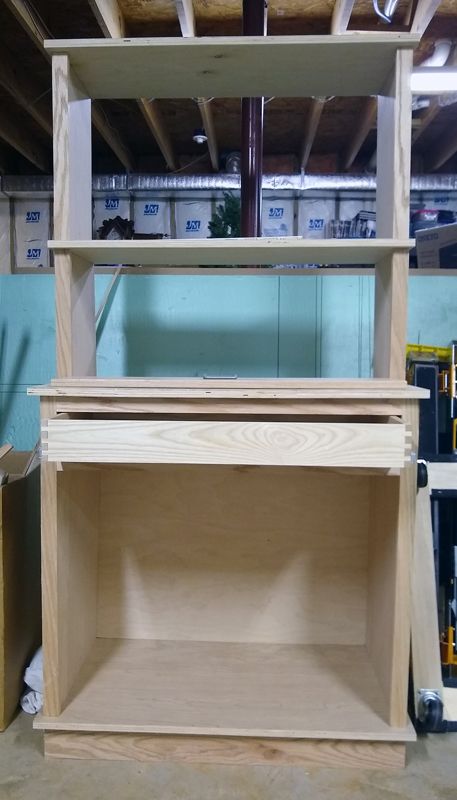
Seems over the years I've always built my projects and then applied the finish. Now I'm beginning to question that very practice. I'm working on a office cabinet/bookcase for my wife. The sides and shelves are plywood while the trim and doors are solid white oak. The carcass is assembled using pocket screws. As is I've got open shelves on the top section w/no doors while the lower section has a drawer and below that will be an adjustable shelf and have two raised panel doors. The caucus as done so far is attached. I am using General Finishes High Performance Satin as I have been on almost everything for years. I just like it's durability, finish, and ease of applying. What is generally the accepted process to applying finish, do the individual parts before assembly or assemble then apply? I can see pros and cons for both processes but I think in this case it may be easier to do the parts then assemble. The corners where parts meet would be cleaner I think but then again I'd like to hear what others do in these cases. I also need to clarify that I'll be using the sponge brushes to apply. Likely to have 4-5 coats with sanding between of course. I have yet to use my new Apollo Eco 4 HVLP sprayer I bought several years ago hoping a class would come up at Woodcraft.......but that's another story.

-
Thanks Fred. I'll go through the setup again and have done that several times but another doesn't hurt or take long. It's mounted on a board as they suggest. I'm using one of my Bosch 1617EVS which I got a centering pin for and works well. I'll triple check that as well. I need to mill some pine or poplar to exact thickness for more trail material. My 1st thoughts have been and are still in the back of my mind the depth of cut after changing bits is causing me issues. I think making some edge that can be temporarily attached so you can lower the bit and not be bent over while lowering the bit in a position that doesn't have the best lighting may also be playing a role. I also had seen a tip where marking the board on the outfacing side to make sure the boards are orientated properly would help and will do as well. You are right on as to their manual and expertise over the phone. Friendliest bunch I've dealt with as dealers go. Maybe I've not given it enough time to get use to its use yet. I have many irons in the fire so to say......... Thanks Again, Steve
- 4 replies
-
- 1
-

-
- dovetail jig
- jig
- (and 1 more)
-
I'm sure it's something simple that I'm simply overlooking but.....the issue with some of these jigs is if you don't use them often the next time is almost like the 1st, especially when you get on in years..... As for the spacing I can make that what I want as long as both sides are identical which they would be as you cut one (pins/tales) 1st then flip the finger assembly and do the other. Or I could get more fingers and use a tighter arrangement but that changes nothing as you still cut the one and flip for the other. Most critical seems to be the depth of the bit.
- 4 replies
-
- 3
-
-
- dovetail jig
- jig
- (and 1 more)
-
Seems I was a bit too confidant in using the above jig that I got for 2 reasons: 1) I really wanted a wide capacity dovetail jig and Leigh had this 24" one with great reviews 2) I had promised to make my oldest granddaughter this cherry blanket chest I had plans for that i really like. Well I have the jig and the wood is all milled up but my test dovetails on the same thickness boards aren't quite there yet. Due to a number of circumstances I shelved this project till I had more time to practice and get the joints right but that hasn't happened in the past year. I've watched the videos and re-read the manual but the results aren't getting that much better. I'm more than sure this jig is capable of repeatable well fitting dovetails but I haven't discovered the touch yet. Any suggestions and/or videos that aren't Leigh's (I've watched all of those several times) that might give me the ah-ha moment or suggested tips? I really need to get this on track again.....
- 4 replies
-
- 4
-
-
- dovetail jig
- jig
- (and 1 more)
-
Very nicely done. I need to get back in my shop and get back to making sawdust....a few cross supports and you've got a cabin bunk bed!
-
So you're one of those guys eh? Actually I could stand to learn some skills with hand planes and such. I've bought a few old ones and cleaned them up and sharpened the cutters but have yet to spend the time actually trying to use them. Most of my attempts left me with either too thick a slice and uneven or barely crapping the top. Nice work Steve. Steve
- 57 replies
-
- 12
-
-

-
JT, that's the neatest chicken coop I think I've ever seen. Better living accommodations that some people have. I'd say you're in it for more then eggs....great job.
-
I thought scraps were sawdust....just saying. Question is what are you going to do with 531 cutting boards ? All kidding aside they should make some great cutting boards and very nice gifts.
- 10 replies
-
- 5
-
-
- end grain
- cutting board
- (and 1 more)
-
Ya done good Tom. A great way to honor your wife's wishes and I'm sure she's pleased. They look far sturdier then most that I've seen. Unique project and 1st time I've seen this. Which issue was this if it isn't a problem?
- 20 replies
-
- 8
-
-
- gel polyurethane
- gel stain
- (and 3 more)
-
Got it thanks! And I've seen that before but.....now printed out and ready for use as long as I don't forget where I put it....even on the workbench isn't always a good idea!
-
Good advice guys and I hadn't really thought of the inside which makes total sense. I think I understand the tape usage from the standpoint of say a mitered joint but how do you apply one on a dovetail joint? I don't recall ever seeing that before but anything that reduces/eliminates the chance of glue squeezing out and showing outside the joint is a good thing. Gene, no liners on these. Just keeping the 1st ones simple for now. Thanks for the nudge in the right direction. At this point I only have 3 coats of satin finish on the top of the covers. I'm using those pointed triangular stands to support the pieces while they dry and using, for the 1st time since getting them many months ago, those shaped rubber Contour Sanding Pads like those. Really helped on the small round-over edge on the other top. Some new ground on this project and very productive. I used for the 1st time my Mega Flush Trim Router Bit which did a fantastic job and will get far more use in the near future when using templates (new to me). Using the Incra LS Positioner which I have installed on my SawStop table saw to do dovetails of different types. Several new cutters were used that I had previously gotten knowing I had these types of projects in the near future. I'm a huge fan of Whiteside bits and have been for years. Not saying they don't have some quality competition but they haven't let me down yet. I've had two bits break on me over the years and bother were very small diameter slot cutters. Either I was too deep or too fast when they broke and both time sit was my fault. Besides my table saw, I'd have to say my router table is one of my most used tools and I have enjoyed it so much since building it.