

Danl
-
Posts
734 -
Joined
-
Last visited
Content Type
Profiles
Forums
Gallery
Military
Glossary
Events
Downloads
Blogs
Store
Links Directory
Community Map
Posts posted by Danl
-
-
Sorry, I missed your original post. Very nice for sure. I like all of the different dye colors. the dice cups are awesome. Danl
- Cal, Gerald and Grandpadave52
-
 2
2
-
 1
1
-
- Popular Post
- Popular Post
1 hour ago, John Morris said:If it was dangerous or deceptive Cal, I'd never ever ever, expose ya'll to something like that. I bet DanL has his own reasons and I am sure they are important to him.
But as far as anything here in this community, after 13 years of being live as a community, I am sure you all have a pretty good level of trust in me?
")
I wanted to post my opinion and I hope that I did not offend anyone. If I did, I sincerely apologize. I have no reason to think that this forum is other than safe. I came from a professional world were my company was being attacked every day and they had firewalls on top of firewalls and as an employee we were advised and told what to do to try to eliminate the "bad guy" from entering our systems/computer. One defensive approach I took and still use is to not use links when ever I could type the URL. Regularly, I receive email which looks like it came from Amazon, but it is not from Amazon. Thank you all for your kindness and support. I do enjoy being a part of this forum. Danl
- Fred W. Hargis Jr, John Morris, HARO50 and 2 others
-
4
-
1
-
- Popular Post
- Popular Post
This will likely be the final post for the mission style bed but hopefully more posts will follow for the mission style chest-of-drawers; all apart of the mission style bedroom set. The bed was put into the spare bedroom yesterday alongside the mission style nightstand. Thanks for looking. Danl
Posting log for the Mission style Bedroom set journey
1. Help me with my lumber hauling Feb. 15, 2022
2. White oak is here Feb. 28, 2023
3. Moxon vise May 15, 2022
4. TS - tenoning jig May 29, 2023
5. Double tenons June 5, 2022
6. Mission Bedroom set – making progress July 23, 2022
7. Mission Bedroom set – making progress – take 2 Sept. 18, 2022
8. Inlay lines & dots Sept. 30, 2022
9. Mission Bedroom set – Nightstand door Oct. 9, 2022
10. Table saw made dovetail joinery for a drawer Nov. 13, 2022
11. Mission Bedroom set – Nightstand is complete Dec. 23, 2022
12. Mission style bed – prototype March 7, 2023
13. Mission style bed – production -1 May 23, 2023
14. Mission style bed – production – 2 June 3, 2023
15. Mission style bed – production – 3 June 15, 2023
16. Mission style bed – production – 4 June 21, 2023
17. Mission style bed – production – 5 July 22, 2023
18. Mission style bed – production – final Aug. 13, 2023

-
I use Amazon and I would never use the link. I always type in the URL for the sites I want to visit.
Danl
- John Morris, HARO50 and Cal
-
3
-
2 hours ago, Danl said:
Clever gift idea. I look forward to seeing the one you build. thanks Danl
Sorry for the misspelling. Danl
- Larry Buskirk, Cal, Grandpadave52 and 1 other
-
2
-
 1
1
-
 1
1
-
- Popular Post
- Popular Post
Cleaver gift idea. I look forward to seeing the one you build. thanks Danl
- steven newman, lew, Grandpadave52 and 2 others
-
5
-
Beautifully done! thanks
Danl
- FrederickH and Cal
-
2
-
- Popular Post
- Popular Post
On 7/29/2023 at 10:59 PM, Grandpadave52 said:Not a turner, but yes I have too many to count pictures as well as countless free project plans. All filed in the "round2it" folder.
 Then more pictures, ideas and plans for jigs, fixtures, benches, carts, shop accessories etc. Just waiting on Groucho to deliver a case of Geritol to get started.
")
I am much the same, including sketch-up files. I know that I have more ideas than I have years. Danl
- Grandpadave52, Larry Buskirk, Al B and 5 others
-
8
-
The hot weather is playing havoc with the completion. I need to perform a little more spraying of finish and it is either too hot or too humid or both. I guess I now have the time to get a hair cut. Thanks for the kind words. Danl
-
- Popular Post
- Popular Post
A few more progress pics of the Mission style bed build. Danl
I do not have a pic of the side-rail cleat before glue-up to the side rail. This is a pic of the final assembly of the side rail with the cleat being attached.
I made a simple jig to help make the cleat dove-tail. The dove-tail will accept the bed slats. The cleat is being held in my Moxon vise. I removed most of the material with the table saw and then used a router with a trim bit. The temporary tenons in the side of the rails will aid with the spray finishing. The rail slats are made from poplar wood.
Sample board showing the progression of the finishing process. Raw QSWO, one coat of Transtint medium brown in DA, then sprayed with 1-1/2# seal coat, then one coat of General Finishes Antique Walnut, then sprayed with 1-1/2# seal coat, then three oats of Sherwin Williams Sher-wood Kem Aqua plus (WB lacquer).
I spray in my garage and the weather is hot. Cure time is in the kitchen.
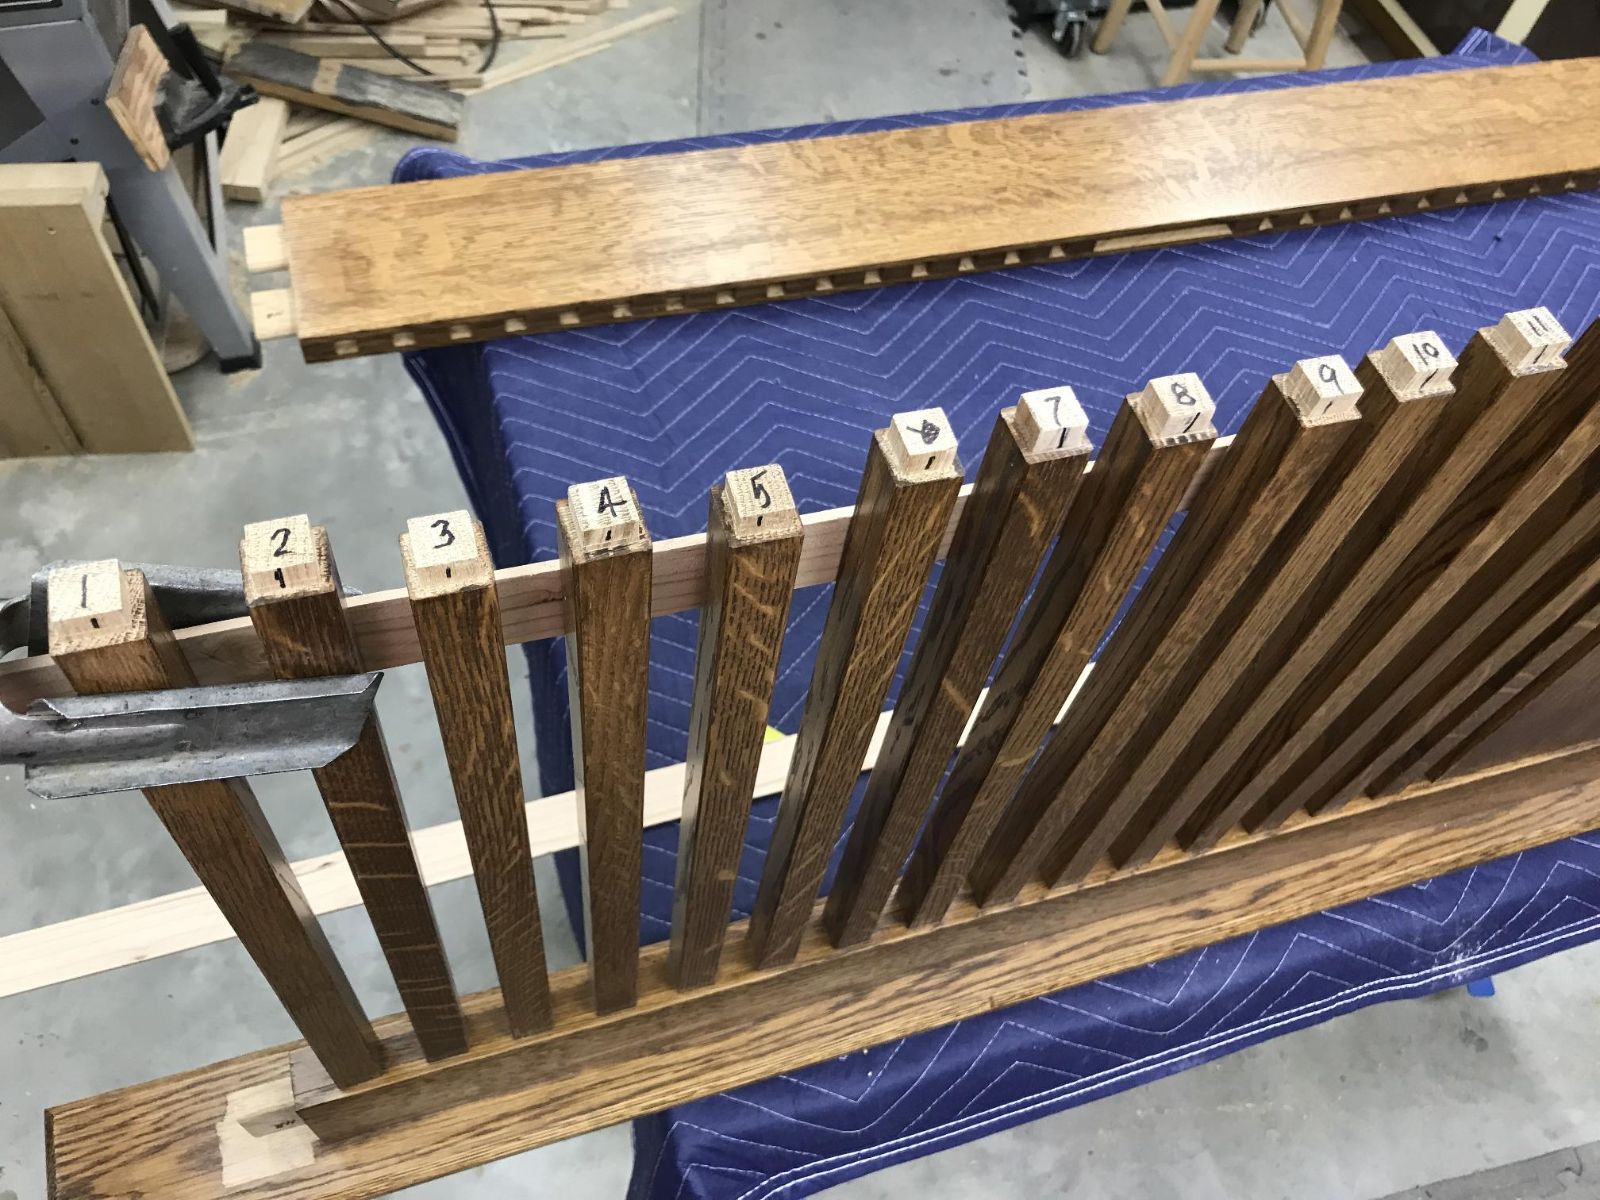
Now time to assemble the footboard. The first dry-run took 1 hour by myself. My wife and I were able to get the spindles glued in 10 min and final glue-up in 1/2 hour. I used Titebond hide glue for the adhesive. The two pine strips aided in holding the spindles in location while flipping the top rail and strips 90-deg and then positioning the lower rail. The footboard had 68 joints. The fit-up of the spindles to the rails were fairly tight before adding the glue. The pine strip closes to the lower rail was made 1/64"-1/32" thinner than the gap measurement to aid in the assembly. All of the spindle were numbered and had a reference mark to assure clocking orientation to get the "pretty side" on the correct side. Numerous glue aids were made. Most were painted red.
The next day I glued the headboard assembly. It is similar to the footboard except with the addition of a 3rd rail and longer legs. To aid in the assy, I made the tenons on the lower rail 1/4" shorter than the upper and mid rail. I also made the tenons on the middle spindle, or center slat, 1/4" longer, top and bottom, than the other spindles for both the footboard and headboard.
Now time to add felt pads to the bottom of all the legs.
I still have to spray finish to the top cap of the footboard and headboard, spray finish to the side rails, and spray shellac on the bed slats. All of this before final assembly. I did trial install the side rails to the footboard and headboard. Pics will be forthcoming. Thanks for looking. Danl
- Grandpadave52, Fred W. Hargis Jr, Cal and 5 others
-
3
-
 4
4
-
 1
1
-
5 hours ago, Cal said:
That is beautiful Paul

Ditto! Beautifully done. Danl
- lew, Cal and Grandpadave52
-
3
-
- Popular Post
57 minutes ago, 4DThinker said:Are you sure? Helping a student clamp up a chair frame I put a 40" K-body clamp across the bottom of the legs to keep them from spreading, then used 36" K body clamps to pull the arms down into tenons on the top of the legs. The bar of the K-bodys tried to resist, but made beautiful arcs as I tightened them. A rare use for the clamps, but in a furniture design shop we had to get creative occasionally when students needed help.
Jon Peters has an interesting video about what clamps to us. Danl
-
40 minutes ago, KevTN said:
I thought about Mineral Spirits but I read, and please tell me if I am wrong, that it has water in it and takes longer to dry...
I do not think it has water in it because I have not had the grain raised from using it. Any time I use it it dries fast. I have never used DA for wiping, but I use it with dye and shellac. Danl
-
Mineral spirits is what I use all the time to wipe wood before finish to remove any sanding dust. Danl
-
his work is very innovative. thanks Danl
- John Morris and Cal
-
2
-
A few more progress pics of the Mission style bed build. Danl
Qty (60) 7/8" x 7/8" spindles with 1/2" x 5/8" x 5/8" tenons, both ends.
1/8" x 1/8" chamfers routered on the bottoms of the legs.
Headboard dry-fitted. The 1st time I tried the dry-fit it took 1 hr. This time it took 10 min. It should be adequate time with the Titebond hide glue.
Headboard, footboard and side-rails dry fitted with the slip tenon also not glued yet.
Epoxied the weld nut to the bottom of the slip tenon
Glued the slip tenon into the mortise and drill hole for peg (belt and suspender approach). The peg will be hidden when the headboard and footboards are assembled.
Used the cut-off to help make a gluing caul. I attached cork the side that touches the corbel. The corbel is splined to the leg.
Getting ready to apply finish. I will be finishing most parts separately. The finish schedule is (1) coat dye, seal coat, (1) coat stain, seal coat, and then 2-3 coats of WB lacquer.
Thanks for looking. Danl
-
On 6/18/2023 at 5:24 PM, Larry Buskirk said:
Gas tank on the log splitter was leaking.

After taking a closer look at it, it would appear something was chewing on it.

Checked with Bruce to see if he maybe had one like it, no such luck.
Bruce said it looked like a Racoons work.

 Online prices for that particular gas tank $80.00-136.00
 String Trimmer/mower line is basically the same type of plastic as that gas tank, I wonder.
Now where did I put that,...
Ok found it.
I filled it with water to check for leaks, wasn't sure if I could get it to seal or not but after the third try SUCCESS!
(There were two small holes about 1/4" apart)
Whatever it was chewed on the gas cap also. (It's still usable)
$80-136.00 for a plastic gas tank?

I had a leaking window washer tank on a car once. I cut a 1" x 1" patch from a plastic milk jug and fused it to the tank with a hair dryer. Held water for many years. Danl
-
Paul, the inlay looks nice and so the rest of the door. thanks Danl
- lew, Cal and Grandpadave52
-
3
-
-
Great idea and use of what you already have. thanks
Danl
- lew, Headhunter, Grandpadave52 and 1 other
-
3
-
1
-
-
A few more progress pics of the Mission style bed build. Danl
I added a profile to the footboard lower rail, similar to the design feature on the night stand.
Clamped a router jig to the side-rail for the 5/8" x 4-1/2" x 7/8" deep mortise which goes into the end of the side rail.
Using a router guide bushing and a spiral 1/2" up-cut router bit.
Clamped the router jig for the mounting hardware access 'T-slot
Clamped the router jig to router the mortice for the T-slot cover plate.
Added identification marking to the side-rail.
Added the identification markings to the legs.
I added masking tap to the TS fence to allow me to remove 0.004" from the slip tenon material to allow for a nice fit.
Temporary installed the slip tenons into their respect leg mortice after holes were drilled for the attachment bolt and hidden encapsulated nut.
Thanks for looking. Danl
- Cal, Grandpadave52, DuckSoup and 1 other
-
4
-
-
38 minutes ago, sreilly24590 said:
Not sure if that's a King or Queen but I hope you have plenty of help carrying it to it's resting place.....that is one sweet bed!
It is a queen size bed. I just hope the box springs fits inside of the rails. I could not find any plans that were for a queen size using a box spring. So, I used my best guess. Yes, it will be heavy. Thanks Danl
- Cal and Grandpadave52
-
2


Picnic basket - table
in General Woodworking
Posted
Looks nice. I like your choose of wood. Danl