Leaderboard
Popular Content
Showing content with the highest reputation on 10/14/2018 in all areas
-

Cherry Blanket Chest
Grandpadave52 and 5 others reacted to John Moody for a topic
Well for several weeks I have posted some pictures of this chest and I am happy to report to you that it is finished. Just a recap. Started with a visit to the Wood Stash and hand picked some of the best looking Cherry Boards from the stack. Cut them to size, ran them across the jointer and then through the planner. I then took the cherry boards and edge glued them together to make the panels for the front, back and both ends of the chest. Then I put two of these panels together to make a four board panel. Then I put the two four board panels together to make one large panel. Actually one of the panels had five boards.. Using my 50" Bessey clamps to hold the two panels together. So I had two long panels for the front and back and two short panels for the ends. Then I started working on a sample for the trim or molding to go around the top and bottom. After a few adjustments to the bits, I settled on the way I wanted to make the trim and started routing the pieces. First a couple of passes with the curved bit in the router and the with the round top bit and then a 1/2" round over bit. So I sanded the trim and then started on the feet for the chest. They are double boards so the chest actually sits on one board and the trim sits on the other board. There are blocks behind the feet to attach them to the plywood bottom. So everything is now trimmed up, miters cut and ready to put together. Now it is time to move it to the spray booth and put the water based dye on. I purchased an Antique Cherry dye and I really love the look it gave the chest. I sprayed it on and then took a damp paper towel and smoothed out the finish. If you get a bit much in a spot it is okay, you still have time to smooth it out. I put two coats on and then sprayed on five coats of General Finishes Enduro Var. It was them rubbed out with 0000 steel wool and Johnson's paste wax.. So there you have the Cherry Blanket Chest from start to finish.6 points -

Making smaller things
Cal and 4 others reacted to Smallpatch for a topic
Well I just went and bought him an outboard so he could carry the oars inside. If I hang it under the ceiling fan the prop will turn. Also makes a shaky picture. Prop must be out of balance. 5 points
 -

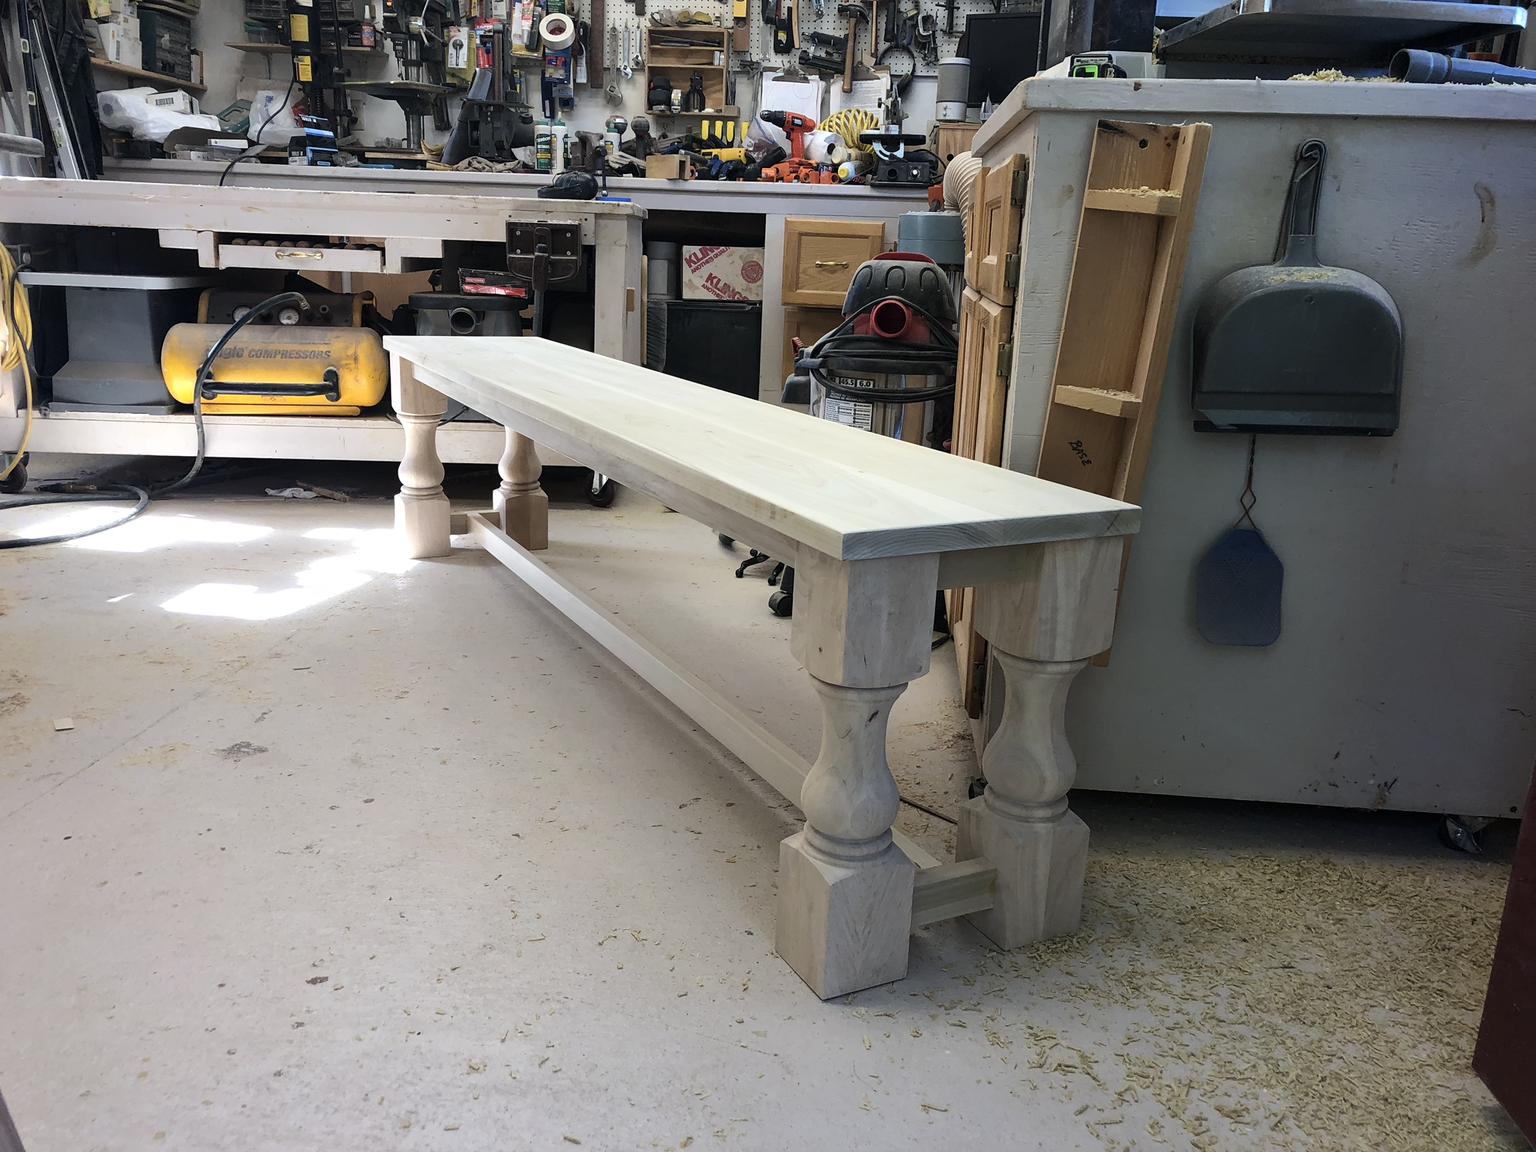
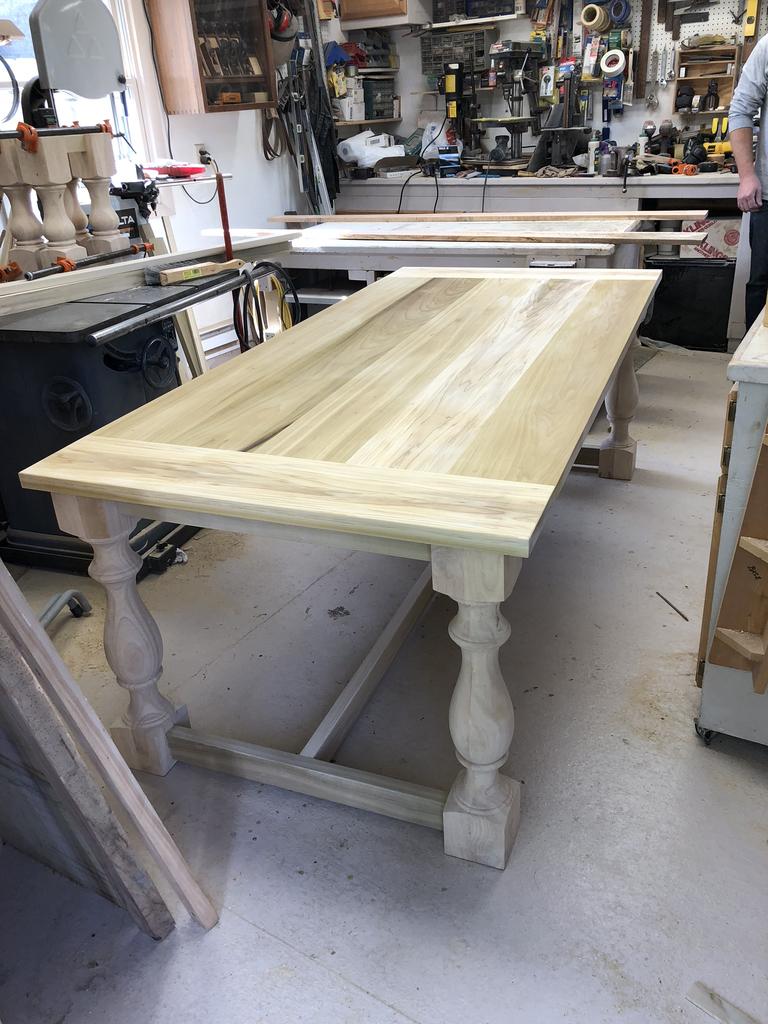
The Farmhouse Table
Harry Brink and 4 others reacted to Ron Dudelston for a topic
That bench is finished. The customer is going to buy 3 unfinished chairs to go with it
5 points -
The Farmhouse Table
Harry Brink and 3 others reacted to Ron Dudelston for a topic
The new owner owns a photography studio and I’ve already requested professional pics of the finished product.4 points -
Making smaller things
Artie and 2 others reacted to Smallpatch for a topic
A daughter gave my wife this as a gift. Its made from forks and spoons and eating things. So since we only have two or three of each to eat with I used wood instead.. I didn't think I would waste too many trees with this thing even though I added a few more fishing necessaries.. After looking it over while hanging up there I might should have put the oars farther up front for they look like his skinny legs where I put them... This is a picture of my fishing for all the big ones are still in the water..By the way , that is an exact photo of me in my own boat wife took some time ago. Didn't catch nothing that day.....
3 points -

Friday, October 12, 2018 - What’s on Your Weekend Agenda?
HARO50 and 2 others reacted to Larry Buskirk for a topic
What? I'm still trying to figure out what to do last weekend.3 points -

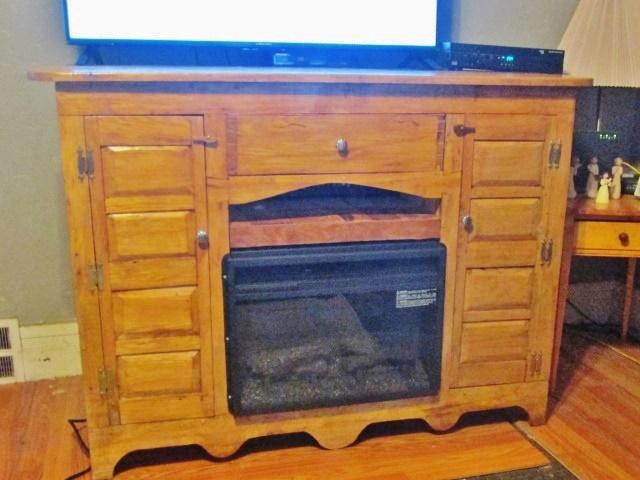
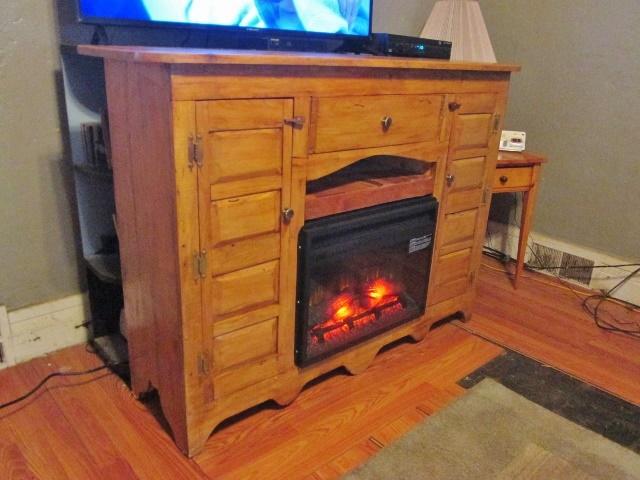
Next Project start up
HARO50 and 2 others reacted to steven newman for a topic
Ok...got this thing up out of the shop, today....about all the crew could handle....heavy and awkward to carry. Back of the case was nailed into place, once I found a hammer that could indeed drive a nail straight....Plastic foot pads were nailed into place....cussing level was a bit high, today...slid this thing around a corner, and installed the insert... Then to see how it looked plugged in...(Bookcase is still sitting behind this thing) And...with the doors opened up.. Still have the flooring to patch up...after this thing is in it's new home. There IS a second Shaker End Table, to sit on the lefthand side. Well...does it look better than that Odd Lots cabinet?
3 points -
.thumb.jpg.573d1497d0675219908c85aabefd797a.jpg)
Nicholson Pattern Makers Rasp's (old story but still applicable)
HARO50 and 2 others reacted to John Morris for a topic
An older article but apparently still relevant when it comes to the Nicholson Pattern Makers Rasp's. I found this blog story at one of my favorite hand tool suppliers, I have purchased quiet a few tools from Tools For Working Wood, the last tool I purchased last year was an English Mortise chisel made by Ray Isles. Tools For Working Wood is a great resource in their blogs, and their tools for purchase, just thought I'd share the blog on their decision to not sale Nicholson Rasps any longer and why. Click on Read more below.3 points -

Air Compressor Drain Valve Upgrade
Grandpadave52 and 2 others reacted to JIMMIEM for a topic
I received the part, have installed it, and it works. The ball valve is so much more convenient to use than the original drain valve.3 points -
Making smaller things
Cal and 2 others reacted to Smallpatch for a topic
This old microwave has a large glass turn table with a raised edge so I fill it with water, boil it and the maple wood and this is how I heat the wood to bend. Then clamp it in some formed pieces of wood. Good suggestion Dan. I think also an out board motor would look okay instead of the oars.... Herb when I go fishing I am always going after the largest thing in the water and this being a fresh water lake I could set a record here in my county if I hauled in a 500 lb. white tip. It might even be down played by the New York Times.!!!3 points -
I love it, what a unique idea. Looks like you found a school of sharks. Herb3 points
-
Great idea you had. That is using your head for something besides wearing a hat. LOL3 points
-
Smaller diameter would give more down pressure on the rollers and less chance of snipe.2 points
-
Turning a Mallet
Grandpadave52 and one other reacted to John Morris for a topic
Brought back up an oldie but goodie from the archives by @steven newman. Yes, he does turn! And quiet awesomely at that!2 points -
Wood Carving Forum (Resolved)
Cal and one other reacted to John Morris for a topic
A Wood Carving forum will be installed, thank you folks for all your valuable feedback.2 points -
I have the head. Not installed yet. I bought the OEM size, not the smaller one. The tear down and installation...for me...is going to take some time. I'll probably get to it after the wife has her operation.2 points
-
The Farmhouse Table
LarryS and one other reacted to Ron Dudelston for a topic
The table has left the building. Today, we loaded the top and base to take it to its new home. We threw the top on long enough to see what it looks like. Not too bad. Tomorrow the bench goes home and I move to the next project.
2 points -

Ornament
Grandpadave52 and one other reacted to Gene Howe for a topic
I don't get out much but, I've never seen an upside down pregnant woman.2 points -
The side table goes good with it. Good Job!. Herb1 point
-
Oh my goodness, that is stunning! Been waiting to see the insert in place. I am not disappointed!1 point
-
Ornament
HARO50 reacted to Grandpadave52 for a topic
Add my vote1 point -
I just bought a new chuck from Rockler. It seemed like a decent deal at $149. If anybody needs another chuck check them out. Not sure how long the sale will last. 1) Nova G3 Chuck with 1'' x 8-TPI Threading (1) Set of 50mm/2" jaws (1) Set of 100mm/4'' jaws (JS100N) (1) Set of Pin Jaws (JSPIN) (1) Safe Lock™ Woodworm screw (1) Instruction Manual (1) T-handle chuck key (1) Set of fastenings (1) Storage case1 point
-
Maybe too much pressure? That's what I have in mine, now. It's a 4' piece of pre laminated shelving from Lowes. One cleat on the infeed side. Works great with the blades in there now. We'll see when the Shelix is running. Or, maybe Don will try it first.1 point
-
@hawkeye10 Don Have you tried making a sled and planing a board and see if it still gives a snipe? Also some guys eliminates the snipe by mounting a 3'-4' 3/4" board on the bed with a cleat on the bottom in the middle, this allows even support front and back for the board being planed,and eliminates snipe.1 point
-
Retirement Community Woodworking Shop
Cal reacted to Grandpadave52 for a topic
Knowing the general community I'd speculate they would thank us for our concern then respectfully remind us they've made it this far in life w/o using hearing protection, safety guards and so forth. They do it for fun and to keep busy and active...just a hunch but reminiscent of an event with my late MIL. She had moved to an assisted living, nursing home after a few falls while living on her own. She was also a Type 2 Diabetic. During one of our visits my wife took her a bag of butterscotch discs (hard candy) per my MIL's request. I questioned her, "Mary should you really have these with your diabetes?" To which she promptly and firmly replied, "David, I'm 84 y/o...I'll eat whatever I darn well please! Now would you put them in the drawer over there for me?" I never questioned her "snack" requests after that. BTW, besides my mother, my wife, and a great aunt, she was the only one who ever called me David. Anyways, I thought the story was a great public & human interest news story. An enjoyable change to the doom, gloom, politics, and Indy daily murder count.1 point -
Retirement Community Woodworking Shop
Cal reacted to Grandpadave52 for a topic
It's Carmel Ron...probably 5 star catered meals, wine & cheese bar1 point -
Or, can't hear it anymore.1 point
-

The Farmhouse Table
Cal reacted to Fred W. Hargis Jr for a topic
You are a master of understating things....look really nice!1 point -

Retirement Community Woodworking Shop
Cal reacted to Ron Pemberton for a topic
When I was fixing to retire several years ago, some coworkers asked me if I was going to move and downsize. I told them I was staying because of my shop. I told them I had built a casket. It was in my shop in cardboard boxes because I didn't want looking at it. When I croaked my wife was to open the box where she would find a hammer, nails and instructions for assembly. She was to put me in the casket, call the backhoe and bury me outside by the front door to my shop. I wasn't leaving.1 point -
Gene, I am just glad it wasn't your road rage finger. LOL1 point
-
The Krenov Foundation
Cal reacted to John Morris for a link
1 point -
Happy 243rd Birthday United States Navy!
Cal reacted to John Morris for a topic
1 point -
But Gene, how else can they get the necessary ingredient for Duck à l'orange1 point
-
i have no plans to leave our house and my shop. 55+ retirement community? pass.1 point
-
The only retirement home around here just offers a duck feeding activity. Hopefully, I'll only leave my workshop in a body bag. Feeding ducks is not on my agenda.1 point
-
The retirement village where my Mom lives has a really nice carpenter's shop. The stuff the fellows make there is really top notch.1 point
-
Ornament
Grandpadave52 reacted to John Morris for a topic
Ya, it's just you Gerald.1 point -

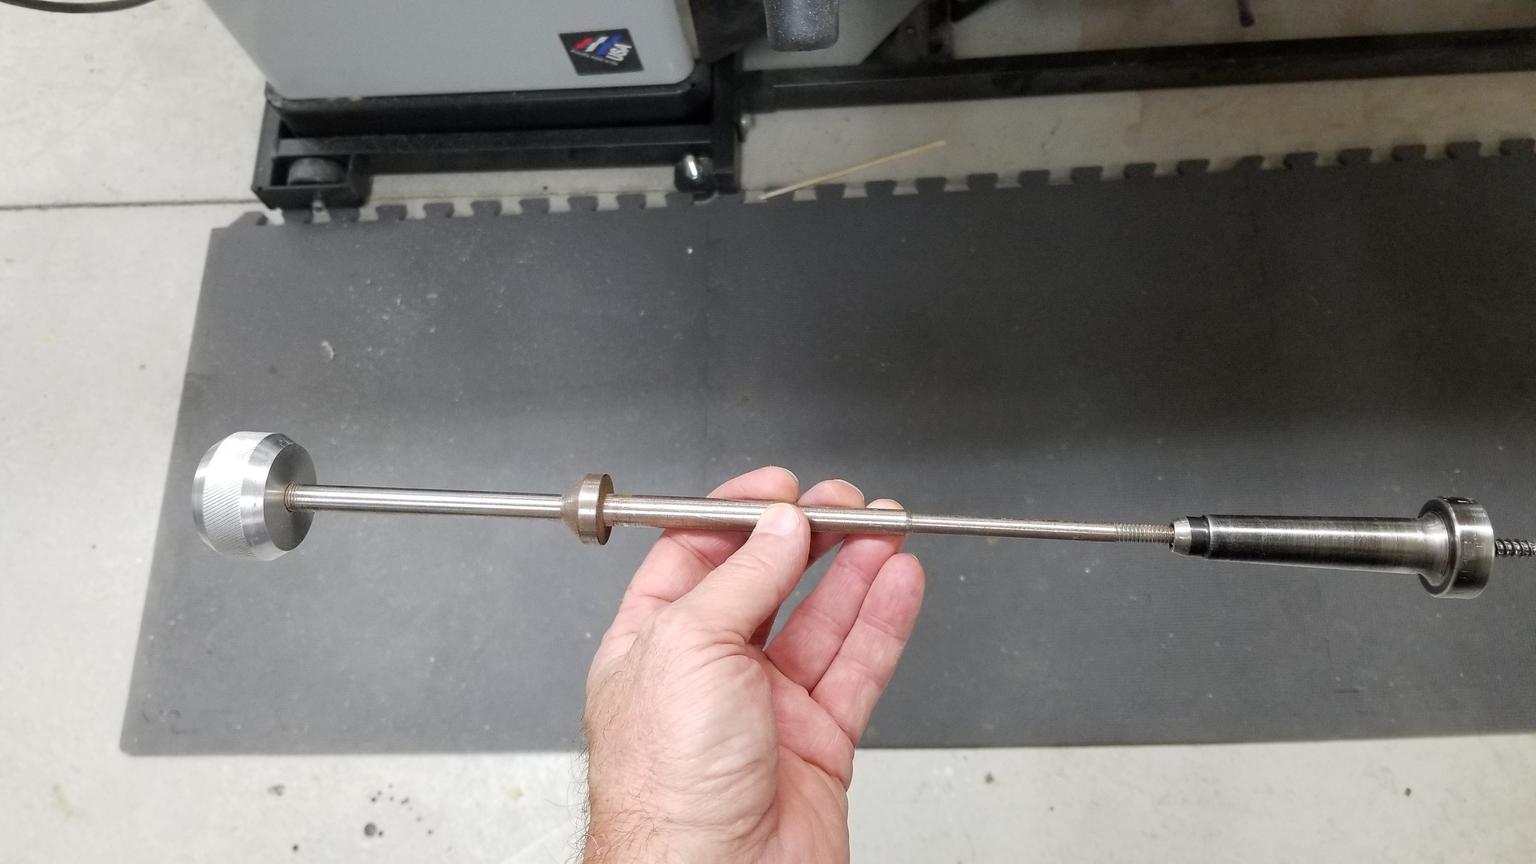
Vintage 9 Inch South Bend Lathe
FlGatorwood reacted to IrishWoodCarver for a topic
@GrandpaDave - I think this is what you were thinking of. My uncle made this - which goes through the spindle and seats itself on the back side. It screws into the back of my screw mount to prevent it from popping out if I am not using a tailstock. I remember him taking all the measurements to ensure it would seat itself and provide enough threads at the end to screw into the screw mount.
1 point -

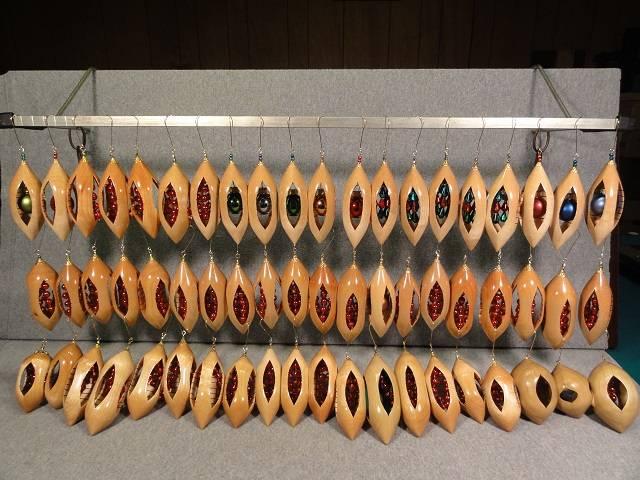
Walnut ornament
steamshovel reacted to Gerald for a topic
Looks great now what are the tiny red balls?1 point -

Walnut ornament
steamshovel reacted to HandyDan for a topic
They are fun to do. they have the wow factor when people see them. I have done a few too.
1 point -
since the 1st table anyways...1 point
-
the homemade version should have a key cut into it to receive the corner of the leg... your dado blade set over to 45° is just the ticket for this and the key way helps w/ fastening the bracket to the leg... not only do those brackets help the corner junction strength immensely they work hard at keeping the leg from getting ''laid over''when the table is slid around... note... use modified truss headed (see pic) or pan head screws w/washers to screw the brace in... if you use a full threaded screw, drill a clearance hole for it in the bracket... FH screws tend to split the wood when put under duress... think splitting wedge... instead of lagging the leg I use GRK or RSS structural screws... (4th picture)... you get strength w/o the risk of splitting the leg...1 point
-

Walnut ornament
steamshovel reacted to Ron Altier for a topic
Steve, I've done about 5 or 6 and not all were successful. Early attempts failed because the glue or tape allowed movement. Now I use quarter inch ply screwed to the ends of the pieces and all stays tight.1 point -
sure hope not... hope you and yours fair well...1 point
-
skirt = apron??? describe what you have in mind for braces if you would.. I wouldn't put an ''8'' in the middle... mere mortals won't be able to pick that table up so when it gets moved it will be shove/pushed/drug around which will be tough on the apron/leg joints so here's something you might want to consider...
1 point
-
Wood Carving Forum (Resolved)
John Morris reacted to Gene Howe for a topic
Count me in.1 point -

Turning a Mallet
steven newman reacted to Charles Nicholls for a topic
Hey I like that one.1 point -

Turning a Mallet
steven newman reacted to lew for a topic
Sweet! Love that thick handle!1 point