Let's use heat to speed up the drying process!

By lew in Bowl Drying
· 2,632 views
Woodturners took a page out of the lumber industry playbook for drying their bowl blanks. If you can speed up drying lumber, why not a bowl blank. Turners have been building/repurposing equipment to create drying kilns for some time.
The trick to incorporating this method is not to dry the bowl blanks too quickly. As with the previous methods, controlling the moisture loss to equilibrium is a balancing act. Too slow and you'll grow old waiting as well as mold can grow on the blanks. Too fast and the blanks run the risk of cracking.
A quick Internet search will yield a plethora of ideas, videos and "professionals". I've tried to pick more authoritative sources for reliable ideas.
This first exchange is from the American Association of Woodturners. The original poster inquired about a shop made kiln. The responses were from experienced turners and they offered good advice/ideas.
https://www.aawforum.org/community/threads/home-made-kiln.12618/
Following along with this post, led me to Cindy Drozda's site and her instructions on a drying kiln-
http://www.cindydrozda.com/handouts_Pdfs/handouts/demo handouts/drying_kiln.pdf
Another woodturning organization- The Baltimore Woodturners- wrote this article on how one of their members built/modified his kild-
https://www.baltimoreareaturners.org/articles/bowldryingkiln.pdf
All of the preceding ideas are based around drying a lot of bowls. Not every turner (myself included) needs to process a dozen or more bowls at one time. For me, I needed to find something that could dry a few small bowls (5" to 6" in diameter) or maybe 1 or 2 medium to large bowls. Rick Morris (aka Rick Turns) came up with a space saving idea using readily available materials. His kiln idea can be set up to dry a bowl(s) and then disassembled when done. With my small shop, this idea was really appealing.
Rick's video goes shows how he made his kiln/drying box-
Never one to let well enough alone, I had to add my twist to what Rick did. If the entire heat/air mechanism could be incorporated into one unit, storing it would be easier and I might not forget where I put all of the pieces.
I used Sketchup to design a one piece unit

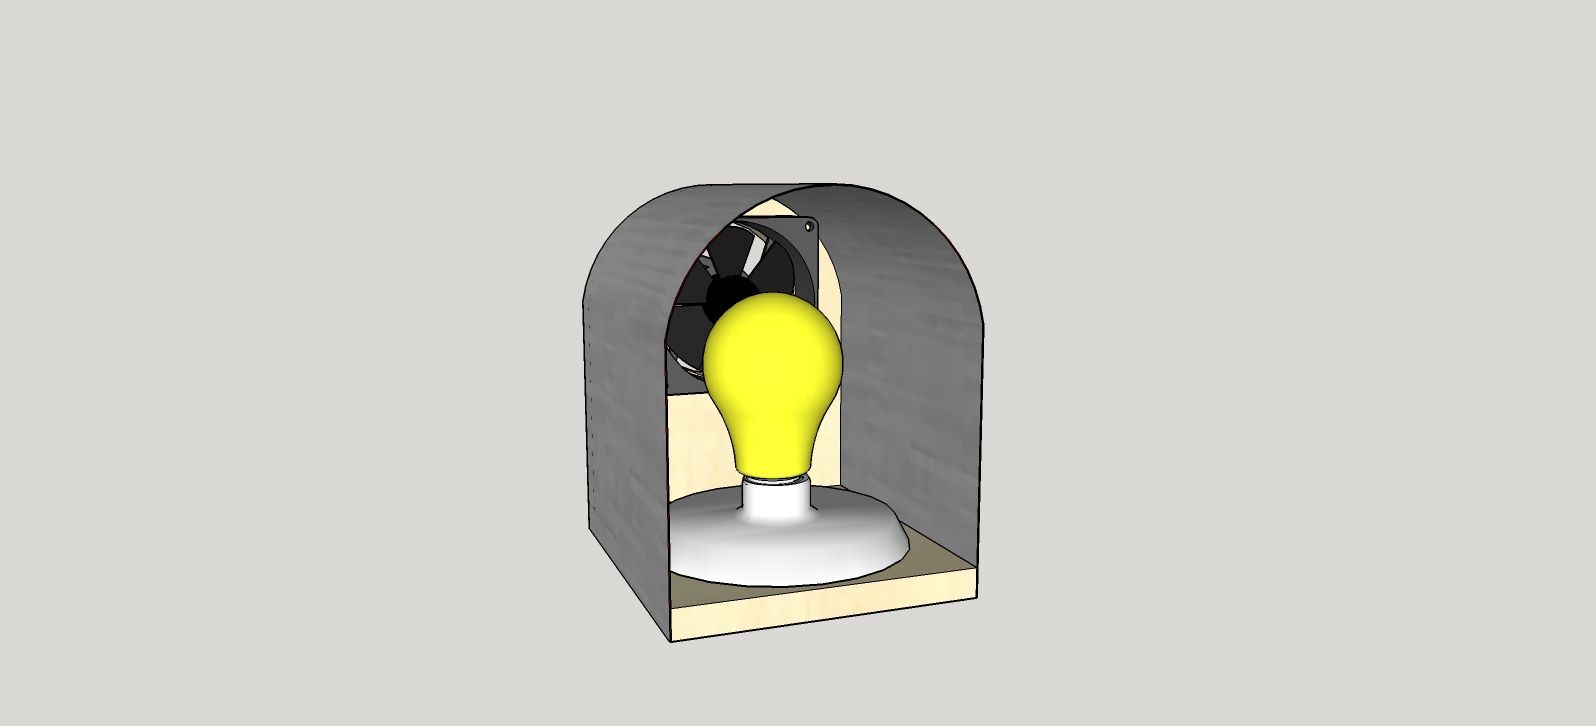

To hold the unit snuggly to the card board box, there are a couple of long sheet metal screws that pierce the box and grab the cardboard. Some foam rubber, self sticking, air barrier tape makes a pretty good seal. I had to experiment with the bulb size to prevent the temperature from going too high. So far this is a workable idea. The Sketchup model is available to anyone who wants it.
Kilns work by applying heat to the outside of the wood and migrating to the inside. What if we applied the heat to the inside and allowed it to migrate out? A turner, somewhere, thought- "the microwave heats like that!" Placing the rough blank in the microwave for a few minutes at a time can be used to drive out the moisture. This turner suffered severe injuries when his wife returned home and found him in her kitchen. If you decide to use this method- buy your own microwave! 
Again, I've tried to find reputable sources for ideas and tips. The first 2 are from the AAW and contain additional links to more information-
https://www.aawforum.org/community/threads/drying-wood-in-oven-or-microwave.6855/
And-
https://www.aawforum.org/community/threads/microwave-bowl-drying.9555/
This video, from Kent Weakley, describes the process and provides a bunch of tips
Another method of applying heat is to use a dehydrator. With the proper temperature settings this can also be a viable drying procedure
Next up we'll look at some not so traditional methods of drying
Edited by lew
Added dehydrator
-
 2
2
Recommended Comments
Join the conversation
You are posting as a guest. If you have an account, sign in now to post with your account.
Note: Your post will require moderator approval before it will be visible.