
Part 1- The Drum

By lew
· 1,387 views
When making my rolling pins, I use the thickness planer to bring the thin strips down to 1/8” thick. Unfortunately, if the grain in the wood is not uniform- or there are knots- the strips shatter. This wastes a lot of wood and doesn’t do the planer any good either. It seemed to me a thickness sander would be perfect for this process. Well, Craig’s List wasn’t producing any results and I couldn’t afford a new one. Time to take action!
Starting with what seemed to me to be the most critical/difficult part; I began researching construction methods and gathering parts for the drum. The choices were narrowed down to three. One- buy the kit, two- solid wood cylinder or 3- PVC/wood combination. #1 was quickly eliminated- I’m cheap! #2- maybe, but then I found a hunk of 3” PVC in my stash of plumbing left overs. #3 it is- I’m cheap! Next, the pillow block bearings- had to buy these- $20 each. The 5/8” shaft was from the scrap bin at the local Vocational School. Glued up some oak scraps and began turning the end cap, pulley end and center supports.
(EndBlock)

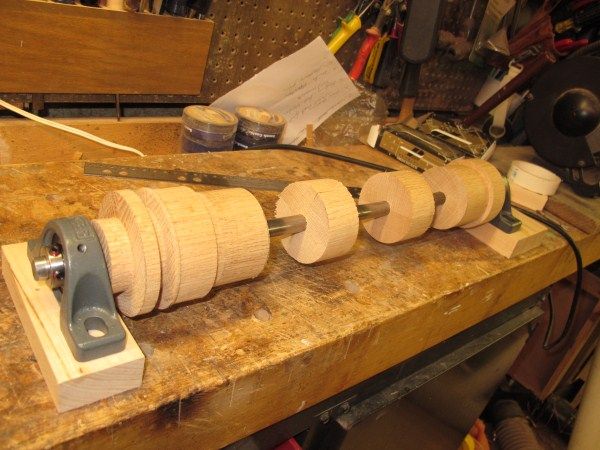
The process is the same for the end block, pulley block and center supports. The center supports were sliced from a single turning.
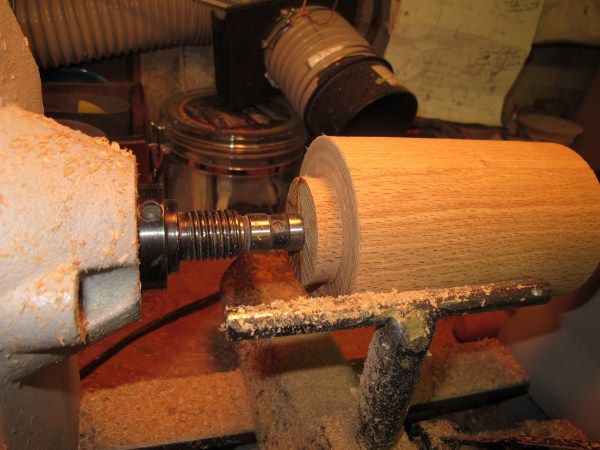
Turn a blank to a slightly larger diameter than the PVC. Turn a tenon on one end to permit the use of a chuck.
(Turned round w/ tenon)
Remount the blank with the tenon in a chuck.
(Remount)
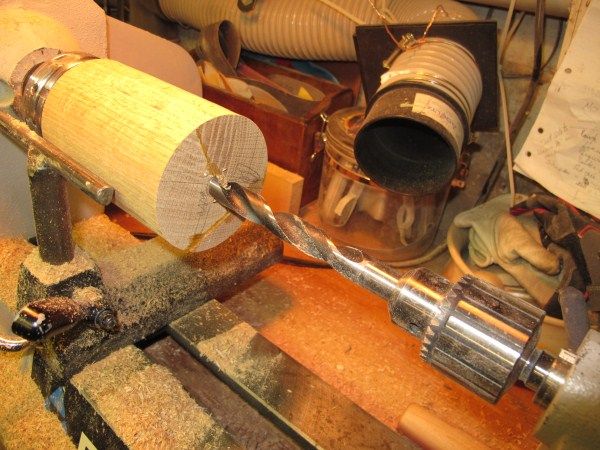
Drill the blank to fit the center axle.
(drill for shaft)
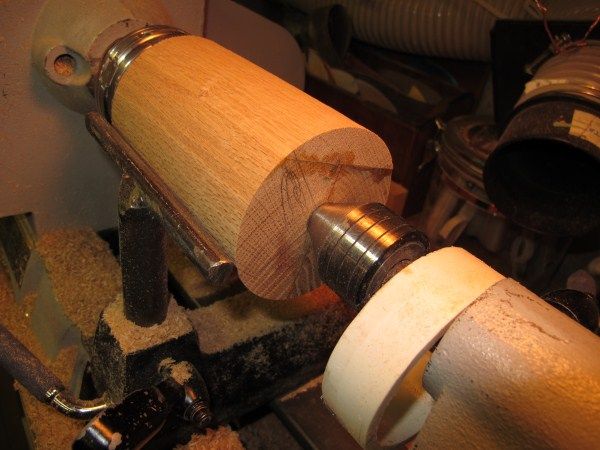
Remove the drill bit/Jacobs chuck and remount the live center. Advance the live center into the axle hole. Check to make sure the blank spins true. The first end cap turned out to be slightly misaligned. I didn’t see it until testing the drum and motor combination. Fortunately, it wasn’t too difficult to disassemble the drum and make a new end cap. Place a piece of cut off PVC over the Live Center. This will be used to test for the correct diameter as the blank is turned.
(Remount Live Center)
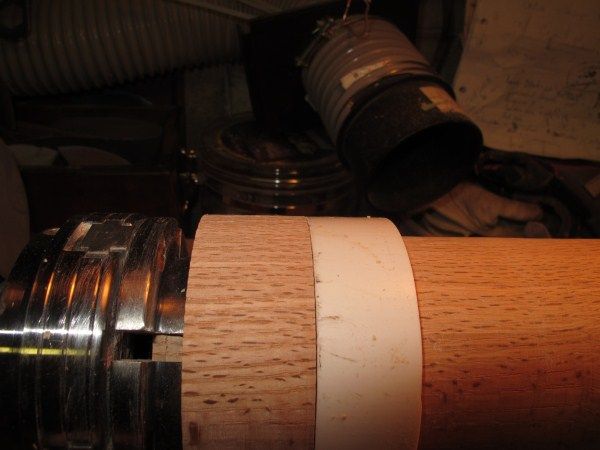
Turn the blank to the inside diameter of the PVC, testing for a snug fit. I left about 1 ½ “ long shoulder- turned to the PVC’s outside diameter- on the End Cap piece.
(test for fit)
The center supports are snug fit piece that was sliced in half.
The pulley end is turned in the same fashion as the end cap. The only real difference is that the “shoulder” is longer to accommodate the integral pulley. In addition, the tenon, used by the chuck, is left in place to allow a spring pin to capture the axle.
(all pieces 1 and 2 and pulley)
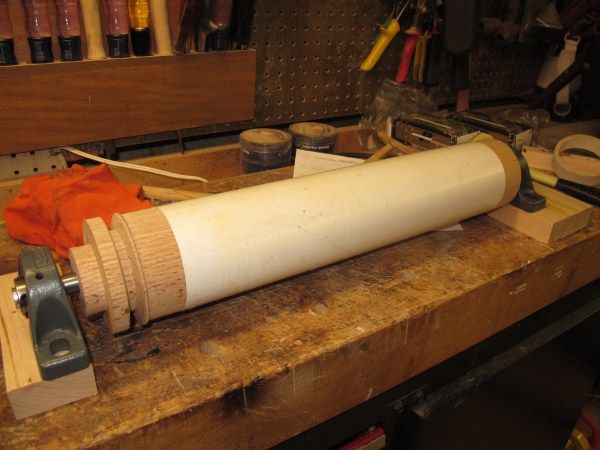
The PVC is cut to length and the wooden pieces fitted into place. Mark the locations of the center supports and the end pieces. These will have screws to capture the PVC to the wood, later.
(PVC installed)
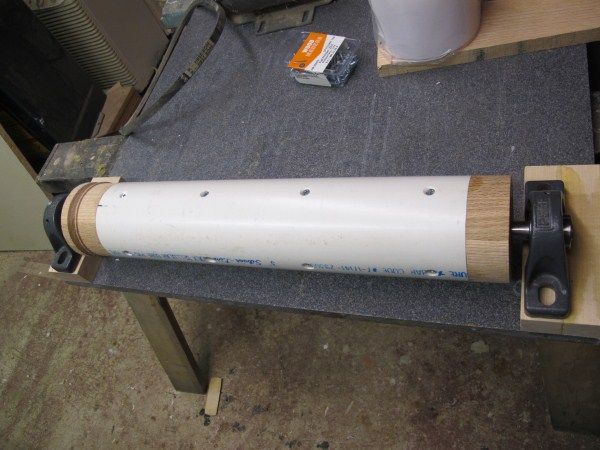
Drill and countersink the PVC for screws. I wasn’t sure how these would affect the balance so I evenly spaced the screw lengthwise and at 90
degrees around the circumference. Also, not being a plumber, I did not realize that 3” PVC is not solid (at least what I had). Mine was a foam core type. It seems to be working OK, however. Just had to be careful not to press hard on the countersink!
(PVC screws)
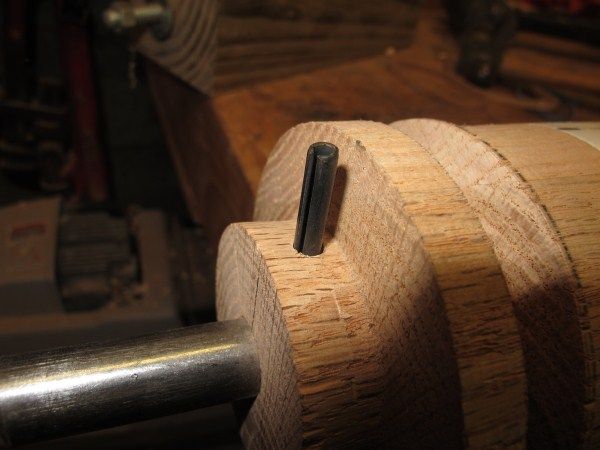
Once the PVC is secured and everything is positioned, drill a hole in the pulley end tenon to accept a spring pin. This hole is drilled completely through the axle and tenon. I wanted to be certain that if something broke the spring pin could be driven back out.
(Spring pin)
So far, I had to buy the pillow block bearings and the spring pin.

Recommended Comments
Join the conversation
You are posting as a guest. If you have an account, sign in now to post with your account.
Note: Your post will require moderator approval before it will be visible.