Search the Community
Showing results for tags 'shavings'.
Found 8 results
-
I cleaned my shop today. I got four loader buckets of chips and two loader buckets of cut-offs. Didn’t realize it was that bad.

-
Many may already be aware but, maybe some newbies to Walnut might find this helpful. Walnut shavings/dust should never be used around hooved animals, especially horses. It causes hoof rot...or that's the term horse people use. Have you ever noticed that no other plants or grasses grow under a live Walnut tree? It's a self preservation thing. Walnut trres are aggressively protective of their domain. I once visited a Walnut farm of 500 acres of cultivated Walnut trees. The owner said he never had to mow. Some of us two legged animals are also susceptible to the dust. Masks should be worn for sawing and sanding operations no matter the efficacy of your DC system. Walnut's aggressive tendencies can work in our favor, though. When the DC bag gets full after a lengthy session of planing, it gets spread around the outside perimeter of the shop. Sure does eliminate the need for the weed whacker. One more caution: DO NOT ADD IT TO YOUR POTTING SOIl!!! DAMHIK.
- 13 replies
-
- 14
-

-

-

-

Drying Methods One By One- Bags, Boxes and Shavings
lew posted a blog entry in Bowl Drying Adventures
Bowl drying, without cracks, is accomplished by slowing down the escaping moisture until moisture equilibrium (emc) between the bowl and the ambient air is achieved. As a turner, we can improve the odds of successful drying- regardless of the method used- by assuring the roughed out blank walls have a consistent thickness and round over sharp corners/edges before starting the drying process. One of the earlier more successful methods of achieving slow drying was to surround the blank with a barrier to prevent the moisture from escaping too quickly. Various containers can be used as a barrier. Mostly we find paper grocery bags or cardboard boxes being used. In addition, the shavings from the blank turning process are packed around the rough blank to slow the drying and help absorb some of the escaping moisture. Blanks should be checked for mold and moisture as the process takes place. When the blanks have released the majority of their moisture, they can be removed from their container and placed on a shelf to reach final equilibrium. The storage are should be free from a lot of air movement and out of the sunlight to allow the blanks to dry evenly. Checking for moisture can be done with a moisture meter or with a kitchen/mailing scale. Using grams instead of ounces will provide a more accurate indication of moisture loss. If you are using a scale to check for moisture, when the weight of the blank remains constant, it is dry. For moisture meters, refer to the instructions to determine the moisture content. There are some turners who use plastic bags for the barrier. These bags do not transfer the released moisture into the surrounding air. Every few days, the bag should be opened, turned inside out and the moisture shaken off and then put the blank back into the bag. Shavings can be used to help absorb moisture. This video from Sam Angelo, WyomingWoodTurner, illustrates these methods- Tim Yoder mentions using a garbage bag in this video. He said this particular method was from Ron Fleming. This is just the segment of the video that deals with drying- One of the major drawback of this technique is the time involved. Depending on the size of the blanks, drying can take several months (or longer). Turners are inherently impatient people. Turning offers almost instant gratification for a project. Waiting for months to see a turning to fruition isn't something we enjoy. So, we will investigate other methods that promise faster, successful results and see how they stack up. Some of the terminology used throughout this blog can be found at this link- https://uwoodcraft.com/a-glossary-of-wood-drying-terms/ -
I got tired of stumbling around so I swept the lathe area. I got three buckets of chips. We are not talking five gallon buckets.
-
I was watching a video of a guy turning a pepper mill and he was sanding the turned piece. Then he did something I've never seen before. He grabbed some of his wood waste shavings and held it against his turning piece. He had already sanded it down to a very fine finish. I can't see this as being any more effective than very fine sandpaper or 0000 steel wool. I will try it................Do you use this technique?
-

From the album: Hindy's Projects
-

From the album: Hindy's Projects
-
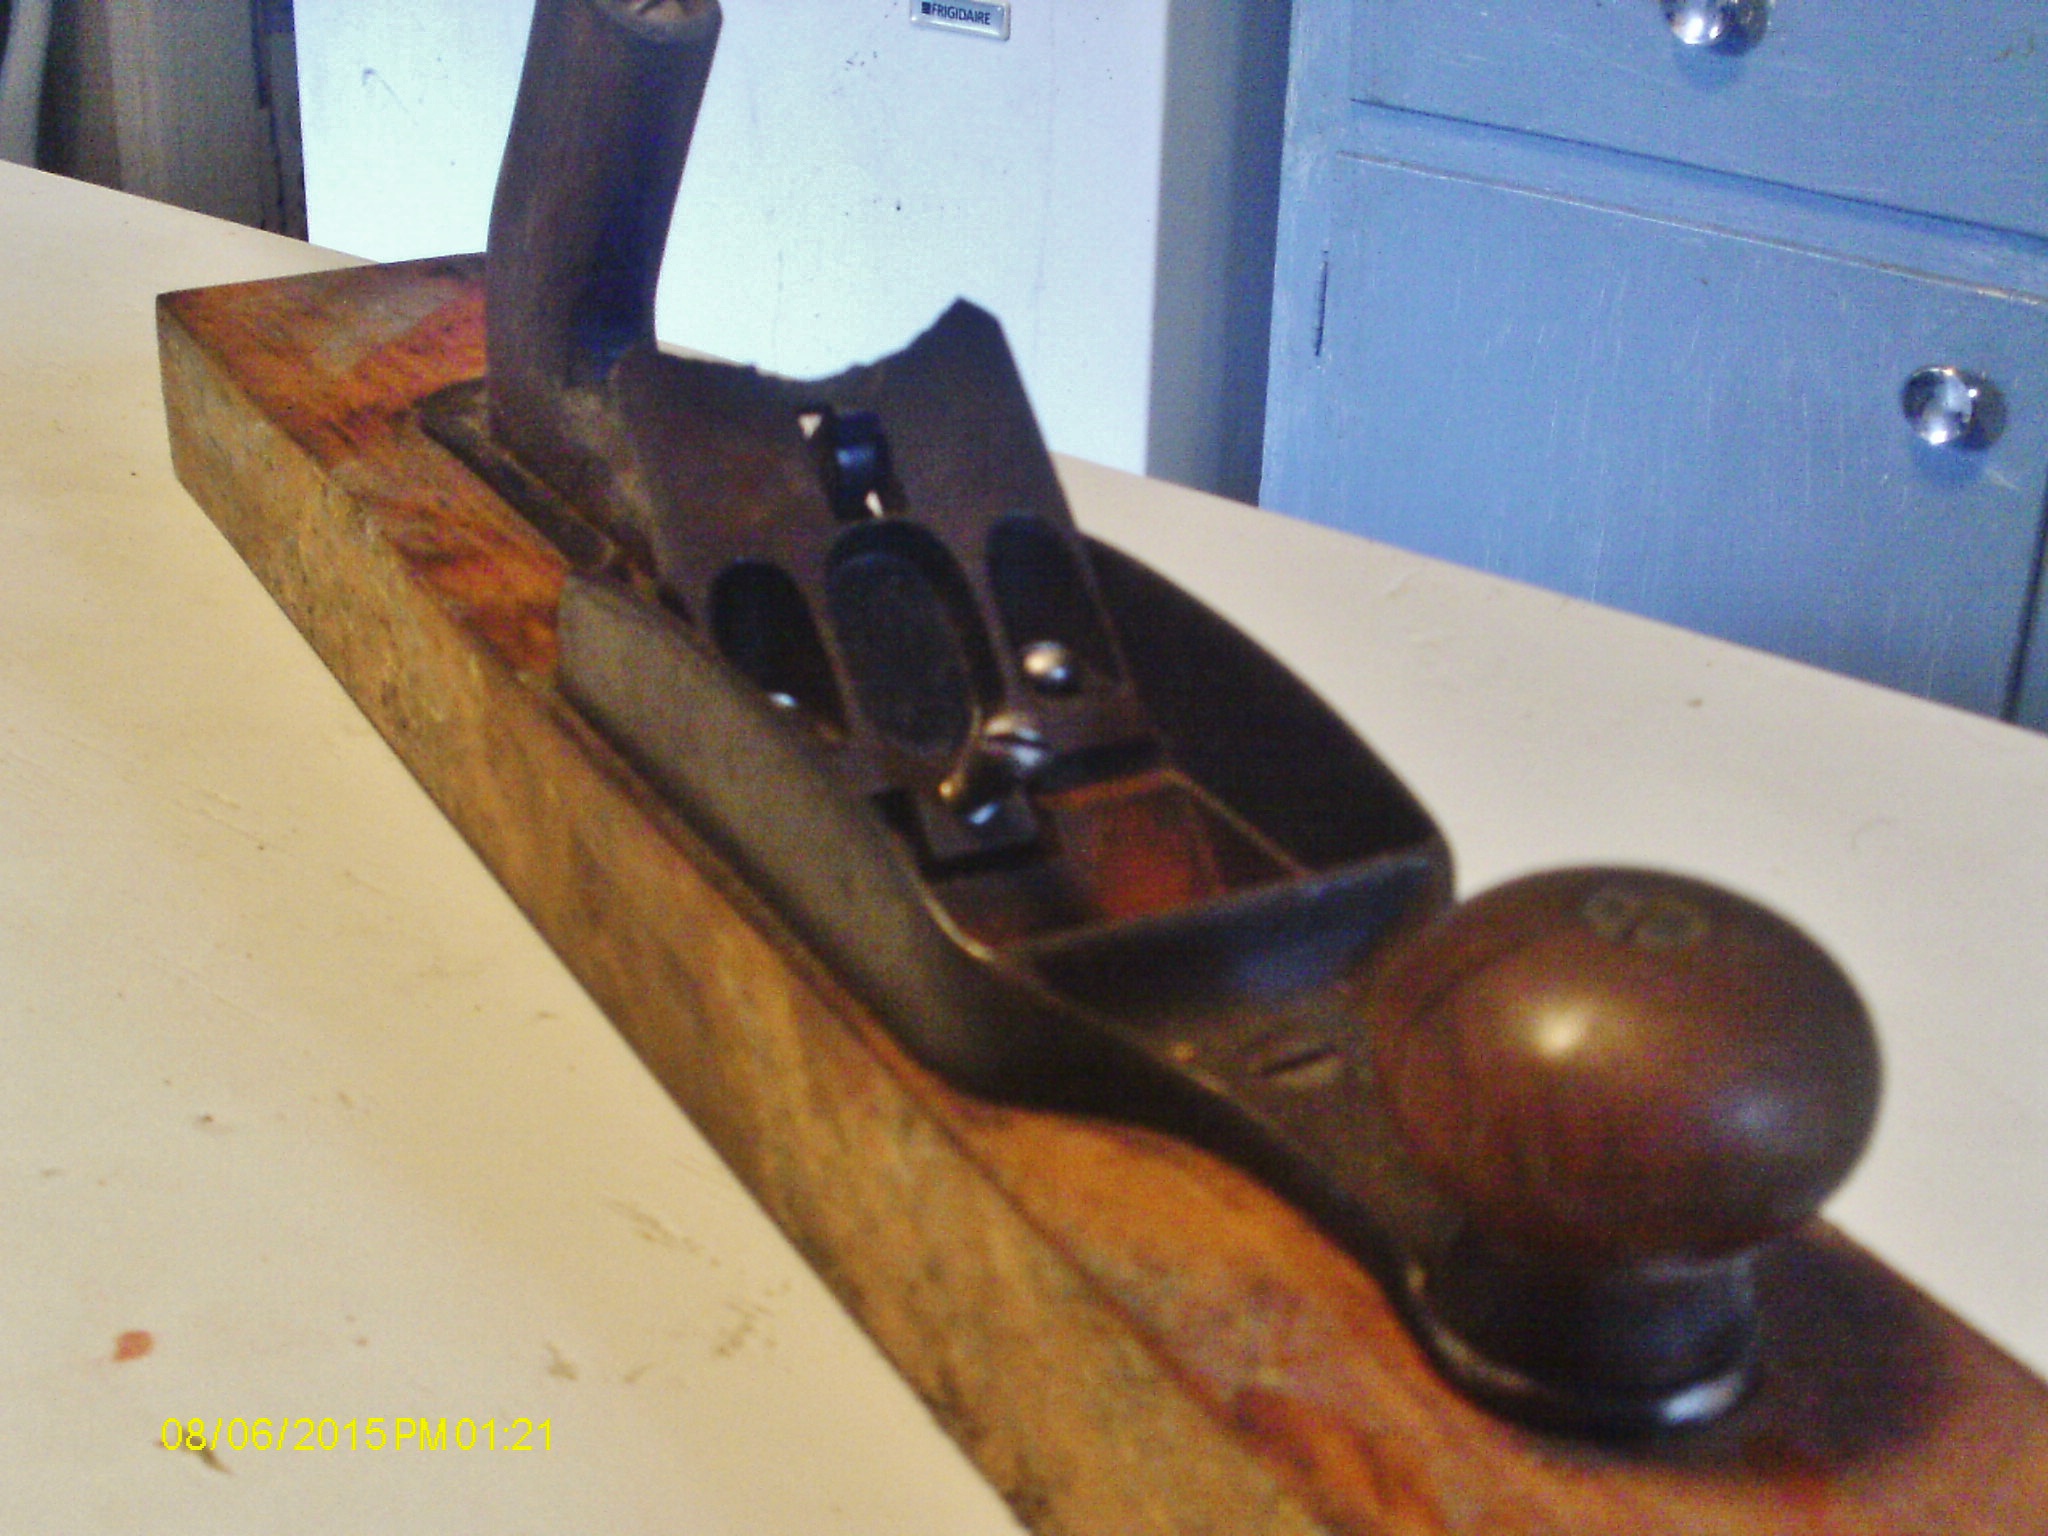
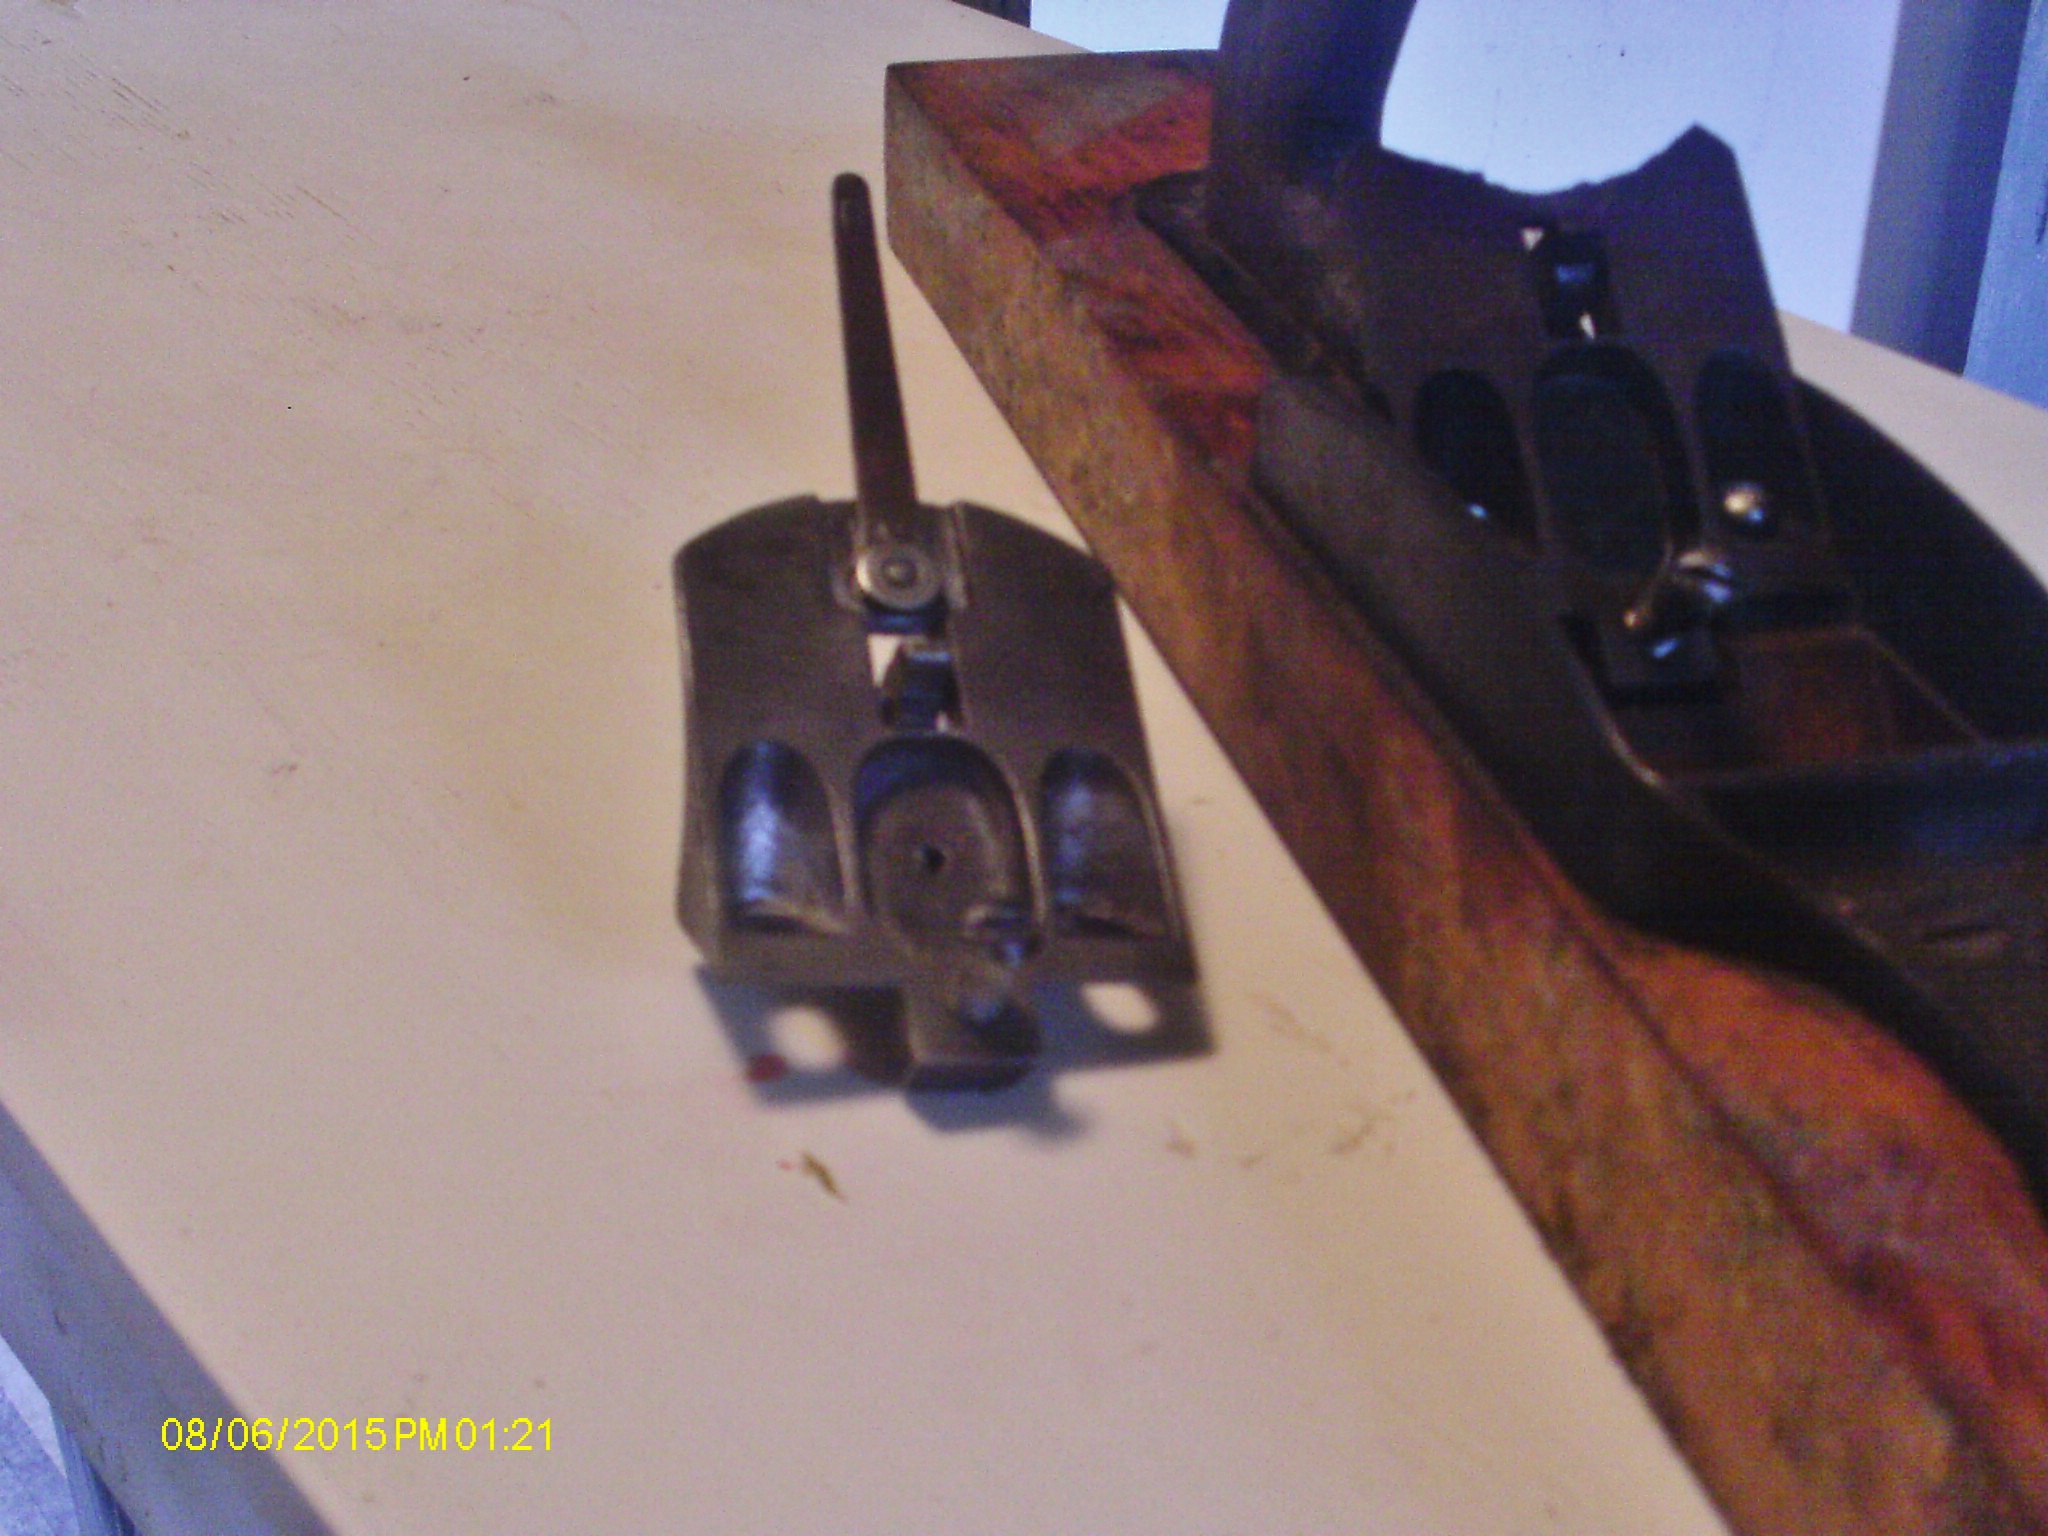
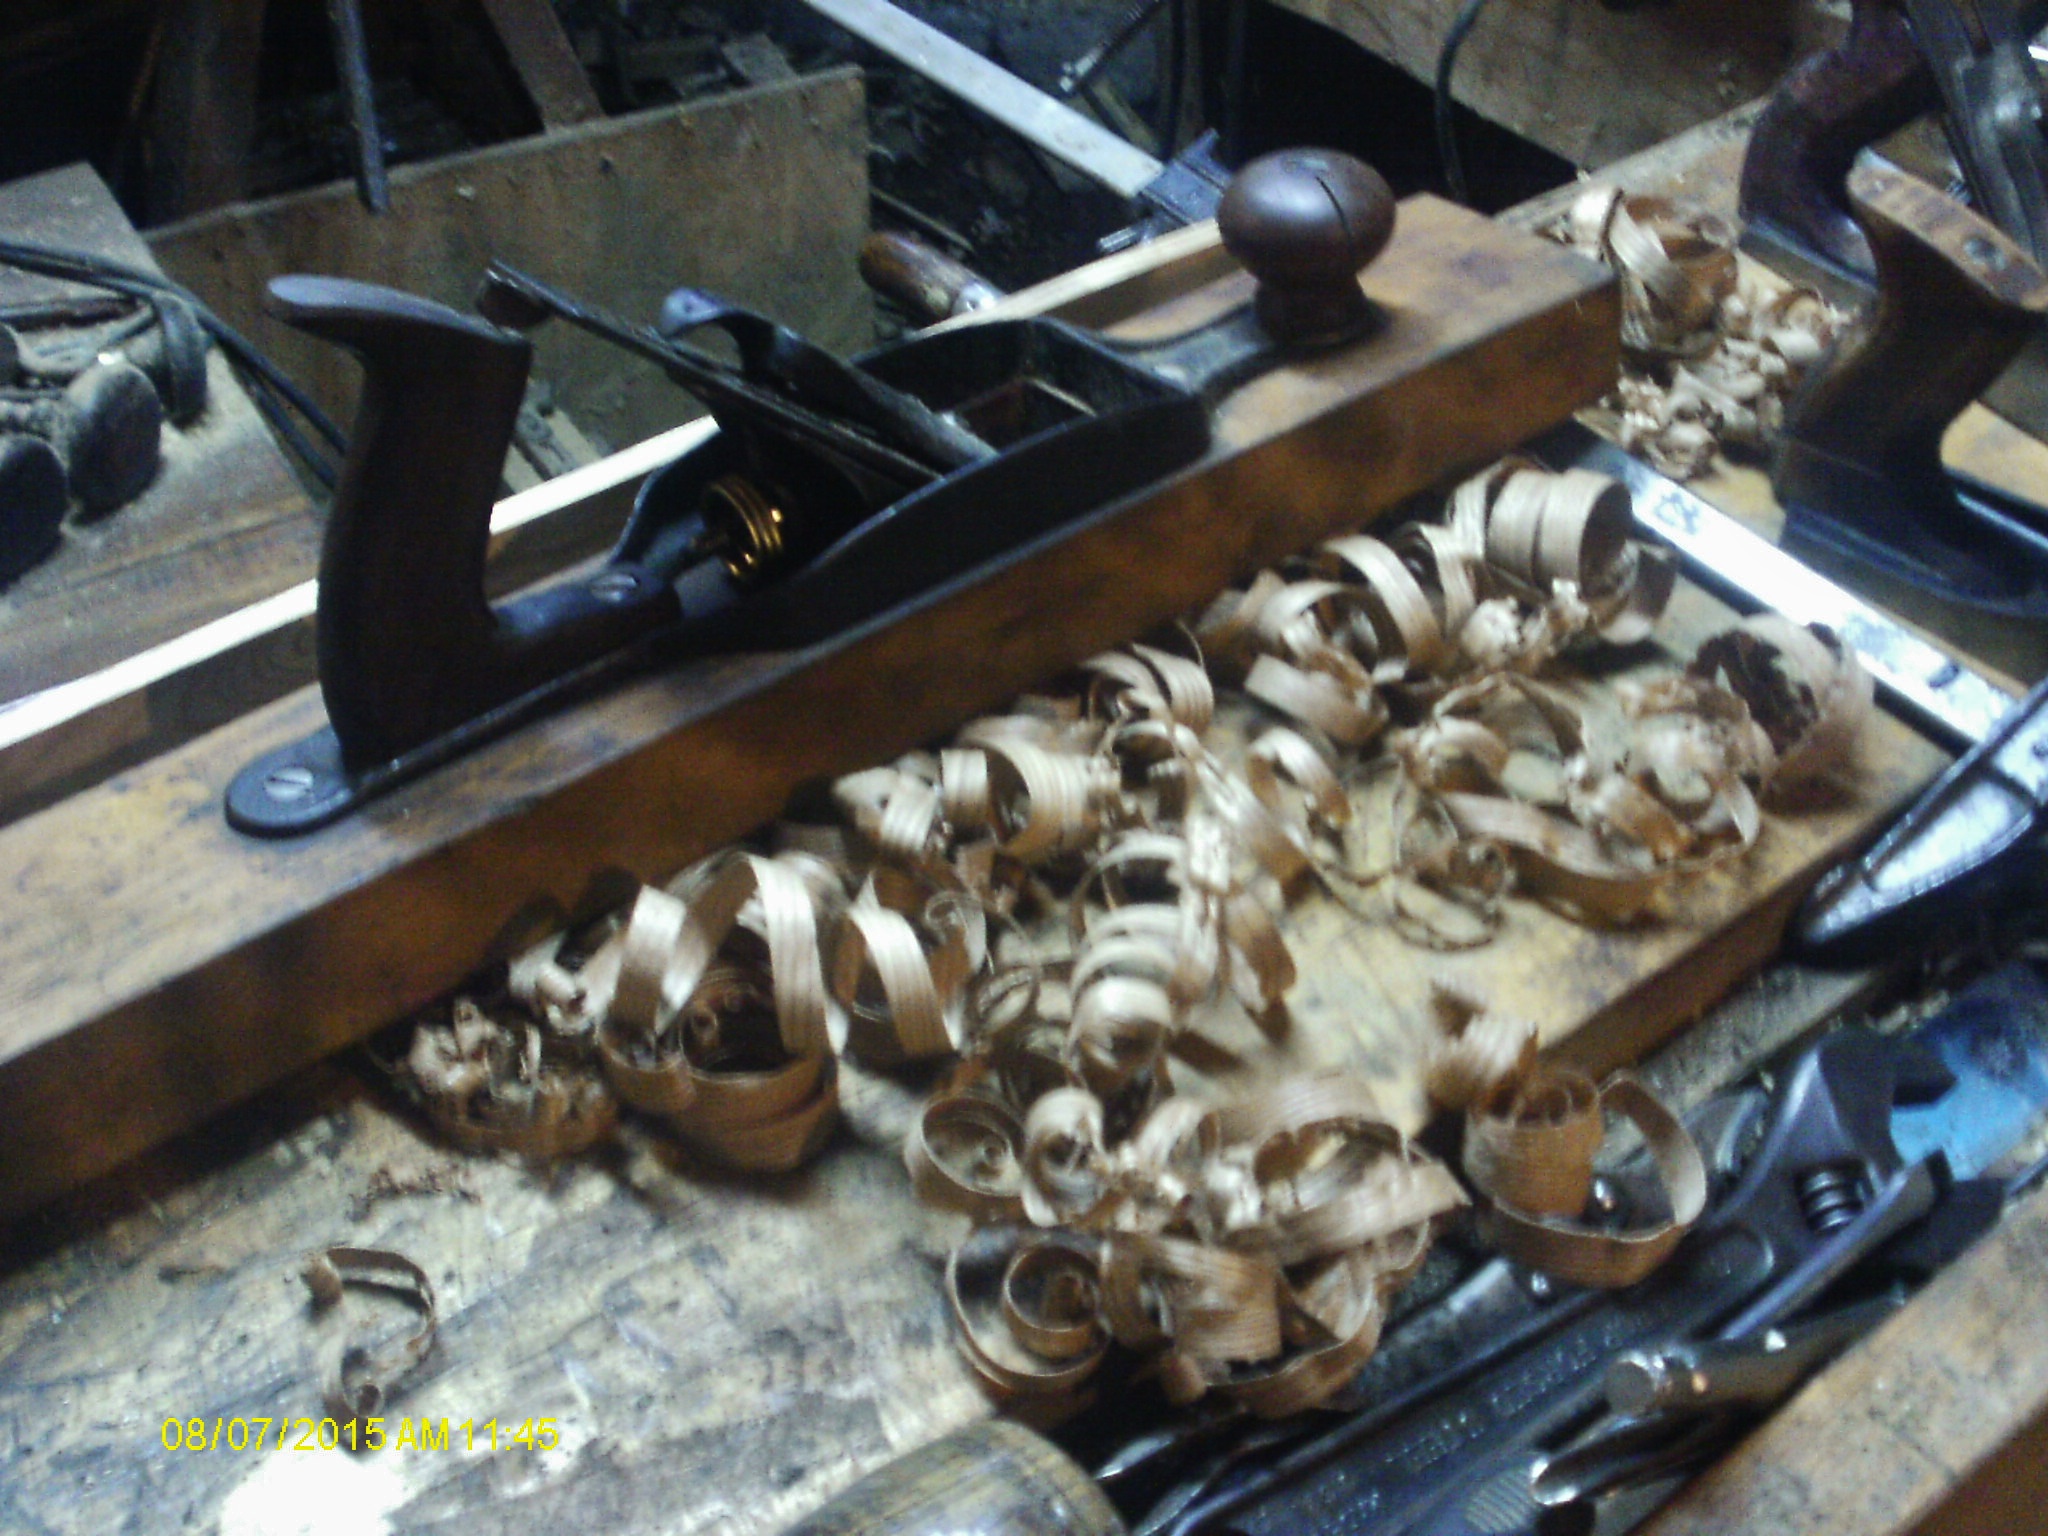
Awhile back, won a pair of Stanley planes at an auction. The shorter one is a Stanley No. 28, the other is a No.29. Same irons, just the 29 is SUPPOSED to be 2" longer...Rehabbed them up, to present to Polite Company Pretty, ain't they? Well, the #29 had "issues" Look at the nose. there should have been a logo and a model number there. It was, until someone had sawn off over an inch, you can still see the saw marks! Other issues? rear handle was not only missing the top "horn" but was broken in two. Dug out another handle, walnut one I made for a #5 iron bodied plane. It had an extra hole for a toe bolt..ok we can add that feature. Drill and tap a hole, and install the "new" handle But, there was another bad issue with this plane Ah..yeah. Missing the lateral lever, and the area where it sat. Won a "new" frog on FeeBay @$15 counting S&H. Came in yesterday, covered in silver spray paint.. Took awhile to wire wheel all of it off, they even painted the brass wheel! Grrr. Anyway, here tis.. Which left me with two wheels to clean up Not even sure which is which. Frog was sold as a No. 28....the No. 29 takes the same frog. Installed the "new" frog, set it up flush with the bed for the iron That tab where the lever cap bolt stick out of. Supposed to be flush with the wooden "ramp" bed. Soon to be changed. Had the plane all back in one piece, tried to set the depth of cut.....1/8" would not go back in...happen to set the plane down next to the Minty No.28.....nose end of the 29 was that 1/8" lower... Bed was worn in front by that amount, but not in the rear? I could add a shim like sole...zero to 1/8"...too much trouble. Decided to just back the frog back as far as it would go. It made the iron tilt back at the top. Closed the mouth a bit, too. More to the point, the cutting edge of the iron was barely sticking out. Adjusted things a bit, tighten everything down. set up a white oak test track. First couple passes...nothing, adjust again..Next few passes? That is much better. No even a sign of chatter, too. Curlies even tried to wrap around my wrist. I think the issues have beenfixed enough to make this a usable try/jointer plane? Just maybe??